Chocolate Fudge Cake Pops: A Decadent Delight for Every Occasion
The History of Chocolate Fudge Cake Pops
Cake pops, in their modern form, rose to fame in the late 2000s, thanks largely to creative bakers and DIY dessert enthusiasts who transformed leftover cake into bite-sized treats on a stick. While the concept of repurposing cake crumbs dates back much further—often seen in traditional truffle-like desserts across Europe—the invention of the contemporary cake pop is often attributed to blogger and baker Angie Dudley of Bakerella. Her innovative designs, including character-themed cake pops, sparked a viral sensation around 2008.
The chocolate fudge variation quickly emerged as one of the most popular flavors due to its rich, velvety texture and universal appeal. Combining the moistness of chocolate cake with the creaminess of fudge frosting, these cake pops deliver an indulgent experience in every bite. Originally conceived as a clever way to use up leftover birthday cakes or failed baking experiments, cake pops have evolved into a staple at weddings, baby showers, holidays, and gourmet dessert displays. Their compact size, portability, and endless decorative potential make them ideal for gift-giving and party favors.
Today, chocolate fudge cake pops are not only found in home kitchens but also in upscale bakeries and confectionery shops worldwide. They represent the perfect fusion of nostalgia and modern dessert artistry—a sweet homage to classic chocolate fudge and moist layer cakes, reinvented into a fun, edible sculpture.
Ingredients Breakdown: What Makes Chocolate Fudge Cake Pops Irresistible
The magic of chocolate fudge cake pops lies in their simple yet luxurious ingredients. Each component plays a vital role in achieving the ideal texture, flavor, and structural integrity needed for perfect cake pops.
- Chocolate Cake (Homemade or Box Mix): The foundation of your cake pops. A dense, moist chocolate cake works best. Overly fluffy or dry cakes won’t bind well when mixed with frosting.
- Chocolate Fudge Frosting: Acts as the “glue” that binds the cake crumbs together. It adds moisture, richness, and enhances the chocolate flavor. You can use store-bought or homemade buttercream with cocoa powder and melted chocolate for extra depth.
- Semi-Sweet or Dark Chocolate Melting Wafers: Used to coat the cake balls. These wafers are formulated to melt smoothly without seizing and provide a glossy, crisp shell. Brands like Ghirardelli, Wilton, or Merckens are highly recommended.
- Candy Melts (Optional – for Colored Coatings): Available in various colors and flavors, these are ideal for decorative touches or themed events.
- Cake Pop Sticks: Specially designed short sticks made from food-safe paper or plastic. Regular lollipop sticks work too, but ensure they’re food-grade and sturdy enough to hold the weight.
- Vegetable Shortening or Coconut Oil (Optional): Added to melted chocolate to thin it slightly, making dipping smoother and preventing cracking after coating.
- Sprinkles, Crushed Nuts, Edible Glitter, or Drizzles: For decoration. These elevate both visual appeal and texture contrast.
- Vanilla Extract (in frosting): Enhances overall flavor complexity.
- Salt (a pinch): Balances sweetness and intensifies chocolate notes.
Using high-quality ingredients ensures that each cake pop delivers a premium taste experience. Opting for real chocolate over low-grade coatings results in a richer mouthfeel and more authentic flavor profile.
Step-by-Step Recipe: How to Make Perfect Chocolate Fudge Cake Pops
Ingredients
- 1 baked chocolate cake (9-inch round, cooled completely) – approx. 6 cups crumbled
- 1 cup chocolate fudge frosting (homemade or high-quality store-bought)
- 12 oz semi-sweet chocolate melting wafers
- 1–2 tsp vegetable shortening or coconut oil
- 20–25 cake pop sticks
- Assorted decorations: sprinkles, crushed cookies, mini M&M’s, etc.
- Double boiler or microwave-safe bowl
- Styrofoam block or cake pop stand (for drying)
Directions
- Prepare the Cake Crumbs: Crumble the cooled chocolate cake into fine, even pieces using your hands or a food processor. Place the crumbs in a large mixing bowl. Avoid large chunks—they can prevent proper binding.
- Mix in the Frosting: Gradually add the chocolate fudge frosting, one tablespoon at a time, mixing thoroughly with a spatula or clean hands. The mixture should come together into a soft dough that holds its shape when rolled. If too sticky, chill for 15 minutes. If too dry, add another spoonful of frosting.
- Roll into Balls: Scoop out about 1 tablespoon of the mixture and roll it between your palms into a smooth, round ball approximately 1 inch in diameter. Place on a parchment-lined tray. Repeat until all mixture is used. Aim for uniform size so they bake evenly and look professional.
- Chill the Cake Balls: Refrigerate the balls for at least 1–2 hours (or freeze for 30 minutes) to firm them up. This step is crucial—it prevents them from falling off the stick during dipping and helps maintain shape.
- Prepare the Coating: Melt the chocolate wafers using a double boiler or microwave. In 30-second intervals, stir until completely smooth. Add 1–2 teaspoons of vegetable shortening or coconut oil to achieve a fluid consistency—thin enough to dip easily but not runny.
- Attach the Sticks: Remove cake balls from the fridge. Dip the end of a cake pop stick about ½ inch into the melted chocolate, then insert it halfway into a cake ball. This “glues” the stick in place. Return to the tray and chill again for 15 minutes to set the bond.
- Dip the Cake Pops: One at a time, submerge each cake ball into the melted chocolate, gently swirling to fully coat. Lift slowly, tapping the stick lightly against the edge of the bowl to remove excess coating. Use a toothpick or skewer to help guide and rotate if necessary.
- Decorate Immediately: While the outer shell is still wet, roll or sprinkle with desired toppings. Work quickly before the chocolate sets.
- Dry Upright: Insert the sticks into a Styrofoam block, cake pop stand, or upside-down egg carton to let them dry completely upright. Allow at least 1–2 hours for full hardening at room temperature. Avoid refrigeration unless humidity is high, as condensation may cause bloom (white streaks).
- Finishing Touches (Optional): Once dry, drizzle with contrasting colored candy melts (e.g., white chocolate zigzags), add edible glitter, or hand-paint details with food coloring pens for a custom look.
Tips for Making Flawless Chocolate Fudge Cake Pops
- Use Moist Cake: Dry cake leads to crumbly pops. Bake your cake a day ahead and wrap tightly overnight—the slight aging improves moisture retention when mixed with frosting.
- Don’t Over-Frost: Too much frosting makes the mixture too soft and oily. Start with less and add gradually. The ideal texture resembles playdough—moldable but not greasy.
- Keep Hands Cool: Warm hands melt the fat in the mixture. Chill your hands under cold water or wear food-safe gloves when rolling.
- Uniform Size Matters: Consistent sizing ensures even chilling and dipping. Use a small cookie scoop (#60) for precision.
- Pre-Dip Stick Tip: Dipping the stick in chocolate before inserting acts as an anchor, reducing breakage and leakage.
- Avoid Air Bubbles: When rolling, press firmly to eliminate air pockets which can expand during chilling or cause cracks in the coating.
- Work in Batches: Only melt enough chocolate for 5–6 pops at a time to keep it warm and fluid. Reheat gently as needed.
- Fix Mistakes: If a pop cracks or falls, re-roll the ball, re-chill, and try again. Nothing goes to waste!
- Room Temperature Is Key: Ensure cake balls are cold but not frozen solid when dipping—condensation causes chocolate to seize.
- Use Quality Tools: A tall, narrow container (like a liquid measuring cup) makes dipping easier and neater than wide bowls.
Variations and Customizations: Elevate Your Chocolate Fudge Cake Pops
While classic chocolate fudge is beloved, there’s no limit to how you can personalize these treats. Here are some creative twists:
- Peanut Butter Swirl: Mix peanut butter into the frosting or swirl it inside each cake ball before rolling. Top with chopped Reese’s pieces.
- Red Velvet Fudge Fusion: Use red velvet cake with chocolate fudge frosting for a tangy-sweet twist. Coat in white candy melts and sprinkle with red sugar.
- Mint Chocolate: Add ¼ tsp peppermint extract to the frosting and dip in dark chocolate. Garnish with crushed Andes mints.
- Salted Caramel Center: Hide a small piece of soft caramel in the center of each ball before chilling. Drizzle finished pops with caramel sauce and sea salt.
- Espresso Kick: Infuse the cake with strong coffee or espresso powder (1 tbsp) for mocha lovers. Dust with cocoa powder after dipping.
- Gluten-Free Option: Use gluten-free chocolate cake mix and certified GF frosting. Check labels on melting wafers too.
- Vegan Version: Substitute dairy-free chocolate cake, vegan buttercream (using plant-based butter and non-dairy milk), and vegan chocolate wafers.
- Holiday Themes:
- Valentine’s Day: Heart-shaped pops, pink coatings, edible hearts.
- Halloween: Orange and black drizzle, spiderweb designs, ghost faces.
- Christmas: Green and red sprinkles, snowflake patterns, reindeer faces.
- Easter: Pastel colors, bunny ears made from fondant, jelly bean accents.
- Alcoholic Twist (Adult-Only): Add 1–2 tablespoons of Baileys, Kahlua, or Grand Marnier to the frosting for a boozy kick. Label clearly for adult consumption.
- Nutty Crunch: Roll finished pops in crushed almonds, pecans, or pretzels for added texture.
- Gold Leaf Elegance: Apply edible gold leaf flakes for wedding or anniversary celebrations.
Health Considerations and Nutritional Value
Chocolate fudge cake pops are undeniably indulgent. While delicious, they should be enjoyed in moderation due to their high sugar, fat, and calorie content.
Nutritional Estimate (Per Cake Pop, approx. 1.5 oz / 42g):
- Calories: 180–220
- Total Fat: 10–13g (Saturated Fat: 6–8g)
- Carbohydrates: 22–26g (Sugars: 18–22g)
- Protein: 2–3g
- Sodium: 70–100mg
- Cholesterol: 10–15mg
Key Considerations:
- Sugar Content: High due to frosting, chocolate coating, and possible added candies. Those managing blood sugar levels or diabetes should consume sparingly.
- Saturated Fat: Comes primarily from butter, chocolate, and shortening. Opt for dark chocolate (higher cocoa, lower sugar) and reduce frosting quantity where possible for a slightly healthier version.
- Allergens: Contains common allergens such as dairy, eggs, wheat (gluten), soy, and possibly nuts (depending on additives). Always label accordingly when serving guests.
- Portion Control: Small size doesn’t mean low-calorie. One average slice of chocolate cake may equal 2–3 cake pops in energy content.
- Kid-Friendly but Monitor Intake: Children love these treats, but excessive sugar can affect mood and energy. Serve alongside fruit or yogurt for balance.
To make a lighter version, consider:
- Using reduced-fat chocolate frosting or Greek yogurt-based frosting.
- Coating with tempered dark chocolate instead of sugary candy melts.
- Adding grated zucchini or applesauce to the original cake for natural moisture and fiber.
- Reducing portion size slightly (¾ inch balls).
Frequently Asked Questions (FAQ)
Q: Why are my cake pops cracking after I dip them?
A: Cracking usually occurs due to temperature shock. If the cake ball is too cold and the chocolate is warm, the sudden change causes expansion and splitting. Let chilled balls sit at room temp for 5–10 minutes before dipping. Also, avoid adding too much shortening to chocolate, which weakens the shell.
Q: Can I make cake pops without frosting?
A: Not really. Frosting is essential as a binder. Without it, the crumbs won’t stick together. However, you can minimize the amount or use alternatives like cream cheese, condensed milk, or ganache in small quantities.
Q: How long do chocolate fudge cake pops last?
A: Stored in an airtight container in the refrigerator, they last up to 1 week. At room temperature (in cool, dry conditions), they stay fresh for 2–3 days. For longer storage, freeze uncoated cake balls for up to 2 months; thaw before proceeding.
Q: Can I freeze finished cake pops?
A: Yes, but with caution. Freeze in a single layer first, then wrap individually in plastic to prevent moisture and odor absorption. Thaw slowly in the fridge before bringing to room temperature. Condensation may dull the chocolate shine.
Q: My cake pops keep falling off the sticks. What am I doing wrong?
A: Ensure you’re pre-dipping the stick tip in chocolate before inserting—it creates a stronger bond. Also, don’t overload the ball; oversized ones are heavier and more likely to snap. Chill thoroughly after attaching sticks before dipping.
Q: Can I use a different type of cake?
A: Absolutely! While chocolate fudge pairs best with chocolate cake, you can experiment with devil’s food, black forest, or even chocolate sponge. Avoid very light or airy cakes unless you increase frosting slightly.
Q: How do I get a smooth chocolate coating?
A: Use high-quality melting wafers, stir constantly while melting, and add a bit of shortening or coconut oil. Avoid overheating. Tap gently after dipping to remove air bubbles and excess chocolate.
Q: Are cake pops safe for nut allergies?
A: Only if you use nut-free ingredients throughout. Many boxed cake mixes, frostings, and chocolate products are processed in facilities with nuts. Always read labels carefully and opt for certified nut-free brands when needed.
Summary
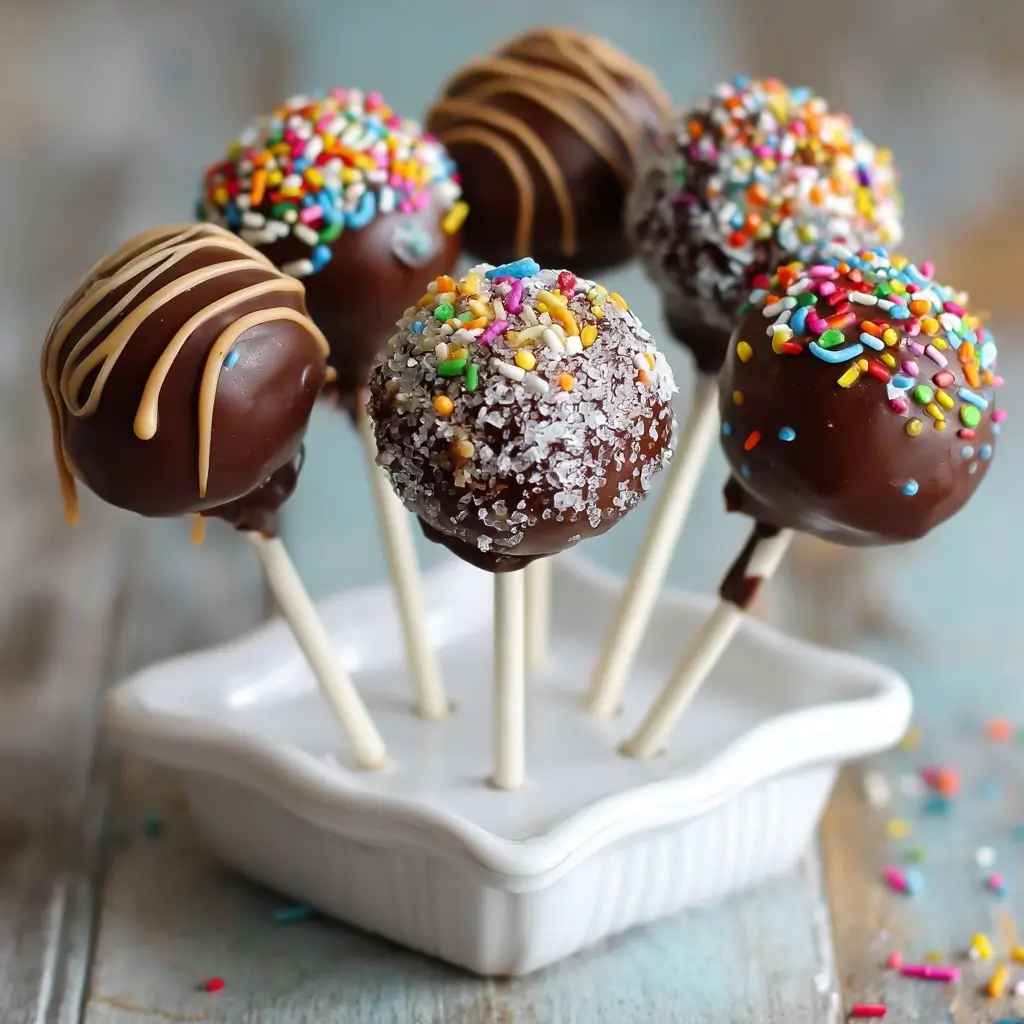
Chocolate fudge cake pops combine moist chocolate cake with rich fudge frosting, rolled into bite-sized spheres, coated in silky chocolate, and decorated to perfection. They’re a crowd-pleasing treat ideal for celebrations, gifts, or satisfying a chocolate craving.