Introduction
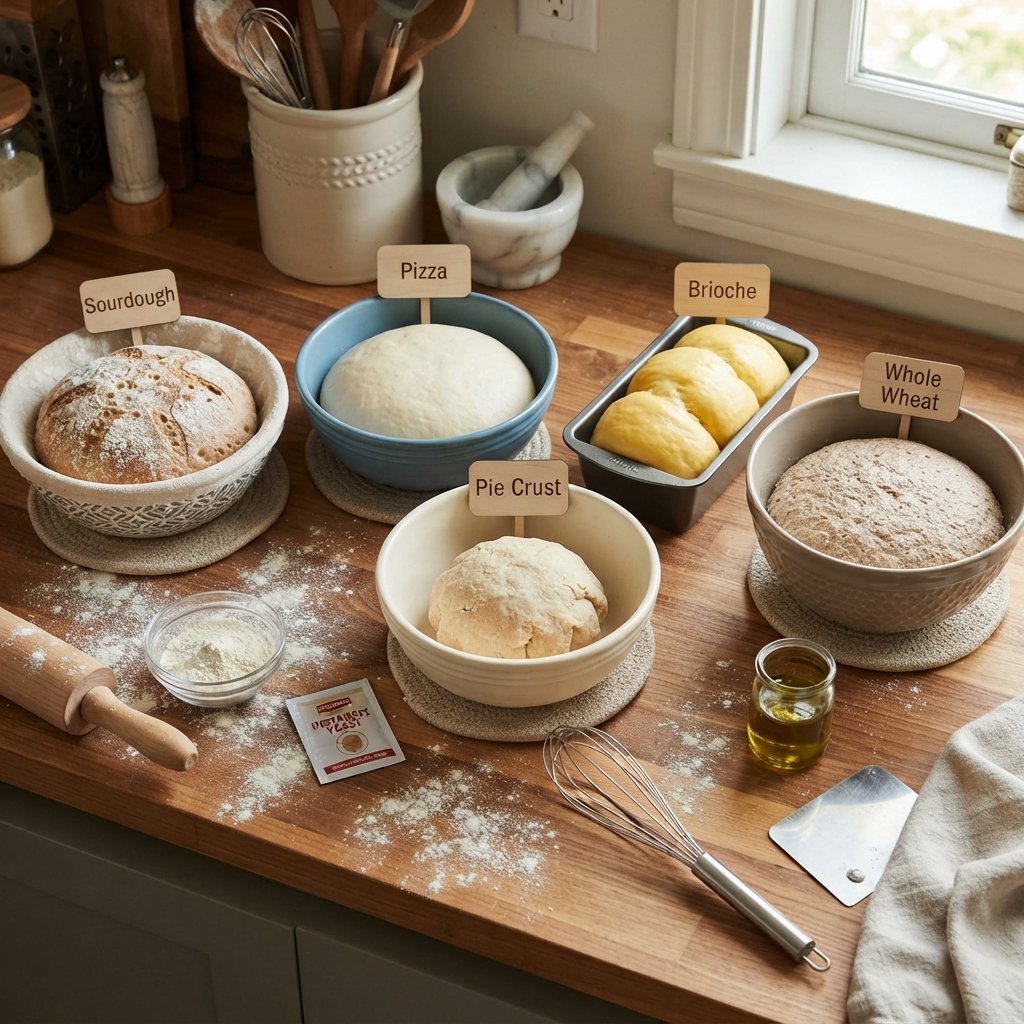
Welcome to the ultimate guide on mastering the art of homemade dough. There is something profoundly satisfying about creating the foundation of countless meals with your own hands. Whether you are kneading a rustic loaf, rolling out a delicate pie crust, or shaping fresh pasta, the process connects you to centuries of culinary tradition. This comprehensive guide is designed to demystify the world of doughs, providing you with the knowledge and confidence to create five distinct, easy-to-make homemade doughs right in your kitchen. From yeast-leavened wonders to quick no-bake treats, we will explore the science, history, and practical application of dough making. By the end of this article, you will not only have five reliable recipes in your arsenal but also a deep understanding of how flour, water, fat, and leavening agents interact to create magic. Let us embark on this floury journey together and transform your home cooking experience.
The History
The history of dough is essentially the history of civilization itself. Archaeological evidence suggests that humans began processing grains into dough-like substances over 30,000 years ago, during the Upper Paleolithic era. Early humans would crush wild grains between stones, mix the resulting powder with water, and cook the paste on hot stones or in ashes. This primitive flatbread was the precursor to all modern doughs.
In ancient Egypt, around 4000 BC, the discovery of yeast fermentation revolutionized dough making. It is believed that Egyptian bakers accidentally left a mixture of flour and water out in the warm climate, allowing wild yeast spores to settle and ferment the mixture. When baked, this dough rose, creating the first leavened bread. This knowledge spread to the Greeks and Romans, who refined baking techniques and built communal ovens. The Romans, in particular, developed various types of doughs, including enriched doughs with oil and honey, which resemble modern pizza and focaccia bases.
During the Middle Ages in Europe, dough making became a specialized guild profession. Bakers guarded their sourdough starters like family secrets, passing them down through generations. The Industrial Revolution brought about the standardization of flour and the invention of commercial yeast in the 19th century, making dough preparation more consistent and accessible to the home cook. Today, while we have stand mixers and food processors, the fundamental principles of dough making remain unchanged from those ancient Egyptian bakeries. Understanding this lineage adds a layer of appreciation to every batch you mix, knead, and bake.
Ingredients Breakdown
To master dough, one must understand the role of each component. While recipes vary, most doughs rely on a core group of ingredients that interact chemically and physically.
- Flour: The backbone of any dough. Flour provides structure through proteins, primarily glutenin and gliadin, which form gluten when hydrated. All-purpose flour is versatile for most doughs. Bread flour has higher protein content for chewier textures (like pizza). Pastry flour has lower protein for tender crusts (like pie).
- Water: Hydration activates the flour proteins and dissolves salts and sugars. The temperature of the water is crucial; cold water slows yeast activity (good for pie crust), while warm water activates yeast (good for bread).
- Fat: Butter, oil, or shortening. Fat coats flour proteins, inhibiting gluten formation. This results in a tender, flaky texture rather than a chewy one. In cookie dough, fat provides richness and spread.
- Leavening Agents: These create gas bubbles that make dough rise. Yeast is a living organism that ferments sugars over time. Baking powder/soda are chemical leaveners that react quickly with acid or heat. Some doughs, like pasta, use no leavening at all.
- Salt: Essential for flavor, but also strengthens gluten structure and regulates yeast activity. Without salt, dough can taste bland and yeast may ferment too quickly.
- Sugar: Provides food for yeast, aids in browning during baking, and tenderizes the dough. In sweet doughs, it is a primary flavor component.
Step-by-Step Recipe
While each of the five doughs detailed later has specific instructions, the general process of making dough follows a universal methodology. Understanding this workflow will help you troubleshoot any recipe.
- Mise en Place: Measure all ingredients accurately. For baking, weight measurements (grams) are far more accurate than volume measurements (cups) due to flour compaction.
- Combining Dry Ingredients: Whisk flour, salt, and leavening agents together. This ensures even distribution so you do not bite into a mouthful of baking soda or salt.
- Adding Wet Ingredients: Create a well in the center of the dry mix or add fats and liquids gradually. For yeast doughs, ensure liquids are not too hot to kill the yeast.
- Mixing: Combine until a shaggy mass forms. At this stage, it will look messy and uneven. This is normal.
- Kneading: This develops the gluten network. Push the dough away with the heel of your hand, fold it back, and turn it. Repeat until the dough is smooth and elastic. Some doughs (like pie crust) should not be over-kneaded to maintain flakiness.
- Resting/Proofing: Allow the dough to rest. This relaxes the gluten (making it easier to roll) and allows yeast to produce gas (making it rise). Cover the dough to prevent a skin from forming.
- Shaping: Divide and shape the dough according to your intended final product.
- Cooking: Bake, boil, fry, or chill depending on the specific dough type.
Tips
Success in dough making often comes down to subtle techniques and environmental factors. Here are expert tips to elevate your results:
- Measure by Weight: Invest in a digital kitchen scale. One cup of flour can vary by 20 grams depending on how you scoop it. Consistency is key.
- Watch the Weather: Humidity affects flour. On humid days, flour absorbs moisture from the air, so you may need to add slightly more flour. On dry days, you may need more water.
- The Windowpane Test: For yeast doughs, stretch a small piece of dough. If it stretches thin enough to let light through without tearing, your gluten is fully developed.
- Keep Fat Cold: For pie crusts and biscuits, keep butter ice-cold until it hits the oven. This creates steam pockets during baking, resulting in flakiness.
- Don’t Rush the Rest: Resting dough is not optional. It relaxes the gluten strands. If you try to roll dough immediately after kneading, it will shrink back like a rubber band.
- Yeast Proofing: If your yeast dough isn’t rising, check the expiration date on your yeast. Proof it in warm water with a pinch of sugar first to ensure it is active.
- Flour Surfaces Lightly: When rolling, use just enough flour to prevent sticking. Too much extra flour incorporated into the dough during rolling can make it tough.
Variations and Customizations
Once you master the base recipes, the possibilities for customization are endless. Here is how you can adapt the five doughs in this guide:
- Flour Substitutions: You can substitute up to 50% of white flour with whole wheat flour for added fiber and nutty flavor. For gluten-free options, use a 1:1 gluten-free flour blend, though hydration levels may need adjustment.
- Infused Flavors: Add dried herbs (rosemary, thyme), spices (cinnamon, cardamom), or zest (lemon, orange) directly into the dry ingredients for flavored doughs.
- Fat Swaps: Substitute butter with olive oil for a vegan option or a fruitier taste. Coconut oil works well in sweet doughs like cookies.
- Liquid Variations: Replace water with milk for a softer crumb and richer browning. Beer can be used in pizza dough for added yeast flavor and crispness.
- Filled Doughs: These doughs can serve as vessels. Use pizza dough for calzones, pie crust for quiches, pasta dough for ravioli, and cookie dough for sandwich cookies.
- Sweet vs. Savory: Adjust sugar and salt levels to pivot a base dough from breakfast to dinner. Adding honey or maple syrup can enhance browning and sweetness.
Health Considerations and Nutritional Value
Homemade dough offers a significant advantage over store-bought alternatives: control over ingredients. Commercial doughs often contain preservatives, high sodium levels, and unhealthy trans fats. By making dough at home, you manage the nutritional profile.
- Caloric Density: Dough is energy-dense, primarily due to carbohydrates in flour and fats. Portion control is important for balanced diets.
- Whole Grains: Using whole wheat or spelt flour increases fiber content, which aids digestion and stabilizes blood sugar levels compared to refined white flour.
- Sodium Control: Store-bought doughs can be excessively salty. Homemade versions allow you to reduce salt without sacrificing texture.
- Healthy Fats: You can choose high-quality fats like extra virgin olive oil or grass-fed butter, which provide better fatty acid profiles than vegetable shortening.
- Allergen Management: Homemade preparation ensures no cross-contamination with nuts, dairy, or other allergens, crucial for those with sensitivities.
- Glycemic Index: Fermented doughs (like sourdough or yeast pizza dough) often have a lower glycemic index than quick breads because the fermentation process breaks down some starches.
Ingredients
Below are the specific ingredient lists for the five easy homemade doughs featured in this guide. Ensure all ingredients are at the recommended temperatures before starting.
1. Classic Yeast Pizza Dough
- 3 cups (360g) Bread Flour (high protein for chewiness)
- 1 packet (2.25 tsp) Instant Yeast
- 1 tsp Granulated Sugar (to feed the yeast)
- 1 tsp Fine Sea Salt
- 1 ¼ cups (300ml) Warm Water (approx. 105°F-110°F)
- 2 tbsp Extra Virgin Olive Oil
2. Quick No-Yeast Flatbread Dough
- 2 cups (240g) All-Purpose Flour
- 1 tsp Baking Powder
- ½ tsp Salt
- ¾ cup (180ml) Warm Water (adjust as needed)
- 2 tbsp Greek Yogurt (optional, for tenderness)
- 1 tbsp Olive Oil
3. Traditional Pie Crust (Shortcrust)
- 2 ½ cups (300g) All-Purpose Flour
- 1 tsp Salt
- 1 tbsp Sugar (optional, for sweet pies)
- 1 cup (225g) Unsalted Butter, very cold and cubed
- 6-8 tbsp Ice Water (keep ice cubes in the water until use)
- 1 tsp White Vinegar (helps prevent toughness)
4. Fresh Egg Pasta Dough
- 2 cups (240g) “00” Flour or All-Purpose Flour
- 3 Large Eggs (room temperature)
- ½ tsp Salt
- 1 tsp Olive Oil (optional, for elasticity)
- Semolina Flour (for dusting during rolling)
5. Edible Cookie Dough (No-Bake)
- 2 cups (240g) All-Purpose Flour (heat-treated, see directions)
- ½ cup (115g) Unsalted Butter, softened
- ½ cup (100g) Brown Sugar, packed
- ¼ cup (50g) Granulated Sugar
- 3 tbsp Milk or Heavy Cream
- 1 tsp Vanilla Extract
- ¼ tsp Salt
- ½ cup Mini Chocolate Chips (ensure they are safe for raw consumption)
Directions
Follow these specific instructions for each of the five doughs. Pay close attention to resting times and temperature requirements.
1. Classic Yeast Pizza Dough Directions
- Activate Yeast: In a small bowl, combine warm water, sugar, and yeast. Let sit for 5-10 minutes until foamy. If it doesn’t foam, your yeast is dead; start over.
- Mix Dry Ingredients: In a large bowl, whisk together flour and salt.
- Combine: Make a well in the flour. Pour in the yeast mixture and olive oil. Stir with a wooden spoon until a shaggy dough forms.
- Knead: Turn onto a floured surface. Knead for 8-10 minutes until smooth and elastic. Alternatively, use a stand mixer with a dough hook for 5 minutes.
- First Rise: Place dough in a greased bowl, cover with a damp cloth or plastic wrap. Let rise in a warm place for 1-2 hours, or until doubled in size.
- Shape: Punch down the dough to release air. Divide into two balls for two 12-inch pizzas. Let rest for 15 minutes before stretching.
- Bake: Top with sauce and cheese. Bake at the highest oven setting (usually 450°F-500°F) for 12-15 minutes.
2. Quick No-Yeast Flatbread Dough Directions
- Whisk Dry: In a mixing bowl, combine flour, baking powder, and salt.
- Add Wet: Add the yogurt, olive oil, and warm water. Mix with a spoon until combined.
- Knead Lightly: Turn onto a surface and knead gently for 2-3 minutes. Do not overwork, or the bread will be tough.
- Rest: Cover and let rest for 30 minutes. This relaxes the gluten for easier rolling.
- Divide: Split dough into 6-8 equal balls.
- Roll: Roll each ball into a thin circle (approx. ¼ inch thick).
- Cook: Heat a dry skillet over medium-high heat. Cook each flatbread for 2-3 minutes per side until puffed and browned spots appear.
3. Traditional Pie Crust (Shortcrust) Directions
- Prepare Butter: Ensure butter is cubed and kept in the freezer until the last moment.
- Pulse Dry: In a food processor, pulse flour, salt, and sugar.
- Cut in Fat: Add cold butter. Pulse until the mixture resembles coarse crumbs with some pea-sized butter pieces remaining. This is vital for flakiness.
- Add Liquid: Drizzle ice water and vinegar over the mixture. Pulse just until the dough begins to clump. Do not over-process.
- Form Disk: Turn dough onto a surface. Gather into a ball and flatten into a disk. Wrap in plastic.
- Chill: Refrigerate for at least 1 hour (up to 2 days). This solidifies the fat.
- Roll: Roll out on a floured surface to fit your pie dish. Transfer carefully and crimp edges.
- Blind Bake (Optional): If making a custard pie, prick holes with a fork, fill with pie weights, and bake at 375°F for 15 minutes before adding filling.
4. Fresh Egg Pasta Dough Directions
- Mound Flour: Pour flour onto a clean work surface and make a large well in the center.
- Add Eggs: Crack eggs into the well. Add salt and oil.
- Incorporate: Whisk eggs gently with a fork, slowly pulling in flour from the inner walls of the well.
- Knead: Once a dough forms, knead vigorously for 10 minutes. It should be firm and smooth. If sticky, add flour; if crumbly, add water drop by drop.
- Rest: Wrap tightly in plastic wrap. Let rest at room temperature for 30 minutes. This is crucial for rolling.
- Roll: Divide into quarters. Roll each piece through a pasta machine, starting at the widest setting and progressively narrowing until desired thickness is reached.
- Cook: Boil in salted water for 2-4 minutes. Fresh pasta cooks much faster than dried.
5. Edible Cookie Dough (No-Bake) Directions
- Heat Treat Flour: This is a safety step to kill bacteria. Spread flour on a baking sheet. Bake at 350°F for 5 minutes. Let cool completely before using.
- Cream Butter and Sugars: In a bowl, beat softened butter, brown sugar, and granulated sugar until light and fluffy.
- Add Liquids: Mix in vanilla, milk, and salt.
- Combine: Gradually add the heat-treated flour. Mix until fully incorporated.
- Add-ins: Fold in chocolate chips gently.
- Chill: For best texture, refrigerate for 30 minutes before serving.
- Serve: Scoop into balls and enjoy safely without baking.
FAQ
Here are answers to common questions regarding homemade dough preparation and troubleshooting.
Q: Why is my dough too sticky?
A: Sticky dough often results from high humidity or too much water. Add flour one tablespoon at a time while kneading. However, some high-hydration doughs (like ciabatta) are supposed to be sticky.
Q: Why is my dough too tough?
A: Toughness usually comes from over-kneading (developing too much gluten) or using too much flour during the rolling process. Ensure you let the dough rest to relax the gluten strands.
Q: Can I freeze homemade dough?
A: Yes. Most doughs (pizza, pie, cookie) freeze well. Wrap tightly in plastic wrap and place in a freezer bag. Thaw in the refrigerator overnight before using. Yeast doughs may need a second rise after thawing.
Q: My yeast dough didn’t rise. What happened?
A: The yeast may have been killed by water that was too hot, or the yeast was expired. Ensure water is warm to the touch, not hot. Always proof yeast if you are unsure of its viability.
Q: Can I make these doughs vegan?
A: Absolutely. Substitute butter with vegan butter or coconut oil. Replace eggs in pasta with water and oil (though texture will differ) or use commercial egg replacers. Use plant-based milk for cookie dough.
Q: How do I know when pie crust is done blind baking?
A: The edges should be lightly golden brown. If the crust puffs up, prick it with a fork. It should feel firm to the touch.
Q: What is the best flour for pasta?
A: Italian “00” flour is finely milled and creates a silky texture. However, standard all-purpose flour works very well for home cooks and is more accessible.
Summary (in two lines)
Mastering these five versatile homemade doughs empowers you to create everything from pizza nights to delicate desserts with full control over ingredients and quality. By understanding the science of mixing and resting, you can consistently achieve professional textures and flavors in your own kitchen.