Introduction
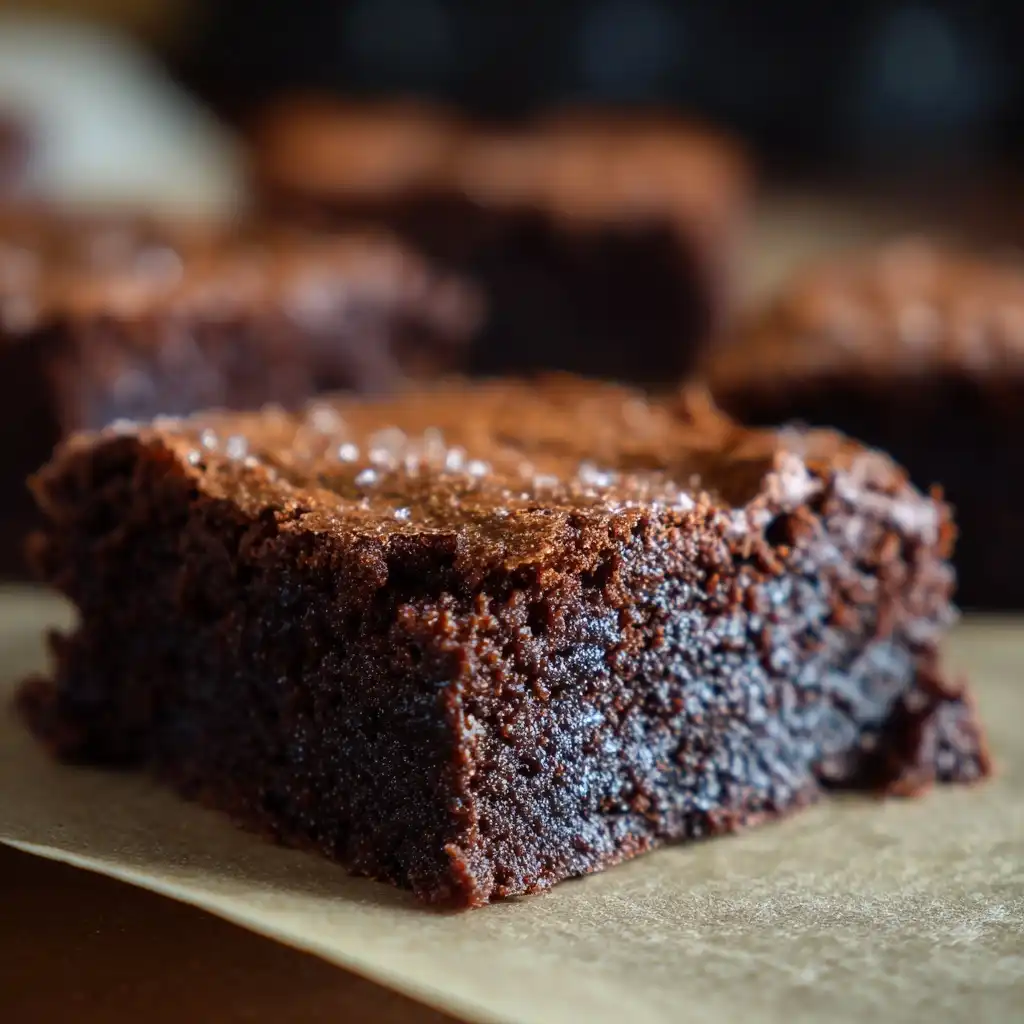
Indulge in the ultimate chocolate fantasy—One Bowl Cocoa Brownies. These decadent, fudgy squares are not just a dessert; they’re a joyful ritual of simplicity, richness, and nostalgia rolled into one effortless preparation. Designed for home bakers who crave deep cocoa intensity without the fuss of multiple bowls, intricate techniques, or last-minute pantry scrambles, this recipe delivers restaurant-quality brownies with pantry-staple ease. Whether you’re a seasoned baker or a curious beginner, the magic lies in its elegant minimalism: one mixing bowl, no electric mixer required (though you’re welcome to use one), and a mere 10 minutes of hands-on time before the oven works its alchemy. With a crackly top, tender-crumbed interior, and molten chocolate depth that lingers on the palate, these brownies promise satisfaction in every bite—and cleanup in under five minutes.
The History
The brownie’s origin story is as rich and layered as its texture. While its exact birthplace remains deliciously contested—Chicago’s 1893 World’s Columbian Exposition, Boston’s famed Palmer House Hotel (1897), or even early 20th-century American home kitchens—the brownie evolved from a happy accident: an over-baked cake or a cake batter stripped of leavening, yielding something denser, chewier, and profoundly more chocolate-forward. By the 1920s, brownies had secured their place in American cookbooks and community cookbooks alike, often baked in simple rectangular pans and cut into uniform squares for potlucks, school bake sales, and Sunday suppers. The “one-bowl” adaptation emerged organically in the mid-to-late 20th century alongside the rise of convenience cooking, feminist kitchen advocacy (emphasizing time-saving, accessible methods), and the proliferation of reliable, high-quality unsweetened cocoa powder. Unlike traditional brownie recipes relying on melted butter and chocolate, this version harnesses the power of cocoa’s solubility and emulsification properties—allowing dry and wet ingredients to marry seamlessly in a single vessel. It honors tradition while embracing modern life: no double boilers, no tempering, no sifting unless you prefer it—and certainly no guilt about skipping the dishwashing pile.
Ingredients Breakdown
Every ingredient in this One Bowl Cocoa Brownies recipe plays a precise, science-backed role—no filler, no fluff, just functional flavor:
- Unsweetened Cocoa Powder (¾ cup): The soul of the recipe. Dutch-process cocoa yields a deeper, smoother, less acidic chocolate note and richer color; natural cocoa works beautifully too (just ensure your baking powder is fresh if substituting). Cocoa provides antioxidants (flavanols), intense aroma, and the structural backbone for fudginess.
- Granulated Sugar (1 ½ cups): More than just sweetness—sugar tenderizes gluten, aids in crust formation, and contributes to moisture retention and shelf life. Its granular structure helps create the signature shiny, crackly top when combined with proper mixing technique.
- Brown Sugar (½ cup, light or dark): Adds molasses-derived moisture, subtle caramel notes, and acidity that enhances cocoa’s complexity. Dark brown sugar intensifies the richness; light offers a milder balance.
- All-Purpose Flour (1 cup): The structural scaffold. Not too much (to avoid cakey texture), not too little (to prevent collapse). For gluten-free adaptations, a 1:1 certified GF blend with xanthan gum works reliably—no separate binder needed.
- Salt (1 tsp): A critical flavor amplifier—not detectable as “salty,” but essential for rounding out bitterness and highlighting chocolate’s fruity, earthy undertones. Fine sea salt or kosher salt ensures even distribution.
- Baking Powder (1 tsp): Used sparingly to provide *just enough* lift for tenderness without sacrificing density. Omitting it yields ultra-fudgy, almost pudding-like brownies; including it creates a slightly more resilient, sliceable crumb—ideal for make-ahead or gifting.
- Eggs (3 large, room temperature): Act as emulsifiers, leaveners, and moisture reservoirs. Room-temperature eggs incorporate more evenly, reducing risk of seizing the batter. Their proteins coagulate during baking to set the structure, while yolks lend luxurious mouthfeel.
- Vegetable Oil (½ cup): Chosen for neutrality, high smoke point, and superior moisture delivery vs. butter (which contains water and milk solids that can cause uneven texture or greasiness in high-cocoa recipes). Canola, grapeseed, or light olive oil (not extra virgin) all work flawlessly.
- Vanilla Extract (2 tsp, pure): Enhances aromatic complexity—vanillin binds with cocoa compounds to elevate perceived chocolate intensity. Imitation vanilla lacks depth and may taste artificial under heat.
- Hot Coffee or Hot Water (¼ cup): The secret catalyst. Hot liquid blooms the cocoa, unlocking volatile aromatics and dissolving sugars fully. Coffee deepens chocolate flavor without tasting like coffee (use decaf if preferred); hot water yields a purer cocoa profile. Never skip this step—it transforms graininess into silk.
- Optional Add-Ins (½–1 cup total): Chocolate chips (semisweet, bittersweet, or chopped bars), toasted walnuts or pecans, dried cherries, espresso beans, flaky sea salt for finishing, or even a swirl of peanut butter or caramel.
Step-by-Step Recipe
- Preheat & Prep: Position oven rack to center position. Preheat oven to 350°F (175°C). Grease a 9×13-inch metal or glass baking pan *generously*, then line with parchment paper, leaving 2-inch overhang on two opposite sides for easy lifting. Lightly grease the parchment. This step prevents sticking and guarantees clean, professional-looking slices.
- Dry Whisk: In your large mixing bowl, add cocoa powder, granulated sugar, brown sugar, flour, salt, and baking powder. Whisk vigorously for 45–60 seconds until fully homogenized and no streaks remain. Breaking up sugar clumps here ensures even sweetness and avoids gritty spots.
- Make a Well & Add Wet Ingredients: Create a wide well in the center of the dry mixture. Into the well, add eggs, oil, and vanilla. Begin mixing with a sturdy silicone spatula or wooden spoon—start slowly, folding from the center outward—to gradually incorporate dry ingredients without splashing.
- Incorporate Hot Liquid: Carefully pour hot coffee or water into the batter. Continue folding gently but deliberately for 60–90 seconds until the batter is completely smooth, glossy, and thick—like warm chocolate pudding. Avoid overmixing beyond this point (no more than 120 seconds total mixing time) to prevent excess gluten development, which leads to toughness.
- Fold in Extras: If using add-ins, gently fold them in with 3–4 broad strokes—just until evenly dispersed. Over-folding can cause chips to sink or nuts to break down.
- Pour & Smooth: Immediately pour batter into prepared pan. Use an offset spatula or the back of a spoon to spread evenly into corners. Tap pan firmly on countertop 3–4 times to release air bubbles and encourage even rising.
- Bake with Precision: Bake for 28–34 minutes. Begin checking at 28 minutes: edges should be puffed and set, center should look moist but not wet, and a toothpick inserted 1 inch from edge should come out with moist crumbs (not wet batter); inserted in center, it should have *a few* damp crumbs clinging—not clean, not soupy. Baking time varies by oven calibration, pan material (metal bakes faster than glass), and altitude (reduce baking powder by ¼ tsp and increase liquid by 1 tbsp per 3,000 ft elevation).
- Cool Completely—Non-Negotiable: Remove pan from oven and place on a wire rack. Let cool *undisturbed* for 2 hours at room temperature. This allows residual heat to finish setting the crumb and prevents crumbling when cutting. For best texture and clean cuts, refrigerate uncovered for 1 hour before slicing—or chill overnight for ultra-firm, fudge-like squares.
- Cut & Serve: Using a sharp chef’s knife wiped clean between cuts, slice into 16–24 squares. For pristine edges, dip knife in hot water and dry before each cut. Serve at cool room temperature for ideal contrast of crisp top and yielding interior.
Tips
- Room-Temperature Eggs Are Essential: Cold eggs can cause the oil to seize or create a curdled appearance—even if it bakes fine, the texture suffers. Place eggs in warm water for 5 minutes if forgotten.
- Measure Flour Correctly: Spoon flour into measuring cup and level with straight edge—never scoop directly from bag (compresses flour, adding up to 25% extra). Too much flour = dry, crumbly brownies.
- Hot Liquid Must Be HOT: Use liquid heated to just below boiling (about 200°F/93°C). Microwaving for 45–60 seconds usually suffices. Lukewarm liquid won’t bloom cocoa effectively.
- No Mixer Needed—But If You Use One: Use low speed only—and stop the moment ingredients are combined. Overbeating = tough, rubbery brownies. A whisk or spatula gives you better control.
- Rotate Pan Mid-Bake (If Your Oven Has Hot Spots): At 20 minutes, give pan a half-turn for even browning. Most convection ovens don’t require this—but conventional ovens often do.
- Underbake Slightly for Fudgier Results: Pull them out when the center still jiggles *just slightly*—it will firm up during cooling. Overbaking is the #1 cause of dry brownies.
- Chill Before Cutting = Game-Changer: Refrigeration firms the fat and sets the cocoa solids, allowing razor-sharp edges and preventing smearing. Don’t skip this if presentation matters!
- Store Smart: Keep cooled brownies in an airtight container at room temperature for up to 4 days, or refrigerate for up to 10 days. Freeze unfrosted squares layered between parchment for up to 4 months—thaw at room temperature for 30 minutes before serving.
- Revive Stale Brownies: Wrap individual squares in damp paper towel and microwave for 5–8 seconds. The steam rehydrates the crumb instantly.
- Scale With Confidence: This recipe doubles perfectly in a 13×18-inch half-sheet pan—bake 32–38 minutes. Halving? Use an 8×8-inch pan and reduce time to 22–26 minutes.
Variations and Customizations
This foundational recipe is a canvas—elegant in its versatility and endlessly adaptable to seasons, dietary needs, and cravings:
- Double Chocolate Espresso: Add 1 tbsp instant espresso powder with dry ingredients; fold in 1 cup chopped dark chocolate (70% cacao) and ½ cup white chocolate chips.
- Nutty Maple Pecan: Replace brown sugar with pure maple syrup (reduce hot liquid to 3 tbsp) and fold in 1 cup toasted, chopped pecans + 2 tbsp maple sugar sprinkled on top before baking.
- Gluten-Free Vegan: Swap flour for 1 cup King Arthur Measure-for-Measure GF blend; replace eggs with “flax eggs” (3 tbsp ground flaxseed + 9 tbsp warm water, rested 10 mins); use coconut oil (refined, for neutral taste) and plant-based milk + vinegar (1 tsp apple cider vinegar + ¼ cup unsweetened almond milk) instead of hot water/coffee.
- Red Velvet Brownies: Add 1 tbsp red food gel (not liquid) with wet ingredients; swap 2 tbsp cocoa for unsweetened red velvet cocoa (or add 1 tsp white vinegar + ½ tsp baking soda to dry mix for lift and tang).
- Sea Salt & Caramel Swirl: Drizzle ½ cup thick salted caramel sauce over batter before baking, then swirl gently with a knife. Finish with flaky Maldon salt immediately after cooling.
- Orange-Zested Dark Chocolate: Add 2 tsp finely grated orange zest + 1 tsp orange extract with vanilla; fold in 1 cup chopped 85% dark chocolate and ¼ cup candied orange peel.
- Protein-Packed Peanut Butter Cup: Add 2 scoops chocolate protein powder (reduce flour to ¾ cup); swirl in ⅓ cup creamy peanut butter before baking; top with miniature peanut butter cups pressed in during last 5 minutes.
- Boozy Bourbon Walnut: Replace hot liquid with 3 tbsp hot coffee + 1 tbsp bourbon; fold in 1 cup toasted walnuts and 2 tbsp bourbon-soaked raisins (soaked 15 mins in warm bourbon).
- Spiced Mexican Cocoa: Add 1 tsp ground cinnamon, ¼ tsp chipotle powder, ⅛ tsp ground clove, and pinch of cayenne with dry ingredients; top with crumbled cinnamon-sugar tortilla chips before baking.
- Kid-Friendly Confetti: Fold in ¾ cup rainbow sprinkles (jimmies, not nonpareils—they bleed) and ¼ cup mini marshmallows. Skip baking powder for extra chew.
Health Considerations and Nutritional Value
While indulgence is part of the joy, mindful baking means understanding what’s in your treat—and how small tweaks influence wellness impact. Per standard 2″×2″ square (recipe yields ~24 servings):
- Calories: ~145–165 kcal (varies by add-ins and sugar adjustments)
- Total Fat: 7–9 g (mostly unsaturated from oil; zero trans fat, minimal saturated fat)
- Carbohydrates: 20–23 g (including 16–18 g naturally occurring sugars; no added syrups or corn syrup)
- Fiber: 1.5–2 g (boost to 3–4 g with whole wheat pastry flour or 2 tbsp ground flax)
- Protein: 2–3 g (enhance with protein powder, almond butter swirl, or egg white substitution)
- Key Micronutrients: Iron (from cocoa), magnesium (supports muscle/nerve function), potassium, and flavanols (linked to improved endothelial function and cognitive support when consumed regularly as part of a balanced diet)
Considerations for Special Diets:
- Lower-Sugar Option: Reduce granulated sugar to 1 cup and brown sugar to ¼ cup; add 2 tbsp monk fruit-allulose blend for bulk and browning. Texture remains fudgy—just slightly less glossy.
- Low-Fat Adaptation: Replace half the oil (¼ cup) with unsweetened applesauce or mashed ripe banana—but expect a softer, more cake-like crumb and shorter shelf life.
- Allergen Notes: Naturally nut-free (unless added), soy-free (if using soy-free chocolate/chips), and dairy-free (ensure chocolate is dairy-free). Always verify labels on cocoa, chocolate, and vanilla for hidden allergens.
- Heart-Healthy Tweaks: Use avocado oil (high in monounsaturated fats); add 1 tbsp ground chia or hemp seeds; top with fresh raspberries and mint for antioxidant synergy.
- Portion Control Tip: Cut into 32 smaller squares—still deeply satisfying, with ~95 kcal each—and pair with Greek yogurt or a handful of almonds for balanced satiety.
Remember: Brownies aren’t “health food,” but they *can* be part of a nourishing, joyful, sustainable relationship with food—especially when made with intention, real ingredients, and shared with love.
Ingredients
- ¾ cup unsweetened cocoa powder (Dutch-process preferred)
- 1 ½ cups granulated sugar
- ½ cup packed light or dark brown sugar
- 1 cup all-purpose flour (spooned & leveled)
- 1 teaspoon fine sea salt
- 1 teaspoon baking powder
- 3 large eggs, room temperature
- ½ cup neutral vegetable oil (canola, grapeseed, or light olive oil)
- 2 teaspoons pure vanilla extract
- ¼ cup hot brewed coffee or hot water (just below boiling)
- ½–1 cup add-ins of choice (chocolate chips, toasted nuts, dried fruit, etc.)
Directions
- Preheat oven to 350°F (175°C). Grease a 9×13-inch baking pan and line with parchment paper, leaving overhang on two sides. Grease parchment.
- In a large bowl, whisk together cocoa powder, granulated sugar, brown sugar, flour, salt, and baking powder until no lumps remain and mixture is uniform (45–60 sec).
- Make a well in the center. Add eggs, oil, and vanilla into the well.
- Fold gently with a spatula until dry ingredients are mostly moistened (~30 sec).
- Pour hot coffee or water into batter. Continue folding for 60–90 seconds until smooth, thick, and glossy—do not overmix.
- Gently fold in add-ins with 3–4 strokes.
- Pour batter into prepared pan. Spread evenly. Tap pan firmly on counter 3–4 times.
- Bake 28–34 minutes, until edges are set, center is moist but not wet, and toothpick inserted 1 inch from edge has moist crumbs.
- Cool in pan on wire rack for 2 hours at room temperature. For cleanest cuts, refrigerate uncovered 1 hour or overnight.
- Lift brownies using parchment overhang. Cut into squares with a sharp, hot-wiped knife.
FAQ
- Can I use melted butter instead of oil?
- Yes—but expect a slightly cakier, less fudgy result due to butter’s water content and milk solids. Use ⅝ cup (10 tbsp) unsalted butter, melted and cooled slightly. Reduce hot liquid to 3 tbsp to compensate for added moisture.
- Why did my brownies sink in the middle?
- Most common causes: underbaking (pull them out too soon), opening oven door too early (causes rapid temperature drop), expired baking powder (test by mixing ½ tsp with ¼ cup hot water—if no vigorous fizz, replace), or excessive mixing after adding hot liquid.
- Can I make these ahead for a party?
- Absolutely! Bake 1–2 days ahead. Cool completely, wrap tightly in plastic wrap, then foil. Store at room temperature. They taste even better on Day 2 as flavors meld. Refresh with 5-second microwave bursts before serving.
- My batter looks grainy—did I do something wrong?
- Not necessarily. Graininess often occurs if cocoa wasn’t fully bloomed or sugar wasn’t whisked thoroughly. As long as you added hot liquid and mixed adequately, it will smooth out during baking. Next time, whisk dry ingredients longer—and ensure your hot liquid is truly hot.
- Can I freeze the batter?
- Not recommended—leavening agents lose potency, and eggs may separate upon thawing. However, baked, cooled brownies freeze exceptionally well for up to 4 months in airtight containers with parchment between layers.
- What’s the best cocoa brand for maximum flavor?
- For Dutch-process: Valrhona Cocoa Powder, Droste, or Guittard’s Dutch-Process. For natural cocoa: Hershey’s Natural (iconic American profile) or Ghirardelli’s Unsweetened. All deliver excellent results—taste preference is personal!
- Can I bake these in a muffin tin?
- Yes! Line a standard 12-cup muffin tin with paper liners. Fill each ¾ full. Bake at 350°F for 18–22 minutes. They’ll be portable, portion-controlled, and perfect for lunchboxes or events.
- How do I fix overly sweet brownies?
- Balance is key: serve with tart accompaniments—unsweetened whipped cream, fresh berries, a scoop of coffee ice cream, or a sprinkle of flaky salt. Next time, reduce granulated sugar by ¼ cup and add 1 tsp instant espresso powder to deepen flavor without sweetness.
- Why does this recipe not use chocolate bars?
- Using cocoa powder maximizes chocolate intensity *and* simplifies the process—no melting, no seizing, no tempering. It also provides superior control over fat content and texture. That said, you can absolutely stir in chopped chocolate for melty pockets—just don’t replace cocoa with chocolate.
- Are these suitable for high-altitude baking?
- Yes—with minor adjustments: decrease baking powder to ¾ tsp, increase flour to 1 ¼ cups, increase hot liquid to ⅓ cup, and bake at 360°F for 26–32 minutes. Monitor closely—high altitude accelerates evaporation and leavening.
Summary
One Bowl Cocoa Brownies redefine chocolate decadence through radical simplicity: rich, fudgy, crackly-topped squares born from a single vessel, pantry staples, and scientifically tuned technique—no fancy tools, no wasted time, no compromised flavor. Whether you’re feeding a crowd, soothing a craving, or rediscovering the quiet joy of unhurried baking, this recipe delivers soul-warming consistency, endless creativity, and the profound satisfaction of homemade magic—measured in moments, not milestones.