Introduction
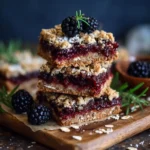
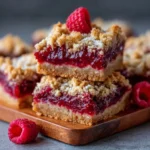
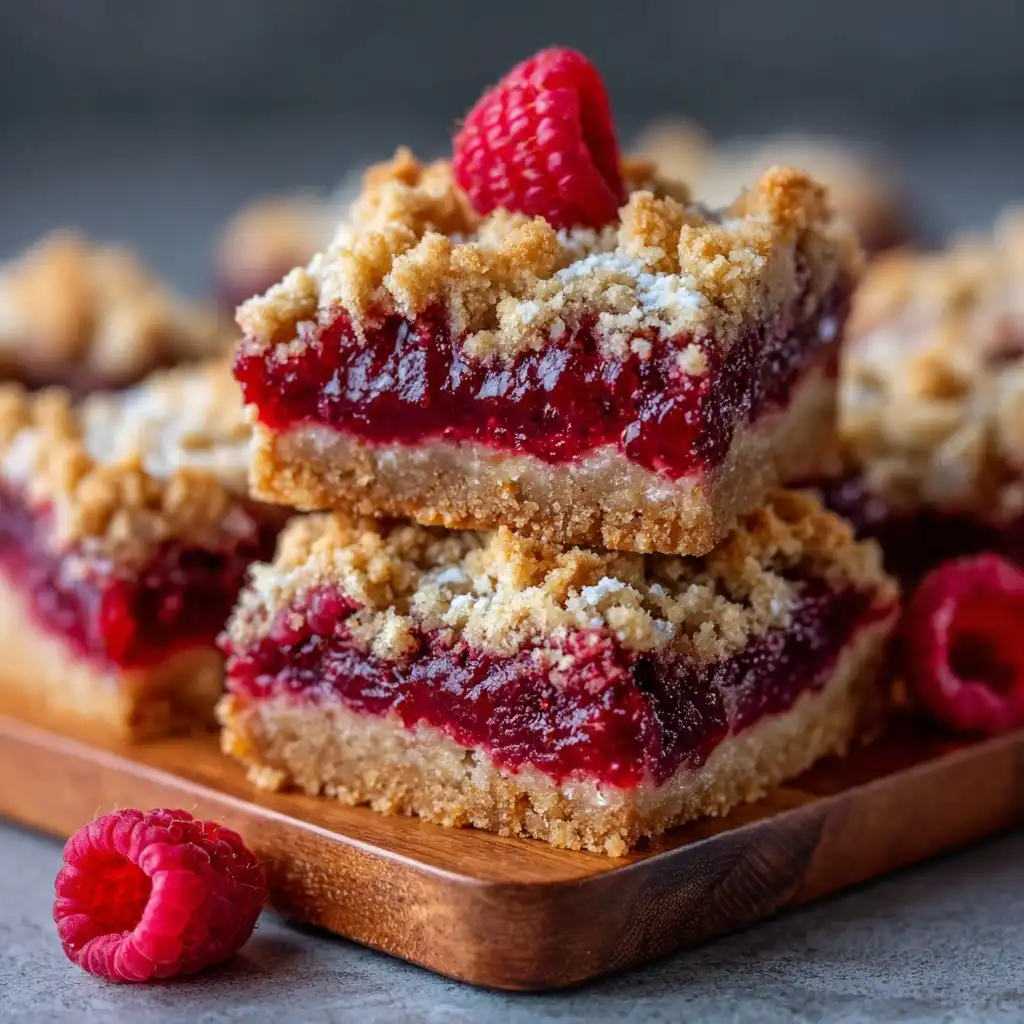
Raspberry Crumble Bars are a beloved American dessert that marries the bright, tangy sweetness of fresh or frozen raspberries with a buttery, golden-brown shortbread-like base and crumbly oat-and-brown-sugar topping. These bars strike the perfect balance between tart and sweet, soft and crisp, rustic and refined—making them ideal for potlucks, bake sales, afternoon tea, holiday platters, or simple weeknight indulgence. Unlike traditional pies or tarts, Raspberry Crumble Bars require no fancy equipment or pastry skills—just a mixing bowl, a 9×13-inch baking pan, and about an hour from start to finish. Their layered structure—dense bottom crust, luscious fruit filling, and textured streusel crown—delivers complex flavor and contrasting mouthfeel in every bite. Whether served warm with a scoop of vanilla bean ice cream or chilled and sliced neat for clean presentation, these bars evoke nostalgia while remaining refreshingly versatile.
The History
The origins of crumble bars trace back to early 20th-century American home baking traditions, evolving from simpler concepts like fruit squares, coffee cakes, and “dump cake”-style desserts popularized during the Great Depression and World War II eras—when resourcefulness, pantry staples, and minimal oven time were essential. While the British “crumble” (a baked fruit-and-crumble-topping dish served with custard) emerged in the 1920s as a wartime alternative to pastry, the American bar version diverged by incorporating a dual-layered structure: a pressed crust *and* a separate crumb topping—often enriched with oats, nuts, and brown sugar. Raspberry specifically rose in prominence post–World War II, as commercial raspberry puree and frozen berry availability expanded across U.S. grocery chains. The first printed recipe resembling modern Raspberry Crumble Bars appeared in the 1954 edition of The Joy of Cooking, under “Raspberry Squares,” and was later refined in regional church cookbooks (notably Pacific Northwest and Midwest editions) where wild and cultivated raspberries thrive. By the 1970s, food magazines like Bon Appétit and Woman’s Day featured glossy, styled versions—often dubbed “Raspberry Streusel Bars” or “Berry Crisp Bars”—solidifying their status as a timeless, adaptable classic. Today, they’re celebrated not only for taste but also for their cultural resonance: a symbol of comfort, simplicity, seasonal awareness, and intergenerational kitchen wisdom.
Ingredients Breakdown
Every component of Raspberry Crumble Bars plays a deliberate role in texture, structure, and flavor harmony:
- Base Layer: All-purpose flour provides gluten structure and tenderness; granulated sugar adds sweetness and promotes browning; unsalted butter (cold and cubed) delivers richness, flakiness, and binding power when pulsed or rubbed in; a pinch of salt enhances all other flavors and balances sweetness.
- Filling: Fresh or frozen raspberries supply natural pectin for gentle thickening and vibrant acidity; granulated and brown sugars work synergistically—granulated for clarity and control, brown sugar for molasses depth and moisture retention; lemon juice brightens and prevents dullness; cornstarch (or tapioca starch) is critical for stabilizing the juicy filling without turning it gummy or runny; a touch of vanilla extract rounds out the fruit’s sharpness.
- Crumble Topping: Rolled oats (old-fashioned, not instant) contribute chew, nuttiness, and structural lift; brown sugar adds caramel notes and hygroscopic moisture; cold butter binds the crumbs while ensuring pockets of flakiness upon baking; flour reinforces cohesion without toughness; cinnamon (optional but recommended) adds warmth that complements raspberry’s floral undertones; a final sprinkle of coarse turbinado or demerara sugar yields delightful crunch and sparkle.
Each ingredient is chosen not just for function but for synergy—no element overpowers; instead, they build a cohesive, multi-dimensional experience.
Step-by-Step Recipe
- Prep & Preheat: Position oven rack to center position. Preheat oven to 350°F (175°C). Line a 9×13-inch metal baking pan with parchment paper, leaving 2-inch overhang on two opposing sides for easy lifting. Lightly grease exposed pan edges.
- Make the Base: In a large bowl, whisk together 2 cups all-purpose flour, ½ cup granulated sugar, and ¼ tsp fine sea salt. Add 1 cup (2 sticks / 227g) cold, unsalted butter, cut into ½-inch cubes. Using a pastry cutter, two forks, or fingertips, work butter into flour mixture until it resembles coarse, pea-sized crumbs with some larger flakes remaining (about 2–3 minutes). Avoid overworking—warm butter leads to greasiness and loss of crumbliness. Press mixture evenly and firmly into the bottom of the prepared pan using the back of a measuring cup or flat-bottomed glass. Prick all over with a fork. Bake for 18–20 minutes, until lightly golden at edges and just set—not browned. Remove and cool slightly while preparing filling (5 minutes).
- Prepare the Filling: In a medium non-reactive bowl (stainless steel or glass), gently combine 4 cups (about 16 oz / 450g) fresh or thawed/frozen (not drained) raspberries, ¾ cup granulated sugar, ½ cup light or dark brown sugar, 2 tbsp fresh lemon juice, 1 tsp pure vanilla extract, and ¼ tsp fine salt. Stir once or twice—do not crush berries excessively. In a small bowl, whisk ¼ cup cornstarch (or quick-cooking tapioca starch) until fully dissolved in 1 tbsp cold water (slurry), then stir into raspberry mixture until uniformly coated. Let sit 5 minutes to allow starch activation and juice release.
- Assemble: Pour filling evenly over warm, partially baked base. Spread gently with an offset spatula, avoiding excessive pressure that could disturb the crust.
- Make & Apply the Crumble Topping: In a clean medium bowl, combine 1 cup old-fashioned rolled oats, 1 cup all-purpose flour, 1 cup packed light or dark brown sugar, ½ tsp ground cinnamon (optional but recommended), and ¼ tsp fine salt. Cut in ¾ cup (1.5 sticks / 170g) cold unsalted butter, using same method as base, until mixture forms moist clumps and pea-sized crumbs—some should hold together when pinched, others remain loose. Sprinkle evenly over raspberry layer. For extra visual appeal and crunch, gently press a few larger clusters onto surface, then sprinkle with 1–2 tbsp turbinado sugar.
- Bake: Place pan in preheated oven and bake for 45–55 minutes, rotating halfway through. Bars are done when topping is deep golden brown, edges bubble vigorously, and center filling is set (jiggles only slightly when gently shaken—not liquidy). A toothpick inserted into the center should come out with thick, jammy residue—not raw juice.
- Cool Completely: Transfer pan to a wire rack. Cool at room temperature for at least 2 hours—this step is non-negotiable for clean slicing. For optimal texture and flavor integration, refrigerate uncovered for 2–4 hours or overnight. Chilling firms the filling, solidifies the butter in both layers, and deepens flavor complexity.
- Cut & Serve: Using parchment overhang, lift bars from pan onto a cutting board. Trim uneven edges for professional appearance. Slice into 12–16 uniform bars (3×4 or 4×4 grid) using a sharp, thin-bladed knife wiped clean between cuts. Serve at cool room temperature or slightly warmed.
Tips
- Butter Temperature Matters: Use cold butter for both base and topping—never softened or melted. Cold fat creates steam pockets during baking, yielding tender, flaky, and crumbly textures. If your kitchen is warm, chill flour and bowls for 10 minutes before starting.
- Frozen Berries? Yes—but Don’t Drain: Frozen raspberries often yield superior consistency—more reliable pectin and less variability than peak-season fresh. Thaw completely in a colander placed over a bowl, then reserve ALL accumulated juice and add it back to the berries before mixing in starch. Draining removes vital pectin and flavor.
- Starch Substitutions: Cornstarch gives clarity and sheen; tapioca starch offers greater heat stability and subtle chew; arrowroot works well but may thin slightly upon cooling. Avoid flour-only thickeners—they can leave a chalky, cloudy aftertaste.
- Prevent Soggy Bottoms: Partially pre-baking the base ensures it stays crisp beneath the juicy filling. Underbaking risks gumminess; overbaking leads to hardness. Watch closely at the 18-minute mark.
- Cutting Clean Bars: Use a hot, wet knife: dip blade in hot water, wipe dry, slice, repeat. Or chill bars thoroughly—cold sets the butter and thickens the filling dramatically. A serrated knife helps with delicate tops without smearing.
- Storage Wisdom: Store covered at room temperature up to 2 days; refrigerate up to 1 week (bring to cool room temp before serving); freeze unfrosted bars up to 3 months—wrap individually in parchment + foil, thaw overnight in fridge.
- Boost Flavor Depth: Toast oats for the topping (350°F for 8–10 min, cooled before mixing); add ¼ tsp almond extract to filling; infuse lemon zest into sugar before combining; or stir in 1 tsp balsamic vinegar for sophisticated acidity.
Variations and Customizations
Raspberry Crumble Bars are wonderfully adaptable—here’s how to personalize them without compromising integrity:
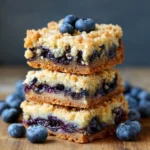
- Fruit Swaps: Substitute blackberries, boysenberries, or mixed summer berries (reduce sugar by 1–2 tbsp if very sweet). For apples or pears: peel, dice small, toss with 1 tsp lemon juice + ½ tsp cinnamon, and increase cornstarch to ⅓ cup. For rhubarb: combine 2 cups diced rhubarb + 2 cups raspberries, increase granulated sugar to 1 cup, and add ½ tsp ginger.
- Gluten-Free Option: Replace all-purpose flour with 1:1 gluten-free baking blend (like King Arthur or Bob’s Red Mill) in both base and topping. Ensure oats are certified GF. Add ½ tsp xanthan gum to base mixture only if blend doesn’t include it.
- Vegan Version: Use cold vegan butter (Miyoko’s or Earth Balance sticks work best), replace honey/vanilla with maple syrup (reduce other sugars by 1 tbsp), and ensure cornstarch is plant-derived. Add 1 tbsp ground flaxseed to base for binding.
- Nutty Crunch: Fold ½ cup toasted sliced almonds or chopped pecans into crumble topping—or sprinkle ¼ cup on top before baking for dramatic texture.
- Chocolate-Raspberry Fusion: Press ½ cup high-quality dark chocolate chips (60–70% cacao) into warm base before adding filling. Or drizzle cooled bars with melted white chocolate and freeze briefly to set.
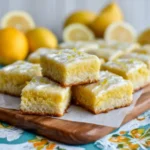
- Lemon-Raspberry Zing: Add 1 tbsp finely grated lemon zest to filling and ½ tsp to crumble topping. Increase lemon juice to 3 tbsp and reduce granulated sugar by 2 tbsp.
- Herbal Elegance: Infuse 1 tbsp fresh basil or mint leaves in warm butter for topping (strain before cutting in); or stir 1 tsp dried lavender (culinary grade) into brown sugar for filling—use sparingly!
- Mini Bar Format: Press base into lined muffin tin cups (24 standard), bake 10–12 min, fill with 1 tsp raspberry mixture, top with 1 tsp crumble, bake 15–18 min. Perfect for parties or portion control.
Health Considerations and Nutritional Value
While Raspberry Crumble Bars are undeniably indulgent, thoughtful modifications can enhance their nutritional profile without sacrificing enjoyment:
- Natural Antioxidant Powerhouse: Raspberries rank among the highest fruits in antioxidant capacity (ORAC score), delivering abundant vitamin C, manganese, fiber (8g per cup!), and ellagic acid—a polyphenol studied for anti-inflammatory and cellular protective properties.
- Fiber Benefits: The combination of whole raspberries and rolled oats contributes significant soluble and insoluble fiber—supporting digestive regularity, satiety, and healthy blood sugar response. One standard bar (1/16 of recipe) contains ~2.5g dietary fiber.
- Reduced Sugar Options: You can safely reduce total sugar by up to ¼ cup without compromising texture—brown sugar’s moisture compensates for lost sweetness. Consider coconut sugar (lower glycemic index) or monk fruit blends for partial substitution (test in small batches).
- Whole Grain Upgrade: Replace up to half the all-purpose flour with white whole wheat flour or oat flour—adds B vitamins, magnesium, and heart-healthy fiber while maintaining tenderness.
- Healthy Fat Awareness: Butter provides saturated fat, but its role in structure and flavor is hard to replicate. Grass-fed butter adds conjugated linoleic acid (CLA) and vitamin K2. For lower saturated fat, use half butter/half cold avocado oil in topping only (not base).
- Portion Mindfulness: At approximately 220–260 calories per bar (depending on size and butter content), these are calorie-dense. Serving alongside Greek yogurt or a handful of walnuts boosts protein and healthy fats, promoting longer fullness.
- Allergen Notes: Naturally nut-free (unless customized), but contains gluten and dairy. Easily adapted for common restrictions—see Variations section for GF and vegan pathways.
- Not a “Health Food”—But a Thoughtful Treat: Enjoyed occasionally as part of a balanced diet rich in vegetables, lean proteins, and whole grains, Raspberry Crumble Bars offer more nutritional substance than many ultra-processed desserts—and far more joy than deprivation ever could.
Ingredients
- For the Base:
- 2 cups (250g) all-purpose flour
- ½ cup (100g) granulated sugar
- ¼ teaspoon fine sea salt
- 1 cup (227g / 2 sticks) cold unsalted butter, cubed
- For the Raspberry Filling:
- 4 cups (450g) fresh or frozen (thawed, juices reserved) raspberries
- ¾ cup (150g) granulated sugar
- ½ cup (100g) packed light or dark brown sugar
- 2 tablespoons fresh lemon juice (about 1 lemon)
- 1 teaspoon pure vanilla extract
- ¼ teaspoon fine sea salt
- ¼ cup (30g) cornstarch or quick-cooking tapioca starch
- 1 tablespoon cold water (for slurry)
- For the Crumble Topping:
- 1 cup (90g) old-fashioned rolled oats (not instant)
- 1 cup (125g) all-purpose flour
- 1 cup (200g) packed light or dark brown sugar
- ½ teaspoon ground cinnamon (optional but recommended)
- ¼ teaspoon fine sea salt
- ¾ cup (170g / 1.5 sticks) cold unsalted butter, cubed
- 1–2 tablespoons turbinado or demerara sugar (for finishing)
Directions
- Preheat oven to 350°F (175°C). Line a 9×13-inch metal baking pan with parchment paper, allowing 2-inch overhang on two opposite sides. Lightly grease exposed pan edges.
- In a large bowl, whisk together 2 cups flour, ½ cup granulated sugar, and ¼ tsp salt. Add 1 cup cold, cubed butter. Using a pastry cutter or fingers, work butter into flour until mixture resembles coarse crumbs with some pea-sized pieces. Firmly press into bottom of prepared pan. Prick all over with a fork. Bake 18–20 minutes, until pale golden at edges and just set. Cool 5 minutes.
- While base bakes, prepare filling: In a medium bowl, gently combine raspberries, ¾ cup granulated sugar, ½ cup brown sugar, lemon juice, vanilla, and ¼ tsp salt. In small bowl, whisk cornstarch with 1 tbsp cold water until smooth; stir into raspberry mixture. Let stand 5 minutes.
- Pour filling evenly over warm base. Spread gently.
- For topping: In clean bowl, combine 1 cup oats, 1 cup flour, 1 cup brown sugar, cinnamon (if using), and ¼ tsp salt. Cut in ¾ cup cold butter until mixture forms moist clumps and crumbs. Sprinkle evenly over filling; gently press larger clusters onto surface. Sprinkle with turbinado sugar.
- Bake 45–55 minutes, rotating pan halfway, until topping is deep golden and filling bubbles thickly at edges and barely jiggles in center.
- Cool completely in pan on wire rack—minimum 2 hours at room temperature. For cleanest cuts, refrigerate uncovered 2–4 hours or overnight.
- Using parchment overhang, lift bars from pan. Trim edges. Slice into 12–16 rectangles with sharp, clean knife (wipe between cuts). Serve cool or slightly warmed.
FAQ
- Can I use blackberry or strawberry instead of raspberry?
- Absolutely! Blackberries work identically. Strawberries require dicing (½-inch pieces), increasing cornstarch to ⅓ cup and reducing sugar slightly (they’re sweeter); add ½ tsp lemon zest for brightness.
- Why did my bars turn out soggy on the bottom?
- Most commonly: base wasn’t pre-baked long enough, or filling was poured over a hot (not just warm) crust—causing premature melting. Also check if frozen berries were drained (juice = pectin = structure).
- Can I make these ahead for a party?
- Yes! Fully baked and cooled bars keep beautifully refrigerated for 5 days. Assemble unbaked bars (base + filling + untopped) and refrigerate up to 24 hours before adding crumble and baking. Or freeze baked bars (unfrosted) up to 3 months—thaw overnight in fridge, then bring to room temp before serving.
- My crumble topping sank into the filling—what went wrong?
- Butter was too warm or overmixed—creating a paste instead of crumbs. Also possible: filling was too hot when topped, or topping wasn’t applied evenly and firmly enough. Always use cold butter and avoid pressing topping down.
- Is there a lower-sugar version that still sets properly?
- Yes—reduce total sugar by ¼ cup and increase cornstarch by 1 tsp. Use ripe, in-season raspberries (naturally sweeter), and add 1 tsp apple cider vinegar to filling for perceived sweetness via acidity.
- Can I double this recipe for a larger crowd?
- Yes—double all ingredients and bake in a 12×17-inch jelly roll pan. Increase base bake time to 22–24 minutes, total bake time to 55–65 minutes. Rotate pan twice for even browning.
- What’s the best way to transport these to a picnic or potluck?
- Cool completely, slice in pan, and store upright in a rigid container with parchment between layers. Keep chilled until departure. For warm-weather travel, place gel packs around container (not touching bars) and insulate with towels.
- Can I add white chocolate to the filling?
- Yes—fold in ½ cup finely chopped high-quality white chocolate *after* mixing filling but *before* pouring over base. It will melt into ribbons and create pockets of creamy sweetness. Do not add to hot base.
Summary
Raspberry Crumble Bars are a timeless, deeply flavorful American dessert featuring a tender shortbread base, a vibrant, naturally thickened raspberry filling, and a fragrant, oat-enriched crumble topping—all baked into one glorious, shareable pan. With smart ingredient choices, flexible customizations, and attention to temperature and timing, they deliver nostalgic comfort, impressive texture contrast, and surprising nutritional merit—making them equally suited to Sunday suppers, holiday tables, or mindful weekday treats.
Whether you stick to the classic formula or explore seasonal fruit swaps, gluten-free adaptations, or nutrient-boosting tweaks, these bars remain a masterclass in balance: tart yet sweet, soft yet crunchy, simple to make yet unforgettable to eat.