Introduction
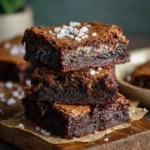
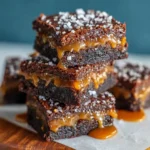
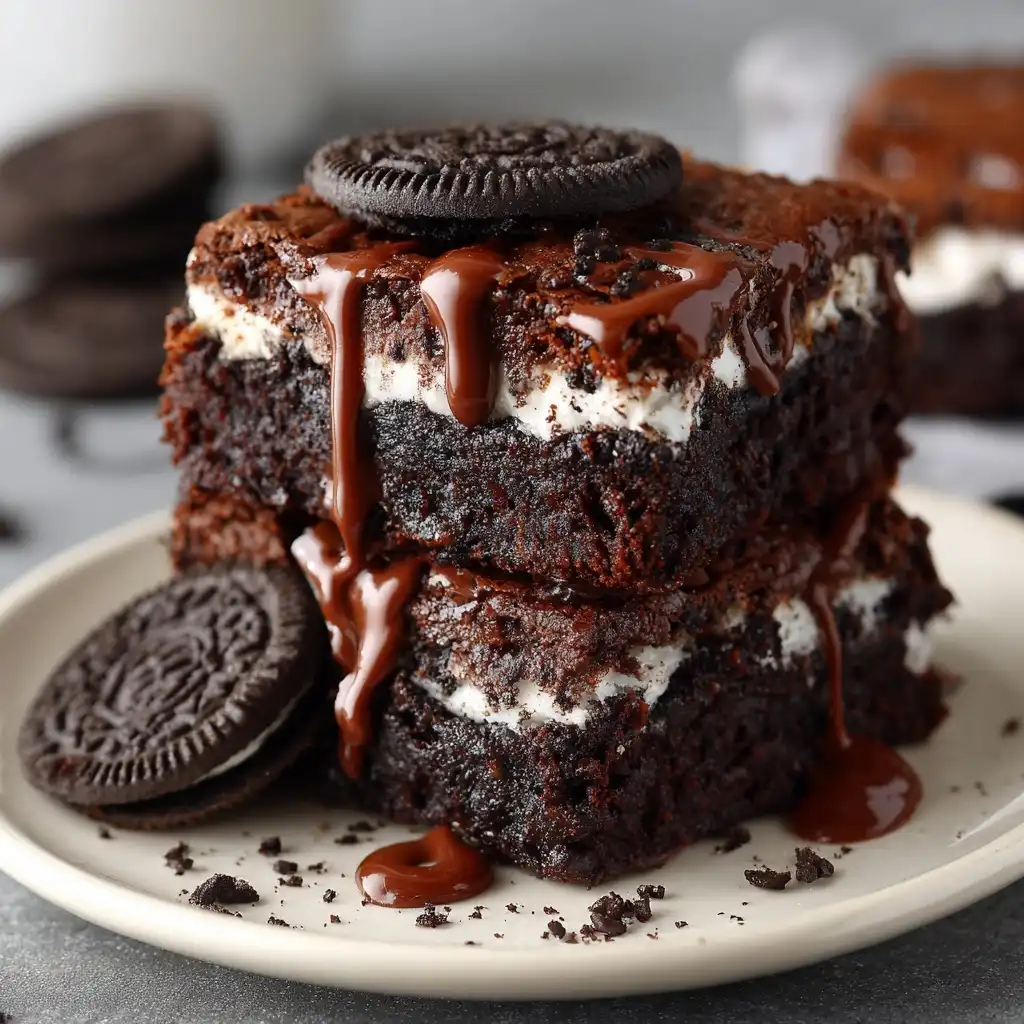
Oreo Brownie Bars are the ultimate fusion dessert—rich, fudgy brownie batter swirled and layered with the unmistakable crunch and creamy sweetness of everyone’s favorite chocolate sandwich cookie. These bars combine the nostalgic comfort of classic brownies with the playful, indulgent charm of Oreos, resulting in a decadent treat that’s equally at home at birthday parties, bake sales, holiday cookie exchanges, or quiet Sunday afternoons with a tall glass of cold milk. Unlike traditional brownies or simple cookie bars, Oreo Brownie Bars offer a dynamic textural symphony: dense cocoa-infused crumb, melt-in-your-mouth ganache notes, chewy edges, crisp cookie shards, and pockets of creamy filling that bloom with every bite. Whether you’re a seasoned baker or a beginner eager to impress, this recipe delivers consistent, crowd-pleasing results—with room for creativity, customization, and even subtle health-conscious tweaks.
The History
The origins of the Oreo Brownie Bar lie at the delicious intersection of two American icons: the Oreo cookie and the brownie. The Oreo was first introduced by the National Biscuit Company (now Mondelez International) in 1912—a revolutionary “sandwich cookie” featuring two chocolate wafers hugging a sweet vanilla creme filling. Its cultural dominance grew steadily through clever marketing, the iconic “twist, lick, dunk” ritual, and countless limited-edition flavors. Meanwhile, the brownie emerged around the same era—believed to have been invented in the late 1800s in the U.S., possibly in Chicago or Boston—and quickly became a staple of home baking due to its simplicity, richness, and adaptability. While no single documented “inventor” of the Oreo Brownie Bar exists, food bloggers, test kitchens, and home bakers began experimenting with incorporating whole or crushed Oreos into brownie batters as early as the 1980s and 1990s—especially as double-stuffed versions gained popularity. By the 2000s, viral recipe sites like AllRecipes and Pinterest helped catapult variations—including marbled, layered, stuffed, and swirl-style Oreo brownie bars—into mainstream baking consciousness. Today, they’re a beloved staple on bakery menus, TikTok baking trends, and holiday dessert trays—symbolizing the joyful, unapologetic marriage of childhood nostalgia and sophisticated homemade indulgence.
Ingredients Breakdown
Understanding each ingredient’s role ensures not just flavor—but texture, structure, and reliability. Here’s a detailed functional breakdown:
- Unsalted Butter (1 cup / 2 sticks): Provides fat for richness, moisture retention, and tenderness. Unsalted allows precise control over sodium levels. Melted (not browned) butter helps create a dense, fudgy crumb rather than a cakey one.
- Granulated Sugar (1 ¼ cups): Sweetens and contributes to crust formation and slight caramelization during baking. A portion is also responsible for aeration when combined with eggs.
- Brown Sugar (½ cup, light or dark): Adds molasses depth, moisture, and chewiness. Dark brown sugar intensifies caramel notes; light yields a milder, more balanced sweetness.
- Eggs (3 large, room temperature): Act as binders and leavening agents. Whisking them thoroughly with sugar before adding dry ingredients incorporates air—key for lift and crackly top formation.
- Vanilla Extract (2 tsp, pure): Enhances all other flavors and adds aromatic complexity. Avoid imitation—its alcohol content and nuanced profile matter.
- All-Purpose Flour (¾ cup): Provides gluten structure. Too much leads to toughness; too little causes collapse. Sifting ensures even distribution and prevents clumping.
- Natural or Dutch-Process Cocoa Powder (⅔ cup): Imparts deep chocolate flavor and color. Natural cocoa (acidic) reacts well with baking soda if used; Dutch-process is milder and less acidic—ideal for richer, smoother bars. For maximum impact, use a high-fat cocoa (22–24% cocoa butter).
- Salt (¾ tsp fine sea salt or kosher): Balances sweetness and amplifies chocolate notes. Essential—even in small amounts—for flavor clarity.
- Baking Powder (¼ tsp): A tiny amount adds subtle lift without compromising fudginess—just enough to prevent dense, leaden bars.
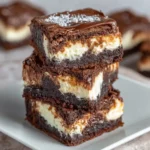
- Mini or Full-Size Oreos (24–30 cookies, ~250g): Serve triple duty—texture contrast, visual appeal, and bursts of creme. Mini Oreos distribute more evenly; full-size ones create dramatic layers and pockets. Double-Stuf or Mega Stuf versions increase cream-to-cookie ratio for extra decadence.
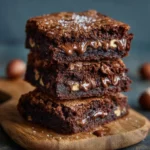
- Optional Add-Ins: Chocolate chips (semisweet or white), espresso powder (½ tsp for depth), flaky sea salt for finishing, chopped toasted walnuts or pecans (½ cup), or a tablespoon of instant coffee granules to enhance chocolate intensity.
Step-by-Step Recipe
- Prep Work (15 minutes): Preheat oven to 350°F (175°C). Line a 9×13-inch metal baking pan with parchment paper, leaving 2-inch overhangs on two opposite sides for easy lifting. Lightly grease exposed pan edges and parchment. Gather all ingredients at room temperature—especially eggs and butter—to ensure seamless emulsification.
- Melt Butter & Bloom Cocoa (5 minutes): In a medium heatproof bowl, melt butter in the microwave in 30-second intervals, stirring between each, until fully liquid but not bubbling. Whisk in cocoa powder until smooth and glossy—this “blooms” the cocoa, unlocking deeper flavor and eliminating raw powder grit.
- Combine Sugars & Eggs (3 minutes): In a large mixing bowl, whisk granulated sugar, brown sugar, and salt until homogeneous. Add eggs one at a time, whisking vigorously for 30 seconds after each addition until thickened and pale. Whisk in vanilla until fully incorporated. The mixture should fall from the whisk in thick ribbons.
- Combine Wet & Dry (2 minutes): Gradually pour the warm cocoa-butter mixture into the egg-sugar mixture while whisking constantly. Once fully combined, sift flour and baking powder over the batter. Gently fold with a silicone spatula just until no dry streaks remain—do not overmix (gluten development = toughness).
- Incorporate Oreos (4 minutes): Reserve 6–8 whole Oreos for topping. Coarsely chop remaining cookies—aim for pieces ranging from pea-sized to dime-sized. Fold in gently, ensuring even dispersion without crushing them entirely. Batter will thicken slightly as Oreos absorb moisture.
- Pan & Layer (3 minutes): Pour batter into prepared pan. Use an offset spatula or the back of a spoon to spread evenly. Press reserved whole Oreos, creme-side up, evenly across the surface—slightly embed them so they don’t float away during baking.
- Bake (28–34 minutes): Place pan on center oven rack. Bake until edges are set and pull away slightly from the pan, top forms a thin, shiny crust, and a toothpick inserted 1 inch from edge comes out with moist crumbs (not wet batter)—but avoid overbaking! Center should still appear slightly soft. Rotate pan halfway through for even browning.
- Cool & Set (2+ hours, non-negotiable): Cool bars in pan on a wire rack for 45 minutes. Then, using parchment overhangs, carefully lift entire slab onto rack. Cool completely—minimum 1 hour at room temp, ideally 2+ hours or overnight refrigerated—for clean cuts and optimal fudgy texture. Warm bars crumble; chilled bars slice like silk.
- Cut & Serve (5 minutes): Using a sharp chef’s knife wiped clean between cuts, slice into 16–24 uniform bars (depending on desired size). For ultra-clean edges, chill bars for 15 minutes before slicing—or dip knife in hot water and dry thoroughly between each cut.
Tips
- Room Temperature Is Key: Cold eggs can cause the melted cocoa-butter mixture to seize or separate. Let eggs sit in warm water for 5 minutes if forgotten.
- Don’t Skip the Bloom: Whisking cocoa into warm butter—not cold milk or water—develops flavor and prevents lumps. This step alone elevates taste from “good” to “gourmet.”
- Fold, Don’t Stir: Overmixing after adding flour activates gluten. Use gentle, sweeping folds from bottom to top—stop at the first sign of uniformity.
- Chop Strategically: Use a serrated knife for clean Oreo breaks. Place cookies between parchment sheets and gently tap with a rolling pin for varied shards.
- Underbake Slightly: Remove bars when the center jiggles *just* slightly—it firms up while cooling. Err on the side of underdone; overbaked bars dry out fast.
- Cooling Isn’t Optional—It’s Science: Fudgy texture relies on starch retrogradation and fat re-crystallization, which only occur during proper cooling. Cutting too soon guarantees crumbles, not clean bars.
- Storage Matters: Keep bars airtight at room temperature up to 3 days, refrigerated up to 1 week, or frozen up to 3 months (wrap individually in plastic + foil). Thaw overnight in fridge or 15 minutes at room temp.
- Make-Ahead Friendly: Prepare batter (without Oreos) up to 24 hours ahead—cover and refrigerate. Bring to room temp, fold in Oreos, and bake. Or assemble fully and freeze unbaked—bake straight from frozen, adding 5–7 minutes.
- Crust Hack: For a crispier top layer, sprinkle 1 tbsp granulated sugar over surface before baking—it creates delicate caramelized crunch.
- Altitude Adjustments: Above 3,000 ft? Reduce sugar by 1 tbsp, add 1 tbsp extra flour, and increase oven temp by 15°F. Check 5 minutes earlier.
Variations and Customizations
These bars are endlessly adaptable—here are 12 inspired twists, from festive to gourmet to dietary-inclusive:
- Peppermint Oreo Brownie Bars: Add ½ tsp peppermint extract + ¼ tsp red food gel to batter; top with crushed candy cane and white chocolate drizzle.
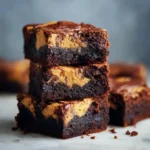
- Peanut Butter Cup Fusion: Swirl in ½ cup melted peanut butter cups before baking; garnish with chopped Reese’s and drizzle with melted PB.
- Golden Oreo Edition: Swap regular Oreos for Golden Oreos (vanilla wafers + cream) for a buttery, caramel-forward twist—pair with white chocolate chips.
- Espresso-Dark Chocolate: Dissolve 1 tsp instant espresso powder into warm butter; use 70% dark chocolate chunks and dark cocoa powder.
- Gluten-Free Version: Substitute ¾ cup certified GF 1:1 baking blend (like King Arthur or Bob’s Red Mill); verify Oreos are GF-certified (e.g., Kinnikinnick or Glutino GF “Oreo-style” cookies).
- Vegan Adaptation: Use dairy-free butter, flax eggs (3 tbsp ground flax + 9 tbsp water), coconut sugar, and vegan Oreos (e.g., Newman-O’s or Back to Nature). Add 1 tbsp apple cider vinegar for lift.
- Protein-Packed Bars: Add ¼ cup unflavored or chocolate whey/collagen protein powder (reduce flour by 2 tbsp); stir in ¼ cup chopped almonds or sunflower seeds.
- Red Velvet Swirl: Reserve ⅓ of batter, mix with 1 tbsp red food gel + ½ tsp white vinegar + 1 tsp cocoa; marble into main batter.
- Sea Salt Caramel Surprise: Drizzle ⅓ cup warmed salted caramel sauce over batter pre-bake; swirl gently with a knife before adding Oreos.
- Boozy Brownie Bars: Add 2 tbsp bourbon or Kahlúa to wet ingredients; finish with flaky salt and dark chocolate curls.
- Matcha-Oreo Fusion: Replace 2 tbsp cocoa with ceremonial-grade matcha; use green tea-flavored “Oreos” (available seasonally) or vanilla wafers + matcha cream.
- Kid’s “Rainbow Blast”: Use rainbow sprinkle Oreos (or crush regular Oreos with jimmies); add rainbow chips to batter and top with whipped cream + extra sprinkles.
Health Considerations and Nutritional Value
While inherently indulgent, mindful preparation can improve nutritional balance without sacrificing joy. A standard 2″x2″ bar (1/24th of recipe) contains approximately:
- Calories: ~220–250 kcal
- Total Fat: 12–14g (7–8g saturated)
- Carbohydrates: 28–32g (22–25g sugars)
- Protein: 2–3g
- Fiber: 1g (naturally low—boost with added flax, oats, or black beans)
- Sodium: 130–160mg
Smart Swaps & Enhancements:
- Reduce Sugar: Cut granulated sugar by ¼ cup; boost flavor with espresso powder or vanilla bean paste instead of compensating with extra sweetness.
- Boost Fiber & Protein: Replace 2 tbsp flour with oat fiber or psyllium husk; stir in 2 tbsp ground flax or chia seeds.
- Heart-Healthy Fats: Substitute 2 tbsp butter with avocado oil or melted coconut oil (refined for neutral taste).
- Lower Glycemic Impact: Use coconut sugar or monk fruit blend (1:1 ratio), though texture may be slightly denser.
- Dairy Sensitivity?: Opt for lactose-free butter or plant-based alternatives with high fat content (e.g., Miyoko’s or Country Crock Plant Butter).
- Allergen Notes: Traditional Oreos contain soy and wheat; always verify labels for nut/tree nut cross-contamination if needed. Top with sunflower seed butter chips for nut-free crunch.
- Mindful Enjoyment: Serve smaller portions (1.5″x1.5″) alongside fresh berries or Greek yogurt for contrast and satiety. Pair with herbal tea instead of sugary drinks to reduce total daily sugar load.
Remember: Nutrition is holistic. Occasional treats support mental wellness, social connection, and culinary joy—cornerstones of sustainable, balanced living.
Ingredients
- 1 cup (227g / 2 sticks) unsalted butter
- ⅔ cup (65g) natural or Dutch-process unsweetened cocoa powder
- 1 ¼ cups (250g) granulated sugar
- ½ cup (100g) packed light or dark brown sugar
- ¾ teaspoon fine sea salt
- 3 large eggs, room temperature
- 2 teaspoons pure vanilla extract
- ¾ cup (95g) all-purpose flour, sifted
- ¼ teaspoon aluminum-free baking powder
- 24–30 standard Oreos (or 1 ½ cups coarsely chopped mini Oreos)
- 6–8 whole Oreos, for topping
Directions
- Preheat oven to 350°F (175°C). Line a 9×13-inch metal baking pan with parchment paper, leaving overhangs on two opposite sides. Lightly grease exposed edges.
- In a medium heatproof bowl, melt butter in the microwave in 30-second bursts, stirring between each, until fully liquid. Whisk in cocoa powder until smooth and glossy. Set aside to cool slightly (2–3 minutes).
- In a large bowl, whisk together granulated sugar, brown sugar, and salt. Add eggs one at a time, whisking vigorously for 30 seconds after each. Whisk in vanilla until thick and pale.
- Pour warm cocoa-butter mixture into egg-sugar mixture while whisking constantly. Mix until fully combined and uniform.
- Sift flour and baking powder over batter. Gently fold with a silicone spatula until just incorporated—no dry streaks remain.
- Coarsely chop 24–30 Oreos. Fold into batter until evenly distributed. Reserve 6–8 whole Oreos.
- Pour batter into prepared pan. Spread evenly. Press reserved whole Oreos, creme-side up, across surface.
- Bake 28–34 minutes, rotating pan halfway, until edges are set and toothpick near edge yields moist crumbs (center will look soft but not wet).
- Cool in pan on wire rack 45 minutes. Lift out using parchment. Cool completely—minimum 2 hours at room temp or overnight refrigerated.
- Using a sharp, hot-wiped knife, cut into 16–24 bars. Store airtight at room temperature up to 3 days, refrigerated up to 1 week, or frozen up to 3 months.
FAQ
- Can I use oil instead of butter?
- Yes—but expect a slightly less rich, more cake-like texture. Substitute ¾ cup neutral oil (avocado or grapeseed) and add 2 tbsp melted coconut oil for better mouthfeel. Butter is strongly recommended for authentic fudginess and flavor.
- Why did my bars sink in the center?
- Most commonly caused by overmixing after adding flour (too much gluten), opening the oven too early (<15 min), or underbaking. Ensure proper cooling—bars continue to set as they cool.
- Can I make these gluten-free?
- Absolutely. Use a trusted 1:1 GF flour blend (like Cup4Cup or Namaste) and certified GF Oreos (check labels—many “Oreo-style” brands exist). Add ¼ tsp xanthan gum if your blend doesn’t include it.
- How do I prevent Oreo filling from melting into the batter?
- Use cold, freshly opened Oreos—room-temp cookies soften faster. Chop just before folding in, and avoid overmixing. Chilling batter 15 minutes before baking also helps.
- Can I add nuts or other mix-ins?
- Yes! Fold in ½ cup toasted walnuts, pecans, or hazelnuts with the Oreos. For chocolate lovers, stir in ½ cup semisweet or dark chocolate chunks.
- My bars turned out too cakey—what went wrong?
- Likely causes: too much flour (spoon-and-level, don’t scoop!), overmixing, using baking soda instead of powder, or substituting cocoa with chocolate syrup. Also, older baking powder loses potency—test it in hot water before use.
- Can I bake these in a different size pan?
- Yes—with adjustments: 8×8-inch pan → bake 35–42 min, yields thicker, fudgier bars (cut into 16). Muffin tin → line with liners, fill ¾ full, bake 18–22 min for brownie-cup “Oreo bombs.”
- Are Oreos vegan?
- No—standard Oreos contain whey and refined sugar processed with bone char. However, Nabisco confirmed U.S. Oreos are now vegan (as of 2020) *except* for potential cross-contamination warnings. Always verify current packaging or opt for certified vegan alternatives like Back to Nature.
- How do I get that perfect crackly top?
- Whisk eggs and sugar thoroughly until thick and pale, use granulated sugar (not all brown), and avoid overmixing after adding flour. A hot oven and proper cooling also contribute.
- Can I mail these as gifts?
- Yes! Fully cool, wrap each bar individually in parchment + plastic wrap, then pack snugly in a rigid box with parchment layers. Ship via 2-day priority. Include a “best by” date and storage instructions.
Summary
Oreo Brownie Bars are the irresistible lovechild of two American classics—fudgy, deeply chocolate brownies and crunchy, creamy Oreos—crafted for maximum texture contrast, nostalgic delight, and reliable, restaurant-quality results.
With smart substitutions, thoughtful technique, and endless customization options—from vegan and gluten-free adaptations to festive, boozy, or protein-enhanced versions—these bars satisfy every palate while inviting creativity, celebration, and the simple joy of baking something truly special.