Introduction
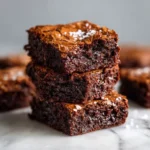
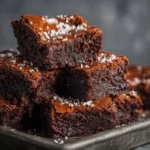
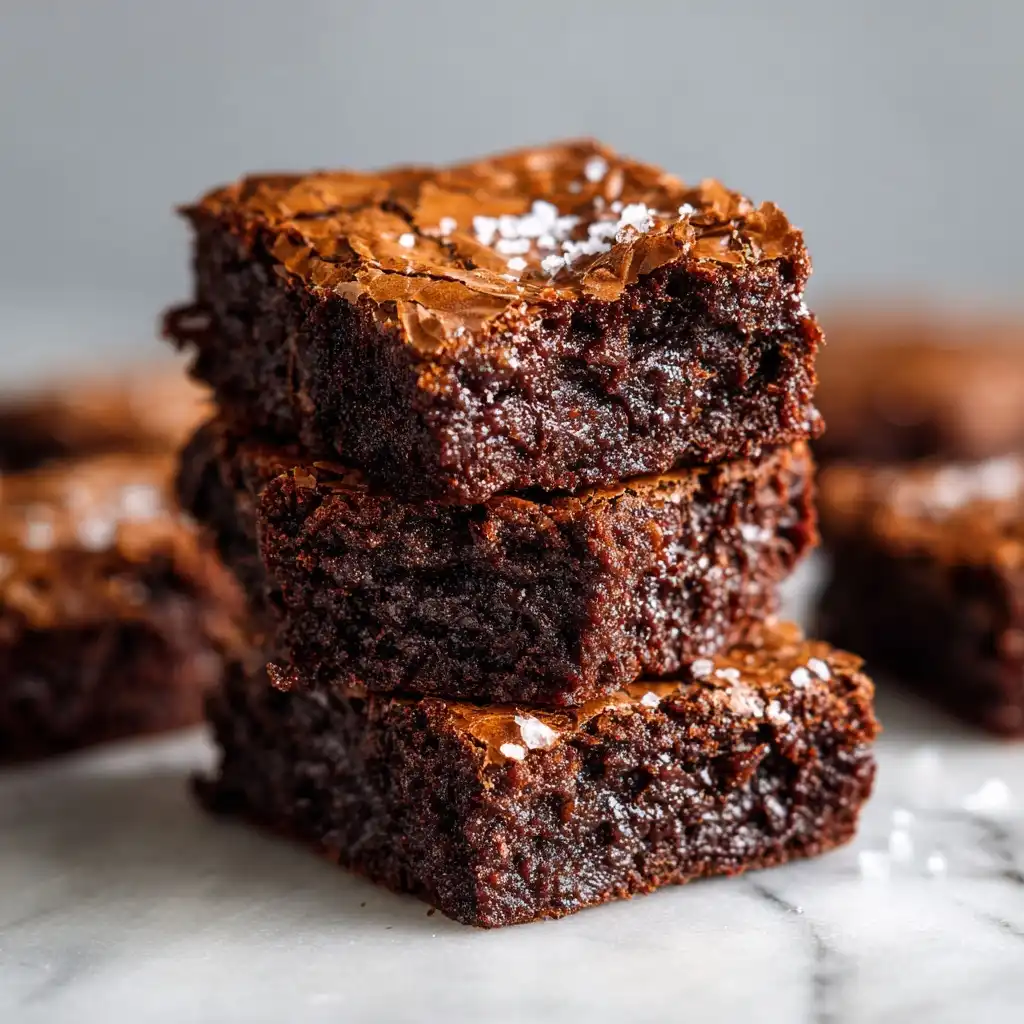
Crinkle Top Chewy Brownies are the quintessential dessert that strikes the perfect balance between decadence and texture—rich, fudgy centers swirled with deep chocolate intensity, crowned by a dramatically cracked, glossy, sugar-dusted crust that shatters delicately with every bite. Unlike cakey brownies that rise tall and spring back, or overly dense, greasy versions that lack nuance, crinkle tops achieve their signature appearance through precise moisture control, proper sugar crystallization, and strategic mixing techniques. This isn’t just a brownie—it’s a textural symphony: crisp yet yielding, chewy yet melt-in-the-mouth, intensely chocolaty yet subtly nuanced with notes of espresso, vanilla, and toasted nuts. Whether served warm with a scoop of bourbon-vanilla ice cream or enjoyed cold straight from the fridge with morning coffee, Crinkle Top Chewy Brownies deliver consistent emotional resonance—comfort, indulgence, nostalgia—all wrapped in that unmistakable webbed, crackled surface that signals authenticity and craftsmanship.
The History
The origins of the crinkle top brownie trace back to mid-20th century American home baking culture, evolving alongside the broader rise of the brownie itself—a dessert born from resourcefulness and innovation. While the first published brownie recipe appeared in the 1896 Boston Cooking-School Cook Book by Fannie Farmer (a relatively plain, molasses-based bar), the modern chocolate brownie as we know it emerged in the 1890s–1900s, likely inspired by chocolate fudge and German chocolate cakes. The “crinkle top” variation, however, gained widespread popularity in the 1940s and 1950s, coinciding with the proliferation of reliable home ovens, standardized granulated sugar, and accessible cocoa powder. Early iterations often relied on high-ratio sugar-to-fat ratios and vigorous beating of eggs and sugar—techniques borrowed from sponge cake methodology—to incorporate air and encourage surface tension during baking. The iconic cracks formed not by accident, but by deliberate formulation: excess surface moisture evaporating rapidly, causing the top layer to dry, tighten, and fissure under internal steam pressure. Iconic brands like Betty Crocker and Pillsbury further cemented the crinkle top aesthetic in the 1960s with boxed mixes engineered for visual appeal—shiny, wrinkled surfaces became a hallmark of “professional-looking” homemade treats. In recent decades, food scientists and pastry chefs have demystified the physics behind the crinkle: it requires a delicate equilibrium of high sugar content (especially granulated, not brown), minimal flour, adequate moisture (from eggs and melted butter), and crucially—no overmixing after adding dry ingredients, which preserves gluten development just enough to support structure without toughness. Today, the Crinkle Top Chewy Brownie stands as a beloved cultural artifact: a testament to American ingenuity, scientific curiosity in the kitchen, and the universal joy of a beautifully flawed, deeply satisfying dessert.
Ingredients Breakdown
Every ingredient in Crinkle Top Chewy Brownies plays a precise functional and sensory role—none are merely filler or tradition. Understanding their individual contributions allows for intelligent substitutions, troubleshooting, and flavor elevation:
- Unsweetened Chocolate (60–70% cacao): Provides deep, bitter-chocolate backbone, cocoa solids for richness, and essential cocoa butter for mouthfeel and sheen. Higher cocoa % yields more intense flavor but requires balancing sweetness; lower % may mute complexity. Why not cocoa powder alone? Melted chocolate contributes fat, emulsifiers (lecithin), and volatile aromatic compounds lost in dutched or alkalized cocoa.
- Granulated Sugar: The non-negotiable star of the crinkle top. Its coarse crystals resist full dissolution during mixing, creating micro-crystalline pockets that expand and fracture during oven spring. It also draws moisture to the surface via osmosis, promoting rapid drying and cracking. Brown sugar is intentionally omitted here—its molasses adds moisture and acidity, inhibiting crispness and encouraging spread instead of lift-and-crack.
- Large Eggs (Room Temperature): Act as emulsifiers, leaveners (trapping air when beaten), and structural binders. Room temperature ensures uniform incorporation and optimal volume. The whites provide tensile strength for the top layer; yolks add fat, richness, and tenderness. Using too few eggs yields dense, greasy bars; too many creates cakey, less chewy results.
- Pure Vanilla Extract: Not just flavor—it enhances perception of chocolate, rounds sharp bitterness, and contributes subtle phenolic complexity. Imitation vanilla lacks depth and can impart a medicinal note under high heat.
- Unsalted Butter: Must be melted—not browned, not clarified—so it integrates smoothly without introducing water separation. Butter provides luxurious mouth-coating fat, shortens gluten strands for tenderness, and carries fat-soluble flavor compounds. Salted butter risks inconsistent salinity and can mask nuanced chocolate notes.
- All-Purpose Flour: Used sparingly (typically ¼–⅓ cup) to provide just enough gluten network for cohesive chew without rubberiness. Too much flour = cakey; too little = fragile, oily sludge. Sifting is critical to prevent clumping and ensure even distribution.
- Instant Espresso Powder (Optional but Highly Recommended): A mere ½–1 tsp amplifies chocolate flavor without tasting like coffee—via synergistic Maillard reactions and caffeine-enhanced aroma perception. It deepens color and adds subtle roasted, caramelized nuance.
- Fine Sea Salt: Balances sweetness, heightens all other flavors, and mitigates perceived bitterness. Added both to the batter and sprinkled lightly on top pre-bake for contrast.
- Mini Semi-Sweet Chocolate Chips (Optional Swirl): Added *after* initial batter mixing to preserve distinct pockets of melty chocolate. Full-size chips can sink; minis disperse evenly and create delightful bursts of gooey texture.
Note: Baking powder, baking soda, and oil are deliberately excluded—they introduce unwanted lift, greasiness, or chemical aftertastes that compromise chew and crinkle integrity.
Step-by-Step Recipe
- Preheat & Prep: Position oven rack to center position. Preheat oven to 325°F (163°C)—not higher, as excessive heat causes premature surface drying and uneven cracking. Line an 8×8-inch metal baking pan with parchment paper, leaving 2-inch overhang on two opposite sides for easy removal. Lightly grease parchment and pan edges with butter or non-stick spray.
- Melt Chocolate & Butter: In a heatproof bowl set over a saucepan of barely simmering water (double boiler), combine chopped unsweetened chocolate and butter. Stir constantly with a silicone spatula until fully melted, smooth, and homogeneous—about 4–6 minutes. Remove from heat and let cool slightly (1–2 minutes) to avoid cooking eggs later. Do not let mixture exceed 120°F (49°C).
- Whisk Wet Ingredients: In a large heatproof bowl, whisk granulated sugar, eggs, and vanilla extract vigorously for 2–3 minutes until thickened, pale, and ribbony—when lifted, batter should fall in a slow, continuous ribbon that holds its shape for 3–5 seconds. This step is critical for air incorporation and crinkle formation. Add cooled chocolate-butter mixture in a slow, steady stream while continuing to whisk constantly. Whisk until fully combined and glossy—about 30 seconds.
- Combine Dry Ingredients: In a separate small bowl, sift together all-purpose flour, instant espresso powder (if using), and fine sea salt. Whisk 2–3 times to fully aerate and distribute.
- Fold, Don’t Mix: Using a silicone spatula, gently fold dry ingredients into wet mixture in 2–3 additions. Use a cutting-and-turning motion—scrape bottom and sides—just until *no dry streaks remain*. Overmixing develops gluten, resulting in tough, rubbery brownies instead of tender-chewy ones. Batter will be thick, shiny, and slightly grainy from undissolved sugar crystals—this is ideal.
- Add Optional Mix-Ins: If using mini chocolate chips, fold in gently *only* until evenly distributed—do not overfold. Avoid nuts unless finely chopped and toasted first (to prevent sinking and add crunch contrast).
- Transfer & Smooth: Pour batter into prepared pan. Using an offset spatula or the back of a spoon, spread evenly into corners. Tap pan firmly on counter 3–4 times to release large air bubbles and level surface.
- Final Touches: Sprinkle top evenly with a light pinch (⅛ tsp) of flaky sea salt. For extra gloss and pronounced crinkles, dust very lightly with 1 tsp additional granulated sugar—this creates micro-hotspots that accelerate surface drying.
- Bake with Precision: Place pan in preheated oven. Bake for 28–34 minutes. Begin checking at 26 minutes: edges should be set and pulling slightly from pan; center should look moist but not liquid—when gently shaken, it should jiggle *minimally*, like firm Jell-O. A toothpick inserted 1 inch from edge should come out with moist crumbs; center insertion should show *damp* crumbs—not wet batter, not clean. Avoid overbaking—even 60 extra seconds dries out chew.
- Cool Completely (Non-Negotiable): Remove pan from oven and place on a wire rack. Let cool *undisturbed* for at least 2 hours at room temperature. This allows residual heat to finish cooking the center gently, starches to fully set, and surface to contract naturally—enhancing crack definition. For cleanest cuts and maximum chew, refrigerate uncovered for 1 hour before slicing.
- Cut & Serve: Use a hot, thin-bladed knife (dipped in hot water and wiped dry between cuts) to slice into 16 even squares. Wipe knife after each cut for pristine edges. Serve at cool room temperature for ideal texture contrast.
Tips
- Sugar Texture Matters: If your granulated sugar is lumpy or old, pulse it in a blender for 5 seconds to restore fine, uniform crystals—critical for even cracking.
- Egg Temperature is Key: Cold eggs won’t emulsify properly with warm chocolate-butter and won’t whip to sufficient volume. Set eggs out 30 minutes before starting—or place in warm water for 5 minutes.
- Don’t Rush the Whisking: That 2–3 minute vigorous whisk isn’t optional—it’s where the crinkle’s structural foundation begins. Use a timer if needed. Your arm will thank you later, but your brownies will thank you forever.
- Oven Thermometer Required: Most built-in oven thermostats are inaccurate by ±25°F. An inexpensive oven thermometer ensures your 325°F is truly 325°F—too hot = burnt edges and shallow cracks; too cool = no rise and sticky top.
- Altitude Adjustments: Above 3,000 ft: Reduce sugar by 1 tbsp, increase flour by 1 tsp, and bake at 335°F for 25–30 minutes. Lower air pressure accelerates evaporation and weakens structure.
- Parchment Is Non-Negotiable: Foil tears, wax paper melts, and greased pans cause sticking and uneven browning. Parchment ensures effortless release and clean, sharp corners.
- Cooling Patience Pays Off: Cutting warm = gummy, smeary, misshapen bars. Cooling transforms texture: proteins relax, starches retrograde, and the crinkle deepens. Resist temptation—it’s science, not delay.
- Storage Wisdom: Keep in an airtight container at room temperature for up to 3 days. For longer storage (up to 1 week), refrigerate—but bring to room temp 30 minutes before serving. Freeze unfrosted squares layered between parchment for up to 3 months. Thaw overnight in fridge, then at room temp.
- Revive Stale Brownies: If stored too long, wrap individually in foil and warm in a 300°F oven for 5–7 minutes—moisture redistributes, chew returns, and crinkle regains crispness.
Variations and Customizations
While the classic Crinkle Top Chewy Brownie is perfection incarnate, thoughtful variations honor its integrity while expanding its versatility across seasons, diets, and palates:
- Double Chocolate Crinkle: Replace 1 oz unsweetened chocolate with 1 oz high-quality dark chocolate (70%). Add 2 tbsp unsweetened cocoa powder to dry ingredients. Dust top with cocoa before baking for dramatic contrast.
- Espresso-Orange Swirl: Add 1 tsp orange zest to batter with vanilla. After pouring into pan, drizzle 2 tbsp Grand Marnier–orange reduction (simmer ¼ cup OJ + 1 tbsp sugar + 1 tbsp liqueur until syrupy) in zigzag pattern; swirl gently with toothpick.
- Peanut Butter Cup Crunch: Press 16 miniature peanut butter cups (room temp) into batter surface before baking. Sprinkle with crushed roasted peanuts post-bake.
- Sea Salt & Caramel Ripple: Swirl ⅓ cup thick, cooled salted caramel sauce (homemade preferred—avoid store-bought with stabilizers) into batter just before baking. Finish with flaky salt and caramel drizzle.
- Gluten-Free Crinkle Top: Substitute ¼ cup (30g) Bob’s Red Mill 1-to-1 Gluten-Free Baking Flour (with xanthan gum). Increase eggs to 3 (all large), add 1 tsp psyllium husk powder for binding, and chill batter 15 minutes before baking to hydrate flours.
- Vegan Crinkle Top: Use ¾ cup melted refined coconut oil (not virgin—neutral taste), ¾ cup aquafaba (chickpea brine) whipped to soft peaks + 1 tbsp apple cider vinegar, 1 cup coconut sugar (finely ground), and dairy-free dark chocolate. Bake at 335°F for 30–35 minutes. Crinkle forms beautifully—just slightly less glossy.
- Spiced Chai Crinkle: Infuse melted butter with 1 cinnamon stick, 4 cardamom pods, 1 tsp ginger, and 2 cloves for 10 minutes off heat; strain. Add 1 tsp chai spice blend to dry ingredients. Garnish with candied ginger.
- Black Forest Style: Fold in ½ cup pitted, chopped Morello cherries (well-drained) and 1 tbsp kirsch. Top with dark chocolate ganache and fresh cherries post-bake.
- White Chocolate Raspberry: Replace unsweetened chocolate with white chocolate (reduce sugar to 1 cup). Fold in ¾ cup freeze-dried raspberries (crushed). Dust top with freeze-dried raspberry powder.
- Matcha Green Tea Crinkle: Replace espresso powder with 1½ tsp ceremonial-grade matcha. Add 1 tsp lemon zest. Top with white chocolate drizzle and matcha-sugar dusting.
Pro Tip: Always test one variation at a time—and keep meticulous notes. Small changes compound quickly in brownie chemistry!
Health Considerations and Nutritional Value
A single 2″x2″ square (approx. 45g) of classic Crinkle Top Chewy Brownies contains roughly:
- Calories: 180–210 kcal
- Total Fat: 11–13g (7–9g saturated)
- Carbohydrates: 22–25g (19–21g sugars)
- Protein: 2–3g
- Fiber: 1g
- Iron: 5–8% DV (from cocoa)
- Magnesium: 10–15% DV (cocoa is rich in magnesium)
- Antioxidants: High levels of flavanols (epicatechin, procyanidins) linked to improved endothelial function and reduced oxidative stress—especially potent in high-cacao chocolate.
Health Considerations:
- Sugar Content: The high granulated sugar is essential for texture but contributes significantly to glycemic load. Those managing blood sugar should limit portion size (1 small square) and pair with protein/fat (e.g., almond butter or Greek yogurt) to slow absorption.
- Saturated Fat: Primarily from butter and chocolate. While recent research questions blanket vilification of saturated fat, moderation remains prudent—especially for those with familial hypercholesterolemia or cardiovascular risk factors.
- Caffeine: ~12–25mg per square (from chocolate and espresso)—less than a shot of espresso but potentially disruptive for sensitive individuals or evening consumption.
- Gluten & Allergens: Naturally gluten-free if using certified GF flour (in variations); contains dairy, eggs, and soy (lecithin in chocolate). Tree nut allergens possible if using nut-based add-ins.
- Functional Upgrades: Boost nutrition without sacrificing crinkle by: using 70%+ dark chocolate (higher antioxidants, lower sugar), substituting 1 tbsp cocoa for 1 tbsp flour (increases fiber/flavanols), adding 2 tbsp ground flaxseed (omega-3s, fiber), or topping with antioxidant-rich berries instead of sugary frosting.
- Portion Mindfulness: Because they’re so satisfyingly rich and chewy, smaller portions deliver greater satiety than lighter desserts—making them surprisingly compatible with mindful eating practices when enjoyed intentionally.
Bottom line: Crinkle Top Brownies are a treat—not health food—but their whole-food ingredients (real chocolate, eggs, butter) and absence of artificial additives make them a far superior choice to ultra-processed snacks. Enjoy regularly, joyfully, and in attuned portions.
Ingredients
- 4 oz (113g) high-quality unsweetened chocolate (60–70% cacao), finely chopped
- ½ cup (113g) unsalted butter, cut into tablespoon pieces
- 1¼ cups (250g) granulated sugar, plus 1 tsp for dusting
- 3 large eggs, room temperature
- 2 tsp pure vanilla extract
- ¼ cup (32g) all-purpose flour, sifted
- 1 tsp instant espresso powder (optional but recommended)
- ½ tsp fine sea salt, plus flaky sea salt for finishing
- ½ cup (85g) mini semi-sweet chocolate chips (optional)
Directions
- Preheat oven to 325°F (163°C). Line an 8×8-inch metal baking pan with parchment paper, leaving 2-inch overhang on two opposite sides. Lightly grease parchment and pan edges.
- In a heatproof bowl set over a saucepan of barely simmering water, melt chocolate and butter, stirring constantly until smooth and glossy. Remove from heat and let cool 1–2 minutes.
- In a large bowl, whisk sugar, eggs, and vanilla vigorously for 2–3 minutes until thick, pale, and ribbony.
- Slowly drizzle in warm chocolate-butter mixture while whisking constantly until fully combined and glossy.
- In a small bowl, sift together flour, espresso powder, and ½ tsp fine sea salt.
- Gently fold dry ingredients into wet mixture in 2 additions using a silicone spatula—just until no dry streaks remain. Batter will be thick and slightly grainy.
- Fold in mini chocolate chips, if using, until evenly distributed.
- Pour batter into prepared pan. Smooth top with offset spatula. Tap pan firmly on counter 3–4 times.
- Sprinkle top evenly with 1 tsp granulated sugar and a light pinch of flaky sea salt.
- Bake 28–34 minutes, until edges are set and center jiggles minimally when gently shaken. A toothpick 1 inch from edge should show moist crumbs; center should show damp crumbs—not wet batter.
- Cool completely in pan on wire rack—minimum 2 hours at room temperature. For best texture, refrigerate uncovered 1 hour before slicing.
- Using a hot, thin knife wiped clean between cuts, slice into 16 squares. Serve at cool room temperature.
FAQ
- Why didn’t my brownies develop crinkles?
- Most common causes: 1) Oven too cool—preheat fully and verify with thermometer; 2) Under-whisked eggs/sugar—must achieve thick, ribbony consistency; 3) Overmixed batter after adding flour—gluten development prevents proper surface tension; 4) Used brown sugar or confectioners’ sugar—granulated is mandatory; 5) Pan too large—stretches batter too thin, preventing lift.
- Can I use a glass or ceramic pan?
- Not recommended. Glass and ceramic retain and radiate heat differently, causing uneven baking—often over-browned edges and under-set centers. Metal conducts heat quickly and evenly, essential for uniform crinkle formation. If you must use glass, reduce oven temp to 315°F and add 3–5 minutes to bake time—but expect less dramatic cracks.
- My brownies sank in the center after cooling. What happened?
- This indicates underbaking. The structure wasn’t fully set before cooling began. Next time, bake 1–2 minutes longer—or until a toothpick inserted 1 inch from edge comes out with *moist, not wet*, crumbs. Also ensure eggs are room temperature; cold eggs cause uneven emulsification and weak structure.
- Can I make these ahead for an event?
- Absolutely—and they improve! Bake, cool completely, and store airtight at room temperature for up to 48 hours. For events >2 days out, freeze unbaked batter in pan (covered tightly) for up to 1 month—thaw overnight in fridge, then bake as directed (add 2–3 minutes). Or bake, cool, slice, and freeze individually wrapped squares.
- How do I get clean, sharp edges every time?
- Chill fully before cutting. Use a chef’s knife with a thin, rigid blade—not serrated. Dip knife in hot water, wipe completely dry, cut firmly in one motion (no sawing), and repeat—hot knife + dry wipe = flawless edges.
- Can I substitute cocoa powder for chocolate?
- Not without major reformulation. Cocoa powder lacks cocoa butter, altering fat ratio, moisture, and emulsification. You’d need added fat (oil/butter), extra eggs, and sugar adjustment—defeating the crinkle’s delicate balance. Stick with real chocolate for authentic results.
- Are these suitable for high-altitude baking?
- Yes—with adjustments: Reduce sugar by 1 tbsp, increase flour by 1 tsp, raise oven temp to 335°F, and decrease bake time by 2–4 minutes. Monitor closely—the crinkle forms faster at altitude due to lower boiling point.
- What’s the best way to store leftovers?
- Airtight container at room temperature for 3 days. Refrigerate for up to 1 week (wrap tightly to prevent drying). Freeze for up to 3 months—layer between parchment, seal in freezer bag, thaw overnight in fridge.
- Can I add nuts? Which kind?
- Yes—but only if toasted and finely chopped (¼-inch max) to prevent sinking and ensure even distribution. Toasted walnuts, pecans, or hazelnuts work best. Add during final fold, after dry ingredients.
- Why do you recommend espresso powder?
- It doesn’t make brownies taste like coffee—it intensifies chocolate’s inherent complexity by enhancing perception of bitterness, sweetness, and aroma via neurological cross-wiring. It also deepens color and adds subtle roasted notes. Omit only if strictly avoiding caffeine.
Summary
Crinkle Top Chewy Brownies are a masterclass in controlled imperfection—where precise ratios of granulated sugar, eggs, and melted chocolate converge under gentle heat to yield irresistibly fudgy centers beneath a dramatically fractured, glossy, sugar-dusted crust. Their magic lies not in complexity, but in reverence for fundamentals: patient whisking, disciplined folding, unhurried cooling, and unwavering attention to ingredient integrity.
Whether enjoyed as a humble weekday treat or elevated with artisanal twists like sea salt caramel ripple or matcha-white chocolate, these brownies deliver profound comfort, textural delight, and timeless satisfaction—one beautifully cracked, deeply chocolatey bite at a time.