Introduction
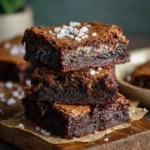
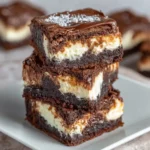
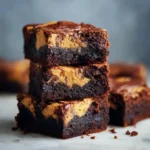
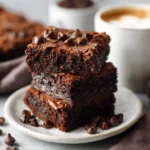
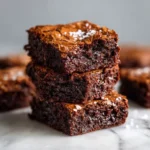
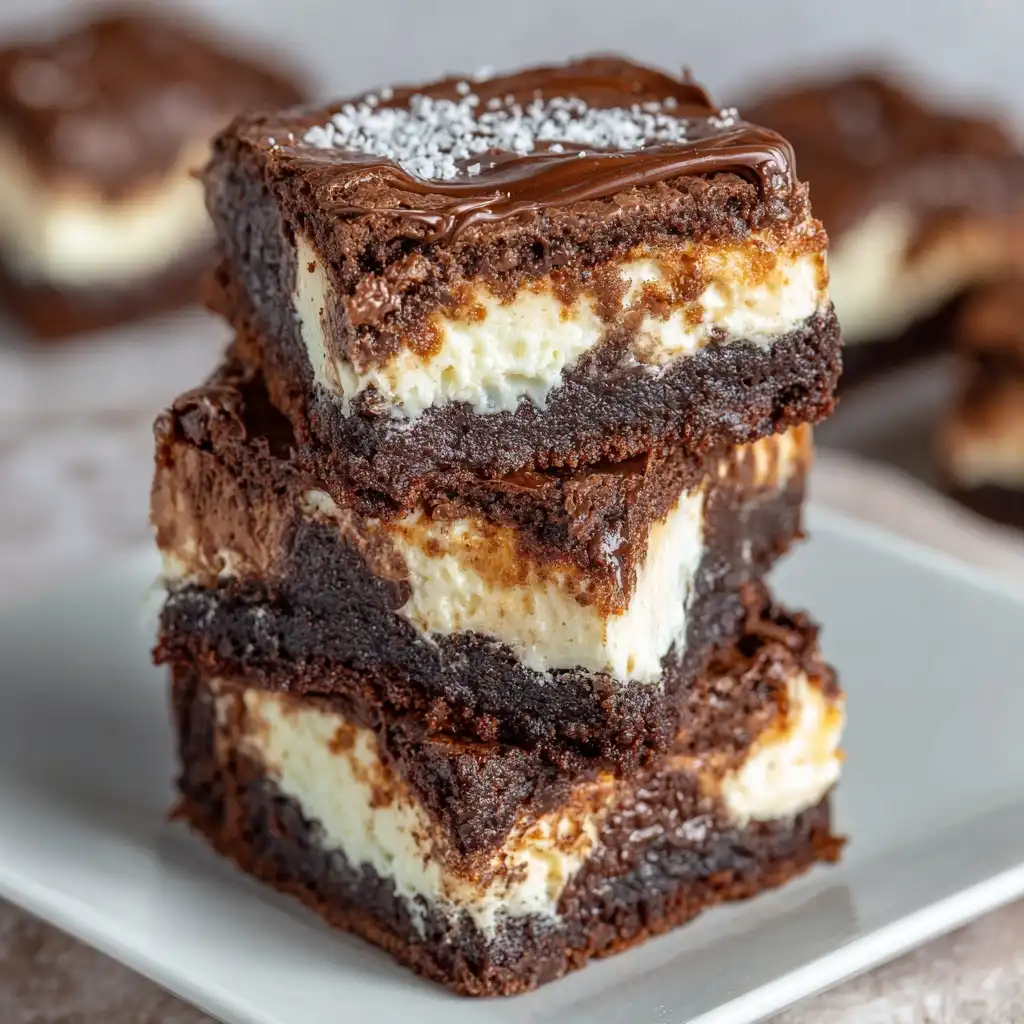
Cream Cheese Brownie Bars are the ultimate fusion dessert—rich, fudgy chocolate brownies swirled with luxuriously tangy, creamy cheesecake layers. These decadent bars combine the best of both worlds: the deep cocoa intensity of classic brownies and the velvety smoothness of baked cream cheese filling. Perfect for potlucks, holiday trays, birthday celebrations, or even a well-deserved midweek treat, they deliver impressive visual appeal (with those signature marbled swirls) and unforgettable texture contrast—crackly top, dense yet tender crumb, and a luscious, slightly tart cream cheese ribbon that cuts through the sweetness just right. Whether you’re a seasoned baker or a curious beginner, this recipe is approachable, reliable, and endlessly adaptable—making it a beloved staple in home kitchens across generations.
The History
The origins of Cream Cheese Brownie Bars trace back to the broader evolution of two iconic American desserts: brownies and cheesecake. Brownies themselves emerged in the late 19th century—first appearing in cookbooks like the 1896 Boston Cooking-School Cook Book by Fannie Farmer—and gained national popularity after being featured at the 1893 World’s Columbian Exposition in Chicago. Meanwhile, cream cheese was commercially introduced in the U.S. in 1872 by William Lawrence in Chester, New York, and later popularized by the Philadelphia Cream Cheese brand (despite its name, it was never made in Philadelphia). The marriage of these two ingredients likely began in earnest during the post–World War II baking boom, when home cooks experimented with layered and swirled desserts using newly accessible pantry staples—cocoa powder, boxed brownie mixes, and refrigerated cream cheese. Early versions appeared in community cookbooks and women’s magazines of the 1950s and ’60s, often titled “Marbled Brownie Squares” or “Cheesecake Brownie Bars.” By the 1980s and ’90s, food bloggers and test kitchen editors refined the technique—standardizing ratios, optimizing bake times to prevent cracking or sinking, and emphasizing ingredient temperature control. Today, Cream Cheese Brownie Bars stand as a testament to American dessert ingenuity: humble ingredients, clever layering, and nostalgic comfort elevated into something truly special.
Ingredients Breakdown
Understanding each ingredient’s role ensures consistent, professional-quality results:
- Unsalted Butter: Provides richness, moisture, and structure. Melted (not hot) butter emulsifies smoothly with sugar and eggs; clarified or browned butter can add nuance but may alter texture.
- Granulated Sugar: Sweetens and contributes to the brownie’s signature shiny, crackly crust via sugar bloom during baking. A portion can be substituted with light brown sugar for subtle molasses depth and chewier texture.
- Large Eggs (Room Temperature): Act as binders and leaveners. Room-temperature eggs incorporate more air and blend evenly into the batter without curdling—critical for both brownie and cream cheese layers.
- Pure Vanilla Extract: Enhances aroma and rounds out flavor. Avoid imitation vanilla, which can taste medicinal when baked.
- All-Purpose Flour: Provides gluten structure. Too much leads to cakey or tough bars; too little yields fragile, greasy slabs. Spoon-and-level method is essential for accuracy.
- Unsweetened Cocoa Powder (Natural or Dutch-Process): Natural cocoa (acidic) pairs best with baking soda; Dutch-process (alkalized) is milder and richer—ideal here. Sift to eliminate lumps and ensure even dispersion.
- Salt: Balances sweetness and intensifies chocolate flavor. Use fine sea salt or kosher salt—avoid iodized table salt for cleaner taste.
- Heavy Cream or Sour Cream (in cream cheese layer): Adds fat, acidity, and tenderness—prevents the cream cheese layer from becoming rubbery or grainy. Sour cream also enhances tanginess and moisture retention.
- Full-Fat Cream Cheese (Brick Style, Not Spreadable): Must be at room temperature and thoroughly softened (no cold lumps!). Low-fat or whipped varieties contain stabilizers and excess air, leading to separation, weeping, or collapse during baking.
- Confectioners’ Sugar (for cream cheese layer): Dissolves instantly and adds sweetness without graininess. Granulated sugar won’t fully incorporate and may leave gritty pockets.
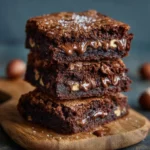
- Optional Add-Ins: Chocolate chips (semi-sweet or dark), chopped toasted walnuts or pecans, espresso powder (½ tsp boosts chocolate depth), orange zest (¼ tsp brightens richness), or flaky sea salt for finishing.
Step-by-Step Recipe
- Prep Work (30 minutes ahead): Line a 9×13-inch metal baking pan with parchment paper, leaving 2-inch overhang on two opposite sides for easy lifting. Lightly grease the parchment and pan sides. Preheat oven to 325°F (163°C)—a lower temperature prevents over-browning and ensures even baking of both layers. Place all ingredients at room temperature (especially cream cheese and eggs) for at least 1 hour before starting.
- Make the Brownie Batter: In a large heatproof bowl, melt butter and cocoa together over a double boiler or in 30-second microwave bursts, stirring until smooth and glossy. Cool slightly (about 2 minutes), then whisk in granulated sugar until thick and combined (~1 min). Whisk in eggs one at a time, fully incorporating each before adding the next. Stir in vanilla. Sift flour, salt, and optional espresso powder over mixture; fold gently with a spatula just until no dry streaks remain—do not overmix. Batter should be thick, glossy, and pourable but not runny.
- Prepare the Cream Cheese Layer: In a separate medium bowl, beat softened cream cheese with an electric mixer on medium speed until completely smooth and lump-free (~2 min). Add confectioners’ sugar and beat until creamy and lightened (~1 min). Add egg, sour cream (or heavy cream), and vanilla; beat on low until just combined—scrape bowl thoroughly. Overbeating incorporates excess air and causes cracking or puffing.
- Layer & Swirl: Pour brownie batter into prepared pan and spread evenly with an offset spatula. Carefully spoon cream cheese mixture in large dollops over the top. Using a butter knife or thin skewer, drag through both layers in a figure-eight or zigzag motion to create dramatic, deep swirls—avoid over-swirling, which blends layers too much and loses definition.
- Bake with Precision: Place pan on center oven rack. Bake for 42–50 minutes. The bars are done when the edges are set and lightly pulling away from the pan, the center jiggles *just slightly* (like firm Jell-O) when gently nudged, and a toothpick inserted 1 inch from the edge comes out with moist crumbs—not wet batter—while the very center may still look soft. Rotate pan halfway through for even baking. Note: Baking time varies significantly by oven calibration, pan material (dark metal bakes faster), and altitude—start checking at 40 minutes.
- Cool Completely (Non-Negotiable Step): Remove pan from oven and cool on a wire rack for 1 hour at room temperature. Then refrigerate, uncovered, for at least 4 hours—or preferably overnight. This slow cooling sets the cream cheese layer, firms the brownie crumb, prevents crumbling during cutting, and allows flavors to meld and deepen.
- Cut & Serve: Use parchment overhang to lift entire slab from pan. Place on a cutting board. With a sharp, thin-bladed knife wiped clean between cuts, slice into 16–24 uniform bars (2-inch squares for generous portions; 1½-inch for bite-sized treats). For clean edges, dip knife in hot water and dry before each cut.
Tips
- Temperature Is Everything: Cold cream cheese = lumps. Cold eggs = curdled batter. Warm melted butter = scrambled eggs. Always verify temperatures—room temp means 68–72°F (20–22°C); if in doubt, let ingredients sit out for 60–90 minutes.
- Measure Flour Correctly: Fluff flour in bag, spoon into measuring cup, and level with straight edge. Scooping directly packs flour—adding up to 25% extra, resulting in dry, dense bars.
- Don’t Skip the Parchment: Aluminum foil tears easily; greasing alone makes removal messy. Parchment with overhang guarantees flawless release and clean edges every time.
- Swirl Strategically: Use a narrow tool (e.g., chopstick or wooden skewer) and make *fewer*, deeper passes—not many shallow ones. Aim for bold ribbons, not a homogenous marble.
- Underbake Slightly: These bars continue cooking from residual heat. Pull them out when the center is *almost* set—it will firm perfectly during cooling. Overbaking causes dryness and cream cheese layer shrinkage.
- Cooling Is Part of the Recipe: Cutting warm bars guarantees gooey, misshapen pieces. Refrigeration transforms texture—making them sliceable, fudgier, and more flavorful.
- Storage Matters: Keep refrigerated in an airtight container for up to 1 week. Freeze unfrosted bars (wrapped tightly in plastic + foil) for up to 3 months. Thaw overnight in fridge before serving.
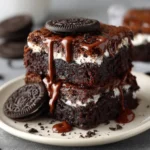
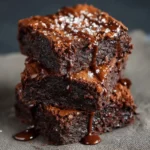
- Enhance Presentation: Dust with cocoa powder or powdered sugar using a fine-mesh sieve. Garnish with fresh raspberries, mint leaves, caramel drizzle, or flaky Maldon salt just before serving.
Variations and Customizations
These bars serve as a versatile canvas—elevate, personalize, or accommodate dietary needs without compromising integrity:
- Double Chocolate Swirl: Fold 1 cup finely chopped dark chocolate (70%) into brownie batter before spreading. Or replace 2 tbsp cocoa with black cocoa for intensified color and bitterness.
- Espresso Crunch: Add 1 tbsp instant espresso powder to brownie batter + ½ cup crushed toffee bits (like Heath) folded in before swirling.
- Nutty Delight: Toast 1 cup walnuts or pecans; fold ¾ cup into brownie batter, reserve ¼ cup for sprinkling on top before baking.
- White Chocolate Raspberry: Swap cream cheese layer for white chocolate ganache (melt 8 oz white chocolate with ½ cup warm heavy cream; cool 15 min before swirling) and top with fresh raspberries before baking.
- Gluten-Free: Substitute 1:1 gluten-free all-purpose flour blend (with xanthan gum included). Verify cocoa and other ingredients are certified GF. Add ¼ tsp xanthan gum if blend doesn’t include it.
- Lower-Sugar Option: Reduce brownie sugar to 1¼ cups and use monk fruit–erythritol blend (cup-for-cup) in cream cheese layer. Add 1 tsp stevia glycerite to brownie batter for enhanced sweetness perception.
- Vegan Adaptation: Use dairy-free butter, flax eggs (2 tbsp ground flax + 5 tbsp water per egg), aquafaba (3 tbsp per egg in cream cheese layer), vegan cream cheese (Tofutti or Kite Hill), and coconut milk instead of sour cream. Expect softer set—chill 8+ hours.
- Mini Bar Version: Use a 9×9-inch pan and reduce bake time to 32–38 minutes. Or bake in lined muffin tins (fill ⅔ full) for 22–26 minutes—yields 24 individual portions.
- Liqueur Infusion: Add 1 tbsp Grand Marnier, Baileys, or Amaretto to cream cheese layer for sophisticated depth (reduce sour cream by 1 tbsp).
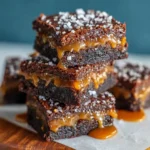
- Seasonal Twists: Pumpkin Spice (add 1 tsp pumpkin pie spice + 2 tbsp pumpkin puree to cream cheese layer); Peppermint (¼ tsp extract + crushed candy cane garnish); Salted Caramel (drizzle warm caramel sauce over cooled bars, then sprinkle with sea salt).
Health Considerations and Nutritional Value
While Cream Cheese Brownie Bars are inherently indulgent, mindful preparation can support balanced enjoyment:
- Caloric Profile (per standard 2×2-inch bar, ~1/16 of recipe): Approximately 280–320 calories—primarily from complex carbohydrates (brownie base), saturated fat (butter, cream cheese), and protein (eggs, dairy). A typical serving contains ~16g total fat (9g saturated), 32g carbs (24g sugars), and 3g protein.
- Portion Awareness: Serving smaller bars (1½-inch) reduces calories by ~30% and helps manage added sugar intake—especially important given the dual sugar sources (brownie + cream cheese layers).
- Nutrient Highlights: Cocoa provides flavonoids linked to antioxidant activity and cardiovascular support; eggs contribute choline (vital for brain health) and vitamin D; cream cheese offers calcium and vitamin A. Using high-quality, minimally processed ingredients maximizes phytonutrient density.
- Reducing Saturated Fat: Substitute half the butter with unsweetened applesauce (¼ cup) or mashed ripe banana—note: texture becomes cakier and shelf life shortens. For cream cheese layer, try reduced-fat brick-style cream cheese (not spreads)—but expect less richness and potential textural compromise.
- Added Sugar Management: Opt for dark chocolate (>70% cacao) in batter or swirls to lower overall sugar load. Replace granulated sugar with coconut sugar (similar glycemic index) or date paste (adds fiber)—adjust liquid content accordingly.
- Dietary Restrictions: Naturally nut-free and soy-free (verify cream cheese label). Easily adapted for gluten-free (see Variations). Not suitable for dairy-free unless fully veganized. Contains eggs—unsuitable for strict vegans or those with egg allergy.
- Mindful Enjoyment Strategy: Pair with a protein-rich snack (Greek yogurt, almonds) or fiber-rich fruit (berries) to slow glucose absorption. Savor slowly—each bite delivers sensory satisfaction that supports satiety cues.
Ingredients
For the Brownie Layer:
- 1 cup (227g) unsalted butter, cut into tablespoons
- 1 cup (85g) unsweetened natural or Dutch-process cocoa powder, sifted
- 2 cups (400g) granulated sugar
- 4 large eggs, room temperature
- 2 teaspoons pure vanilla extract
- 1 cup (125g) all-purpose flour, spooned and leveled
- 1 teaspoon fine sea salt
- ½ teaspoon baking powder (optional, for slight lift)
For the Cream Cheese Layer:
- 16 oz (454g) full-fat brick-style cream cheese, room temperature
- 1 cup (120g) confectioners’ sugar, sifted
- 1 large egg, room temperature
- ¼ cup (60g) full-fat sour cream or heavy cream
- 1 teaspoon pure vanilla extract
- ¼ teaspoon fine sea salt
Optional Enhancements:
- 1 cup (175g) semi-sweet or dark chocolate chips
- 1 cup (120g) toasted walnuts or pecans, coarsely chopped
- 1 tablespoon instant espresso powder (added to brownie batter)
- Flaky sea salt, for finishing
Directions
- Preheat & Prep: Adjust oven rack to center position. Preheat oven to 325°F (163°C). Line a 9×13-inch metal baking pan with parchment paper, ensuring overhang on two long sides. Lightly grease parchment and exposed pan sides with non-stick spray or butter.
- Melt Chocolate Base: In a large heatproof bowl, combine butter and cocoa powder. Melt over a simmering double boiler (bottom of bowl not touching water), stirring constantly until smooth and glossy—about 3–4 minutes. Alternatively, microwave in 30-second intervals, stirring between bursts, until fully melted. Let cool 2 minutes—warm but not hot.
- Build Brownie Batter: Whisk granulated sugar into warm cocoa-butter mixture until thickened and glossy (~1 minute). One at a time, whisk in eggs, fully incorporating each before adding the next. Stir in vanilla. Sift flour, salt, and espresso powder (if using) over mixture; fold gently with silicone spatula until *just* combined—no dry pockets, no overmixing. Fold in chocolate chips or nuts, if using. Set aside.
- Prepare Cream Cheese Mixture: In a medium bowl, beat cream cheese with electric mixer on medium until completely smooth and creamy (2–3 min). Add confectioners’ sugar; beat on low until incorporated, then medium until lightened (~1 min). Add egg, sour cream, vanilla, and salt; beat on low until *just* combined—scrape bowl and beat 5 seconds more. Do not overmix.
- Layer & Swirl: Pour brownie batter into prepared pan. Smooth top with offset spatula. Drop cream cheese mixture by heaping tablespoonfuls evenly over brownie layer. Using a thin knife or skewer, drag through both layers in parallel lines, then perpendicular lines, then a gentle figure-eight to create dramatic, defined swirls—about 10–12 passes max.
- Bake: Place pan in center oven. Bake 42–48 minutes—until edges are deeply set and slightly puffed, center jiggles minimally when nudged, and toothpick inserted 1 inch from side comes out with moist crumbs. Rotate pan front-to-back at 25 minutes.
- Cool & Chill: Transfer pan to wire rack. Cool 60 minutes at room temperature. Refrigerate uncovered for minimum 4 hours—or ideally, 12–24 hours—for optimal texture and clean slicing.
- Cut & Serve: Lift slab using parchment overhang. Place on cutting board. With sharp knife wiped clean and dried between cuts, slice into 16 (2-inch) or 24 (1½-inch) bars. Garnish with flaky salt or berries. Store refrigerated in airtight container.
FAQ
- Can I use a boxed brownie mix?
- Yes—but for superior texture and flavor, prepare from scratch. If using mix, follow package instructions *except* reduce oil by 2 tbsp and omit water—replace with ¼ cup brewed coffee or strong espresso for depth. Prepare cream cheese layer as directed and swirl as usual.
- Why did my cream cheese layer sink or disappear?
- This usually occurs due to underbaked brownie base (too soft to support layer), overmixed cream cheese batter (trapped air expands then collapses), or drastic oven temperature fluctuations. Ensure brownie batter is spread evenly and baked just until set at edges before adding cream cheese layer. Also, avoid opening oven door during first 30 minutes.
- Can I make these ahead of time?
- Absolutely—and recommended! They taste even better on Day 2–3 as flavors mature. Prepare up to 3 days ahead and refrigerate. For events, bake 1 day ahead, chill overnight, cut morning-of, and store in single layer with parchment between slices.
- My bars cracked on top. What went wrong?
- Cracking is common and often harmless—it results from rapid surface drying or temperature shock. To minimize: ensure eggs and cream cheese are truly room temperature, avoid overbeating cream cheese layer, cool gradually (don’t rush refrigeration), and consider placing a small oven-safe dish of hot water on bottom rack during baking for gentle steam.
- Can I freeze Cream Cheese Brownie Bars?
- Yes! Fully cooled, uncut bars freeze beautifully for up to 3 months. Wrap tightly in plastic wrap, then aluminum foil, and place in freezer bag. Thaw overnight in refrigerator before slicing. Avoid freezing cut bars—they may dry out or stick together.
- What’s the best way to prevent sticking when cutting?
- Chill thoroughly (minimum 4 hours), use a sharp, non-serrated knife, dip in hot water and wipe dry before *every* cut, and apply gentle, downward pressure—no sawing. For perfect squares, measure and lightly score top with knife before chilling.
- Can I add fruit to the cream cheese layer?
- Fresh berries (raspberries, blueberries) can be gently folded in—but pat them *very* dry first to avoid water pockets. Avoid juicy fruits like peaches or mangoes, which release liquid and cause separation. Freeze-dried fruit powder (1 tbsp blended into cream cheese layer) adds intense flavor without moisture.
- Is there a way to make them less sweet?
- Reduce granulated sugar in brownie layer to 1¾ cups and confectioners’ sugar in cream cheese layer to ¾ cup. Boost complexity with 1 tsp espresso powder, ¼ tsp cinnamon, or 1 tbsp bourbon—these enhance perceived richness without added sugar.
- Why does my cream cheese layer look curdled or grainy?
- Almost always caused by cold cream cheese or cold egg. Let both sit at room temperature for 90+ minutes. Also, ensure no water gets into cream cheese (wet beaters or bowls) and avoid mixing on high speed once egg is added.
- Can I bake these in a glass or ceramic pan?
- You can—but adjust: reduce oven temperature to 315°F and increase bake time by 5–8 minutes. Glass retains heat longer and may overbake edges. Metal pans provide most predictable, even results.
Summary
Cream Cheese Brownie Bars are an elegantly simple yet deeply satisfying dessert where rich, fudgy chocolate brownies meet tangy, velvety cream cheese swirls—baked to perfection with a crackly top, dense-yet-tender crumb, and luxurious mouthfeel.
With meticulous attention to ingredient temperature, precise swirling technique, strategic underbaking, and mandatory overnight chilling, these bars transform from homemade treat into showstopping, restaurant-worthy confections that delight every time.