Chocolate Peanut Butter No-Bake Bars: A Decadent, Easy-to-Make Treat
Introduction
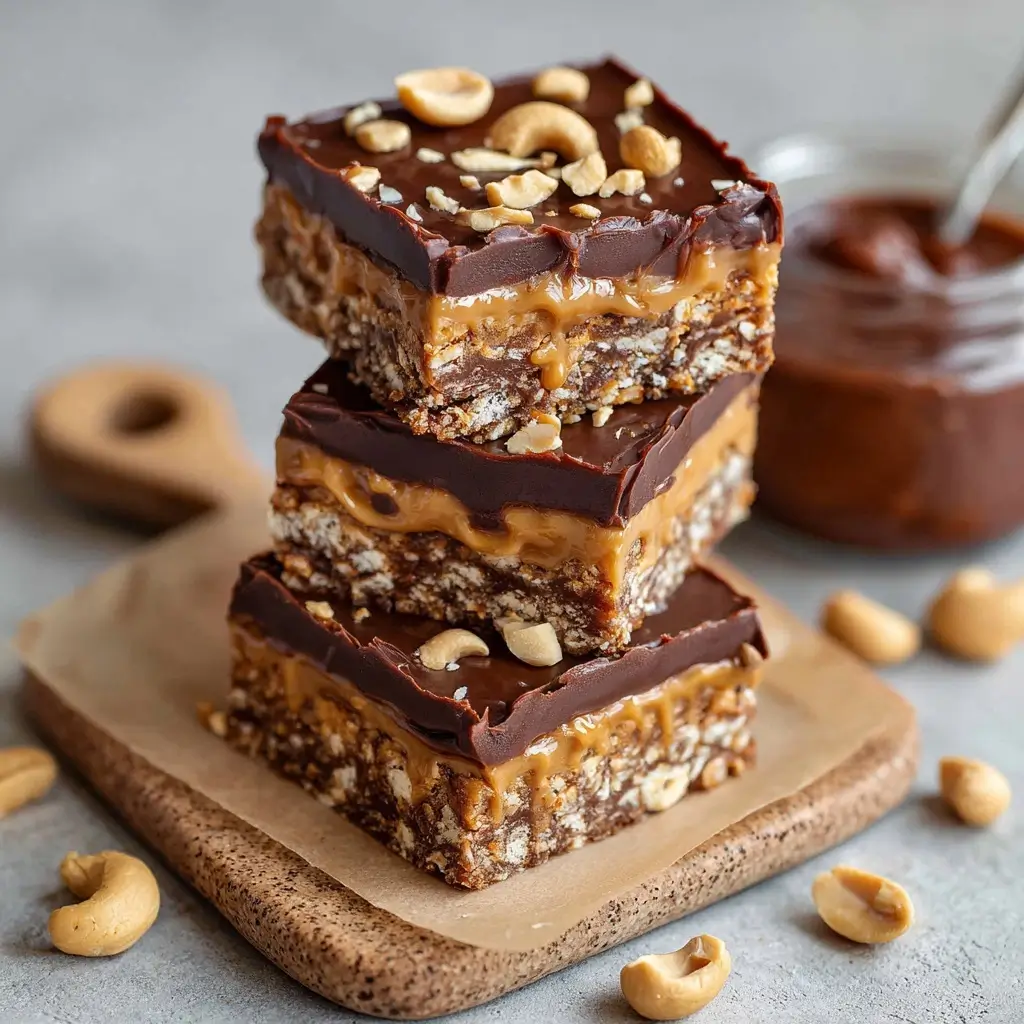
If you’re craving a rich, creamy, and utterly satisfying dessert that doesn’t require turning on the oven, look no further than Chocolate Peanut Butter No-Bake Bars. These luscious bars are the perfect blend of sweet and salty, combining smooth chocolate with rich peanut butter in a no-fuss recipe that’s ideal for busy days, last-minute gatherings, or simple indulgence. Whether you’re a seasoned baker or a complete novice in the kitchen, this recipe is approachable, forgiving, and guaranteed to impress.
With just a handful of ingredients and minimal cleanup, these bars have become a staple in households across the country. They’re often found at potlucks, school bake sales, holiday parties, and family dinners — and for good reason. Not only do they taste incredible, but they also come together in under 30 minutes, including chilling time. Let’s dive into everything you need to know about making the perfect batch of Chocolate Peanut Butter No-Bake Bars.
The History
No-bake desserts gained popularity in the mid-20th century, especially during the post-war era when convenience foods and quick recipes became more desirable. As refrigerators became standard in American homes, chilled desserts like puddings, gelatin salads, and no-bake bars began appearing in cookbooks and women’s magazines.
One of the earliest versions of no-bake peanut butter bars can be traced back to the 1950s and 60s, often using corn syrup, sugar, and margarine as key binding agents. These early recipes were inspired by traditional fudge techniques but simplified for home cooks looking for faster results. The addition of chocolate on top transformed a humble peanut butter square into a decadent treat reminiscent of a candy bar.
The rise of brands like Reese’s Peanut Butter Cups in the 1970s further fueled the love affair between chocolate and peanut butter. Home bakers began experimenting with layering melted chocolate over peanut butter mixtures, creating their own homemade versions of the iconic candy. Over time, variations emerged with graham cracker crusts, oats, coconut, and even marshmallows.
Today, Chocolate Peanut Butter No-Bake Bars are a beloved classic — a nostalgic favorite passed down through generations and continuously adapted to modern tastes, dietary needs, and ingredient preferences. Their enduring appeal lies in their simplicity, bold flavor, and crowd-pleasing nature.
Ingredients Breakdown
The beauty of this recipe lies in its simplicity. Each ingredient plays a crucial role in texture, flavor, and structure. Here’s a detailed breakdown:
- Peanut Butter: Use natural or conventional creamy peanut butter (avoid extra-runny varieties). It provides richness, nutty depth, and binds the base layer. Opt for unsweetened or lightly salted versions to control sweetness.
- Butter: Unsalted butter adds creaminess and helps create a smooth, spreadable consistency. It also contributes to the fudgy texture once chilled.
- Powdered Sugar: Also known as confectioners’ sugar, it sweetens the mixture while blending seamlessly without graininess. Its fine texture ensures a silky finish.
- Vanilla Extract: Enhances overall flavor with a warm, aromatic note that complements both peanut butter and chocolate.
- Salt: Balances sweetness and intensifies the other flavors. Especially important if using unsalted peanut butter.
- Chocolate Chips: Semi-sweet, milk, or dark chocolate chips melt smoothly and form a glossy top layer. High-quality chips yield better taste and shine.
- Optional Add-ins: Crushed peanuts, sea salt flakes, crushed pretzels, or even a drizzle of caramel can elevate the final product.
Every ingredient works in harmony to deliver a balanced bar — not too sweet, not too heavy, with a luxurious mouthfeel and deep flavor profile.
Step-by-Step Recipe
Follow these easy steps to create perfectly textured, restaurant-quality Chocolate Peanut Butter No-Bake Bars from scratch.
- Prepare the Pan: Line an 8×8-inch or 9×9-inch baking dish with parchment paper, leaving overhang on two sides for easy removal. Lightly grease the parchment with non-stick spray or butter.
- Make the Peanut Butter Layer: In a large microwave-safe bowl, combine 1 cup (240g) creamy peanut butter and ½ cup (113g) unsalted butter. Microwave in 30-second intervals, stirring between each, until fully melted and smooth (about 1–2 minutes total).
- Add Sweeteners and Flavor: Stir in 2 cups (240g) powdered sugar, 1 teaspoon vanilla extract, and a pinch of salt. Mix vigorously until a thick, dough-like consistency forms. If needed, add another tablespoon of powdered sugar to reduce stickiness.
- Press Into Pan: Transfer the mixture to the prepared pan. Use a spatula or your hands (lightly greased) to press it evenly into the bottom. Aim for uniform thickness to ensure even slicing later.
- Chill the Base: Place the pan in the refrigerator for at least 20–30 minutes to firm up the layer before adding chocolate.
- Melt the Chocolate: In a clean microwave-safe bowl, add 1 ½ to 2 cups (270–360g) chocolate chips. Microwave in 30-second bursts, stirring well after each interval, until completely smooth and glossy. For extra shine, stir in ½ teaspoon vegetable oil or shortening.
- Top with Chocolate: Pour the melted chocolate over the chilled peanut butter layer. Tilt the pan gently or use a spatula to spread it evenly across the surface.
- Optional Garnishes: While still wet, sprinkle flaky sea salt, chopped peanuts, or crushed pretzels on top for added crunch and visual appeal.
- Final Chill: Return the pan to the refrigerator for at least 45–60 minutes, or until the chocolate is completely set and firm to the touch.
- Cut and Serve: Using the parchment overhang, lift the slab out of the pan. Place on a cutting board and slice into squares or rectangles with a sharp knife. Wipe the knife between cuts for clean edges.
Store leftovers in an airtight container in the fridge for up to one week or freeze for longer storage.
Tips
- Use Room Temperature Ingredients: Ensure your butter and peanut butter aren’t cold straight from the fridge; they’ll incorporate more easily and melt uniformly.
- Don’t Overheat the Mixture: When microwaving, stop as soon as ingredients are melted. Overheating can cause separation or graininess.
- Prevent Sticky Hands: Grease your fingers with butter or cooking spray when pressing the peanut butter mixture into the pan for easier handling.
- Smooth Chocolate Finish: Tap the pan gently on the counter after pouring the chocolate to release air bubbles and achieve a flat, professional-looking top.
- Sharp Knife Is Key: Warm the blade slightly under hot water and dry it thoroughly before cutting — this prevents cracking or smearing.
- Double the Batch: These bars disappear fast! Consider making two trays — one to enjoy now, one to hide for later.
- Label and Date: If freezing, wrap individual bars in wax paper and place in a freezer bag. Label with the date — they keep well for up to 3 months.
Variations and Customizations
One of the greatest strengths of this recipe is its versatility. Try these creative twists to suit different occasions, dietary needs, or flavor cravings:
- Gluten-Free: Ensure all ingredients (especially peanut butter and chocolate chips) are certified gluten-free. This recipe is naturally gluten-free otherwise.
- Nut-Free Version: Substitute sunflower seed butter or soy nut butter for peanut butter. Pair with allergen-safe chocolate.
- Vegan Option: Use plant-based butter and dairy-free chocolate chips. Confirm powdered sugar is vegan (some contain bone char).
- Protein-Packed Bars: Add ¼ to ½ cup vanilla or chocolate protein powder to the base. You may need to adjust liquid slightly with a splash of almond milk.
- Oatmeal Chocolate Peanut Butter Bars: Mix in 1 cup of rolled oats into the peanut butter layer for a heartier, chewier texture.
- Reese’s-Inspired Bars: Press mini Reese’s cups onto the chocolate layer before chilling, or layer chopped pieces into the base.
- White Chocolate Drizzle: After the main chocolate sets, drizzle melted white chocolate over the top for contrast and elegance.
- Spicy Kick: Add a pinch of cayenne pepper or chili powder to the peanut butter layer for a sweet-heat fusion.
- Coconut Bliss: Fold shredded coconut into the base or sprinkle toasted coconut on top of the chocolate.
- Cookie Crust Base: Replace part of the mixture with crushed graham crackers, Oreos, or Biscoff cookies for a crunchy foundation.
Get creative — these bars welcome experimentation!
Health Considerations and Nutritional Value
While undeniably delicious, Chocolate Peanut Butter No-Bake Bars are best enjoyed in moderation due to their high sugar and fat content. However, they do offer some nutritional benefits depending on ingredient choices.
Nutritional Highlights:
- Healthy Fats: Peanut butter contains monounsaturated and polyunsaturated fats, which support heart health.
- Protein Source: A single serving provides around 3–5 grams of protein, helping promote satiety.
- Energy Boost: Ideal as an occasional energy-dense snack for active individuals or growing children.
- Antioxidants: Dark chocolate (if used) contains flavonoids linked to improved cardiovascular function.
Considerations:
- High in Calories: One bar can range from 180–250 calories, depending on size and ingredients.
- Sugar Content: Contains significant added sugars from powdered sugar and chocolate. Those managing blood sugar should consume cautiously.
- Sodium Levels: Peanut butter and salt contribute to sodium intake. Opt for low-sodium versions if necessary.
- Allergens: Contains peanuts and dairy (in butter and chocolate). Not suitable for those with severe allergies unless substitutions are made.
- Portion Control: Due to their addictive taste, it’s easy to overeat. Pre-cut and store in individual portions to avoid mindless snacking.
To make a healthier version, consider reducing powdered sugar, using natural peanut butter with no added oils or sugars, choosing dark chocolate with 60%+ cocoa, and incorporating fiber-rich add-ins like oats or flaxseed.
Ingredients
- 1 cup (240g) creamy peanut butter (natural or regular)
- ½ cup (113g) unsalted butter
- 2 cups (240g) powdered sugar (confectioners’ sugar)
- 1 teaspoon pure vanilla extract
- Pinch of salt (omit if using salted peanut butter)
- 1 ½ to 2 cups (270–360g) semi-sweet or milk chocolate chips
- (Optional) ½ teaspoon vegetable oil or shortening (for smoother chocolate)
- (Optional toppings) Flaky sea salt, chopped peanuts, crushed pretzels
Directions
- Line an 8×8-inch or 9×9-inch baking pan with parchment paper, allowing for overhang on two sides. Lightly grease and set aside.
- In a large microwave-safe bowl, combine peanut butter and butter. Microwave in 30-second intervals, stirring each time, until fully melted and smooth (approx. 1–2 minutes).
- Stir in powdered sugar, vanilla extract, and salt until a thick, cohesive mixture forms. Adjust with additional powdered sugar if too sticky.
- Transfer the mixture to the prepared pan. Grease your hands lightly and press it down firmly and evenly into a smooth layer.
- Refrigerate for 20–30 minutes to chill and firm the base.
- Meanwhile, melt chocolate chips in a microwave-safe bowl in 30-second bursts, stirring frequently, until smooth. Stir in oil for extra gloss if desired.
- Pour melted chocolate over the chilled peanut butter layer. Use a spatula to spread evenly.
- Sprinkle optional toppings immediately while chocolate is wet.
- Return to refrigerator for 45–60 minutes until chocolate is completely set.
- Lift the slab out using the parchment paper. Place on a cutting board and slice into 12–16 bars with a sharp knife.
- Store in an airtight container in the refrigerator for up to 1 week or freeze for longer shelf life.
FAQ
Can I make these bars without powdered sugar?
While powdered sugar is essential for texture and binding, you can try alternatives like erythritol-based confectioners’ substitute for a sugar-free option. Be aware that results may vary in consistency.
Why did my chocolate crack when I cut the bars?
This usually happens if the chocolate wasn’t stirred enough or was overheated. Make sure to melt gently and stir thoroughly. Letting the bars sit at room temperature for 5 minutes before slicing can also help.
Can I use crunchy peanut butter?
Absolutely! Crunchy peanut butter adds a delightful texture. Just ensure it’s well mixed to avoid clumping.
How long do these bars last?
Up to 1 week in the refrigerator or 3 months in the freezer. Keep them covered to prevent absorbing odors.
Can I make them in a larger pan?
Yes! Use a 9×13-inch pan for thinner bars. Reduce chilling time slightly and adjust chocolate amount accordingly.
Are these safe for kids?
Yes, but supervise young children due to choking hazards (especially with nuts). Ensure no allergies are present.
Can I use honey instead of powdered sugar?
No — honey will make the mixture too wet and prevent proper setting. Powdered sugar is crucial for structure.
Why didn’t my base firm up?
You may have used too little powdered sugar or a very oily peanut butter. Chill longer or remix with additional powdered sugar.
Can I use milk instead of butter?
No — butter provides fat and structure. Milk will dilute the mixture and prevent setting.
Can I bake these?
No — this is a no-bake recipe designed to set in the fridge. Baking will cause melting and burning.
Summary
Chocolate Peanut Butter No-Bake Bars are a rich, creamy, and irresistibly delicious treat that comes together in minutes with no oven required. Perfect for any occasion, they offer endless customization options and satisfy every chocolate-peanut butter lover’s dream.