Introduction
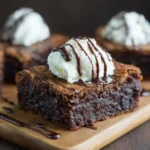
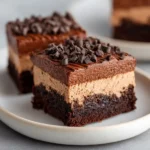
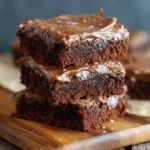
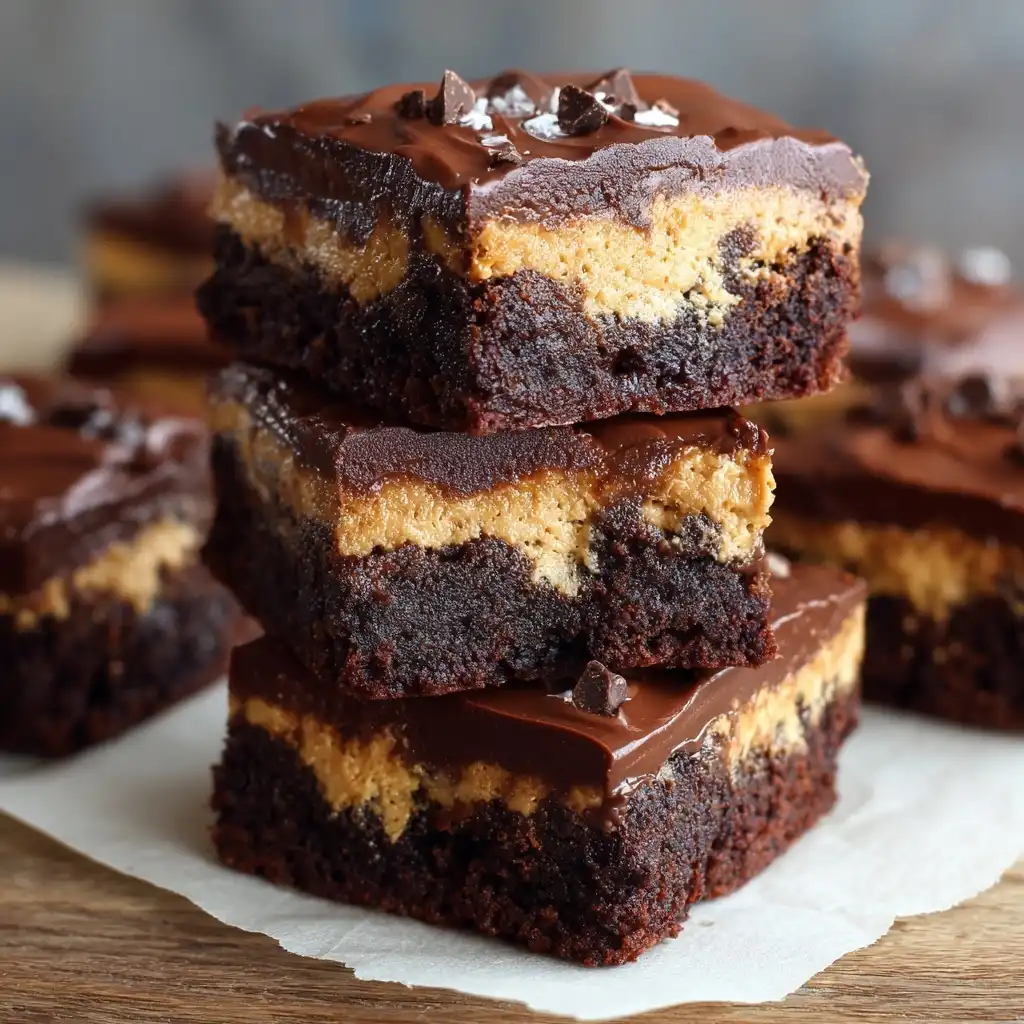
Brownie Truffle Bars are the ultimate fusion of two beloved dessert classics: rich, fudgy brownies and decadent, melt-in-your-mouth chocolate truffles. These bars deliver an indulgent, multi-layered experience—featuring a dense, moist brownie base, a luxuriously smooth truffle layer infused with real chocolate and cream, and often crowned with a glossy chocolate ganache glaze, flaky sea salt, or crushed nuts. Unlike traditional brownies or standalone truffles, Brownie Truffle Bars offer structural integrity for easy slicing while delivering the deep cocoa intensity and velvety mouthfeel of premium confections. They’re ideal for special occasions, holiday platters, gourmet gift boxes, or simply as a weekend treat that feels both nostalgic and elevated. Whether you’re a home baker seeking to impress or a seasoned pastry enthusiast craving complexity and contrast in texture and flavor, these bars strike the perfect balance between homemade warmth and artisanal sophistication.
The History
The origins of Brownie Truffle Bars lie at the intersection of early 20th-century American baking innovation and mid-century European chocolate craftsmanship. Classic brownies emerged in the United States around the 1890s—first appearing in cookbooks like the 1896 Boston Cooking-School Cook Book by Fannie Farmer—as a dense, cake-like chocolate square. Meanwhile, truffles—named for their resemblance to the prized underground fungi—were pioneered in France and Switzerland in the late 1800s, with Antoine Dufour credited for founding the first truffle company (La Maison du Chocolat) in 1920. The marriage of these two traditions began gaining traction in the 1970s and ’80s, as American bakers experimented with layering techniques and high-cocoa chocolate. A pivotal moment came in the early 1990s when food magazines like Bon Appétit and Martha Stewart Living published “truffle-topped brownie” recipes, often featuring ganache swirls or chilled truffle centers. By the 2000s, bakery chains and artisan chocolatiers—including Vosges Haut-Chocolat and Fran’s Chocolates—began offering hybrid bars in retail and online markets, cementing their status as a modern dessert staple. Today, Brownie Truffle Bars symbolize the evolution of comfort food: rooted in tradition yet endlessly adaptable, deeply nostalgic yet refined enough for fine-dining dessert menus.
Ingredients Breakdown
Understanding each ingredient’s functional and sensory role is key to mastering Brownie Truffle Bars. Below is a comprehensive breakdown—not just of what goes in, but *why* it matters:
- Unsweetened Chocolate (70–85% cacao): Provides intense, bitter-sweet depth and structure. Higher cocoa solids yield richer color, denser crumb, and superior truffle layer emulsification. Avoid Dutch-processed cocoa here unless substituting in the brownie base only—it lacks the acidity needed to activate baking soda.
- Granulated Sugar: Not only sweetens but aids in aeration during creaming, contributes to crisp edges and chewy centers, and enhances Maillard browning for complex caramelized notes.
- Brown Sugar (light or dark): Adds moisture via molasses, imparts subtle toffee and rum-like undertones, and promotes tenderness—especially critical in preventing a dry brownie base beneath the truffle layer.
- Eggs (large, room temperature): Act as binders, leaveners (via trapped air), and emulsifiers. Extra yolks (often added beyond the base count) enrich the truffle layer with fat and lecithin, ensuring silkiness and stability.
- All-Purpose Flour: Supplies gluten for gentle structure—but too much yields toughness. Weighing (not scooping) ensures precision; sifting prevents lumps and overmixing.
- Espresso Powder (instant, unsweetened): A secret weapon—it doesn’t make bars taste like coffee, but *intensifies chocolate flavor* by amplifying aromatic compounds without bitterness.
- Heavy Cream (36–40% milkfat): Essential for truffle layers. Its high fat content enables proper ganache emulsification, creates a luxurious mouthfeel, and allows for clean setting without graininess. Ultra-pasteurized versions may require longer simmering to reduce water content.
- Unsalted Butter: Offers superior flavor control and consistent fat composition. Clarified butter can be used in the truffle layer for enhanced shelf life and higher melting point—ideal for warm-climate gifting.
- Vanilla Extract (pure, Madagascar Bourbon): Complements both brownie and truffle layers with floral, creamy top notes. Alcohol-based extract also helps carry volatile aromatics more effectively than paste or powder.
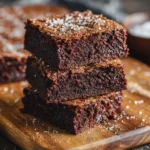
- Flaky Sea Salt (e.g., Maldon or Fleur de Sel): Used as a finishing touch, it creates dynamic contrast—cutting sweetness, enhancing umami, and awakening all other flavors on the palate.
- Optional Add-Ins: Toasted walnuts (for crunch and tannic balance), freeze-dried raspberries (for bright acidity), orange zest (to lift richness), or even a splash of bourbon or Amaretto (for nuanced booziness that volatilizes during baking).
Step-by-Step Recipe
- Prep & Preheat: Line a 9×13-inch metal baking pan with parchment paper, extending 2 inches over two opposing sides for easy lifting. Lightly grease exposed parchment and pan edges. Preheat oven to 325°F (163°C)—a lower temperature ensures even baking without cracking or doming, crucial for clean layer adhesion.
- Make the Brownie Base: In a heatproof bowl set over barely simmering water (double boiler), melt 8 oz unsweetened chocolate and 1 cup (2 sticks) unsalted butter, stirring constantly until smooth and glossy (~5–7 minutes). Remove from heat; whisk in 1¾ cups granulated sugar, ¾ cup packed brown sugar, and 2 tsp instant espresso powder until dissolved. One at a time, whisk in 4 large eggs and 2 egg yolks, beating vigorously for 1 full minute after each addition to incorporate air and create lift. Stir in 1 tbsp pure vanilla extract. Gently fold in 1 cup all-purpose flour, ½ tsp baking powder, and ½ tsp fine sea salt using a silicone spatula—just until no streaks remain. Avoid overmixing. Pour batter into prepared pan and spread evenly with an offset spatula. Tap pan firmly twice on counter to release air bubbles.
- Bake the Base: Bake at 325°F for 22–26 minutes, rotating pan halfway through. The brownie is done when a toothpick inserted 1 inch from edge comes out with *moist crumbs* (not wet batter), and the center still jiggles slightly—remember, residual heat will continue cooking it. Cool completely in pan on a wire rack (minimum 1 hour, ideally 2 hours). Do not rush this step—warm brownie will melt the truffle layer upon contact.
- Prepare the Truffle Layer: While brownie cools, finely chop 6 oz high-quality semi-sweet or bittersweet chocolate (60–70% cacao) and place in a heatproof bowl. Heat ¾ cup heavy cream and 2 tbsp light corn syrup (optional, for shine and anti-crystallization) in a small saucepan over medium-low heat until steaming and tiny bubbles form at edges (~180°F / 82°C). Immediately pour hot cream over chopped chocolate. Let sit undisturbed for 3 minutes. Gently stir with a silicone spatula in concentric circles from center outward until completely smooth, glossy, and homogenous—about 1 minute. Stir in 1 tsp vanilla and ¼ tsp flaky salt. Let cool at room temperature for 15–20 minutes, stirring every 5 minutes, until thickened to a soft, pipeable consistency (like cooled peanut butter). Do *not* refrigerate prematurely—it may seize or become grainy.
- Layer & Chill: Using an offset spatula, evenly spread truffle mixture over completely cooled brownie base. Work quickly but gently to avoid tearing. Optional: Use a toothpick to drag through layers for a marbled effect before chilling. Refrigerate uncovered for 45–60 minutes—or until truffle layer is firm to the touch but not cold-solid (ideal temp: ~55°F / 13°C).
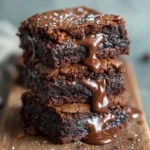
- Add Ganache Glaze (Optional but Recommended): For professional finish, prepare a mirror-like glaze: Heat ½ cup heavy cream until steaming. Pour over 4 oz finely chopped dark chocolate + 1 tbsp corn syrup + 1 tsp unsalted butter in a bowl. Let sit 3 minutes, then stir to emulsion. Cool to 90°F (32°C), then pour evenly over truffle layer. Tilt pan gently to coat fully. Immediately sprinkle with flaky salt or toasted nuts.
- Final Chill & Cut: Refrigerate bars for minimum 2 hours (or overnight) to fully set all layers. For clean cuts: Use a sharp chef’s knife dipped in hot water and wiped dry between each slice. Cut into 12–16 uniform rectangles (2×3 inches recommended). Store chilled until serving.
Tips
- Temperature Is Everything: All components—brownie base, truffle layer, and glaze—must be at precise temperatures before layering. Warm brownie = melted truffle; cold truffle = cracked surface; overheated ganache = dull, matte finish. Invest in an instant-read thermometer for accuracy.
- Parchment Paper Matters: Use *unbleached, heavy-duty* parchment—not wax paper or silicone mats. It withstands heat, prevents sticking, and allows for effortless lift-and-cut presentation. Crimp edges tightly for seamless removal.
- Chop Chocolate Finely: Uniform, pea-sized pieces ensure rapid, even melting and prevent graininess in both brownie batter and truffle layer. A serrated knife works better than a chef’s knife for clean breaks.
- Don’t Skip the Espresso Powder: Even ½ tsp transforms the chocolate profile. If unavailable, substitute 1 tsp instant coffee granules—but never brewed coffee, which adds unwanted water.
- Room-Temperature Eggs Are Non-Negotiable: Cold eggs won’t emulsify properly with melted chocolate and butter, risking separation and greasiness in the brownie base.
- Rotate Your Pan Mid-Bake: Ovens have hot spots—even convection models. Rotating ensures even rise and prevents uneven setting that compromises truffle adhesion.
- Cut With Confidence (and Hot Knives): Run blade under scalding water, dry thoroughly, and cut in one smooth motion—no sawing. Wipe and reheat between cuts. For ultra-clean edges, chill bars for 10 minutes after cutting, then serve slightly cool—not straight from fridge.
- Storage Wisdom: Keep bars refrigerated in an airtight container layered with parchment for up to 1 week. Freeze unfrosted bars (without glaze) for up to 3 months—thaw overnight in fridge before glazing and serving.
- Altitude Adjustments: Above 3,000 ft? Reduce sugar by 1 tbsp, increase flour by 1 tbsp, and raise oven temp to 335°F. Check brownie 3–4 minutes earlier.
- Test Batch First: Make a half-batch to calibrate your oven, chocolate brand, and cream reduction. Note timing and texture—then scale confidently.
Variations and Customizations
Brownie Truffle Bars are a canvas for creativity—whether you’re accommodating dietary needs, celebrating seasons, or elevating for entertaining. Here are meticulously tested variations, each preserving structural integrity and flavor harmony:
- Vegan Version: Replace eggs with flax eggs (2 tbsp ground flax + 6 tbsp water, rested 10 min); use vegan butter and dairy-free dark chocolate (check for soy lecithin, not milk solids); substitute heavy cream with full-fat coconut cream (chilled, solid part only) + 1 tsp apple cider vinegar for acidity. Add ¼ tsp xanthan gum to truffle layer for binding.
- Gluten-Free: Swap AP flour 1:1 with a certified GF all-purpose blend containing xanthan gum (e.g., Bob’s Red Mill 1-to-1). Add ¼ tsp psyllium husk powder to brownie batter for elasticity. Ensure all chocolate and extracts are GF-certified.
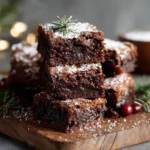
- Peppermint Crunch: Fold ½ cup crushed candy canes into truffle layer. Add ¼ tsp peppermint extract with vanilla. Finish with white chocolate drizzle and extra candy dust.
- Espresso Truffle: Steep 2 tbsp finely ground espresso beans in heated cream for 10 minutes before straining. Add 1 tsp instant espresso to truffle mixture. Top with chocolate-covered espresso beans.
- White Chocolate Raspberry: Use white chocolate for truffle layer (reduce cream to ⅓ cup); fold in ⅓ cup freeze-dried raspberry powder + 2 tbsp fresh raspberry purée (strained). Garnish with fresh berries and edible rose petals.
- Salted Caramel Swirl: Prepare a batch of thick, cool salted caramel (no liquid corn syrup—use date syrup for chew). Dollop over truffle layer before chilling; marble gently with a skewer.
- Spiced Mexican Chocolate: Add 1 tsp ground cinnamon, ¼ tsp chipotle powder, and pinch of cayenne to brownie batter. Infuse cream with 1 whole star anise pod (removed before pouring over chocolate). Finish with candied pepitas.
- Boozy Bourbon Pecan: Add 2 tbsp bourbon to brownie batter and 1 tbsp to truffle layer. Toast 1 cup pecans; press half into truffle layer before chilling, reserve rest for garnish.
- Matcha Green Tea: Sift 1 tbsp ceremonial-grade matcha into brownie dry ingredients. Use white chocolate truffle layer infused with 1 tsp matcha in warmed cream. Dust with additional matcha pre-slicing.
- Keto/Low-Carb: Brownie base: almond flour + coconut flour blend, erythritol/monk fruit blend, sugar-free chocolate, and MCT oil instead of butter. Truffle layer: sugar-free chocolate + heavy cream + optional collagen peptides for structure. Sweeten with liquid stevia (adjust to taste).
Health Considerations and Nutritional Value
While Brownie Truffle Bars are inherently indulgent, mindful ingredient selection and portion awareness allow for enjoyment within balanced eating patterns. A standard 2×3-inch bar (approx. 85g) contains roughly:
- Calories: 320–380 kcal (varies by chocolate %, add-ins, and glaze)
- Total Fat: 20–24g (12–15g saturated; primarily from cocoa butter and dairy fat)
- Carbohydrates: 32–38g (26–30g sugars; naturally occurring + added)
- Fiber: 2–4g (enhance with 1–2 tbsp black chia seeds or ground flax in brownie base)
- Protein: 4–6g (boost with 1 scoop unflavored collagen or whey protein isolate blended into dry ingredients)
- Key Micronutrients: Iron (from cocoa), magnesium (critical for muscle/nerve function), potassium (supports blood pressure), and flavonoid antioxidants (linked to improved endothelial function and reduced oxidative stress)
Notable Considerations:
- Cocoa Content Matters: Bars made with ≥70% dark chocolate deliver significantly more flavanols—and less sugar—than milk chocolate versions. Look for “cocoa mass” or “cocoa solids” >60% on labels.
- Dairy Sensitivity Options: Lactose-intolerant individuals often tolerate small amounts of dark chocolate and heavy cream due to low lactose content; however, full substitution with coconut or oat alternatives is safe and effective.
- Sugar Awareness: Natural sweeteners like coconut sugar or maple syrup *do not* reduce glycemic load meaningfully. For blood sugar management, prioritize portion control and pair with protein/fat (e.g., serve with Greek yogurt or almonds).
- Allergen Notes: Contains tree nuts (if using walnuts/pecans), dairy, eggs, and soy (in most chocolate). Always label clearly for guests or gifting.
- Mindful Indulgence Framework: These bars align with the “80/20 rule”—80% nutrient-dense meals, 20% joyful treats. Their richness encourages slower consumption and greater satisfaction per bite versus highly processed snacks.
Consult a registered dietitian for personalized modifications—especially for diabetes management, pregnancy nutrition, or therapeutic ketogenic protocols.
Ingredients
Makes 16 bars (9×13-inch pan)
Brownie Base
- 8 oz (227g) unsweetened chocolate (100% cacao or 85% bittersweet), finely chopped
- 1 cup (227g / 2 sticks) unsalted butter, cubed
- 1¾ cups (350g) granulated sugar
- ¾ cup (150g) packed light brown sugar
- 2 tsp instant espresso powder
- 4 large eggs + 2 large egg yolks, room temperature
- 1 tbsp pure vanilla extract
- 1 cup (120g) all-purpose flour, spooned & leveled
- ½ tsp baking powder
- ½ tsp fine sea salt
Truffle Layer
- 6 oz (170g) high-quality semi-sweet or bittersweet chocolate (60–70% cacao), finely chopped
- ¾ cup (177ml) heavy cream (36–40% fat)
- 2 tbsp light corn syrup (optional, for gloss and stability)
- 1 tsp pure vanilla extract
- ¼ tsp flaky sea salt
Ganache Glaze (Optional)
- 4 oz (113g) dark chocolate (70%), finely chopped
- ½ cup (118ml) heavy cream
- 1 tbsp light corn syrup
- 1 tsp unsalted butter
Garnish (Optional)
- Flaky sea salt (e.g., Maldon)
- Toasted walnuts, pecans, or hazelnuts
- Edible gold dust or cocoa nibs
Directions
- Prepare Pan & Oven: Line a 9×13-inch metal baking pan with parchment paper, allowing 2-inch overhang on two opposite sides. Lightly grease parchment and exposed pan edges. Preheat oven to 325°F (163°C). Position rack in center.
- Melt Chocolate & Butter: In a heatproof bowl set over a saucepan of barely simmering water (do not let bowl touch water), combine unsweetened chocolate and butter. Stir constantly with a silicone spatula until fully melted and smooth, about 5–7 minutes. Remove from heat.
- Combine Sugars & Espresso: Whisk granulated sugar, brown sugar, and espresso powder into melted chocolate mixture until dissolved and glossy—about 1 minute.
- Add Eggs Gradually: One at a time, whisk in eggs and yolks, beating vigorously for 60 seconds after each addition until mixture thickens and ribbons slowly fall from whisk.
- Finish Batter: Stir in vanilla. Gently fold in flour, baking powder, and salt using a spatula—just until no dry streaks remain. Do not overmix.
- Bake Base: Pour batter into prepared pan. Spread evenly. Tap pan sharply twice on counter. Bake 22–26 minutes, rotating halfway, until edges are set and center jiggles slightly. Cool completely in pan on wire rack (min. 2 hours).
- Make Truffle Layer: While brownie cools, place chopped chocolate in bowl. Heat cream and corn syrup in saucepan until steaming (180°F). Pour over chocolate; wait 3 minutes. Stir gently until smooth. Stir in vanilla and salt. Cool 15–20 min at room temp until thickened (like soft peanut butter).
- Layer Truffle: Spread truffle mixture evenly over cooled brownie. Optional: marble with toothpick. Refrigerate uncovered 45–60 min until firm but cool—not cold.
- Apply Glaze (Optional): Heat cream until steaming. Pour over dark chocolate, corn syrup, and butter. Wait 3 min. Stir until glossy. Cool to 90°F. Pour over truffle layer; tilt to coat. Sprinkle with salt/nuts immediately.
- Chill & Slice: Refrigerate 2+ hours (or overnight). Using hot, dry knife, cut into 16 rectangles. Wipe and reheat knife between cuts. Serve slightly chilled.
FAQ
- Can I make these ahead of time?
- Absolutely. Brownie Truffle Bars improve in flavor over 24–48 hours as cocoa flavors meld. Fully assembled bars keep refrigerated for up to 1 week or frozen (un-glazed) for 3 months. Thaw overnight in fridge before glazing/serving.
- Why did my truffle layer crack or separate?
- Most commonly caused by temperature mismatch (warm brownie + cold truffle), excessive stirring after emulsification, or water contamination (even a drop of moisture causes chocolate to seize). Always cool brownie completely, temper truffle to ideal consistency, and use perfectly dry utensils.
- Can I use cocoa powder instead of chocolate for the brownie base?
- Not recommended for this recipe. Melted chocolate provides essential fat, structure, and emulsification for the truffle layer’s adhesion. Cocoa powder yields a drier, cake-like base incompatible with truffle topping. Reserve cocoa-only versions for classic brownies only.
- My ganache glaze is dull or streaky—what went wrong?
- Ganache requires precise temperature control. If poured above 92°F, it sets with a matte finish. If below 88°F, it becomes thick and streaky. Use a thermometer, stir gently (no whipping), and ensure chocolate is finely chopped for even melting.
- How do I prevent the bars from sticking to the knife?
- Use a long, thin, sharp chef’s knife. Dip blade in near-boiling water for 5 seconds, wipe *completely dry*, and cut in one confident motion. Repeat between every slice. Never saw back and forth.
- Can I bake these in a different size pan?
- Yes—with adjustments. For 8×8-inch: halve recipe, bake base 18–22 min. For 9×9-inch: use ¾ recipe, bake base 20–24 min. Always check doneness with toothpick and adjust truffle quantity proportionally.
- Are these safe for pregnant people or children?
- Yes—this recipe contains no raw eggs (fully baked base) or alcohol unless added intentionally (see Variations). For absolute safety, use pasteurized eggs and ensure all chocolate is from reputable sources with rigorous salmonella testing.
- What if I don’t have heavy cream?
- Substitute full-fat canned coconut milk (solid part only, chilled) for dairy-free truffle layers. For standard version, do not use half-and-half, whole milk, or evaporated milk—they lack sufficient fat and will cause splitting or graininess.
- Can I make these nut-free?
- Easily. Omit nut-based garnishes and verify chocolate is processed in a nut-free facility if severe allergy exists. No nuts are required in base or truffle layers.
- Why does my brownie base taste bland?
- Underseasoning is common. Ensure you use *fine* sea salt (not table salt) and measure espresso powder precisely—it’s a flavor amplifier, not a coffee note. Also, use high-cocoa chocolate (≥85%) for robust depth.
Summary
Brownie Truffle Bars are a masterclass in layered luxury—melding the dense, cocoa-rich soul of a perfected brownie with the silken, intensely chocolatey elegance of a handcrafted truffle, all held together by science-backed technique and ingredient intentionality.
From their historic roots in American kitchens and European chocolateries to today’s customizable, nutrition-conscious, and globally inspired iterations, these bars prove that the most memorable desserts honor tradition while inviting fearless creativity—one impeccably sliced, salt-flecked, melt-in-your-mouth bite at a time.