Brownie Ice Cream Sandwiches: The Ultimate Decadent Dessert
The History of Brownie Ice Cream Sandwiches
The concept of the ice cream sandwich dates back to the late 19th century, with roots believed to be in New York City’s Italian immigrant communities. Originally made with two thin wafers or cookies pressed around a scoop of ice cream, these frozen treats quickly became popular street food. Over time, bakers and dessert lovers began experimenting with different bases—chocolate chip cookies, oatmeal cookies, and even pancakes—leading to endless variations.
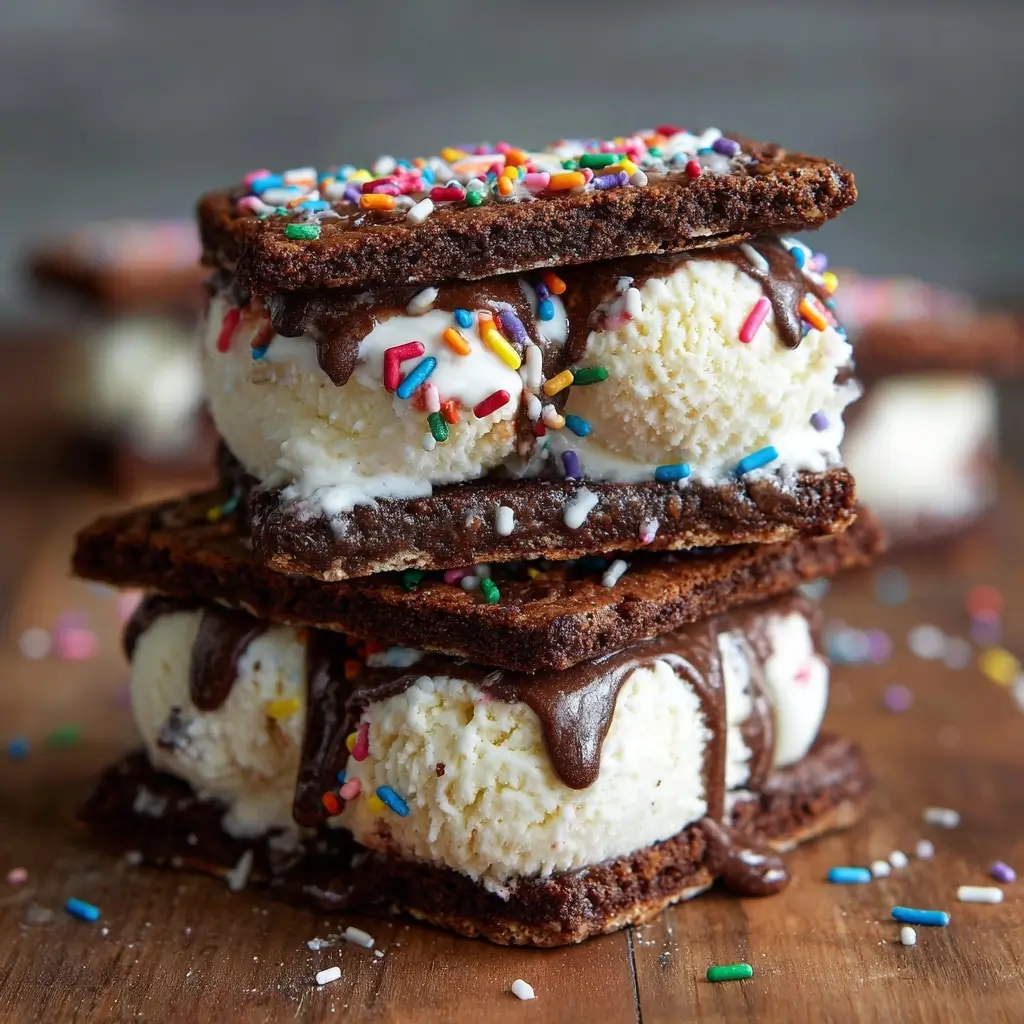
The Brownie Ice Cream Sandwich is a modern twist on this classic idea, combining two rich, fudgy brownies with a generous layer of creamy ice cream. This indulgent hybrid emerged in gourmet dessert cafes and home bakeries during the early 2000s, riding the wave of artisanal ice cream and decadent comfort foods. Today, it’s a staple at summer parties, bake sales, and upscale dessert menus, loved for its luxurious texture contrast and nostalgic flavor profile. It embodies the perfect marriage between warm-baked richness and cold, creamy refreshment—a true celebration of dessert innovation.
Ingredients Breakdown: What Makes This Recipe Special
The magic of Brownie Ice Cream Sandwiches lies in the quality and balance of ingredients used in both components: the brownies and the ice cream. Each ingredient plays a crucial role in achieving the ideal texture, flavor, and structure.
For the Brownies:
- Unsweetened Cocoa Powder: Provides deep chocolate flavor without added sugar. Opt for Dutch-processed cocoa for a smoother, richer taste.
- Dark Chocolate (70% cacao): Melted into the batter, it enhances fudginess and gives a glossy crumb.
- Butter: High-fat unsalted butter ensures moistness and helps create that signature crackly top.
- Granulated Sugar & Brown Sugar: A blend of both adds sweetness and moisture—brown sugar brings molasses notes and chewiness.
- Eggs: Bind the ingredients while contributing to lift and structure. Room temperature eggs integrate better.
- Vanilla Extract: Enhances overall flavor complexity with a warm, aromatic note.
- All-Purpose Flour: Just enough to provide structure without making the brownies cakey.
- Salt: Balances sweetness and intensifies chocolate flavor.
- Espresso Powder (optional): A small amount boosts chocolate intensity without adding coffee taste.
For the Ice Cream Layer:
- High-Fat Heavy Cream: Forms the base for homemade ice cream, delivering a luxuriously smooth texture.
- Whole Milk: Thins the mixture slightly while maintaining creaminess.
- Sugar: Sweetens and lowers the freezing point, preventing icy crystals.
- Vanilla Bean or Extract: Adds classic vanilla flavor; scraping a real bean offers speckled elegance.
- Optional Mix-ins: Crushed cookies, chocolate chips, caramel swirls, or chopped nuts can elevate your ice cream.
Optional Additions for Assembly:
- Melted Chocolate Coating: For dipping the finished sandwiches to seal in the ice cream.
- Sprinkles or Crushed Nuts: Rolled around the edges for visual appeal and crunch.
- Caramel or Fudge Drizzle: Adds gourmet flair before serving.
Step-by-Step Recipe: How to Make Brownie Ice Cream Sandwiches from Scratch
Part 1: Baking the Perfect Brownies
- Preheat oven to 350°F (175°C). Line a 9×9-inch baking pan with parchment paper, leaving overhang on two sides for easy removal.
- In a heatproof bowl, combine chopped dark chocolate and butter. Melt using a double boiler or microwave in 30-second bursts, stirring until smooth. Let cool slightly.
- In a large mixing bowl, whisk together sugars, eggs, and vanilla until well combined and slightly pale. Add the melted chocolate mixture and stir until fully incorporated.
- Sift in cocoa powder, flour, salt, and espresso powder (if using). Fold gently with a spatula until no dry streaks remain. Do not overmix.
- Pour batter into prepared pan and spread evenly. Tap pan lightly on counter to release air bubbles.
- Bake for 25–30 minutes, or until a toothpick inserted in the center comes out with moist crumbs (not wet batter).
- Cool completely in the pan on a wire rack. Once cooled, lift out using parchment and place on cutting board.
- Cut into squares approximately 3 inches wide. You’ll need about 12–16 squares depending on size.
Part 2: Making Homemade Vanilla Ice Cream (or Using Store-Bought)
- In a medium saucepan, heat heavy cream, milk, and half the sugar over medium heat until steaming but not boiling.
- Split a vanilla bean lengthwise and scrape seeds into the mixture (or add 2 tsp pure vanilla extract after heating).
- In a separate bowl, whisk egg yolks with remaining sugar until thick and lemon-colored.
- Slowly temper the yolks by pouring a small amount of hot cream into them while whisking constantly. Then pour everything back into the saucepan.
- Cook custard over low heat, stirring constantly, until it thickens enough to coat the back of a spoon (about 170°F / 77°C).
- Strain through a fine-mesh sieve into a clean bowl. Chill thoroughly in the refrigerator for at least 4 hours or overnight.
- Churn in an ice cream maker according to manufacturer instructions until soft-serve consistency.
- Transfer to a loaf pan, cover with parchment, and freeze for at least 4 hours or until firm.
- Alternatively: Use high-quality store-bought vanilla ice cream. Let soften slightly before assembling.
Part 3: Assembling the Ice Cream Sandwiches
- Take the frozen ice cream and let sit at room temperature for 3–5 minutes to become pliable.
- Place one brownie square on a work surface. Scoop a rounded portion of ice cream (about 1/3 cup) onto it.
- Top with another brownie square and press down gently until ice cream reaches edges.
- Use a knife to trim excess ice cream if needed for a neater look.
- Repeat with remaining brownies and ice cream.
- Wrap each sandwich individually in plastic wrap or parchment and freeze for at least 1 hour to set.
- Optional step: For a professional finish, dip sandwiches in tempered chocolate and roll in sprinkles or nuts.
Tips for Success: Expert Advice for Flawless Results
- Don’t overbake the brownies. They should be fudgy—not gooey, but definitely not dry. Err on the side of underbaking slightly.
- Use room temperature eggs and dairy. Cold ingredients can cause chocolate to seize or create lumps in batter.
- Chill brownies completely before cutting. Warm brownies will crumble when handled.
- Freeze assembled sandwiches quickly. To prevent melting, return them to the freezer immediately after assembly.
- Work fast when assembling. Keep ice cream only slightly softened—too soft and it oozes out; too hard and it cracks the brownies.
- Use parchment between layers. When storing multiple sandwiches, place parchment paper between them to prevent sticking.
- Invest in an ice cream scoop with a trigger release. Ensures consistent portions and cleaner assembly.
- Temper chocolate for coating. If you’re dipping in chocolate, proper tempering gives a shiny, snap-worthy shell.
- Label and date your batches. Homemade ice cream sandwiches are best consumed within 2–3 weeks.
Variations and Customizations: Make It Your Own
One of the greatest joys of Brownie Ice Cream Sandwiches is their versatility. Here are creative ways to customize them for every palate and occasion:
Flavor Twists on the Brownies:
- Peppermint Brownies: Add 1/2 tsp peppermint extract and fold in crushed candy canes before baking.
- Blondie Base: Swap cocoa for extra flour and add white chocolate chips for a caramelized alternative.
- Nutty Brownies: Fold in chopped walnuts, pecans, or hazelnuts for added crunch.
- Spiced Brownies: Add cinnamon, chili powder, or orange zest for a complex flavor profile.
- Gluten-Free: Substitute all-purpose flour with a gluten-free 1:1 baking blend.
- Vegan Brownies: Use flax eggs, plant-based butter, and dairy-free chocolate.
Ice Cream Varieties:
- Chocolate: Rich and intense—pairs beautifully with raspberry swirls.
- Strawberry: Offers a fruity contrast to dense chocolate brownies.
- Cookies and Cream: Crush Oreos into vanilla ice cream for a playful twist.
- Coffee: Complements chocolate with bold, aromatic depth.
- Mint Chip: Refreshing and classic—great for summer gatherings.
- Cookie Dough: Loaded with edible dough chunks for maximum indulgence.
- Dairy-Free: Use coconut milk or almond milk-based ice cream.
Seasonal & Holiday Ideas:
- Halloween: Orange-frosted brownies with pumpkin spice ice cream.
- Valentine’s Day: Pink-dipped edges with strawberry ice cream and heart-shaped sprinkles.
- Fourth of July: Red, white, and blue swirl ice cream with star-shaped cutters.
- Christmas: Peppermint ice cream with chocolate-dipped edges and crushed candy cane rims.
Gourmet Upgrades:
- Sea Salt Sprinkle: Finish with flaky sea salt on top for sweet-salty perfection.
- Caramel Core: Pipe caramel into the center of the ice cream layer before freezing.
- Liqueur-Infused: Add a splash of Kahlúa, Baileys, or Grand Marnier to the ice cream base (for adults only).
- Edible Gold Leaf: For ultra-luxurious presentation at special events.
Health Considerations and Nutritional Value
While Brownie Ice Cream Sandwiches are undeniably indulgent, understanding their nutritional content can help you enjoy them mindfully.
Nutritional Breakdown (Per Serving – One Sandwich, Approx. 4 oz):
| Nutrient | Amount |
|---|---|
| Calories | Approx. 380–450 kcal |
| Total Fat | 22–28g |
| Saturated Fat | 12–15g |
| Cholesterol | 70–90mg |
| Sodium | 180–220mg |
| Total Carbohydrates | 45–55g |
| Dietary Fiber | 2–3g |
| Sugars | 30–38g |
| Protein | 5–7g |
Health Notes:
- High in Saturated Fat and Sugar: Due to butter, cream, and sugar content. Best enjoyed occasionally as a treat.
- Energy-Dense: Ideal for active individuals needing calorie-dense snacks, but may contribute to weight gain if overconsumed.
- Contains Dairy and Eggs: Not suitable for those with allergies unless modified.
- Gluten Content: Standard recipe contains gluten; use certified gluten-free ingredients if needed.
- Antioxidants from Dark Chocolate: Cocoa contains flavonoids, which have been linked to heart health benefits in moderation.
Ways to Lighten the Recipe:
- Use low-fat Greek yogurt instead of some cream in ice cream.
- Reduce sugar by 25% and add stevia or monk fruit for sweetness.
- Choose unsweetened almond milk in place of whole milk.
- Bake brownies with black beans or avocado as partial fat substitutes (results vary).
- Serve smaller portions—mini sandwiches are just as satisfying!
Full Ingredient List
For the Brownies:
- 8 oz (225g) high-quality dark chocolate (70%), finely chopped
- 1/2 cup (115g) unsalted butter
- 1 cup (200g) granulated sugar
- 1/2 cup (100g) packed light brown sugar
- 3 large eggs, room temperature
- 1 tsp pure vanilla extract
- 1/2 cup (50g) unsweetened cocoa powder
- 1/2 cup (60g) all-purpose flour
- 1/4 tsp salt
- 1/4 tsp instant espresso powder (optional)
For the Homemade Vanilla Ice Cream:
- 2 cups (480ml) heavy whipping cream
- 1 cup (240ml) whole milk
- 3/4 cup (150g) granulated sugar
- 1 vanilla bean (or 2 tsp vanilla extract)
- 6 large egg yolks
For Assembly (Optional):
- 8 oz semi-sweet or dark chocolate, melted
- Sprinkles, crushed nuts, or cookie crumbs for coating
- Caramel or fudge sauce for drizzling
Directions Recap
- Bake brownies in a 9×9-inch pan at 350°F for 25–30 minutes. Cool completely, then cut into squares.
- Make custard-style ice cream: Heat cream, milk, and sugar; temper egg yolks; cook until thickened; chill and churn.
- Freeze ice cream until firm.
- Assemble sandwiches: Place ice cream between two brownie squares, press gently, trim excess.
- Wrap and refreeze for at least 1 hour.
- Optional: Dip in melted chocolate and decorate.
- Serve frozen and enjoy immediately!
Frequently Asked Questions (FAQ)
- Can I make Brownie Ice Cream Sandwiches ahead of time?
- Yes! Assemble up to 3 weeks in advance and store in an airtight container with parchment between layers. Freeze until ready to serve.
- Can I use store-bought brownies or ice cream?
- Absolutely. Soft, fudgy store-bought brownies work well. Premium ice creams like Häagen-Dazs or Ben & Jerry’s add convenience without sacrificing taste.
- Why did my ice cream leak out when I bit into the sandwich?
- This usually happens if the sandwich isn’t frozen long enough before eating. Let it sit at room temperature for just 1–2 minutes before serving to soften slightly.
- How do I prevent the brownies from breaking during assembly?
- Ensure brownies are fully cooled and not overbaked. Handle gently and avoid pressing too hard when closing the sandwich.
- Can I make mini versions?
- Yes! Use a muffin tin to bake mini brownie rounds or cut larger brownies into smaller shapes. Use a #40 scoop for bite-sized portions.
- Are there dairy-free options?
- Yes. Use dairy-free chocolate, vegan butter, and coconut milk-based ice cream. Many brands offer excellent alternatives.
- Can I bake the brownies in a different pan?
- You can use an 8×8-inch pan for thicker brownies (increase baking time by 5–7 minutes) or a jelly roll pan for thinner sheets.
- What’s the best way to cut brownies cleanly?
- Use a sharp knife dipped in hot water and wiped clean between cuts for smooth edges.
- Can I add alcohol to the ice cream?
- Yes, but keep it under 3 tablespoons per quart to avoid inhibiting freezing. Liqueurs like Kahlúa, Chambord, or Amaretto work well.
- My ice cream is too hard. How can I fix it?
- Let the sandwich sit at room temperature for 2–3 minutes before serving. Adding a tablespoon of corn syrup or vodka to the ice cream base can also improve scoopability.
Summary
Brownie Ice Cream Sandwiches are the ultimate fusion of chewy, chocolate-rich brownies and creamy, dreamy ice cream—perfect for summer nights, birthday parties, or anytime indulgence.
With endless customization options, make-ahead convenience, and restaurant-quality results, this decadent dessert is sure to become a beloved favorite in your culinary repertoire.