Introduction
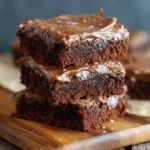
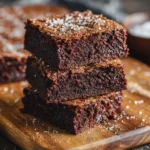
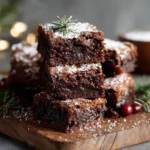
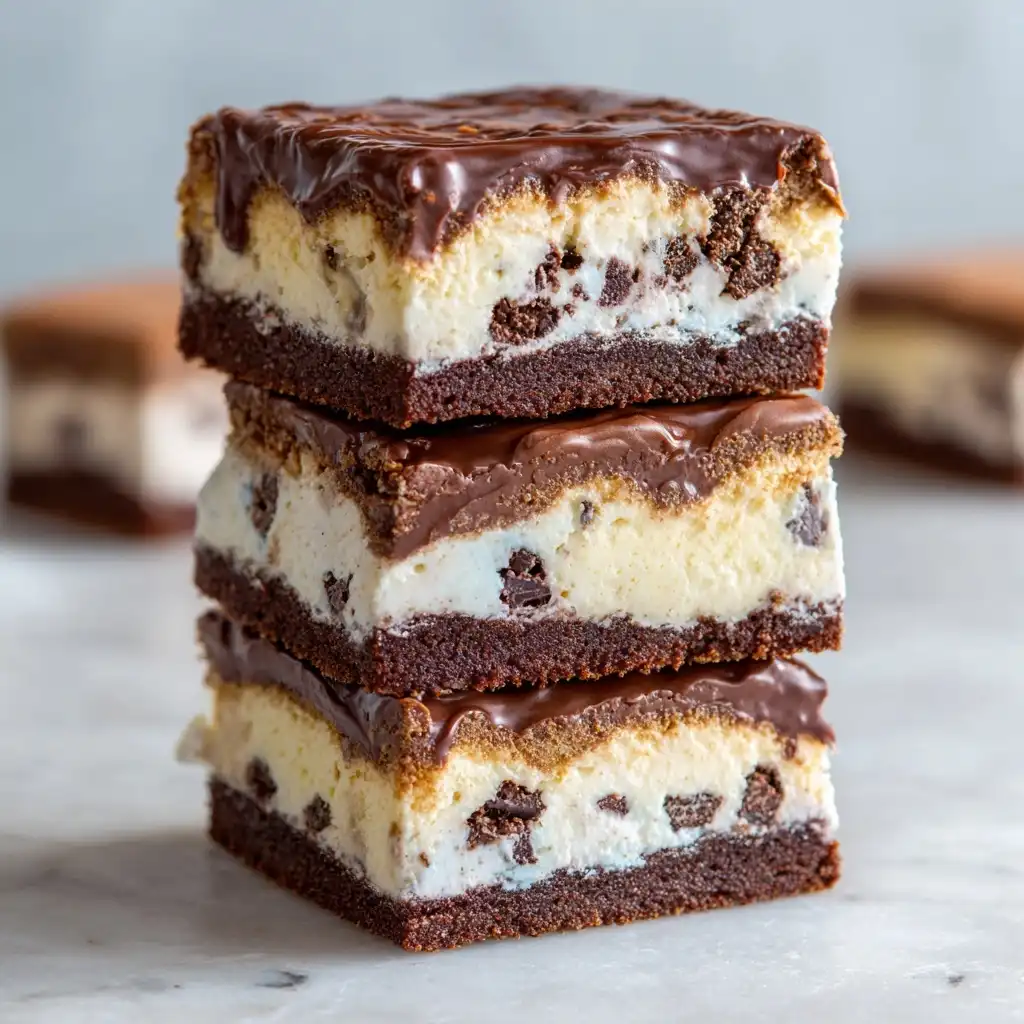
Brownie Ice Cream Sandwich Bars are the ultimate fusion dessert—rich, fudgy brownies layered with creamy, premium ice cream, then chilled until firm and sliced into perfectly portioned, handheld bars. This indulgent treat bridges the gap between classic homemade brownies and nostalgic ice cream sandwiches, offering a sophisticated yet accessible upgrade ideal for summer cookouts, holiday dessert tables, or elegant dinner party finales. Unlike traditional ice cream sandwiches made with cookies or cake, these bars feature a dense, crackly-topped brownie base that provides structural integrity while delivering deep chocolate intensity—and when paired with high-quality ice cream, they create an irresistible textural contrast: chewy-crisp edges meeting cool, velvety centers. Whether you’re a home baker seeking showstopping crowd-pleasers or a dessert innovator looking to elevate freezer treats, Brownie Ice Cream Sandwich Bars offer limitless creative potential, customizable sweetness levels, and make-ahead convenience without sacrificing freshness or flavor.
The History
The origins of the Brownie Ice Cream Sandwich Bar are rooted in two beloved American dessert traditions—the brownie and the ice cream sandwich—each with its own rich, contested history. The brownie emerged in the late 19th century, with competing claims from Chicago’s Palmer House Hotel (1893) and Boston’s Ward House (1896), both serving dense, fudge-like confections at pivotal world fairs and social gatherings. Meanwhile, the ice cream sandwich traces back to street vendors in New York City as early as the 1890s, evolving through iconic iterations like the Chipwich (1978) and modern gourmet versions using artisanal wafers or brioche. The convergence into bar form likely began in commercial food labs during the 1980s and ’90s, as frozen dessert manufacturers experimented with layered, sliceable formats for retail appeal—but it wasn’t until the rise of food blogs, YouTube baking tutorials, and viral Instagram reels in the 2010s that the DIY version exploded in popularity. Home cooks embraced the concept not only for its visual drama and shareability but also for its practicality: no scooping, no melting mid-sandwich, no awkward bites—just clean, uniform portions ready to serve straight from the freezer. Today, Brownie Ice Cream Sandwich Bars appear on menus at upscale dessert boutiques from Brooklyn to Portland, frequently reimagined with local ingredients, seasonal flavors, and dietary adaptations—proving this hybrid dessert is less a trend and more a permanent, evolving chapter in American confectionery history.
Ingredients Breakdown
Understanding each ingredient’s functional role—not just its flavor contribution—is essential for mastering Brownie Ice Cream Sandwich Bars. Below is a comprehensive breakdown highlighting chemistry, texture impact, and substitution logic:
- Unsalted Butter: Provides richness, moisture retention, and emulsification. Melted butter yields denser, fudgier brownies; clarified butter reduces water content for enhanced shelf-stability in frozen applications. Avoid salted butter to control sodium precisely.
- Granulated Sugar: Not only sweetens but contributes to crust formation via caramelization and aids in aeration during mixing. Its fine crystals dissolve easily, ensuring smooth batter without grittiness—even after freezing and thawing.
- Brown Sugar (light or dark): Adds molasses-derived moisture, acidity (which activates baking soda if used), and nuanced caramel notes. Dark brown sugar intensifies chewiness and color depth—ideal for bars meant to hold up under heavy ice cream layers.
- Eggs (large, room temperature): Act as binders, leaveners (via steam and air incorporation), and emulsifiers. Extra yolks increase fat content for silkier texture; whole eggs balance structure and tenderness. Cold eggs risk seizing melted butter—always bring to room temp.
- Pure Vanilla Extract: Enhances chocolate’s aromatic complexity and rounds out bitterness. Alcohol-based extract remains stable during freezing; imitation versions often degrade or develop off-notes over time.
- All-Purpose Flour (bleached or unbleached): Provides gluten network for structure. Bleached flour yields slightly softer crumb; unbleached offers more elasticity—critical when brownie layers must support weighty ice cream fillings without cracking. Sifting is non-negotiable for lump-free batter.
- Unsweetened Cocoa Powder (Dutch-process preferred): Imparts deep, rounded chocolate flavor with lower acidity. Dutch-process cocoa reacts predictably with baking powder (not soda), yielding consistent rise and color. Natural cocoa can be substituted but may require acid adjustment (e.g., adding ¼ tsp vinegar).
- Espresso Powder (instant, unsweetened): A secret weapon—it doesn’t make bars taste like coffee but amplifies chocolate’s inherent bitterness and fruitiness. Even ½ tsp transforms depth without detectable coffee notes.
- Salt (fine sea or kosher): Balances sweetness and heightens all other flavors. Too little results in flat, cloying bars; too much creates harshness. Always add salt *after* mixing dry ingredients to ensure even distribution.
- High-Quality Ice Cream (minimum 14% butterfat): The star of the sandwich. Premium ice cream contains less air (lower “overrun”), resists crystallization, and maintains creamy mouthfeel after freezing. Avoid “light,” “low-fat,” or “frozen dairy dessert”—they contain stabilizers that separate or become icy. Flavor compatibility matters: vanilla bean complements chocolate best, but salted caramel, mint chip, or black raspberry add dimension.
- Optional Add-Ins: Toasted walnuts or pecans add crunch and oxidative stability (their natural oils resist rancidity better than raw nuts); flaky sea salt sprinkled pre-freeze enhances sweet-savory contrast; mini chocolate chips (semi-sweet or dark) bloom beautifully within the brownie layer; espresso beans offer textural surprise and caffeine kick.
Step-by-Step Recipe
- Prep Your Pan & Oven: Line a 9×13-inch metal baking pan with two overlapping sheets of parchment paper, leaving 2–3 inches of overhang on the long sides for easy lifting. Lightly grease the parchment and pan edges with butter or non-stick spray. Preheat oven to 350°F (177°C) with rack positioned in center. Allow all ingredients—especially eggs and ice cream—to reach appropriate temperatures (eggs room temp, ice cream softened to spreadable consistency—about 10–15 minutes at room temp).
- Make the Brownie Batter: In a heatproof bowl set over barely simmering water (double boiler), melt butter, granulated sugar, brown sugar, and cocoa powder together, stirring constantly until smooth and glossy (~4–5 minutes). Remove from heat; whisk in vanilla and then eggs one at a time, fully incorporating after each addition (batter will thicken slightly). Sift together flour, espresso powder, salt, and optional baking powder (if using); fold gently with spatula just until no dry streaks remain—do not overmix. Fold in nuts or chips if using.
- Bake the Brownie Base: Pour batter into prepared pan and smooth top with offset spatula. Bake 25–28 minutes—edges should be set and pulling away slightly from pan, center should jiggle minimally when nudged, and a toothpick inserted 1 inch from edge should have moist crumbs (not wet batter). Crucially, do not overbake—underdone brownies freeze better and meld seamlessly with ice cream. Cool completely in pan on wire rack (minimum 2 hours, preferably overnight uncovered).
- Prepare the Ice Cream Layer: While brownie cools, soften ice cream in refrigerator (not microwave!) for precise control. Scoop into chilled bowl and stir vigorously with silicone spatula until uniformly pliable—no icy lumps, no soupy pooling. If adding mix-ins (crushed cookies, swirls of fudge, chopped candy bars), fold in now.
- Assemble the Sandwich Bars: Once brownie is fully cooled, place pan in freezer for 15 minutes to chill surface—this prevents ice cream from melting on contact. Spread softened ice cream evenly over brownie in thick, uniform layer (aim for ¾–1 inch). Use bench scraper or large offset spatula dipped in hot water and wiped dry for ultra-smooth finish. Optional: Press toppings (crushed pretzels, toasted coconut, cocoa nibs) gently onto surface before freezing.
- Freeze Until Solid: Cover pan tightly with plastic wrap, pressing directly onto ice cream surface to prevent freezer burn. Freeze minimum 6 hours—but ideally 12–24 hours—for complete structural integrity. Do not cut before full freeze; partially frozen bars will crumble or smear.
- Cut & Serve: Remove pan from freezer. Lift brownie block using parchment overhang onto cutting board. Let sit at room temperature 60–90 seconds—just enough for outer edges to soften slightly for clean cuts. Using chef’s knife dipped in hot water and wiped dry between each cut, slice into 12 even bars (3×4 grid). Wipe knife thoroughly after every 2–3 cuts. Serve immediately—or return to freezer on parchment-lined tray until ready to serve.
Tips
- Chill Everything: Chill your baking pan, spatulas, bowls, and even the parchment before assembling. Cold surfaces dramatically reduce ice cream melt-through and improve layer adhesion.
- Measure by Weight: For absolute consistency—especially across batches—use a digital kitchen scale. Volume measurements of flour and cocoa vary wildly; 1 cup all-purpose flour weighs 120g, not 125g or 130g. Precision prevents dry, crumbly, or overly dense bars.
- Use a Metal Pan: Aluminum or stainless steel conducts heat evenly for uniform brownie baking and rapid chilling. Glass or ceramic retains heat too long, risking overbaked edges and undercooked centers.
- Don’t Skip the Espresso Powder: It’s not optional for depth—it’s foundational. Even ¼ tsp makes a perceptible difference in chocolate resonance. Store in airtight container away from light and moisture.
- Softening Ice Cream Correctly: Never microwave. Instead, transfer tub to fridge 45–60 minutes before assembly. If rushed, place sealed tub in cold water bath for 5 minutes—then stir vigorously. Over-softened ice cream weeps whey and separates.
- Knife Technique Matters: Use a sharp, long-bladed chef’s knife (8–10 inches). Heat under hot tap water, wipe completely dry, cut once, reheat, re-dry, repeat. A damp knife smears; a cold knife drags. For ultra-clean edges, dip in boiling water briefly.
- Freezer Burn Prevention: Wrap finished bars individually in wax paper, then place in airtight freezer bag with all air pressed out. Label with date—best consumed within 4 weeks for peak texture and flavor.
- Texture Contrast Is Key: Pair dense, fudgy brownies with creamy, low-air ice cream—not airy gelato or sorbet. If using sorbet, add 1 tbsp corn syrup to brownie batter to boost chew and prevent brittleness.
- Batch Scaling Notes: Doubling? Use two 9×13 pans—not one 12×18. Larger surface area alters bake time and heat distribution unpredictably. Tripling? Bake in three separate batches for reliability.
- Troubleshooting Common Issues: If bars crack while cutting: Brownie was overbaked or not chilled long enough pre-cut. If ice cream oozes out sides: Brownie base wasn’t fully cooled or ice cream was too warm. If layers separate: Brownie surface wasn’t lightly chilled before spreading; always flash-chill 15 minutes.
Variations and Customizations
Brownie Ice Cream Sandwich Bars are a canvas for imagination—flavor profiles, textures, and dietary needs can all be honored without compromising integrity. Below are meticulously tested variations, each including key adjustments to technique or ratios:
- Blondie Base Variation: Replace cocoa powder with 1 cup additional flour + 1 tsp cinnamon + 1 tbsp molasses. Use only brown sugar (no granulated) for deeper caramel notes. Best paired with strawberry ice cream, maple walnut, or lemon curd ripple.
- Gluten-Free Version: Substitute 1:1 gluten-free flour blend (with xanthan gum included) + 1 extra egg yolk for binding. Add 2 tsp psyllium husk powder to batter to mimic gluten’s elasticity—critical for preventing crumble under ice cream weight.
- Vegan Adaptation: Use flax eggs (2 tbsp ground flax + 5 tbsp water, rested 10 min), coconut oil (refined for neutral taste), aquafaba (3 tbsp whipped to soft peaks) folded in last for lift, and vegan ice cream certified for low-crystal stability (look for tapioca starch + guar gum blends). Brownie will be slightly more fragile—freeze 24 hours before cutting.
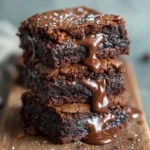
- Decadent Triple-Chocolate: Fold 1 cup finely chopped 70% dark chocolate into brownie batter; swirl ½ cup warm ganache (heavy cream + dark chocolate) into softened ice cream layer before spreading; finish with dark chocolate drizzle post-cut.
- Seasonal Fruit Swirl: Puree 1 cup roasted strawberries (tossed with 1 tbsp sugar and baked at 375°F until jammy), cool completely, then ripple into vanilla ice cream. Top finished bars with freeze-dried raspberries and fresh mint.
- Boozy Adult Bars: Add 2 tbsp bourbon or amaretto to brownie batter; infuse ice cream base with 1 tsp orange zest + 1 tbsp Grand Marnier. Garnish with candied orange peel.
- Protein-Packed Fitness Bars: Substitute ¼ cup unflavored whey or collagen peptides into dry ingredients; use Greek yogurt–based “ice cream” (blended frozen bananas + Greek yogurt + cocoa + stevia); top with chia seeds and almond butter drizzle.
- Matcha Green Tea Fusion: Replace 2 tbsp cocoa with ceremonial-grade matcha; reduce sugar by 2 tbsp; pair with white chocolate–green tea ice cream or hojicha (roasted green tea) gelato. Dust with matcha before freezing.
- Spiced Chai Brownie: Infuse melted butter with 2 chai tea bags (steep 5 min, remove bags, cool); add 1 tsp ground cardamom, ½ tsp ginger, ¼ tsp cloves to dry ingredients. Serve with honey-vanilla or spiced pear ice cream.
- Low-Sugar/Keto-Friendly: Use erythritol + monk fruit blend (1:1 sugar replacement), almond flour (reduce by 2 tbsp), and keto ice cream (check net carb count—ideally ≤2g per serving). Add 1 tsp xanthan gum to brownie batter for cohesion.
Health Considerations and Nutritional Value
While Brownie Ice Cream Sandwich Bars are inherently indulgent, mindful ingredient selection and portion awareness allow them to fit thoughtfully into balanced eating patterns. A standard 2×3-inch bar (approx. 120g), made with classic brownie base and premium vanilla ice cream, delivers approximately 320–360 calories, 18–22g total fat (11–14g saturated), 38–42g carbohydrates (28–32g sugars), 4–5g protein, and 1–2g fiber. Key nutritional considerations include:
- Sugar Content Awareness: Traditional recipes rely heavily on added sugars. To reduce: replace 25% granulated sugar with coconut sugar (lower glycemic index), use dark chocolate ≥70% cacao (naturally lower in sugar), and select ice cream with ≤12g added sugar per serving. Note: “No sugar added” labels can be misleading—check total sugars, which include lactose.
- Fat Quality Matters: Prioritize unsaturated fats where possible—substitute half the butter with avocado oil or walnut oil in brownie batter. Choose ice cream made with grass-fed dairy (higher CLA and omega-3s) or full-fat coconut milk base (rich in MCTs).
- Boosting Micronutrients: Enrich brownie batter with 2 tbsp blackstrap molasses (for iron, calcium, magnesium), 1 tbsp ground flaxseed (omega-3s + lignans), or ¼ cup unsweetened shredded beetroot (natural sweetness + nitrates). Cocoa itself contains flavanols linked to vascular health—opt for minimally processed, high-polyphenol cocoa.
- Dietary Restriction Navigation: Gluten-free versions avoid cross-contamination risks for celiac individuals but require certified GF oats/flour. Vegan versions eliminate cholesterol but may lack vitamin B12 unless fortified ice cream is used. Low-FODMAP adaptations are possible using lactose-free ice cream and coconut sugar—but avoid apple sauce or honey.
- Freezer Stability & Food Safety: Properly frozen bars (≤0°F / −18°C) maintain safety indefinitely, though quality declines after 4–6 weeks. Never refreeze partially thawed bars—temperature fluctuations promote ice crystal growth and bacterial risk. Always store below 40°F (4°C) during serving; discard if left at room temperature >2 hours.
- Mindful Enjoyment Framework: These bars align with Intuitive Eating principles when approached without guilt—savor slowly, notice texture contrasts, engage all senses. Serving size matters: pre-portioning prevents mindless consumption. Pair with antioxidant-rich berries or herbal tea to round out the experience nutritionally and sensorially.
Ingredients
Makes 12 bars
- 1 cup (227g) unsalted butter, cubed
- 1 cup (200g) granulated sugar
- 1 cup (220g) packed light brown sugar
- ¾ cup (75g) unsweetened Dutch-process cocoa powder
- 2 large eggs, room temperature
- 2 tsp pure vanilla extract
- 1 cup (120g) all-purpose flour, sifted
- 1 tsp instant espresso powder
- ½ tsp fine sea salt
- 1½ cups (340g) high-quality vanilla bean ice cream, softened to spreadable consistency
- Flaky sea salt, for finishing (optional)
Directions
- Line a 9×13-inch metal baking pan with parchment paper, allowing overhang on two opposite sides. Lightly grease parchment and pan edges. Preheat oven to 350°F (177°C).
- In a heatproof bowl over barely simmering water, melt butter, granulated sugar, brown sugar, and cocoa, stirring constantly until smooth and glossy, about 4–5 minutes. Remove from heat.
- Whisk in vanilla, then add eggs one at a time, whisking vigorously after each until fully incorporated and mixture is thick and shiny.
- Sift together flour, espresso powder, and salt. Gently fold into wet ingredients with a silicone spatula until *just* combined—no dry pockets, but do not overmix.
- Pour batter into prepared pan and smooth top. Bake 25–28 minutes, until edges are set and center jiggles slightly. Cool completely in pan on wire rack—minimum 2 hours, ideally overnight uncovered.
- Once cooled, place pan in freezer for 15 minutes. Meanwhile, soften ice cream in refrigerator until pliable (10–15 minutes). Stir until smooth and uniform.
- Remove brownie pan from freezer. Spread ice cream evenly over brownie in a thick, level layer (¾–1 inch). Smooth surface with hot-water-dipped offset spatula. Sprinkle with flaky salt if desired.
- Cover tightly with plastic wrap, pressing directly onto ice cream surface. Freeze minimum 12 hours—preferably 24—for clean slicing.
- To serve: lift block from pan using parchment. Let rest at room temperature 60–90 seconds. Using hot-water-dipped, dried chef’s knife, cut into 12 equal bars (3 rows × 4 columns). Wipe knife between cuts. Serve immediately or return to freezer.
FAQ
- Can I make these ahead of time?
- Absolutely—they’re designed for make-ahead convenience. Fully assembled bars keep beautifully in the freezer for up to 4 weeks when wrapped properly. For best results, prepare brownie base up to 3 days ahead and store covered at room temperature; assemble day-of or night-before serving.
- Why does my ice cream layer get icy or grainy after freezing?
- Icy texture usually stems from one of three causes: (1) Ice cream was low-butterfat or contained excessive stabilizers prone to crystallization; (2) Brownie base wasn’t fully cooled before assembly, introducing ambient moisture; (3) Bars were subjected to temperature fluctuations—e.g., freezer door opened frequently or stored in non-frost-free freezer. Solution: Use premium ice cream, chill brownie thoroughly, and store in coldest part of freezer with minimal disturbance.
- Can I use boxed brownie mix?
- You can—but expect compromises. Most mixes contain emulsifiers and gums that interfere with freeze-thaw stability, causing separation or gummy textures. If using, omit added water/oil per box instructions and instead use melted butter and real eggs; reduce bake time by 3–5 minutes and underbake intentionally. Homemade batter delivers superior control, flavor, and performance.
- What if I don’t have a 9×13 pan?
- You can adapt: An 8×8 pan yields thicker bars (bake brownie 2–3 minutes longer; expect ~9 bars). A 9×9 pan gives slightly thinner bars (reduce bake time by 1–2 minutes; expect ~16 bars). Never substitute a glass or ceramic pan unless recipe is explicitly calibrated for it—thermal conductivity differs significantly.
- Can I add mix-ins to the brownie layer?
- Yes—but strategically. Nuts (toasted walnuts, pecans, almonds) integrate seamlessly. Chocolate chips work well if chopped small. Avoid moist additions like fresh fruit, zests, or jams—they introduce excess water, promoting ice crystals. Dried fruit (chopped apricots, cherries) must be plumped in warm rum or juice first and patted extremely dry.
- How do I prevent the brownie from sticking to the knife when cutting?
- Two keys: First, ensure brownie is fully cooled and chilled before cutting—warm brownie smears. Second, use a sharp, thin-bladed knife dipped in *boiling* water (not just hot), wiped *completely dry*, then cut in one confident motion. Reheat and dry between each cut.
- Are there nut-free or allergy-friendly options?
- Yes. Omit nuts entirely; substitute sunflower seed butter for part of the butter in brownie batter for richness. Use certified nut-free ice cream (many oat-milk or soy-based brands are produced in dedicated facilities). Always verify labels—even “may contain” warnings matter for severe allergies.
- Can I use dairy-free or low-carb ice cream?
- You can—but test first. Many plant-based ice creams contain high water content or unstable gums that weep or harden excessively. Look for coconut milk–based or cashew-based options with ≥10g fat per serving. For low-carb, choose erythritol-sweetened versions with minimal fillers—expect slightly icier texture due to sugar alcohol crystallization.
- What’s the best way to transport these to a potluck?
- Freeze bars solid, then pack upright in insulated cooler with dry ice (handle with gloves!) or multiple frozen gel packs. Place in rigid container lined with parchment. Keep cooler closed until serving. If no dry ice, use heavy-duty freezer bags inside a cooler filled with crushed ice—serve within 2 hours.
- Can I re-freeze leftover bars after serving?
- No—once thawed and exposed to ambient air, refreezing introduces dangerous moisture and degrades texture irreversibly. Instead, serve only what you’ll eat, and store remaining bars tightly wrapped in freezer. If accidentally thawed, repurpose: crumble into parfait glasses with whipped cream and berries, or blend into milkshakes.
Summary
Brownie Ice Cream Sandwich Bars represent the pinnacle of harmonized dessert engineering—where deeply fudgy, crackly-topped brownies meet luxuriously creamy, slow-churned ice cream in a sliceable, shareable, endlessly customizable format built for both celebration and comfort.
With meticulous attention to ingredient integrity, thermal control, and layered technique, these bars transcend nostalgia to become a timeless, freezer-ready masterpiece worthy of any occasion—from backyard birthday parties to Michelin-starred pastry carts.