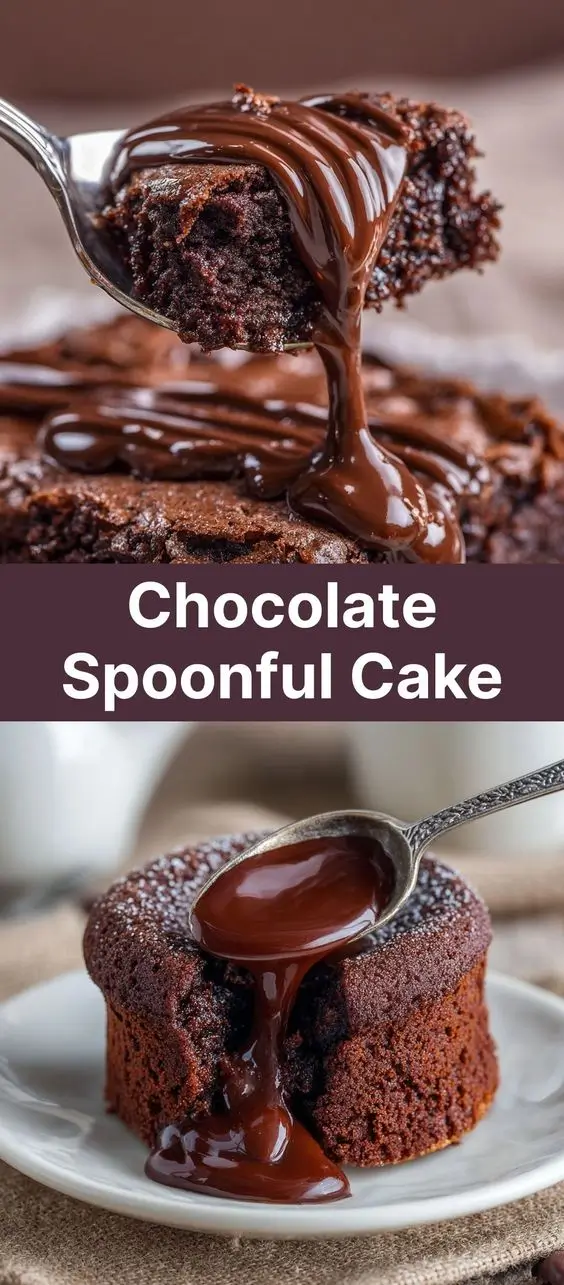
Chocolate Spoonful Cake: A Decadent, Easy-to-Make Dessert That Melts in Your Mouth
The History of Chocolate Spoonful Cake
The origins of the Chocolate Spoonful Cake can be traced back to mid-20th century American home baking traditions, where simplicity and resourcefulness were prized. As households began to embrace convenience without sacrificing flavor, recipes that required minimal tools and effort gained popularity—especially during the post-war era when time-saving kitchen hacks became essential. The term “spoonful” likely originated from the method of preparation, where ingredients were mixed directly in the baking pan using only a spoon, eliminating the need for mixers, blenders, or multiple bowls.
This cake evolved as a variation of Depression-era desserts, such as “wacky cake” or “crazy cake,” which were made without eggs, milk, or butter—ingredients that were often scarce or expensive. Instead, these cakes used pantry staples like sugar, flour, cocoa, vinegar, and oil, relying on chemical reactions (baking soda and vinegar) to create a light, fluffy texture. Over time, bakers adapted the recipe by incorporating richer ingredients, turning it into a moist, intensely chocolatey treat suitable for any occasion.
Today, the Chocolate Spoonful Cake is celebrated not only for its nostalgic charm but also for its incredible ease and consistent results. It has become a favorite among beginner bakers, busy parents, campfire cooks, and even professional pastry chefs looking for a quick fix. Its no-fail nature and one-bowl approach have earned it a permanent spot in community cookbooks, family recipe boxes, and online culinary forums worldwide.
Ingredients Breakdown: What Makes This Cake So Special?
The magic of the Chocolate Spoonful Cake lies in its clever combination of simple, accessible ingredients that work together to produce a rich, moist crumb with deep chocolate flavor—all without requiring eggs, dairy, or complicated techniques. Let’s take a closer look at each component and understand why they’re essential:
- All-Purpose Flour: Provides the structural foundation of the cake. It contains gluten-forming proteins that give the cake its shape and soft chew. Sifting ensures a lump-free batter and lighter texture.
- Granulated Sugar: Not only does sugar sweeten the cake, but it also helps retain moisture and contributes to browning during baking. Its granular nature aerates the mixture slightly when stirred.
- Cocoa Powder (Unsweetened): The star ingredient! High-quality unsweetened cocoa powder delivers intense chocolate flavor. Natural or Dutch-process cocoa can be used, though Dutch-process tends to yield a smoother, less acidic taste.
- Baking Soda: A leavening agent that reacts with acidic components (like vinegar and cocoa) to create carbon dioxide bubbles, making the cake rise and become fluffy.
- Salt: Enhances all the flavors and balances the sweetness. Even a small amount makes a noticeable difference in depth of taste.
- Vegetable Oil: Unlike butter, oil remains liquid at room temperature, contributing to a consistently moist texture. It also coats the flour proteins, reducing gluten development and yielding a tender crumb.
- Vanilla Extract: Adds warmth and complexity to the chocolate flavor. Pure vanilla extract is preferred over imitation for its richer aroma.
- Distilled White Vinegar: Sounds odd, but it’s crucial! When combined with baking soda, it creates an immediate reaction that lifts the batter. It also subtly enhances the cocoa’s richness without leaving a tangy aftertaste.
- Cold Water: The final touch that brings everything together. Using cold water slows down the initial activation of baking soda, allowing more gas to form in the oven for maximum rise. It also keeps the batter smooth and easy to pour.
Optional add-ins like chocolate chips, espresso powder, or a pinch of cinnamon can elevate the flavor profile even further, making this cake endlessly customizable while maintaining its humble roots.
Step-by-Step Recipe: How to Make Chocolate Spoonful Cake
Making a Chocolate Spoonful Cake is delightfully straightforward—so simple that you can prepare it in under 10 minutes before baking. Here’s how to do it right, step by step:
- Preheat the Oven: Begin by preheating your oven to 350°F (175°C). This ensures the oven reaches the perfect temperature by the time your batter is ready.
- Prepare the Baking Pan: Use an 8×8-inch or 9×9-inch square baking dish. Lightly grease the inside with butter or non-stick spray, then dust with a bit of cocoa powder to prevent sticking and enhance chocolate flavor. Alternatively, line it with parchment paper for easy removal later.
- Dry Ingredients: In the prepared baking pan, combine 1 cup (120g) all-purpose flour, 1 cup (200g) granulated sugar, 1/3 cup (30g) unsweetened cocoa powder, 1 teaspoon baking soda, and 1/2 teaspoon salt. Mix thoroughly with a spoon until evenly blended and no streaks remain.
- Wet Ingredients: Make three small wells in the dry mixture. Into one well, pour 1/3 cup (75ml) vegetable oil. Into another, add 1 teaspoon vanilla extract. Into the third, carefully pour 1 teaspoon distilled white vinegar.
- Combine Everything: Slowly pour 1 cup (240ml) of cold water over the entire mixture. Begin stirring with a spoon, starting from the center and gradually incorporating the dry ingredients. Stir until the batter is completely smooth and uniform, about 1–2 minutes. Be sure to scrape the corners and edges of the pan.
- Bake: Place the pan directly into the preheated oven. Bake for 30 to 35 minutes, or until a toothpick inserted into the center comes out clean or with just a few moist crumbs.
- Cool: Remove the cake from the oven and let it cool in the pan for at least 20–30 minutes before slicing. This allows the structure to set and prevents crumbling.
- Serve: Cut into squares and serve as-is, or dress it up with powdered sugar, whipped cream, ice cream, or a drizzle of chocolate ganache.
No mixer? No problem. No eggs? No dairy? Still delicious. This cake proves that extraordinary desserts don’t require extravagant ingredients or skills—just love and a good spoon.
Tips for the Perfect Chocolate Spoonful Cake
While this cake is nearly foolproof, a few expert tips can help you achieve bakery-quality results every single time:
- Use Quality Cocoa Powder: Since cocoa is the dominant flavor, opt for a reputable brand like Ghirardelli, Hershey’s Special Dark, or Valrhona. The better the cocoa, the richer the taste.
- Don’t Overmix: Once you add the water, stir just until combined. Overmixing can lead to a tougher texture due to excess gluten development.
- Check Oven Temperature: An oven thermometer ensures accuracy. Too hot, and the cake may crack or dry out; too cool, and it won’t rise properly.
- Test for Doneness Early: Start checking at 28 minutes. Every oven behaves differently, and overbaking leads to dryness.
- Add Espresso Powder: For a deeper chocolate note, mix 1/2 teaspoon instant espresso powder into the dry ingredients. It won’t make the cake taste like coffee—it enhances the chocolate!
- Let It Cool Completely: Cutting too soon can cause the cake to crumble. Patience rewards you with cleaner slices.
- Store Properly: Keep leftovers covered at room temperature for up to 2 days or refrigerate for up to 5 days. Reheat gently in the microwave for 10 seconds for a warm, fudgy experience.
- Double the Batch: This cake freezes beautifully. Wrap cooled slices tightly in plastic wrap and store in a freezer-safe bag for up to 3 months. Thaw at room temperature before serving.
Variations and Customizations
One of the greatest strengths of the Chocolate Spoonful Cake is its versatility. Whether you’re catering to dietary restrictions, seasonal moods, or adventurous palates, there are countless ways to personalize this classic dessert:
- Gluten-Free Version: Substitute the all-purpose flour with a 1:1 gluten-free baking blend (like Bob’s Red Mill or King Arthur). Ensure your cocoa powder and other ingredients are certified gluten-free.
- Vegan Option: Already naturally vegan (no eggs or dairy), so simply ensure your sugar is vegan-friendly (some refined sugars use bone char).
- Double Chocolate: Fold in 1/2 cup of semi-sweet chocolate chips or chunks before baking for extra melty pockets of chocolate.
- Orange Zest Infusion: Add 1 tablespoon of fresh orange zest to the wet ingredients for a citrus-chocolate twist reminiscent of gourmet truffles.
- Mint Chocolate: Replace vanilla extract with 1/2 teaspoon peppermint extract for a refreshing holiday-inspired treat.
- Spiced Chocolate Cake: Add 1/2 teaspoon ground cinnamon, a pinch of cayenne, and a dash of nutmeg for a Mexican hot chocolate vibe.
- Peanut Butter Swirl: Drop spoonfuls of creamy peanut butter onto the batter and swirl with a knife before baking. Kids—and adults—will adore this combo.
- Mini Muffin Version: Pour the batter into a greased or lined muffin tin and bake at 350°F for 18–22 minutes for adorable individual treats.
- Layered Cake: Double the recipe and bake in two 6-inch round pans. Cool, then stack with chocolate buttercream for a special occasion layer cake.
- Campfire-Friendly Skillet Cake: Use a cast-iron skillet and bake over a campfire or portable stove. Cook covered with hot coals on top for even heat distribution.
You can even turn leftovers into cake pops, trifles, or parfaits by crumbling and layering with whipped cream and berries. The possibilities are limited only by your imagination!
Health Considerations and Nutritional Value
While the Chocolate Spoonful Cake is undeniably indulgent, understanding its nutritional content can help you enjoy it mindfully. Here’s an approximate breakdown per serving (based on 9 servings):
| Nutrient | Amount per Serving |
|---|---|
| Calories | 240 kcal |
| Total Fat | 9g |
| Saturated Fat | 1.5g |
| Cholesterol | 0mg (vegan-friendly) |
| Sodium | 320mg |
| Total Carbohydrates | 38g |
| Dietary Fiber | 2g |
| Sugars | 24g |
| Protein | 2g |
Health Notes:
- Low in Cholesterol: Because it contains no eggs or dairy, this cake is naturally cholesterol-free, making it suitable for heart-healthy diets when consumed in moderation.
- Vegan and Dairy-Free: Ideal for those following plant-based lifestyles or managing lactose intolerance.
- Gluten Sensitivity: Can be adapted to gluten-free with proper flour substitution.
- Sugar Content: Relatively high in added sugars. To reduce, consider replacing up to 1/4 cup of sugar with coconut sugar or maple syrup (though texture may vary slightly).
- Fiber Boost: Add 2 tablespoons of ground flaxseed or oat fiber to increase fiber content and improve satiety.
- Portion Control: Serve smaller squares alongside fruit or yogurt to balance the meal.
While not a health food, this cake can absolutely fit into a balanced diet when enjoyed occasionally. Its lack of animal products and reliance on simple ingredients make it one of the more inclusive desserts you can share with diverse dietary needs.
Ingredients
- 1 cup (120g) all-purpose flour (or gluten-free alternative)
- 1 cup (200g) granulated sugar
- 1/3 cup (30g) unsweetened cocoa powder (natural or Dutch-process)
- 1 teaspoon baking soda
- 1/2 teaspoon salt
- 1/3 cup (75ml) vegetable oil (canola, sunflower, or grapeseed)
- 1 teaspoon pure vanilla extract
- 1 teaspoon distilled white vinegar
- 1 cup (240ml) cold water
Optional Add-Ins: 1/2 tsp espresso powder, 1/2 cup chocolate chips, 1 tbsp orange zest, or 1/2 tsp cinnamon.
Directions
- Preheat oven to 350°F (175°C). Grease an 8×8-inch or 9×9-inch baking pan and lightly dust with cocoa powder.
- In the pan, whisk together flour, sugar, cocoa powder, baking soda, and salt until well combined.
- Create three small wells in the mixture. Pour oil into one, vanilla into another, and vinegar into the third.
- Slowly pour cold water over everything. Stir with a spoon until smooth and fully incorporated, about 1–2 minutes.
- Bake for 30–35 minutes, or until a toothpick inserted in the center comes out clean.
- Cool in the pan for 20–30 minutes before slicing.
- Serve plain or with toppings of choice. Store leftovers in an airtight container at room temperature for up to 2 days.
FAQ
Can I make this cake without vinegar?
While vinegar plays a key role in leavening, you can substitute it with apple cider vinegar, lemon juice, or even lime juice. Avoid omitting it entirely, as the cake may turn out dense.
Why does this cake use water instead of milk?
Water keeps the recipe simple, affordable, and dairy-free. It also allows the cocoa flavor to shine without competing with dairy notes.
Can I use melted butter instead of oil?
Yes, though the texture will be slightly denser. Oil produces a moister crumb because it remains liquid at room temperature.
Is this cake truly “one bowl”?
Absolutely! The entire mixing happens in the baking pan—no extra bowls needed. Just one spoon and you’re done.
Can I double the recipe?
Yes, double the ingredients and bake in a 9×13-inch pan for 35–40 minutes. Adjust baking time as needed.
Why did my cake sink in the middle?
Common causes include underbaking, opening the oven too early, or inaccurate measurements. Ensure your baking soda is fresh and your oven is fully preheated.
Can I make it ahead of time?
Yes! This cake actually tastes better the next day as flavors meld. Store covered at room temperature or refrigerate for longer shelf life.
Can I freeze Chocolate Spoonful Cake?
Yes, slice and wrap tightly in plastic wrap, then place in a freezer bag. Freeze for up to 3 months. Thaw at room temperature before serving.
Summary
The Chocolate Spoonful Cake is a timeless, no-fuss dessert that combines pantry staples into a rich, moist, and deeply chocolatey treat—ready in under an hour with just one spoon and a baking pan.
Perfect for beginners, vegans, last-minute guests, or anyone craving chocolate comfort, this easy recipe proves that sometimes, the simplest desserts are the most unforgettable.