Introduction
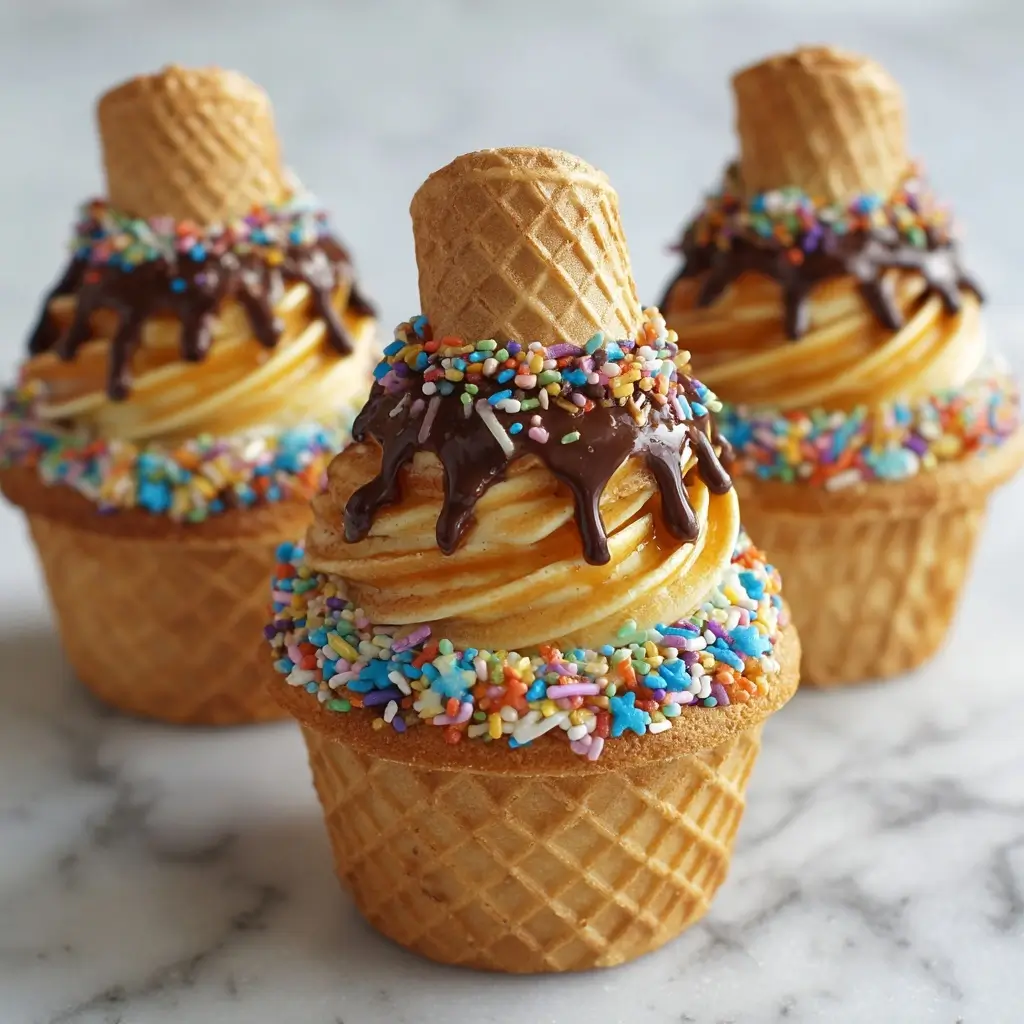
Waffle Cone Cupcakes are a whimsical, visually stunning, and irresistibly delicious fusion dessert that marries the nostalgic crunch of an ice cream waffle cone with the moist, tender crumb of a classic cupcake. More than just a novelty treat, they represent the joyful evolution of American baking—where presentation, texture, and flavor converge in a single, handheld indulgence. These cupcakes are not merely baked goods; they’re edible centerpieces—ideal for birthday parties, summer BBQs, carnival-themed events, baby showers, or even as gourmet gifts. Each cupcake features a real, sturdy waffle cone embedded into the batter, acting both as a structural base and a flavorful, golden-brown contrast to the soft cake surrounding it. Topped with swirls of creamy frosting, drizzles of caramel or chocolate, and garnishes like sprinkles, crushed nuts, or mini candies, Waffle Cone Cupcakes deliver multi-sensory delight—crunchy, fluffy, sweet, cool (when paired with ice cream), and utterly Instagram-worthy.
The History
While no single inventor or documented origin story exists for Waffle Cone Cupcakes, their emergence can be traced to the broader culinary trend of “deconstructed desserts” and “cupcake innovation” that surged in the mid-2000s—fueled by the cupcake renaissance ignited by bakeries like Magnolia Bakery and TV shows like *Ace of Cakes* and *Cupcake Wars*. The concept cleverly borrows from two iconic American food milestones: the invention of the ice cream cone at the 1904 St. Louis World’s Fair (often credited to Ernest Hamwi, a Syrian immigrant who rolled a zalabia wafer into a cone to help an ice cream vendor) and the post-war cupcake boom, when home bakers embraced portion-controlled, festive cakes baked in muffin tins. Early iterations appeared on food blogs around 2008–2010, where craft bakers began experimenting with edible cupcake “liners”—first using sugar cones, then upgrading to sturdier Belgian-style waffle cones. By 2013, high-end patisseries in Los Angeles, Miami, and Chicago were offering seasonal Waffle Cone Cupcakes as signature items, often pairing them with house-made salted caramel buttercream or bourbon-infused vanilla bean cake. Social media accelerated their popularity—particularly Pinterest and Instagram—where their photogenic shape, golden lattice texture, and built-in “handle” made them viral darlings. Today, they’re a staple at bakery pop-ups, wedding dessert tables, and even fine-dining pastry programs seeking playful sophistication.
Ingredients Breakdown
Every element of the Waffle Cone Cupcake is intentionally chosen for function, flavor synergy, and structural integrity. Below is a comprehensive analysis of each component:
- Waffle Cones: Use plain, unsweetened, extra-crispy Belgian-style waffle cones (not sugar cones or chocolate-dipped varieties). Their dense, honeycombed structure withstands oven heat without collapsing or becoming overly greasy. Avoid cones with excessive corn syrup or preservatives—they may weep moisture or burn. Ideal height: 4–4.5 inches for standard cupcake liners; width at base should comfortably fit within a standard muffin cavity (approx. 2.25″ diameter).
- All-Purpose Flour: Provides gluten structure without toughness. For enhanced tenderness, substitute up to 25% with cake flour—or add 1 tbsp cornstarch per cup of AP flour.
- Granulated Sugar: Not only sweetens but aids in creaming, aeration, and crust formation. Fine-grain sugar dissolves more evenly than coarse varieties.
- Brown Sugar (light or dark): Adds moisture, depth, and subtle molasses notes—especially complementary to caramel, cinnamon, or maple variations. Dark brown sugar increases chewiness and richness.
- Unsalted Butter: Must be softened—not melted—to properly cream with sugar and trap air. European-style butter (82–86% fat) yields superior flavor and finer crumb.
- Eggs: Large, room-temperature eggs emulsify the batter and provide lift. Extra yolks (1–2) enhance richness and moisture retention.
- Buttermilk: The acidity tenderizes gluten while reacting with baking soda for optimal rise. Substitute with DIY buttermilk (1 cup milk + 1 tbsp white vinegar or lemon juice, rested 5 minutes) if unavailable.
- Vanilla Extract: Pure, Madagascar Bourbon vanilla adds aromatic complexity. For elevated versions, infuse whole vanilla beans into warm milk or butter.
- Baking Powder & Baking Soda: Dual-leavening system ensures both initial lift (baking powder) and late-stage expansion (soda activated by buttermilk acid), counteracting the weight of the cone.
- Salt: Enhances all flavors and balances sweetness. Use fine sea salt or kosher salt—avoid iodized table salt for best taste.
- Optional Flavor Boosters: Espresso powder (½ tsp) intensifies chocolate; almond extract (¼ tsp) complements vanilla; citrus zest (1 tsp lemon/orange) brightens rich batters.
Step-by-Step Recipe
- Prep Work (30 min ahead): Preheat oven to 350°F (177°C). Line a standard 12-cup muffin tin with parchment or silicone cupcake liners—do not grease the pan. Gently press one waffle cone upright into each liner, ensuring it sits straight and stable. If cones wobble, trim ¼” off the tip with kitchen shears (discard scraps or save for toppings). Chill cones in freezer for 10 minutes—this prevents premature softening during batter pouring.
- Cream Butter & Sugars (5 min): In a large bowl, beat softened unsalted butter, granulated sugar, and brown sugar with an electric mixer on medium-high for 4–5 minutes until pale, fluffy, and free of graininess. Scrape bowl thoroughly.
- Incorporate Eggs (2 min): Add eggs one at a time, beating well after each addition (30 sec per egg). Add extra yolks now if using. Mix in pure vanilla extract. Batter should be smooth and slightly thickened.
- Dry Ingredients (1 min): In a separate bowl, whisk together flour, baking powder, baking soda, and salt. Sift once for uniform distribution.
- Alternating Wet & Dry (3 min): On low speed, add ⅓ of dry ingredients → mix until just combined. Add ½ of buttermilk → mix until incorporated. Repeat with another ⅓ dry → remaining buttermilk → final ⅓ dry. Do not overmix; stop as soon as no streaks remain. Batter will be thick but pourable—like soft cookie dough.
- Filling the Cones (2 min): Using a large scoop (3 tbsp) or a piping bag with a wide tip, carefully spoon or pipe batter around the *outside* of each cone—filling only the space between the cone wall and the liner. Do not fill inside the cone unless making a filled version (see Variations). Fill to ¾ full—about ¾ inch below the rim. Smooth tops gently with an offset spatula.
- Baking (18–22 min): Place tin in center rack. Bake 18 minutes, then rotate pan 180°. Continue baking 2–4 more minutes until a toothpick inserted into the cake portion (not the cone) comes out clean or with moist crumbs. Edges should be lightly golden; cones should retain crispness—not darken excessively. Note: Ovens vary—start checking at 17 minutes.
- Cooling (Critical Step — 30+ min): Let cupcakes cool in pan for 15 minutes—this sets the cake-to-cone bond. Then, carefully lift each cupcake by the cone (not the cake) and transfer to a wire rack. Cool completely (minimum 25 minutes more) before frosting. Rushing this step causes frosting to melt or slide off.
- Frosting Application (5 min): Once fully cooled, pipe or spread frosting generously over the cake portion. For maximum visual impact, use a star tip and create tall, swirled peaks that cascade slightly over the cone’s upper rim. Garnish immediately while frosting is soft.
Tips
- Cone Selection Matters: Test cones beforehand! Some generic brands soften or discolor dramatically in heat. Opt for reputable brands like Joy, Golden Bowl, or store-brand “Belgian Waffle Cones” labeled “oven-safe” or “baking-grade.”
- Chill Before Baking: Freezing cones for 10 minutes pre-bake significantly reduces sogginess and helps maintain structural integrity during the initial steam phase.
- No Overfilling the Cone Interior: Unless intentionally making a “filled” variation (e.g., Nutella core), avoid adding batter inside the cone—it creates steam pockets that make the cone soggy or cause splitting.
- Rotate Mid-Bake: Essential for even browning. Cones absorb and radiate heat differently than metal pans—rotation prevents uneven crisping or scorching on one side.
- Use a Light-Colored Pan: Dark or nonstick muffin tins promote faster browning and may overcook cone bases. If using dark pans, reduce oven temp by 25°F.
- Cool Upside-Down Trick (Advanced): After initial 15-min cooling in pan, invert each cupcake onto a small ramekin so the cone hangs freely in air for 10 minutes—this encourages residual moisture to evaporate from the cone’s interior seam.
- Frosting Temperature: Buttercream must be at cool room temperature (65–68°F)—too cold and it cracks; too warm and it slides. Chill frosted cupcakes for 10 minutes before serving if ambient temps exceed 75°F.
- Storage Wisdom: Unfrosted cupcakes keep in an airtight container at room temp up to 2 days. Frosted versions refrigerate up to 4 days—but bring to room temp 30 minutes before serving to restore cone crunch. Never freeze fully assembled cupcakes—the cone becomes leathery.
- Piping Precision: Fit a piping bag with a large open-star tip (#1M or #2D). Hold vertically above cupcake and apply steady pressure while slowly spiraling outward from center—this builds height and ensures even coverage without dragging frosting down the cone.
- Garnish Timing: Apply crunchy toppings (sprinkles, toasted coconut, crushed pretzels) immediately after frosting while still tacky. Chewy or fresh toppings (berries, mint) go on just before serving.
Variations and Customizations
The versatility of Waffle Cone Cupcakes is nearly limitless—adaptable to dietary needs, seasonal produce, global flavors, and occasion-specific themes. Here’s an expansive guide to creative reinvention:
Flavor Profiles
- Classic Vanilla Bean: Infuse seeds from 1 split vanilla bean into warm buttermilk; fold into batter. Top with Madagascar vanilla Swiss meringue buttercream and edible gold leaf.
- Double Chocolate: Replace ¼ cup flour with unsweetened cocoa powder; add ½ tsp espresso powder. Fill cone interior with molten dark chocolate ganache before baking. Frost with chocolate fudge buttercream and dip cone rim in tempered dark chocolate.
- Lemon Blueberry: Fold 1 cup fresh blueberries (tossed in 1 tsp flour) into lemon-zest-infused batter. Frost with lemon curd–swirled cream cheese frosting and top with candied lemon peel.
- Maple Pecan: Substitute ¼ cup maple syrup for part of the brown sugar; add ½ cup toasted pecans to batter. Frost with maple brown butter Swiss meringue and garnish with candied pecans.
- Funfetti: Add ⅓ cup rainbow jimmies to batter (no need to coat in flour—they won’t bleed if added last). Frost with confetti-studded vanilla buttercream and finish with extra sprinkles pressed into sides.
Dietary Adaptations
- Gluten-Free: Use a 1:1 GF flour blend containing xanthan gum (e.g., Bob’s Red Mill or King Arthur). Add ½ tsp additional xanthan gum if blend doesn’t include it. Ensure cones are certified GF (some contain barley grass or wheat starch).
- Vegan: Replace butter with vegan butter (Miyoko’s or Earth Balance), eggs with flax eggs (2 tbsp ground flax + 5 tbsp water), and buttermilk with almond milk + 1 tbsp apple cider vinegar. Use vegan-certified cones (check for honey or dairy derivatives).
- Lower-Sugar: Reduce granulated sugar by ¼ cup; replace with 2 tbsp monk fruit–erythritol blend. Use unsweetened applesauce (¼ cup) to replace 2 tbsp butter for moisture. Frost with whipped coconut cream sweetened with stevia.
- Keto-Friendly: Bake in keto waffle cones (made with almond flour, psyllium, and erythritol); use almond/coconut flour blend, erythritol, and full-fat sour cream instead of buttermilk. Frost with sugar-free cream cheese frosting.
Themed & Occasion-Based Ideas
- Wedding Elegant: White cake with rosewater buttercream, dipped cone rims in edible silver dust, topped with fresh raspberries and micro mint.
- Halloween Horror: Black cocoa cake, orange cream cheese frosting, cone “dripping” with black royal icing “tar,” topped with candy spiders and crushed chocolate “dirt.”
- Christmas Sparkle: Eggnog-spiced cake, cinnamon buttercream, cone rim dipped in green/white candy melts, decorated with peppermint sticks and red velvet crumbs.
- Ice Cream Sundae Cupcake: Serve unfrosted cupcakes chilled, then top with 2 scoops of premium ice cream, hot fudge, whipped cream, maraschino cherry, and a miniature paper umbrella.
- Breakfast-Inspired: Blueberry-buttermilk cake, maple buttercream, cone rim dipped in crispy bacon bits and maple sugar, garnished with a mini pancake “flag.”
Health Considerations and Nutritional Value
While Waffle Cone Cupcakes are undeniably indulgent, mindful ingredient choices and portion awareness allow for balanced enjoyment. A standard unfrosted cupcake (cake portion only, ~2.5 oz) contains approximately 220–260 kcal, with 30–35g carbs, 3–4g protein, and 9–12g fat—depending on butter and sugar levels. The waffle cone itself contributes ~110–140 kcal, mostly from complex carbohydrates and trace fiber (if made with whole grains). When frosted with traditional American buttercream (½ cup powdered sugar + ¼ cup butter + 1 tsp milk), total calories jump to ~380–450 per cupcake, with added saturated fat and refined sugar.
Nutritional Highlights:
- Fiber Potential: Substituting 30% of flour with oat fiber or almond flour boosts satiety-supporting fiber without compromising texture.
- Calcium & Vitamin D: Using fortified plant-based buttermilk alternatives (e.g., soy or almond milk with added calcium/vitamin D) enhances bone-supportive nutrients.
- Antioxidants: Natural cocoa, berries, matcha, or turmeric-infused batters contribute polyphenols and anti-inflammatory compounds.
- Protein Boost: Adding 1 scoop unflavored collagen peptides or whey isolate to dry ingredients increases protein to 6–8g per cupcake—ideal for sustained energy.
Considerations for Special Populations:
- Diabetics: Prioritize low-glycemic sweeteners (allulose, tagatose), monitor total carb load (aim for ≤25g net carbs per serving), and pair with a source of healthy fat (e.g., almond butter frosting) to slow glucose absorption.
- Children: Limit added sugars to <10% of daily calories (<25g/day for ages 2–18). Use natural colorings (spirulina, beet powder, butterfly pea flower) instead of artificial dyes.
- Seniors: Focus on soft textures and nutrient density—add mashed banana or pumpkin puree for potassium and vitamin A; choose lower-sodium baking powder.
- Allergy Awareness: Always label allergens clearly: wheat (cone & flour), dairy (butter, buttermilk), eggs, tree nuts (if using almond flour or nut-based frostings), soy (in some margarines or lecithin).
Remember: Enjoyment is part of holistic health. Savoring a Waffle Cone Cupcake mindfully—with attention to taste, texture, and joy—can support emotional well-being as meaningfully as nutrient tracking supports physical health.
Ingredients
Makes 12 standard Waffle Cone Cupcakes
- 12 plain Belgian-style waffle cones (4–4.5 inches tall, approx. 2.25″ base diameter)
- 2 ½ cups (315g) all-purpose flour (spooned & leveled)
- 1 ½ cups (300g) granulated sugar
- ½ cup (100g) light brown sugar, packed
- 1 tsp fine sea salt
- 2 tsp baking powder
- ½ tsp baking soda
- 1 cup (240ml) full-fat buttermilk, room temperature
- 2 large eggs + 2 large egg yolks, room temperature
- 2 tsp pure vanilla extract
- 1 cup (227g) unsalted butter, softened to 65°F (creamy but cool)
For Classic Vanilla Buttercream (optional but recommended):
- 1 ½ cups (340g) unsalted butter, softened
- 5 cups (600g) powdered sugar, sifted
- ¼ cup (60ml) heavy cream or whole milk
- 2 tsp pure vanilla extract
- ¼ tsp fine sea salt
Garnish Suggestions (choose 2–3): Rainbow sprinkles, toasted sliced almonds, crushed peanut brittle, mini chocolate chips, edible flowers, caramel drizzle, sea salt flakes, mini marshmallows, freeze-dried strawberry powder.
Directions
- Preheat oven to 350°F (177°C). Line a 12-cup standard muffin tin with parchment cupcake liners. Gently insert one waffle cone upright into each liner. If cones tilt, trim ¼” from pointed tip using clean kitchen shears. Place tin in freezer for 10 minutes.
- In a medium bowl, whisk together flour, granulated sugar, brown sugar, salt, baking powder, and baking soda until uniform. Set aside.
- In a large bowl, beat softened butter with an electric mixer on medium-high for 4–5 minutes until pale, creamy, and fluffy. Scrape bowl thoroughly.
- Add eggs and egg yolks one at a time, beating for 30 seconds after each addition until fully incorporated. Add vanilla and mix 15 seconds more.
- On low speed, add dry ingredients in three parts, alternating with buttermilk in two parts, beginning and ending with dry ingredients. Mix only until just combined after each addition—do not overmix. Batter will be thick and glossy.
- Using a 3-tablespoon ice cream scoop or piping bag fitted with a ½-inch round tip, carefully portion batter around the outside of each cone—filling the space between cone and liner only. Fill to ¾ full (~¾ inch below rim). Smooth tops lightly with an offset spatula.
- Bake for 18 minutes, then rotate pan 180°. Continue baking 2–4 minutes, until a toothpick inserted into the cake portion (avoiding cone) emerges with moist crumbs. Tops should be golden and springs back when lightly touched.
- Let cupcakes cool in pan for 15 minutes. Carefully lift each by gripping the cone (not the cake) and transfer to a wire rack. Cool completely—minimum 25 minutes—before frosting.
- Prepare buttercream: Beat softened butter on medium-high for 3 minutes until pale and airy. Gradually add powdered sugar 1 cup at a time, mixing on low until incorporated. Add cream, vanilla, and salt. Beat on medium-high for 4–5 minutes until ultra-light and fluffy. Adjust consistency with extra cream (to soften) or powdered sugar (to thicken).
- Frost cooled cupcakes using a star tip (#1M). Pipe tall, generous swirls covering the cake portion entirely. Immediately garnish with chosen toppings, pressing gently to adhere. Serve within 2 hours for peak cone crunch—or refrigerate up to 4 days (bring to room temp 30 minutes before serving).
FAQ
- Can I use sugar cones instead of waffle cones?
- No—sugar cones are too thin, fragile, and high in sucrose. They will melt, slump, or burn in the oven. Only thick, dense Belgian-style waffle cones have the structural integrity and low-moisture composition needed for baking.
- Why did my cones get soggy?
- Sogginess usually results from one (or more) of these: 1) Overfilling the interior of the cone with batter, trapping steam; 2) Not chilling cones before baking; 3) Underbaking—moisture didn’t fully set; 4) Cooling cupcakes in the pan longer than 15 minutes, causing condensation buildup. Follow chilling + precise bake time + prompt removal steps strictly.
- Can I make these ahead of time?
- Yes—with caveats. Unfrosted cupcakes (cooled completely) freeze beautifully for up to 3 months—wrap individually in plastic, then place in a freezer bag. Thaw overnight in fridge, then bring to room temp before frosting. Frosted cupcakes refrigerate up to 4 days, but texture degrades after Day 2. Never freeze fully assembled frosted cupcakes.
- My batter seems too thick—is that normal?
- Absolutely. This is intentional. A thicker batter clings better to the cone walls, prevents sinking, and bakes up with a denser, more supportive crumb that complements the crunch. If it’s truly unspreadable, add 1 tsp buttermilk—but resist the urge to over-thin.
- Can I add mix-ins like chocolate chips or nuts?
- Yes—but toss them in 1 tsp flour first to prevent sinking. Limit to 1 cup total per batch. Avoid large chunks (e.g., whole walnuts) that could puncture the cone.
- What if I don’t have buttermilk?
- Create DIY buttermilk: combine 1 cup whole milk + 1 tbsp white vinegar or lemon juice. Stir and let sit 5–10 minutes until slightly curdled and thickened. Do not skip—the acidity is essential for leavening and tenderness.
- Can I bake these in mini or jumbo muffin tins?
- Yes—with adjustments. For mini: use 2-inch mini waffle cones, reduce batter per cup to 1.5 tbsp, and bake 11–13 minutes. For jumbo: use 5-inch cones, increase batter to ¼ cup per cup, and bake 24–28 minutes—check early. Always adjust cooling time proportionally.
- Are there any vegan waffle cones available?
- Yes—but read labels carefully. Many contain honey (not vegan) or dairy derivatives. Brands like “Vegan Treats” and “Sweet William” offer certified vegan cones. You can also make your own using aquafaba, brown rice syrup, and almond milk—but baking stability varies.
- How do I prevent the frosting from sliding off?
- Ensure cupcakes are 100% cool (not just “room temp”—they must feel neutral to touch). Use buttercream at ideal consistency (65–68°F). If frosting still slips, chill cupcakes for 10 minutes after frosting to set the base layer before adding garnishes.
- Can I turn these into ice cream cupcakes?
- Yes—make them “ice cream sandwich style”: bake cupcakes, cool completely, then slice horizontally. Sandwich a ½-inch slab of high-quality ice cream between layers, refreeze 2 hours, then dip entire cupcake in tempered chocolate. Store frozen and serve immediately.
Summary
Waffle Cone Cupcakes are a masterclass in playful precision—uniting the nostalgic crunch of a golden waffle cone with the comforting tenderness of scratch-baked cake, crowned with artful frosting and endless customization potential.
From their carnival-inspired origins to modern bakery showstoppers, they embody joyful creativity, technical mindfulness, and the simple magic of transforming everyday ingredients into unforgettable, share-worthy moments—one delicious, handheld bite at a time.