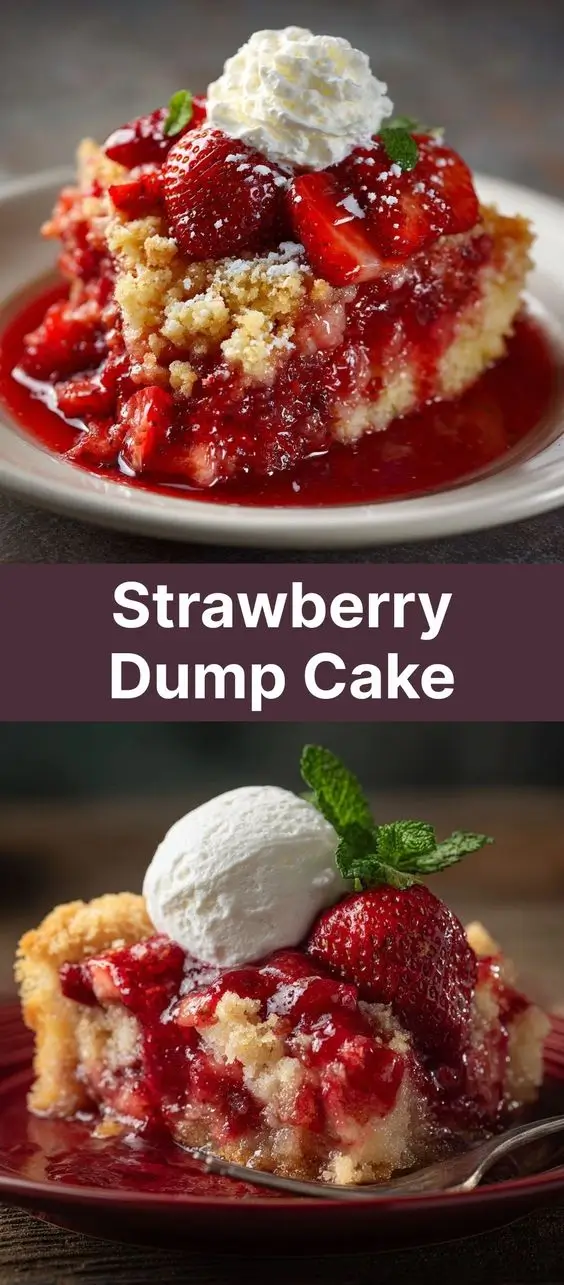
Strawberry Dump Cake: A Simple, Sweet, and Irresistible Dessert
The History of Strawberry Dump Cake
Dump cake, a beloved American dessert known for its simplicity and rich flavor, emerged during the mid-20th century as part of the growing trend toward convenient home cooking. With the rise of processed foods and canned goods in households across the United States, recipes that minimized effort while maximizing taste became immensely popular. The term “dump” refers to the method of preparation—literally dumping ingredients into a baking dish without mixing or complicated steps.
While the exact origins of dump cake are unclear, it is believed to have first appeared in community cookbooks and promotional materials from canned fruit manufacturers like Libby’s and Dole in the 1950s and 60s. These companies encouraged homemakers to use their canned fruits in easy dessert recipes, often pairing them with cake mix and butter. Strawberry dump cake specifically gained traction due to the widespread availability and popularity of canned strawberry pie filling, which provided a sweet-tart base perfect for this no-fuss dessert.
Over the decades, dump cake evolved from a pantry-staple solution to a cherished family favorite, commonly served at potlucks, holiday gatherings, and summer barbecues. Its nostalgic charm, minimal cleanup, and crowd-pleasing taste have cemented its place in American culinary tradition. Today, modern bakers continue to celebrate and reinvent the classic strawberry dump cake, adapting it for dietary needs, seasonal variations, and gourmet twists—all while preserving its hallmark ease and decadence.
Ingredients Breakdown: What Goes Into a Perfect Strawberry Dump Cake?
The beauty of strawberry dump cake lies in its simplicity and accessible ingredients. Each component plays a crucial role in creating the dessert’s signature texture—crispy, golden topping with a soft, juicy fruit center. Here’s a detailed look at each ingredient:
- Canned Strawberry Pie Filling (21 oz): This is the heart of the dessert. It provides consistent sweetness, moisture, and a thickened strawberry base that bubbles up during baking. Opt for high-quality brands with real fruit and minimal artificial additives for the best flavor.
- Yellow Cake Mix (1 box, approx. 15.25 oz): Used dry and unprepared, the cake mix forms the crisp, crumbly top layer. As it bakes, it absorbs the fruit juices and transforms into a tender cake crust. Yellow cake mix complements strawberries better than chocolate or spice flavors.
- Butter (½ cup or 1 stick, unsalted): Melted and poured over the dry mix, butter adds richness and helps create a golden, slightly crunchy topping. Unsalted butter gives you better control over the salt content.
- Fresh Strawberries (optional, 1–2 cups sliced): For a fresher twist, many bakers add fresh strawberries on top of or mixed with the canned filling. This enhances both flavor and texture, especially when berries are in season.
- Vanilla Extract (1 tsp, optional): A small splash added to the fruit layer can deepen the overall flavor profile, adding warmth and complexity.
- Lemon Juice (1 tbsp, optional): Brightens the strawberry flavor and cuts through the sweetness, balancing the dessert.
- Cinnamon or Nutmeg (¼ tsp, optional): A pinch of warm spice can elevate the aroma and give the cake a subtle spiced note, especially appealing in fall or winter versions.
- Brown Sugar (¼ cup, optional): Some recipes call for sprinkling brown sugar over the cake mix before adding butter for a deeper caramelized flavor and extra crunch.
These ingredients work together harmoniously—no pre-mixing, no eggs, no milk needed. That’s what makes dump cake such a go-to for busy cooks and novice bakers alike.
Step-by-Step Recipe: How to Make Strawberry Dump Cake
Follow these simple steps to create a luscious, oven-baked strawberry dump cake that will impress your guests and satisfy any sweet tooth—with minimal effort required.
- Preheat the Oven: Begin by preheating your oven to 350°F (175°C). This ensures even baking and proper browning of the top layer.
- Prepare the Baking Dish: Lightly grease a 9×13-inch glass or ceramic baking dish with non-stick spray or softened butter. This prevents sticking and makes cleanup easier.
- Add the Fruit Layer: Pour the entire can (21 oz) of strawberry pie filling evenly into the bottom of the dish. For an upgraded version, stir in 1–2 cups of sliced fresh strawberries, 1 tsp vanilla extract, and 1 tbsp lemon juice. Spread the mixture smoothly across the pan.
- Sprinkle the Cake Mix: Open the box of yellow cake mix and evenly sprinkle the dry mix over the fruit layer. Be sure to cover the entire surface without stirring. This dry layer will absorb the juices as it bakes.
- Add Optional Enhancements: If using, sprinkle ¼ cup brown sugar and a pinch of cinnamon over the cake mix for extra depth and texture.
- Top with Butter: Slice the cold butter into thin pats (or melt it first), and distribute evenly over the top of the cake mix. Do not stir—let the butter melt naturally during baking, which will help form a cake-like crust.
- Bake: Place the dish in the preheated oven and bake for 40–45 minutes, or until the top is golden brown and crispy, and the filling is bubbly around the edges.
- Cool Slightly: Remove from the oven and let the dump cake cool for 10–15 minutes. This allows the filling to thicken slightly and makes serving easier.
- Serve Warm: Spoon into bowls and serve warm. For maximum indulgence, top with whipped cream, vanilla ice cream, or a drizzle of chocolate sauce.
Note: The cake will continue to set as it cools, so avoid cutting too soon. Leftovers can be stored covered in the refrigerator for up to 5 days and reheated in the microwave.
Tips for the Best Strawberry Dump Cake
- Don’t Stir! One of the most important rules: never mix the layers. Let the magic happen naturally in the oven as the butter melts and the cake mix absorbs the fruit juices.
- Use Cold Butter Pats: While melting the butter works, placing small pats of cold butter across the top creates pockets of richness and helps prevent the top from becoming soggy.
- Uniform Distribution: Spread the cake mix evenly—any exposed fruit might burn or dry out during baking.
- Watch the Edges: Keep an eye on the corners and sides, as they tend to brown faster. If they’re getting too dark, tent loosely with aluminum foil.
- Upgrade the Fruit: Replace or enhance canned pie filling with homemade strawberry compote made from fresh berries, sugar, cornstarch, and lemon juice for a more natural flavor.
- Baking Dish Matters: Use glass or ceramic dishes rather than metal, as they distribute heat more evenly and reduce the risk of over-browning.
- Serve Immediately: Dump cake is best enjoyed warm from the oven when the contrast between the crisp top and gooey center is at its peak.
- Double the Batch: This dessert disappears fast! Consider doubling the recipe for large gatherings—it bakes beautifully in a larger roasting pan with adjusted timing.
Variations and Customizations
One of the greatest strengths of strawberry dump cake is its versatility. Whether you’re catering to dietary preferences, experimenting with flavors, or celebrating a special occasion, here are some creative ways to customize your dessert:
Flavor Twists
- Strawberry-Chocolate: Add chocolate chips or white chocolate chunks over the cake mix before baking for a fruity-chocolate combo.
- Strawberry-Banana: Layer sliced bananas beneath the strawberry filling for a tropical flair.
- Strawberry-Rhubarb: Mix in canned or fresh rhubarb for a tangy-sweet springtime version.
- Citrus Zest: Grate lemon or orange zest into the fruit layer for a bright, refreshing note.
Seasonal Versions
- Summer Berry Medley: Combine strawberry pie filling with blueberries, raspberries, or blackberries for a colorful, antioxidant-rich alternative.
- Fall Spice: Add pumpkin pie spice or nutmeg to the cake mix and pair with apple-strawberry filling.
- Holiday Elegance: Top with crushed graham crackers or streusel before baking, and garnish with mint leaves or powdered sugar for festive occasions.
Dietary Modifications
- Gluten-Free: Use a gluten-free yellow cake mix and ensure all other ingredients (like pie filling) are certified gluten-free.
- Dairy-Free: Substitute butter with coconut oil, vegan butter, or margarine.
- Lower Sugar: Choose low-sugar or no-sugar-added pie filling and use a sugar-free cake mix. You can also reduce or omit added brown sugar.
- Vegan: Combine dairy-free butter with plant-based cake mix and ensure the pie filling contains no gelatin or animal products.
Presentation Upgrades
- Individual Servings: Prepare the dump cake in ramekins or mason jars for charming single-portion desserts.
- Garnishes: Top with fresh strawberry slices, mint, edible flowers, or a dusting of powdered sugar for Instagram-worthy appeal.
- Sauces: Drizzle with caramel, chocolate, or balsamic glaze for a gourmet touch.
Health Considerations and Nutritional Value
While strawberry dump cake is undeniably delicious, it’s important to enjoy it in moderation due to its high sugar and fat content. Here’s a general nutritional breakdown per serving (based on 12 servings):
| Nutrient | Amount per Serving |
|---|---|
| Calories | ~320–360 |
| Total Fat | ~12–15g |
| Saturated Fat | ~7–8g |
| Cholesterol | ~20–25mg |
| Sodium | ~200–300mg |
| Total Carbohydrates | ~55–60g |
| Dietary Fiber | ~1–2g |
| Sugars | ~40–45g |
| Protein | ~2–3g |
Health Notes:
- High in Added Sugars: Both the cake mix and pie filling contain significant added sugars. Frequent consumption may contribute to weight gain, blood sugar spikes, and increased risk of metabolic disorders.
- Limited Nutritional Value: While strawberries provide vitamin C and antioxidants, the processing in canned fillings reduces some nutrient content. The dessert lacks significant protein, fiber, or healthy fats.
- Portion Control Is Key: Serve in smaller portions and pair with a side of Greek yogurt or a green salad to balance the meal.
- Better Ingredient Swaps: Using whole fruit, reducing butter, and choosing lower-sugar alternatives can make the dessert somewhat healthier without sacrificing too much taste.
Ingredients
- 1 (21 oz) can strawberry pie filling
- 1 (15.25 oz) box yellow cake mix
- ½ cup (1 stick) unsalted butter, melted or sliced
- 1–2 cups fresh strawberries, hulled and sliced (optional)
- 1 tsp vanilla extract (optional)
- 1 tbsp lemon juice (optional)
- ¼ cup brown sugar (optional)
- ¼ tsp ground cinnamon (optional)
Directions
- Preheat oven to 350°F (175°C). Grease a 9×13-inch baking dish.
- Pour the canned strawberry pie filling into the dish. Stir in fresh strawberries, vanilla, and lemon juice if using. Spread evenly.
- Sprinkle the dry yellow cake mix uniformly over the fruit layer.
- If desired, sprinkle brown sugar and cinnamon over the cake mix.
- Evenly distribute melted butter or pats of cold butter over the top. Do not stir.
- Bake for 40–45 minutes until the top is golden brown and the filling is bubbling.
- Let cool for 10–15 minutes before serving.
- Serve warm with whipped cream or vanilla ice cream, if desired.
FAQ
Can I make strawberry dump cake ahead of time?
Yes, you can assemble the cake (without baking) up to 24 hours in advance. Cover and refrigerate, then bake as directed—add 5–10 minutes to the baking time if chilled.
Can I freeze dump cake?
Yes. Once completely cooled, wrap tightly in plastic and foil, and freeze for up to 3 months. Thaw in the refrigerator and reheat in the oven at 325°F for 15–20 minutes.
Why is my dump cake soggy?
This usually happens if the cake is underbaked, stirred before baking, or if too much butter is used. Ensure you bake long enough and don’t mix the layers.
Can I use frozen strawberries?
Yes, but thaw and drain them first to avoid excess liquid. You may need to thicken with a bit of cornstarch.
Can I use a different cake mix?
Absolutely! White, vanilla, or even strawberry-flavored cake mix work well. Avoid chocolate unless you want a unique twist.
Do I have to use butter?
Butter contributes significantly to flavor and texture, but you can substitute with margarine or plant-based alternatives for dietary needs.
How do I store leftovers?
Cover and refrigerate for up to 5 days. Reheat individual portions in the microwave for 30–60 seconds.
Summary
Strawberry dump cake is a timeless, effortless dessert that delivers big flavor with minimal effort—perfect for beginners and seasoned bakers alike. With juicy strawberries, a buttery cake topping, and endless customization options, it’s a guaranteed crowd-pleaser.