Introduction
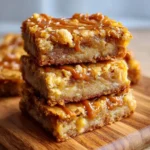
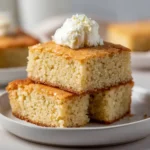
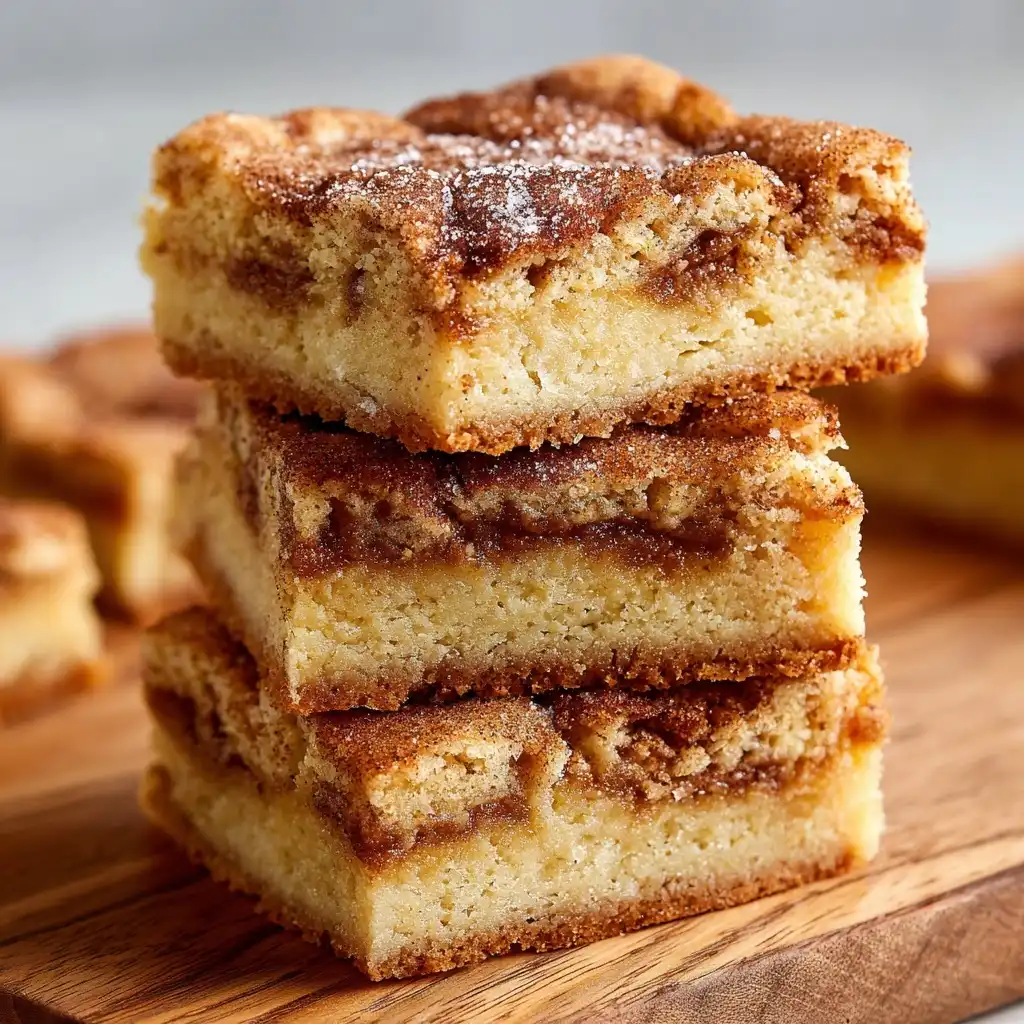
Snickerdoodle Blondie Bars are the irresistible lovechild of two beloved American classics: the soft, chewy, cinnamon-sugar–dusted snickerdoodle cookie and the rich, dense, buttery blondie. These bars marry the warm, nostalgic spice of cinnamon and cream of tartar with the deep caramelized sweetness of brown sugar and vanilla—then elevate it all with a tender, fudgy-yet-cakey crumb that’s neither too dense nor too airy. Unlike traditional blondies, Snickerdoodle Blondie Bars feature a signature swirl of cinnamon-sugar topping that crackles and caramelize during baking, creating an addictive textural contrast between the gooey interior and the delicate, crisp-spiced crust. They’re perfect for potlucks, holiday dessert tables, school bake sales, or simply as a cozy weekend treat with a glass of cold milk—or even a scoop of cinnamon ice cream. Whether you’re a seasoned baker or a curious beginner, these bars deliver maximum flavor with surprisingly approachable technique.
The History
The origins of the Snickerdoodle Blondie Bar lie at the intersection of two distinct culinary traditions. The snickerdoodle cookie itself traces back to late 19th-century New England, likely inspired by German and Dutch settlers’ “schneckennudeln” (cinnamon rolls) and “snipper noodle” (a phonetic anglicization). Its defining traits—tartness from cream of tartar, generous cinnamon-sugar coating, and soft, slightly chewy texture—became codified in American home economics cookbooks by the 1930s. Meanwhile, blondies emerged around the same era as a “brownie’s golden cousin,” first appearing in print in the 1906 edition of Fannie Farmer’s Boston Cooking-School Cook Book, where they were described as “a cake made without chocolate.” Over decades, blondies evolved from simple brown sugar–butter–flour confections into versatile vehicles for nuts, white chocolate, butterscotch, and seasonal spices.
The fusion into Snickerdoodle Blondie Bars is a relatively modern innovation—gaining traction in food blogs and Pinterest-driven baking communities circa 2014–2016—as bakers sought to reimagine nostalgic flavors in bar form for ease, portion control, and visual appeal. Early versions appeared on sites like Sally’s Baking Addiction and Brown Eyed Baker, often featuring a “swirl-and-sprinkle” method to mimic snickerdoodle’s iconic surface. Since then, the concept has been refined with ingredient optimizations—such as brown butter infusions, sour cream for tenderness, and balanced acid levels—to enhance both structure and snickerdoodle authenticity. Today, Snickerdoodle Blondie Bars stand as a testament to American dessert evolution: rooted in heritage, elevated by science, and beloved for their comforting duality—spiced yet sweet, soft yet structured, humble yet unforgettable.
Ingredients Breakdown
Every component in Snickerdoodle Blondie Bars plays a precise role—not just for flavor, but for chemistry, texture, and structural integrity. Understanding each ingredient’s function empowers bakers to troubleshoot, substitute thoughtfully, and elevate results:
- Unsalted Butter (1 cup / 2 sticks): Provides richness, moisture, and leavening support when creamed with sugar. Using unsalted butter ensures full control over sodium content and prevents unintended saltiness. For enhanced depth, many chefs recommend browning the butter first—this adds nutty, toffee-like complexity and reduces water content slightly, yielding a denser, more cohesive crumb.
- Packed Light Brown Sugar (1 ½ cups): The backbone of blondie sweetness and moisture. Molasses in brown sugar contributes acidity (which reacts with baking soda), hygroscopic properties (retaining moisture), and rich caramel notes. Light brown is preferred over dark for a balanced, not-overpowering molasses presence.
- Granulated Sugar (¼ cup): Adds fine-textured sweetness and aids in creaming to incorporate air—critical for lift and tenderness. It also helps create a slight “crisp” on the top layer during baking.
- Eggs (2 large, room temperature): Act as emulsifiers, binders, and leaveners. Room-temperature eggs blend more smoothly into the batter, preventing separation and ensuring uniform aeration. The yolks contribute fat and richness; whites add structure and lightness.
- Pure Vanilla Extract (2 tsp): Not merely flavoring—vanilla enhances perception of sweetness and rounds out cinnamon’s sharpness. Opt for high-quality, alcohol-based extract (not imitation) for aromatic complexity and heat stability.
- All-Purpose Flour (1 ¼ cups): Provides gluten-forming protein for structure—but not too much. Measured correctly (spoon-and-level, not scoop-and-pack) to avoid toughness. Some bakers substitute up to ¼ cup with cornstarch for ultra-tender results.
- Cream of Tartar (1 ½ tsp): The hallmark of authentic snickerdoodles—and essential here. This acidic powder activates baking soda, creates subtle tang, and inhibits sugar crystallization, contributing to chewiness. Do not omit or substitute with lemon juice/vinegar unless adjusting full leavening system.
- Baking Soda (½ tsp): Reacts with cream of tartar and brown sugar’s natural acids to produce carbon dioxide—creating gentle rise and open crumb. Must be fresh (replace every 3–6 months) for full potency.
- Ground Cinnamon (1 ½ tbsp, preferably Saigon or Ceylon): Not just for topping! A full tablespoon is folded into the batter to ensure deep, evenly distributed warmth. High-quality, freshly ground cinnamon delivers volatile oils that perfume the entire bar—not just the surface.
- Fine Sea Salt (¾ tsp): Balances sweetness, enhances all other flavors, and strengthens gluten bonds subtly. Kosher salt may be substituted, but reduce by 25% due to larger crystal size.
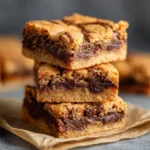
- Cinnamon-Sugar Topping (⅓ cup granulated sugar + 1 ½ tsp ground cinnamon + pinch of cream of tartar): Applied in two stages—half sprinkled pre-bake, half swirled in—this mixture melts, bubbles, and forms a delicate, crackly, spiced “skin.” The added pinch of cream of tartar ensures the topping retains its characteristic snickerdoodle tang even after baking.
Step-by-Step Recipe
- Prep & Preheat: Position oven rack to center position. Preheat oven to 350°F (177°C). Line a 9×13-inch metal baking pan with parchment paper, leaving 2-inch overhang on two opposite sides for easy removal. Lightly grease exposed pan edges and parchment with butter or nonstick spray.
- Brown the Butter (Optional but Highly Recommended): In a light-colored saucepan, melt butter over medium-low heat. Swirl pan gently as butter foams, turns golden, and releases nutty aroma (about 5–7 minutes). Once tiny brown specks form at bottom and fragrance is rich and toasty, immediately pour into a heatproof bowl. Cool 10 minutes—butter should be warm, not hot (≈110°F), to avoid cooking eggs.
- Cream Sugars & Butter: In a large bowl, whisk together cooled brown butter, brown sugar, and granulated sugar. Beat with electric mixer on medium-high for 2–3 minutes until thick, glossy, and noticeably lighter in color. Scrape bowl thoroughly.
- Incorporate Eggs & Flavorings: Add eggs one at a time, beating well after each (≈30 seconds per egg) until fully emulsified and smooth. Mix in vanilla extract and beat 15 seconds more. Batter should be homogeneous with no streaks of egg or oil.
- Dry Ingredients Integration: In a separate medium bowl, whisk together flour, cream of tartar, baking soda, 1 tbsp cinnamon, and salt until fully aerated and lump-free. Sift once for insurance. Gradually add dry mixture to wet mixture in three parts, folding gently with a silicone spatula after each addition—just until no dry streaks remain. Do not overmix; a few small lumps are acceptable. Overmixing develops gluten and yields tough bars.
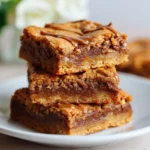
- Prepare Topping & Swirl: In a small bowl, combine ⅓ cup granulated sugar, 1 ½ tsp cinnamon, and a generous pinch (≈⅛ tsp) cream of tartar. Set aside. Pour batter into prepared pan and spread evenly with offset spatula. Sprinkle half (≈3 tbsp) of cinnamon-sugar mixture evenly over surface. Using a butter knife or thin skewer, gently drag through batter in figure-eight or zigzag motions to create marbled swirls—do not over-swirl; aim for visible ribbons, not homogenization.
- Final Topping & Bake: Sprinkle remaining cinnamon-sugar mixture evenly across surface. Gently tap pan on counter twice to settle batter and encourage even rising. Bake 32–38 minutes—start checking at 32 minutes. Bars are done when edges are deeply golden and set, center is puffed and *just* beginning to pull away from pan sides, and a toothpick inserted 1 inch from edge comes out with moist crumbs (not wet batter), while center toothpick may show a few moist crumbs—this ensures fudgy, not cakey, texture. Avoid overbaking: carryover heat will continue cooking bars for 5–7 minutes out of oven.
- Cool & Set: Place pan on wire rack. Cool completely in pan—at least 2 hours, ideally 3–4 hours—for clean cuts and optimal texture development. For best results, refrigerate uncovered for 1 hour before slicing—this firms the crumb and enhances chew. Use a sharp chef’s knife wiped clean between cuts for neat squares.
- Storage: Store cooled bars tightly covered at room temperature for up to 4 days, or refrigerate for up to 10 days. Freeze unfrosted bars layered between parchment in airtight container for up to 3 months. Thaw overnight in fridge or at room temperature 30 minutes before serving.
Tips
- Room-Temperature Ingredients Are Non-Negotiable: Cold eggs or butter can cause batter to seize or curdle, leading to uneven texture and poor rise. Let eggs sit in warm water for 5 minutes if forgotten.
- Weigh Your Flour: Volume measurements vary wildly. For consistency, use a digital scale: 1 ¼ cups all-purpose flour = 156g. Too much flour is the #1 cause of dry, crumbly blondies.
- Brown Butter Is a Game-Changer: Don’t skip this step—even if short on time. Browning intensifies flavor, reduces water, and improves shelf life. If using regular melted butter, chill it 10 minutes before creaming to prevent greasiness.
- Swirling Technique Matters: Use a thin, flexible tool (like a chopstick or wooden skewer) and make only 8–12 gentle passes. Over-swirling incorporates the topping too deeply, losing the signature crackly top.
- Oven Thermometer Required: Most home ovens run hot or cold. An inexpensive oven thermometer ensures accurate 350°F baking—critical for even doneness and preventing burnt edges.
- Underbake Slightly: Err on the side of underdone—bars firm dramatically as they cool. Pull them out when center still looks *barely* soft; they’ll finish setting while cooling.
- Cool Completely Before Cutting: Cutting warm bars causes crumbling and loss of defined edges. Patience yields clean, professional-looking squares every time.
- Use Parchment, Not Just Spray: Greasing alone leads to stuck bars and uneven release. Parchment provides guaranteed lift and protects the delicate cinnamon crust from tearing.
- Double the Topping for Extra Crunch: If you adore that shatteringly crisp, sugary top, increase topping to ½ cup sugar + 2 tsp cinnamon + ¼ tsp cream of tartar—and reserve 1 tbsp for post-bake sprinkle while bars are still warm from oven.
- Rotate Pan Mid-Bake (If Needed):strong> If your oven has hot spots, rotate pan 180° at 20-minute mark for even browning—especially important for achieving consistent golden edges.
Variations and Customizations
Snickerdoodle Blondie Bars are a brilliantly adaptable canvas—ideal for seasonal twists, dietary accommodations, and creative upgrades. Here are meticulously tested, crowd-pleasing variations—all built upon the foundational recipe for reliable results:
- Maple-Snickerdoodle Bars: Replace ¼ cup of the brown sugar with pure maple syrup (reduce granulated sugar to 2 tbsp to balance moisture). Add 1 tsp maple extract with vanilla. Top with maple-glazed pecans: toss ½ cup chopped toasted pecans in 2 tbsp warm maple syrup + 1 tsp melted butter + pinch salt; sprinkle over bars in last 5 minutes of baking.
- Apple-Cinnamon Swirl Bars: Fold in 1 cup finely diced, peeled Granny Smith apples (tossed in 1 tsp lemon juice + 1 tsp flour) with dry ingredients. Add ¼ tsp ground nutmeg and ⅛ tsp ground cloves to cinnamon-sugar topping. Optional: drizzle with salted caramel after cooling.
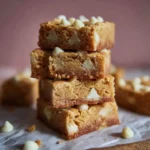
- White Chocolate–Cinnamon Crunch Bars: Fold in 1 cup high-quality white chocolate chips (tempered or chopped) with dry ingredients. Add ½ cup crushed cinnamon toast crunch cereal to topping mixture for playful crunch and amplified spice.
- Gluten-Free Snickerdoodle Blondies: Substitute 1:1 gluten-free all-purpose flour blend (with xanthan gum included—e.g., King Arthur or Bob’s Red Mill). Add 1 extra tbsp sour cream or Greek yogurt to compensate for GF flour’s absorbency. Verify all spices and baking soda are certified GF.
- Vegan Snickerdoodle Blondie Bars: Use vegan butter (e.g., Miyoko’s or Earth Balance), flax eggs (2 tbsp ground flax + 6 tbsp water, rested 10 mins), and coconut sugar (1:1 swap for brown sugar, though flavor will be deeper/more molasses-forward). Add 1 tsp apple cider vinegar to activate leavening. Ensure cinnamon is ethically sourced and vegan-certified (some contain bone char processing).
- Protein-Packed Snickerdoodle Bars: Add ¼ cup unflavored or vanilla whey or plant-based protein powder to dry ingredients. Increase eggs to 3 (or add 1 flax egg) and 2 tbsp Greek yogurt or unsweetened applesauce to retain moisture. Reduce flour by 2 tbsp to prevent density.
- Spiced Chai-Snickerdoodle Bars: Replace 1 tsp cinnamon in batter with equal parts ground cardamom, ginger, and black pepper. Add ¼ tsp ground star anise and 1 tsp loose-leaf chai tea (finely ground in spice grinder) to dry mix. Top with chai-infused sugar: steep 1 tsp loose chai in 2 tbsp hot water 5 mins, cool, mix with sugar.
- Boozy Cinnamon-Whiskey Bars: Add 2 tbsp good-quality bourbon or Tennessee whiskey with vanilla. Replace 1 egg with ¼ cup buttermilk for acidity balance. Optional garnish: flaky sea salt + micro-cinnamon dust post-bake.
- Mini Muffin Tin Version: Grease or line 24 standard muffin cups. Fill ¾ full. Bake at 350°F for 18–22 minutes. Cool 10 minutes in tin, then transfer. Perfect for parties—top with cinnamon-sugar while warm for maximum adhesion.
- Snickerdoodle Blondie Trifle: Cube cooled bars. Layer in glasses with cinnamon mascarpone (whipped mascarpone + 1 tsp cinnamon + 1 tbsp honey) and spiced apple compote. Garnish with candied pecans and edible gold leaf.
Health Considerations and Nutritional Value
While Snickerdoodle Blondie Bars are undeniably indulgent, mindful preparation allows for thoughtful nutritional enhancements without sacrificing authenticity or enjoyment. Below is a detailed analysis per standard 2×2-inch bar (based on 24 bars from a 9×13 pan), alongside evidence-informed considerations:
Nutrition Facts (Approximate per Bar):
Calories: 225 | Total Fat: 10g (Saturated: 6g) | Cholesterol: 45mg | Sodium: 135mg | Total Carbohydrates: 32g (Dietary Fiber: 0.4g, Sugars: 23g—including 14g added sugars) | Protein: 2g
- Sugar Awareness: The high sugar content (primarily from brown and granulated sugars) contributes to rapid blood glucose spikes. For those managing diabetes or insulin resistance, consider reducing total sugar by ¼ cup and adding 2 tbsp unsweetened applesauce + 1 tsp vanilla to maintain moisture and perceived sweetness. Always pair with a protein- or fat-rich food (e.g., Greek yogurt, almond butter) to slow absorption.
- Butter & Saturated Fat: While butter provides beneficial fat-soluble vitamins (A, E, K2) and conjugated linoleic acid (CLA), moderation is key. Replacing half the butter with mashed ripe banana or avocado purée lowers saturated fat by ~3g per bar but alters texture—best reserved for experimental batches.
- Flour & Fiber: Traditional AP flour offers minimal fiber. Boost fiber significantly (to ~2g per bar) by substituting ¼ cup of flour with oat fiber, psyllium husk powder (start with 1 tsp), or whole wheat pastry flour—each requiring minor moisture adjustments.
- Cream of Tartar & Potassium: Often overlooked, cream of tartar is rich in potassium—a vital electrolyte supporting heart health and blood pressure regulation. At 1.5 tsp per full batch, it contributes ~150mg potassium per bar, making these bars a subtle source of this under-consumed nutrient.
- Cinnamon Benefits: Ceylon cinnamon (preferred over cassia) contains potent polyphenols like cinnamaldehyde and procyanidins, shown in clinical studies to support healthy glucose metabolism, antioxidant activity, and anti-inflammatory response. One bar delivers ~150mg of bioactive cinnamon compounds—comparable to a therapeutic dose in supplement form.
- Portion Control Strategy: Cutting into 36 smaller bars (instead of 24) reduces calories per serving to ~150 and makes mindful eating easier. Serve with a side of unsweetened green tea—rich in EGCG—to further support metabolic health.
- Allergen Notes: Contains dairy (butter), eggs, and wheat. For nut-free environments, verify all cinnamon and baking soda are processed in dedicated facilities. Vegan and GF versions (as outlined above) address major allergen concerns responsibly.
- Food Safety Reminder: Due to egg content, bars must reach an internal temperature of at least 160°F (71°C) to ensure safety. A quick-read thermometer inserted in center confirms doneness—especially helpful for high-altitude or humid-climate baking.
Ingredients
- 1 cup (227g / 2 sticks) unsalted butter, preferably browned and cooled
- 1 ½ cups (300g) packed light brown sugar
- ¼ cup (50g) granulated sugar
- 2 large eggs, room temperature
- 2 teaspoons pure vanilla extract
- 1 ¼ cups (156g) all-purpose flour, spooned & leveled
- 1 ½ teaspoons cream of tartar
- ½ teaspoon baking soda
- 1 tablespoon (6g) ground cinnamon (plus more for topping)
- ¾ teaspoon fine sea salt
- For Cinnamon-Sugar Topping:
- ⅓ cup (67g) granulated sugar
- 1 ½ teaspoons ground cinnamon
- Pinch (≈⅛ tsp) cream of tartar
Directions
- Preheat oven to 350°F (177°C). Line a 9×13-inch metal baking pan with parchment paper, leaving 2-inch overhang on two opposite sides. Lightly grease exposed pan edges and parchment.
- If browning butter: Melt butter in a light saucepan over medium-low heat, swirling occasionally, until golden brown with nutty aroma and specks form (~5–7 min). Immediately pour into heatproof bowl; cool 10 minutes.
- In large bowl, whisk together cooled brown butter, brown sugar, and granulated sugar. Beat with electric mixer on medium-high 2–3 min until thick, glossy, and lightened.
- Add eggs one at a time, beating well after each (~30 sec). Mix in vanilla; beat 15 sec more.
- In separate bowl, whisk flour, cream of tartar, baking soda, 1 tbsp cinnamon, and salt until uniform. Sift once.
- Gradually add dry mixture to wet in three parts, folding gently with silicone spatula until *just* combined—no dry streaks. Do not overmix.
- In small bowl, combine topping ingredients: ⅓ cup sugar, 1 ½ tsp cinnamon, pinch cream of tartar.
- Pour batter into pan; spread evenly. Sprinkle half topping over surface. Swirl gently 8–12 times with skewer to marble.
- Sprinkle remaining topping evenly. Tap pan twice on counter.
- Bake 32–38 minutes—edges deeply golden and set, center puffed and *just* pulling from sides. Toothpick 1″ from edge shows moist crumbs; center may show a few crumbs. Do not overbake.
- Cool completely in pan on wire rack (min. 2 hrs, ideally 3–4 hrs). For cleanest cuts, refrigerate uncovered 1 hr before slicing.
- Use sharp knife wiped between cuts. Store covered at room temp up to 4 days, fridge up to 10 days, or freeze up to 3 months.
FAQ
- Can I make these bars ahead of time?
- Absolutely. In fact, they taste even better on Day 2—the cinnamon flavor deepens and texture becomes more cohesive. Prepare up to 2 days ahead and store covered at room temperature. For longer storage, freeze unbaked batter (portioned in pan, covered tightly) for up to 1 month—thaw overnight in fridge, then bake as directed (add 3–5 min to bake time).
- Why did my bars turn out cakey instead of fudgy?
- Most commonly due to overbaking, overmixing, or excess flour. Ensure you’re spooning-and-leveling flour (not scooping), mixing batter *just* until combined, and removing bars when center still looks *slightly* soft—they firm as they cool. Also verify oven temperature with a thermometer; even 25°F variance affects texture dramatically.
- Can I use dark brown sugar instead of light?
- Yes—but expect a stronger molasses flavor and slightly denser, more robust bars. Reduce granulated sugar to 2 tbsp to avoid excessive sweetness. Dark brown sugar also increases acidity, so consider reducing cream of tartar to 1 tsp if using full 1 ½ cups dark brown sugar.
- My cinnamon-sugar topping didn’t get crackly—why?
- Two main causes: 1) Topping applied to cold batter—ensure batter is at room temp before sprinkling, or gently rewarm pan base for 1 minute before topping. 2) Insufficient cream of tartar in topping—this acid prevents sugar from fully melting into liquid, encouraging crystalline “crackle.” Always include that pinch!
- Can I add nuts or chocolate chips?
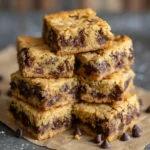
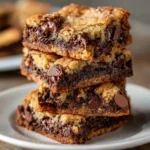
- Yes—with caveats. Fold in ¾ cup toasted walnuts, pecans, or sliced almonds *after* mixing dry into wet—this prevents sinking. For chocolate, use white or cinnamon chips (not dark—clashes with snickerdoodle profile); add ½ cup and reduce flour by 1 tbsp to maintain ratio. Avoid chips with cocoa butter bloom—they’ll bleed color.
- Are these bars suitable for high-altitude baking?
- Yes—with adjustments. Above 3,000 ft: increase flour to 1 ⅓ cups, reduce brown sugar to 1 ⅓ cups, add 1 extra tbsp sour cream, and bake at 360°F for 28–32 minutes. Cream of tartar remains critical—it helps stabilize structure where air pressure is lower.
- Can I make these dairy-free?
- Easily. Use high-fat dairy-free butter (e.g., Miyoko’s) and replace eggs with “flax eggs” (2 tbsp ground flax + 6 tbsp water, rested 10 min). Ensure all extracts and spices are dairy-free certified. Texture remains excellent—slightly more tender, with enhanced cinnamon clarity.
- What’s the best way to reheat a bar?
- For optimal texture: wrap individual bar in damp paper towel and microwave on 50% power for 12–15 seconds. Or place on parchment-lined baking sheet and warm in 325°F oven for 4–5 minutes. Never reheat uncovered in microwave—it dries out rapidly.
- Can I double this recipe for a larger pan?
- Not recommended. Doubling changes heat penetration, leading to undercooked centers or burnt edges. Instead, bake two separate batches in identical 9×13 pans—or use a