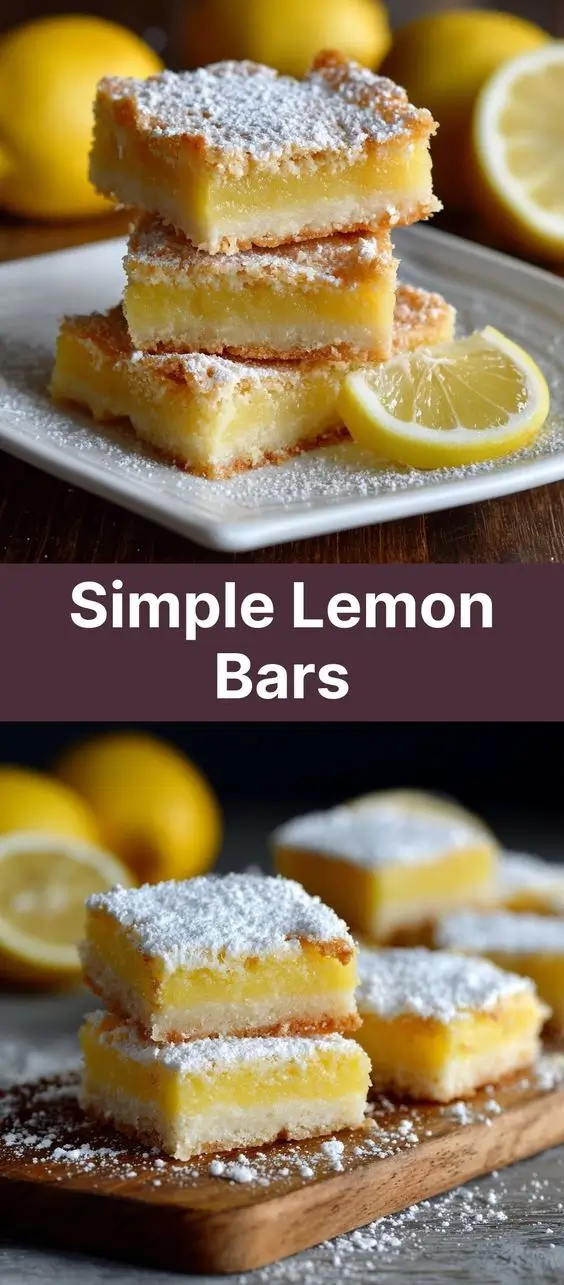
Simple Lemon Bars
The History of Lemon Bars
Lemon bars, also known as lemon squares, have a cherished place in American baking tradition, particularly popularized during the mid-20th century. While their exact origin remains somewhat unclear, many food historians trace the roots of lemon bars back to early 20th-century American cookbooks, where recipes for lemon-filled shortbread or buttery crusts with citrus toppings began appearing. The earliest known version resembling today’s lemon bar was published in the 1950s, often attributed to home bakers experimenting with accessible ingredients like flour, sugar, butter, and fresh lemons—staples in many post-war kitchens.
The dish gained widespread popularity in the 1970s and 1980s, becoming a staple at potlucks, bake sales, and family gatherings across the United States. Its rise in fame is partly credited to its perfect balance of sweet and tart flavors, coupled with an easy-to-make preparation that requires no special equipment. One notable mention occurred when the recipe appeared in the Los Angeles Times in the 1980s, sparking national interest. Since then, variations have emerged—from gluten-free adaptations to gourmet versions featuring Meyer lemons, lavender, or even meringue toppings—but the essence of the classic lemon bar has remained unchanged: a crisp shortbread base topped with a luscious, tangy lemon curd that sets into a silky, sliceable confection.
Though inspired by British and European traditions of lemon tarts and custards, the American lemon bar evolved into its own unique dessert category—portable, shareable, and deeply comforting. Today, it continues to be celebrated not only for its bright, refreshing flavor but also for its nostalgic charm, symbolizing the warmth of homemade baking and the simple pleasures of citrus sunshine captured in a square.
Ingredients Breakdown
Creating perfect lemon bars hinges on using high-quality, fresh ingredients. Each component plays a vital role in achieving the ideal texture and flavor profile—crumbly yet sturdy crust and a smooth, vibrant filling that balances sweetness and acidity.
For the Crust:
- All-Purpose Flour (1½ cups): Provides structure to the shortbread base. Sifted flour ensures a tender, fine crumb without lumps.
- Powdered Sugar (½ cup): Adds sweetness while contributing to a soft, melt-in-your-mouth texture. Powdered sugar integrates more smoothly than granulated sugar, helping prevent a gritty crust.
- Salted Butter (1 cup, softened): Creates richness and flakiness. Using salted butter adds subtle seasoning; if unsalted butter is used, a pinch of salt should be added to the dough.
- Cold Butter Tip: For a flakier texture, some bakers prefer cutting cold butter into the flour mixture, similar to pie crust techniques. However, softened butter is standard for this recipe to allow easy pressing into the pan.
For the Lemon Filling:
- Granulated Sugar (1¼ cups): Sweetens the tart lemon juice and helps the filling set properly when baked. It dissolves easily into the egg mixture to create a smooth custard.
- All-Purpose Flour (¼ cup): Acts as a thickening agent to give the lemon layer its firm, sliceable consistency without being runny.
- Eggs (4 large): Provide structure and help the filling set during baking. They emulsify the mixture and contribute to a creamy, custard-like texture.
- Freshly Squeezed Lemon Juice (⅔ cup, about 3–4 medium lemons): The star ingredient! Fresh juice delivers a bright, clean tartness. Bottled lemon juice can dull the flavor and lacks the aromatic complexity of fresh.
- Lemon Zest (from 2 lemons): Intensifies the lemon flavor and adds essential oils that boost aroma. Be sure to zest before juicing, and avoid the white pith, which is bitter.
- Vanilla Extract (½ teaspoon, optional): Enhances depth of flavor, rounding out the sharpness of the lemon with a hint of warmth.
For Garnish:
- Confectioners’ Sugar (for dusting): Adds a touch of sweetness and visual elegance. Sift it over the cooled bars just before serving for a snow-dusted finish.
Step-by-Step Recipe
- Preheat Oven and Prepare Pan: Preheat your oven to 350°F (175°C). Line a 9×13-inch baking pan with parchment paper, leaving an overhang on two opposite sides to easily lift the bars out after baking. Lightly grease any exposed pan areas to prevent sticking.
- Make the Crust: In a large mixing bowl, combine 1½ cups all-purpose flour and ½ cup powdered sugar. Add 1 cup (2 sticks) softened salted butter and use a pastry cutter, fork, or electric mixer on low speed to blend until the mixture resembles coarse crumbs and comes together into a soft dough.
- Press Into Pan: Transfer the dough to the prepared pan. Use your fingers or the back of a spoon to press it evenly into the bottom, creating a flat, compact layer. Smooth the surface completely to avoid uneven baking.
- Bake the Crust: Bake for 20–25 minutes, or until the edges are lightly golden and the center looks dry and set. Remove from oven and let cool slightly while preparing the filling. Keep the oven on.
- Prepare the Filling: In a medium bowl, whisk together 1¼ cups granulated sugar and ¼ cup all-purpose flour until well combined. Add 4 large eggs, one at a time, whisking thoroughly after each addition. Stir in ⅔ cup freshly squeezed lemon juice, lemon zest from 2 lemons, and vanilla extract (if using). Whisk until smooth and fully incorporated, ensuring no lumps remain.
- Pour Over Crust: Carefully pour the lemon mixture over the warm crust, spreading it evenly with a spatula to cover all areas, especially the corners.
- Bake Again: Return the pan to the oven and bake for 20–25 minutes, or until the filling is set around the edges and only slightly jiggly in the very center (like gelatin). Avoid overbaking, as this can cause cracking.
- Cool Completely: Place the pan on a wire rack and let cool at room temperature for 1 hour. Then transfer to the refrigerator and chill for at least 2 hours—this helps the filling firm up for clean slicing.
- Cut and Serve: Use the parchment overhang to gently lift the entire lemon bar slab out of the pan. Place on a cutting board and trim the edges for neatness (optional). Cut into squares or rectangles using a sharp knife wiped clean between cuts. Dust generously with confectioners’ sugar just before serving.
Tips for Perfect Lemon Bars
- Use Fresh Lemons: Never substitute bottled lemon juice. Freshly squeezed juice provides superior flavor and brightness that defines a great lemon bar.
- Zest First, Then Juice: Always zest your lemons before cutting and juicing them—it’s much easier when the peel is intact.
- Avoid Overbaking: The filling should be set at the edges but still slightly wobbly in the center when you remove it from the oven. Residual heat will continue to cook it as it cools.
- Chill Before Cutting: Refrigeration is crucial for clean slices. Warm filling will smear and tear when cut.
- Wipe Knife Between Cuts: For pristine edges, dip your knife in hot water, wipe dry, and slice between each bar.
- Don’t Skip Parchment Paper: This ensures effortless removal and prevents sticking. Aluminum foil works in a pinch, but parchment is best.
- Sift Confectioners’ Sugar: Sifting creates a light, even dusting rather than clumps. Do this right before serving, as humidity can cause it to dissolve into the surface.
- Room Temperature Eggs: Cold eggs can cause the batter to separate. Let them sit out for 15–20 minutes before using.
Variations and Customizations
While classic lemon bars are timeless, there are countless ways to personalize them to suit dietary needs, seasonal tastes, or creative flair.
Dietary Modifications:
- Gluten-Free Lemon Bars: Replace all-purpose flour with a 1:1 gluten-free baking blend (such as Bob’s Red Mill or King Arthur). Ensure the mix contains xanthan gum for proper binding.
- Dairy-Free/Vegan: Use plant-based butter (like Earth Balance) for the crust. For the filling, substitute eggs with flax eggs (2 tbsp ground flaxseed + 6 tbsp water) and add 1 tsp cornstarch to help with setting. Note: Texture will be softer, but still delicious.
- Lower Sugar: Reduce sugar in the filling to ¾ cup and use a monk fruit or erythritol blend. Be aware that artificial sweeteners may alter texture and browning.
Flavor Twists:
- Meyer Lemon Bars: Swap regular lemons for sweeter, floral Meyer lemons. You may want to reduce sugar slightly due to their natural sweetness.
- Lavender Lemon Bars: Infuse the lemon filling with ½ teaspoon culinary-grade dried lavender. Steep it in warm lemon juice for 5 minutes, then strain before mixing into the batter.
- Berry Swirl: Drop spoonfuls of raspberry or blueberry puree onto the filling before baking and gently swirl with a toothpick for a marbled effect.
- Coconut Crust: Mix ½ cup shredded coconut into the shortbread crust for a tropical twist.
- Lime or Orange Bars: Substitute lemon juice and zest with lime or orange for a citrus variation. Lime bars are especially zesty, while orange bars are milder and sweeter.
Gourmet Touches:
- Torched Meringue Top: After cooling, top with Swiss or Italian meringue and lightly torch for a lemon meringue bar hybrid.
- White Chocolate Drizzle: Melt white chocolate and drizzle over the finished bars for extra decadence.
- Herb Garnish: Add a sprig of mint or edible flowers for an elegant presentation.
Health Considerations and Nutritional Value
Lemon bars are undeniably indulgent, but understanding their nutritional content can help you enjoy them mindfully.
Nutritional Breakdown (per serving, assuming 16 servings):
- Calories: ~220–250 kcal
- Total Fat: 12–14g (mostly from butter)
- Saturated Fat: 7–8g
- Cholesterol: 60–70mg (from eggs and butter)
- Carbohydrates: 28–32g
- Sugars: 20–24g (primarily from granulated and powdered sugar)
- Protein: 2–3g
- Vitamin C: Significant amount from lemon juice (up to 20% DV per serving)
- Calcium & Iron: Small amounts from flour and eggs
Health Notes:
- High in Sugar: These bars are dessert items and should be enjoyed in moderation, especially for those managing blood sugar levels or diabetes.
- Butter Content: High in saturated fat, so individuals watching heart health may opt for reduced-fat versions or plant-based alternatives.
- Eggs: A good source of protein and choline, but raw or undercooked eggs pose a slight salmonella risk. Fully baking the filling eliminates this concern.
- Lemons: Rich in vitamin C and antioxidants, supporting immune function and skin health. The citric acid may benefit digestion but could trigger acid reflux in sensitive individuals.
- Portion Control: Cutting smaller squares (e.g., 2×2 inches) allows for satisfying enjoyment without overindulgence.
Ingredients
Crust:
- 1½ cups (190g) all-purpose flour
- ½ cup (60g) powdered sugar
- 1 cup (226g / 2 sticks) salted butter, softened
Filling:
- 1¼ cups (250g) granulated sugar
- ¼ cup (30g) all-purpose flour
- 4 large eggs
- ⅔ cup (160ml) freshly squeezed lemon juice (about 3–4 lemons)
- Zest of 2 lemons
- ½ teaspoon vanilla extract (optional)
Garnish:
- Confectioners’ sugar, for dusting
Directions
- Preheat oven to 350°F (175°C). Line a 9×13-inch baking dish with parchment paper, leaving overhang on two sides. Lightly grease exposed pan edges.
- In a large bowl, mix flour and powdered sugar. Add softened butter and blend until crumbly. Press evenly into the bottom of the pan.
- Bake for 20–25 minutes until golden. Remove and let cool slightly. Keep oven on.
- In another bowl, whisk sugar and flour. Add eggs one at a time, whisking well. Stir in lemon juice, zest, and vanilla until smooth.
- Pour filling over warm crust, spreading evenly.
- Bake for 20–25 minutes until edges are set and center is slightly jiggly.
- Cool at room temperature for 1 hour, then refrigerate for at least 2 hours.
- Lift out using parchment. Trim edges if desired. Cut into squares and dust with confectioners’ sugar before serving.
FAQ
Can I make lemon bars ahead of time?
Yes! Lemon bars can be made 1–2 days in advance. Store covered in the refrigerator. Dust with powdered sugar just before serving to prevent absorption.
How long do lemon bars last?
They keep well in the refrigerator for up to 5 days. For longer storage, freeze unfrosted bars (wrapped tightly) for up to 3 months. Thaw in the fridge and dust with sugar before serving.
Why did my lemon filling crack?
Overbaking or rapid cooling (e.g., placing a hot pan in the fridge) can cause cracks. Bake just until set and cool gradually at room temperature first.
Can I use bottled lemon juice?
It’s not recommended. Bottled juice lacks freshness and can taste metallic or flat, affecting the overall flavor.
Why is my crust soggy?
Ensure the crust is fully baked before adding the filling. Also, avoid letting the filling sit too long before baking after pouring.
Can I double the recipe?
Yes, but use a half-sheet pan (13×18 inch) and adjust baking times slightly. Monitor closely to prevent overbaking.
Are lemon bars freezer-friendly?
Yes! Freeze in an airtight container with parchment between layers. Thaw in the refrigerator overnight.
Can I make mini lemon bars?
Absolutely! Use a muffin tin lined with parchment cups. Press crust into bottoms, fill, and bake for 15–18 minutes.
Summary
Simple lemon bars feature a buttery shortbread crust topped with a velvety, tangy lemon filling that’s perfectly balanced between sweet and sour. Easy to make and always a crowd-pleaser, they’re the ultimate citrus dessert for any occasion.