Pineapple Upside-Down Cake: A Classic American Dessert Reimagined
Introduction
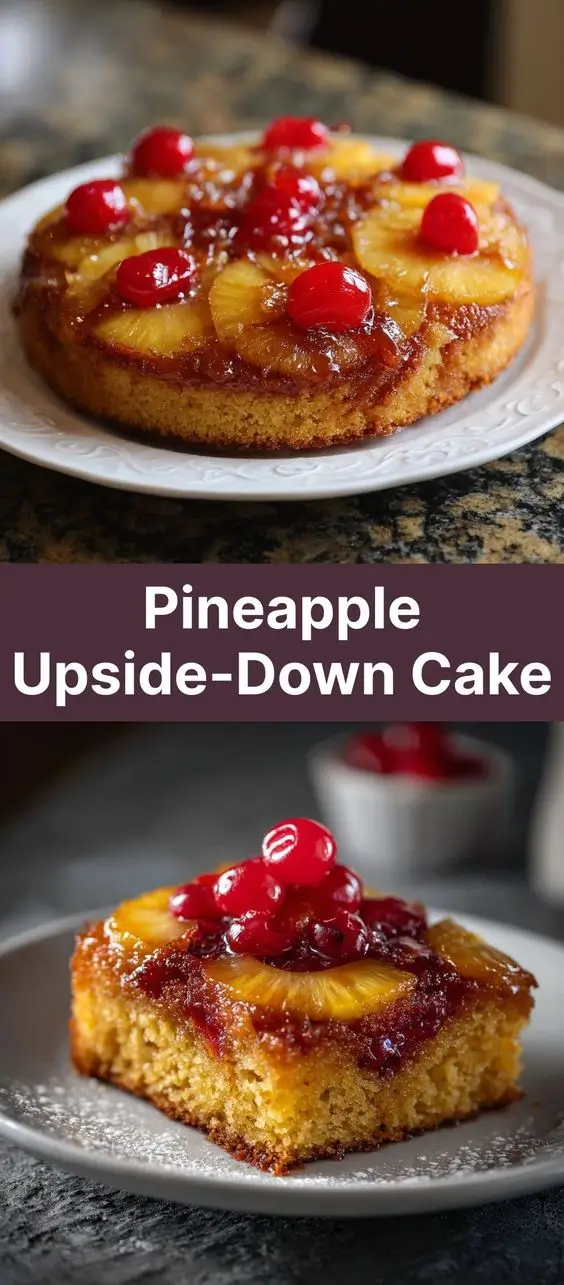
The Pineapple Upside-Down Cake is more than just a dessert—it’s a nostalgic journey back to mid-20th century American kitchens, where simplicity met indulgence in one glorious, caramelized package. With its glossy ring of golden pineapple slices, maraschino cherries perched like jewels, and a moist, buttery cake base, this dessert has captured hearts across generations. Whether served at family dinners, potlucks, or holiday gatherings, the Pineapple Upside-Down Cake stands as a symbol of comfort, warmth, and timeless culinary charm. In this comprehensive guide, we’ll dive deep into every aspect of this beloved treat—from its surprising historical roots to modern twists that cater to today’s diverse palates.
The History
The origins of the Pineapple Upside-Down Cake trace back to the early 1900s, during a time when canned pineapple was gaining popularity in the United States. The Hawaiian Pineapple Company (later known as Dole) played a pivotal role in popularizing the fruit beyond tropical regions. In the 1920s, as home canning became widespread and electric stoves replaced wood-burning ones, bakers began experimenting with new recipes using readily available ingredients.
One of the earliest documented versions of the cake appeared in a 1925 promotional cookbook by the Hawaiian Pineapple Company, encouraging homemakers to use canned pineapple in creative ways. However, the concept of “upside-down” cakes predates even this—bakers had long been layering fruit and sugar at the bottom of skillets, topping them with batter, and flipping them after baking to reveal a beautiful, glazed surface.
By the 1930s and 1940s, the Pineapple Upside-Down Cake had become a staple in American households, especially during World War II, when ingredient rationing made it ideal due to its reliance on shelf-stable components like canned fruit and simple pantry staples. Its golden era continued through the 1950s, gracing dinner tables with a touch of exotic flair at a time when tropical fruits were still considered luxurious.
Today, while culinary trends have evolved, the Pineapple Upside-Down Cake remains an enduring classic—nostalgic yet adaptable, traditional yet open to reinvention.
Ingredients Breakdown
Understanding each ingredient in a Pineapple Upside-Down Cake is key to mastering both flavor and texture. Let’s take a detailed look at what goes into creating this iconic dessert:
- Butter: Unsalted butter is typically used for better control over salt content. It melts into a rich, caramel base when combined with brown sugar, forming the luscious sauce that coats the fruit.
- Brown Sugar: Packed light or dark brown sugar provides deep molasses notes and helps create the signature sticky glaze. Dark brown sugar adds a more robust flavor, while light offers subtlety.
- Canned Pineapple Rings: Typically packed in juice or syrup, these are the star of the show. Their natural sweetness and tender texture caramelize beautifully under heat. Fresh pineapple can be used but may require adjustments due to higher water content.
- Maraschino Cherries: Placed in the center of each pineapple ring, they add color, sweetness, and a nostalgic pop. Some prefer natural cherry alternatives for a less artificial taste.
- All-Purpose Flour: Provides structure to the cake. Sifted to prevent clumping and ensure a light crumb.
- Granulated Sugar: Sweetens the cake batter without overpowering the caramelized fruit layer.
- Baking Powder: The leavening agent that gives the cake its rise and airy texture.
- Salt: Enhances all other flavors and balances sweetness.
- Eggs: Bind the ingredients together and contribute to moisture and richness.
- Butter (in batter): Adds tenderness and depth to the cake’s crumb.
- Milk or Buttermilk: Liquids that hydrate the dry ingredients. Buttermilk adds slight tanginess and improves softness.
- Vanilla Extract: Infuses the cake with warm, aromatic flavor.
Optional additions include almond extract (a classic pairing with cherries), lemon zest (to brighten the pineapple), or spices like cinnamon or nutmeg for complexity.
Step-by-Step Recipe
Follow this detailed method to create a flawless Pineapple Upside-Down Cake with a perfectly caramelized top and tender crumb.
- Preheat Oven: Set your oven to 350°F (175°C). Allow it to fully preheat for consistent baking results.
- Prepare the Skillet or Pan: Use a 10-inch cast-iron skillet or an oven-safe round cake pan. Melt ½ cup (1 stick) of unsalted butter directly in the pan over medium heat until foamy. Remove from heat.
- Add Brown Sugar: Sprinkle ¾ cup packed brown sugar evenly over the melted butter. Stir gently to form a paste-like mixture. Tilt the pan to coat the bottom uniformly.
- Arrange Fruit: Drain pineapple rings and reserve the juice for later use (great for smoothies or drinks). Place pineapple rings snugly over the sugar-butter layer. Put one maraschino cherry in the center of each ring.
- Optional Garnish: For extra flair, tuck smaller pineapple pieces or halved cherries between rings to fill gaps.
- Make the Cake Batter: In a large bowl, whisk together 1 ½ cups all-purpose flour, 1 cup granulated sugar, 1 ½ teaspoons baking powder, and ¼ teaspoon salt.
- Cream Butter and Sugar: In another bowl, beat ⅓ cup softened unsalted butter with granulated sugar until light and fluffy (about 3 minutes).
- Add Eggs and Vanilla: Beat in 2 large eggs, one at a time, followed by 1 teaspoon vanilla extract. Mix until smooth.
- Combine Wet and Dry Ingredients: Alternately add the flour mixture and ½ cup milk (or buttermilk), beginning and ending with dry ingredients. Mix until just combined—do not overmix.
- Pour Batter Over Fruit: Carefully pour the batter over the arranged pineapple layer. Use a spatula to spread evenly, taking care not to disturb the fruit below.
- Bake: Transfer the pan to the preheated oven. Bake for 35–40 minutes, or until a toothpick inserted in the center comes out clean and the top is golden brown.
- Cool Slightly: Let the cake cool for 5–10 minutes. This allows the caramel to set slightly but remain fluid enough to release cleanly.
- Invert the Cake: Place a large serving plate upside-down over the pan. Using oven mitts, firmly hold the plate and pan together and flip them in one confident motion.
- Lift the Pan: Slowly lift the pan to reveal the stunning, glistening fruit layer. If any pieces stick, gently reposition them with a spoon.
- Serve Warm: Best enjoyed slightly warm, though it can be served at room temperature. Optionally serve with whipped cream, vanilla ice cream, or a dusting of powdered sugar.
Tips
- Use a Cast-Iron Skillet: It distributes heat evenly and contributes to a deeper caramelization. Plus, it transitions seamlessly from stovetop to oven.
- Don’t Skip the Cooling Time: Flipping too soon can cause the fruit to slide off; waiting too long can make the caramel harden and stick. Five to ten minutes is ideal.
- Grease the Sides Lightly: While the bottom doesn’t need greasing (thanks to the butter layer), lightly greasing the sides of the pan helps the cake release easily.
- Pat Dry Pineapple: Blot pineapple rings with a paper towel to reduce excess moisture, which can dilute the caramel.
- Reserve Pineapple Juice: Don’t discard it! Use it to make cocktails, marinades, or add to smoothies.
- Check Oven Temperature: An inaccurate oven can lead to under- or over-baking. Use an oven thermometer for precision.
- Don’t Overmix the Batter: Overmixing develops gluten, leading to a tough cake. Mix only until ingredients are incorporated.
- Flip with Confidence: Hesitation during inversion can result in a messy flip. Make sure your plate is larger than the pan and secure your grip before flipping.
Variations and Customizations
The beauty of Pineapple Upside-Down Cake lies in its versatility. Here are some inspired variations to suit different tastes and dietary needs:
- Tropical Twist: Replace pineapple with mango, peach, or banana slices. Combine pineapple with kiwi or passionfruit for a vibrant medley.
- Cherry-Free Version: Omit maraschino cherries or substitute with candied ginger, citrus peel, or fresh raspberries for a sophisticated edge.
- Spiced Upside-Down Cake: Add ½ teaspoon ground cinnamon, a pinch of nutmeg, or cardamom to the brown sugar layer for warmth.
- Almond-Infused: Add ½ teaspoon almond extract to the batter and garnish with toasted sliced almonds after flipping.
- Gluten-Free Option: Substitute all-purpose flour with a 1:1 gluten-free baking blend. Ensure baking powder is gluten-free certified.
- Dairy-Free Version: Use plant-based butter (like coconut or olive oil-based) and almond, oat, or soy milk. Coconut milk adds richness.
- Vegan Pineapple Cake: Replace eggs with flax eggs (1 tbsp ground flax + 3 tbsp water per egg), use vegan butter, and ensure sugar is bone-char free.
- Mini Individual Cakes: Use muffin tins or ramekins to make personal servings. Adjust baking time to 20–25 minutes.
- Boozy Upgrade: Soak pineapple rings in rum or amaretto before arranging. Add 1–2 tablespoons of liquor to the caramel layer for depth.
- Honey-Glazed Version: Swap brown sugar for honey or maple syrup in the caramel base for a more natural sweetener profile (note: may affect browning).
- Fresh Fruit Approach: Use fresh pineapple slices (lightly sautéed first to concentrate flavor) instead of canned. Reduce added sugar accordingly.
Health Considerations and Nutritional Value
While undeniably delicious, Pineapple Upside-Down Cake is a dessert best enjoyed in moderation. Here’s a breakdown of its nutritional aspects:
| Nutrient | Per Serving (1/8 of cake) |
|---|---|
| Calories | ~320–380 kcal |
| Total Fat | 12–16g |
| Saturated Fat | 7–9g |
| Cholesterol | 50–70mg |
| Sodium | 150–200mg |
| Total Carbohydrates | 55–65g |
| Dietary Fiber | 1–2g |
| Sugars | 40–50g (natural + added) |
| Protein | 3–5g |
Health Notes:
- High in Added Sugars: The combination of brown sugar, granulated sugar, and sugary canned fruit makes this dessert high in simple carbohydrates. Those managing blood sugar levels should consume sparingly.
- Source of Vitamin C: Pineapple provides vitamin C and manganese, supporting immune function and antioxidant activity.
- Bromelain Enzyme: Found in fresh pineapple, bromelain aids digestion and has anti-inflammatory properties—though much is lost in canned versions.
- Saturated Fat Content: Due to butter, this cake contains significant saturated fat. Health-conscious bakers can reduce butter or use heart-healthy oils.
- Portion Control: Serve smaller slices and pair with plain yogurt or fresh berries to balance the meal.
- Homemade vs. Store-Bought: Baking at home allows control over ingredients—reducing sugar, avoiding preservatives, and choosing organic or natural options.
Ingredients
For the Caramelized Fruit Layer:
- ½ cup (1 stick / 113g) unsalted butter
- ¾ cup packed brown sugar (light or dark)
- 6–8 canned pineapple rings (about 20 oz can)
- 6–8 maraschino cherries (with stems optional)
For the Cake Batter:
- 1 ½ cups (190g) all-purpose flour
- 1 cup (200g) granulated sugar
- 1 ½ teaspoons baking powder
- ¼ teaspoon salt
- ⅓ cup (75g) unsalted butter, softened
- 2 large eggs
- ½ cup (120ml) milk or buttermilk
- 1 teaspoon vanilla extract
Directions
- Preheat oven to 350°F (175°C).
- In a 10-inch cast-iron skillet or oven-safe cake pan, melt ½ cup butter over medium heat. Remove from burner.
- Stir in ¾ cup brown sugar until well blended and spread evenly across the bottom.
- Arrange drained pineapple rings over the sugar mixture in a single layer. Place a cherry in the center of each ring.
- In a mixing bowl, sift together flour, granulated sugar, baking powder, and salt.
- In another bowl, cream ⅓ cup softened butter until smooth. Gradually add sugar mixture and beat until fluffy.
- Add eggs one at a time, beating well after each. Stir in vanilla.
- Alternately add flour mixture and milk to the wet ingredients, starting and ending with flour. Mix until just combined.
- Pour batter carefully over the pineapple layer, spreading evenly with a spatula.
- Bake for 35–40 minutes, or until a tester comes out clean and the top is golden.
- Let cool for 5–10 minutes. Place a serving plate over the pan and flip upside down with confidence.
- Lift the pan gently. Reposition any stray fruit if needed. Serve warm.
FAQ
- Can I make Pineapple Upside-Down Cake ahead of time?
- Yes, you can bake it a day in advance. Keep it covered at room temperature. Reheat slightly before serving for best texture.
- Why did my fruit stick to the pan?
- This usually happens if the cake cooled too long before flipping. Aim for 5–10 minutes post-bake. Also, ensure enough butter and sugar were used to create a non-stick barrier.
- Can I use a different pan?
- Around 9×13 inch baking dish works, but the visual impact diminishes. Springform pans can leak; avoid unless lined properly. Always use oven-safe materials.
- Is fresh pineapple better than canned?
- Canned pineapple is often preferred because it’s pre-sweetened and has consistent texture. Fresh pineapple contains more moisture and bromelain, which can interfere with gelatin setting—but it works if patted dry and lightly cooked first.
- Can I freeze this cake?
- You can freeze unfrosted slices for up to 2 months. Wrap tightly in plastic and foil. Thaw overnight in the fridge and reheat before serving.
- What causes a soggy cake bottom?
- Excess juice from pineapple or overbaking can create sogginess. Always drain and pat dry pineapple thoroughly. Avoid opening the oven too early during baking.
- Can I double the recipe?
- Yes, but use a larger pan (e.g., 12-inch skillet) and increase baking time by 10–15 minutes. Monitor closely for doneness.
- Why is my cake dry?
- Overbaking or overmixing the batter are common culprits. Measure flour correctly (spoon and level), and check for doneness starting at 35 minutes.
- Can I add nuts?
- Absolutely! Toasted pecans or walnuts sprinkled over the caramel layer add crunch and flavor. Add before pouring the batter.
- Can kids help make this cake?
- Yes! Kids can arrange the pineapple and cherries, mix dry ingredients, or help measure. Supervise near heat and during flipping.
Summary
The Pineapple Upside-Down Cake is a timeless dessert that blends caramelized sweetness with tender cake in one dramatic flip. Easy to customize and rich in nostalgic appeal, it continues to delight bakers and eaters alike.