Introduction
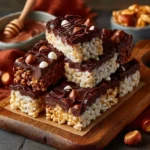
Oatmeal Chocolate Fudge Bars are the ultimate comfort dessert—chewy, rich, deeply chocolatey, and warmly spiced with the wholesome heartiness of rolled oats. These bars strike a perfect balance between indulgence and approachability: they’re far simpler than traditional fudge (no candy thermometers or precise temperature control required), yet infinitely more decadent than basic oatmeal bars. Whether you’re baking for a school bake sale, prepping an easy make-ahead treat for busy weeknights, or satisfying a late-night cocoa craving, these bars deliver dense, fudgy texture, velvety chocolate depth, and subtle nutty-oat complexity in every bite. They’re the kind of dessert that feels nostalgic—like childhood lunchbox treats reimagined with gourmet flair—and versatile enough to adapt to dietary preferences, pantry constraints, or seasonal twists.
The History
While no single inventor or origin year is documented for Oatmeal Chocolate Fudge Bars, their lineage is a delicious convergence of three American baking traditions: oat-based bar cookies (popularized in the early 20th century via brands like Quaker Oats’ recipe pamphlets), chocolate fudge (a confection that surged in popularity after its debut at a 1886 summer resort in New Hampshire), and the mid-century rise of “dump-and-bake” convenience desserts. By the 1950s and ’60s, home economists and women’s magazines began publishing hybrid recipes—like “Oatmeal Fudge Squares” and “Chocolate-Oat Chewies”—designed for efficiency and crowd-pleasing flavor. These early versions often relied on melted chocolate, butter, brown sugar, and quick oats, baked in sheet pans and cut into bars. Over decades, the recipe evolved: the addition of espresso powder for depth, toasted oats for aroma, sea salt for contrast, and modern upgrades like dark chocolate chips or natural sweeteners reflect shifting tastes and culinary awareness. Today, Oatmeal Chocolate Fudge Bars exist as both a retro classic and a canvas for innovation—showcasing how humble ingredients, when thoughtfully combined, can produce something timeless, universally beloved, and endlessly reinventable.
Ingredients Breakdown
Every ingredient in this recipe plays a functional and flavorful role—no filler, no afterthoughts. Here’s why each one matters:
- Old-Fashioned Rolled Oats: Not instant or steel-cut—these provide ideal chew, structure, and absorbency. Their flat, flaky surface soaks up melted chocolate and fat without turning gummy. Toasting them first enhances nuttiness and prevents sogginess.
- Unsweetened Natural Cocoa Powder (Dutch-processed preferred): Delivers intense, smooth chocolate flavor without acidity. Dutch-processed cocoa is alkalized, yielding richer color, mellow bitterness, and superior solubility in the batter—critical for uniform fudginess.
- Granulated Sugar & Packed Brown Sugar: Granulated provides crisp edges and caramelization; brown sugar contributes moisture, molasses depth, and chew. The 1:1 ratio ensures balanced sweetness and optimal texture.
- Unsalted Butter: Melted and cooled, it binds everything while adding luxurious mouthfeel. Unsalted allows full control over sodium levels—especially important when finishing with flaky sea salt.
- Large Egg: Adds structure and lift without making bars cakey. Room temperature incorporation ensures even emulsification and prevents graininess.
- Vanilla Extract (Pure, not imitation): Enhances chocolate’s aromatic compounds and rounds out sharp notes. A splash of vanilla bean paste adds visible specks and heightened complexity.
- Espresso Powder (instant, unsweetened): A secret weapon—it doesn’t make bars taste like coffee, but deepens chocolate flavor by up to 40% through flavor amplification (a well-documented phenomenon in food science).
- Salt (fine sea salt or kosher): Balances sweetness and heightens all other flavors. Critical for preventing cloyingness—undersalted fudge bars taste flat and one-dimensional.
- Mini Semi-Sweet Chocolate Chips: Smaller size ensures even distribution and faster melting into ribbons throughout the bar—not just pockets. They also create a glossy top crust when baked.
- Optional Add-Ins: Toasted walnuts or pecans add crunch and tannic contrast; dried cherries lend bright tartness; a swirl of peanut butter or salted caramel offers textural intrigue and savory-sweet dimension.
Step-by-Step Recipe
- Preheat & Prep: Position oven rack to center position. Preheat oven to 350°F (175°C). Grease a 9×13-inch metal baking pan *thoroughly*, then line with parchment paper—leaving 2-inch overhang on two opposite sides for easy lifting. Lightly grease parchment.
- Toast the Oats: Spread 3 cups old-fashioned rolled oats evenly on a large rimmed baking sheet. Bake 8–10 minutes, stirring halfway, until fragrant and lightly golden. Cool completely (15 min)—*do not skip cooling*, or melted butter will cook the oats and cause greasiness.
- Melt Chocolate Base: In a medium heatproof bowl set over a saucepan of barely simmering water (double boiler), combine 1 cup unsalted butter, ¾ cup unsweetened cocoa powder, 1 cup granulated sugar, and 1 cup packed brown sugar. Stir constantly with a silicone spatula until fully melted, smooth, and glossy—about 5–6 minutes. Remove from heat; cool 5 minutes.
- Incorporate Wet Ingredients: Whisk in 1 large egg, 2 tsp pure vanilla extract, 1½ tsp instant espresso powder, and 1 tsp fine sea salt until fully combined and no streaks remain. Mixture will thicken slightly.
- Fold in Dry & Add-Ins: Gently fold in cooled toasted oats until evenly distributed. Then fold in 1½ cups mini semi-sweet chocolate chips (and optional nuts or dried fruit, if using) until just combined—avoid overmixing to preserve chewy texture.
- Spread & Smooth: Pour batter into prepared pan. Use an offset spatula dipped in hot water (and wiped dry) to spread evenly. Tap pan firmly on counter 3 times to release air bubbles and level surface.
- Bake with Precision: Bake 28–32 minutes—until edges are set and pulling away slightly from pan, top is matte (not shiny), and a toothpick inserted 1 inch from edge comes out with moist crumbs (not wet batter). *Center should look soft but not liquid.* Overbaking causes crumbliness.
- Cool Completely Before Cutting: Let bars cool in pan on a wire rack for 1 hour. Then lift parchment overhang to remove slab. Transfer to cutting board and chill uncovered in refrigerator 2+ hours (or overnight). Cold setting is non-negotiable for clean, fudgy slices.
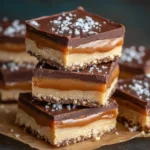
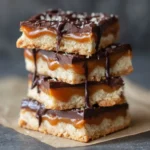
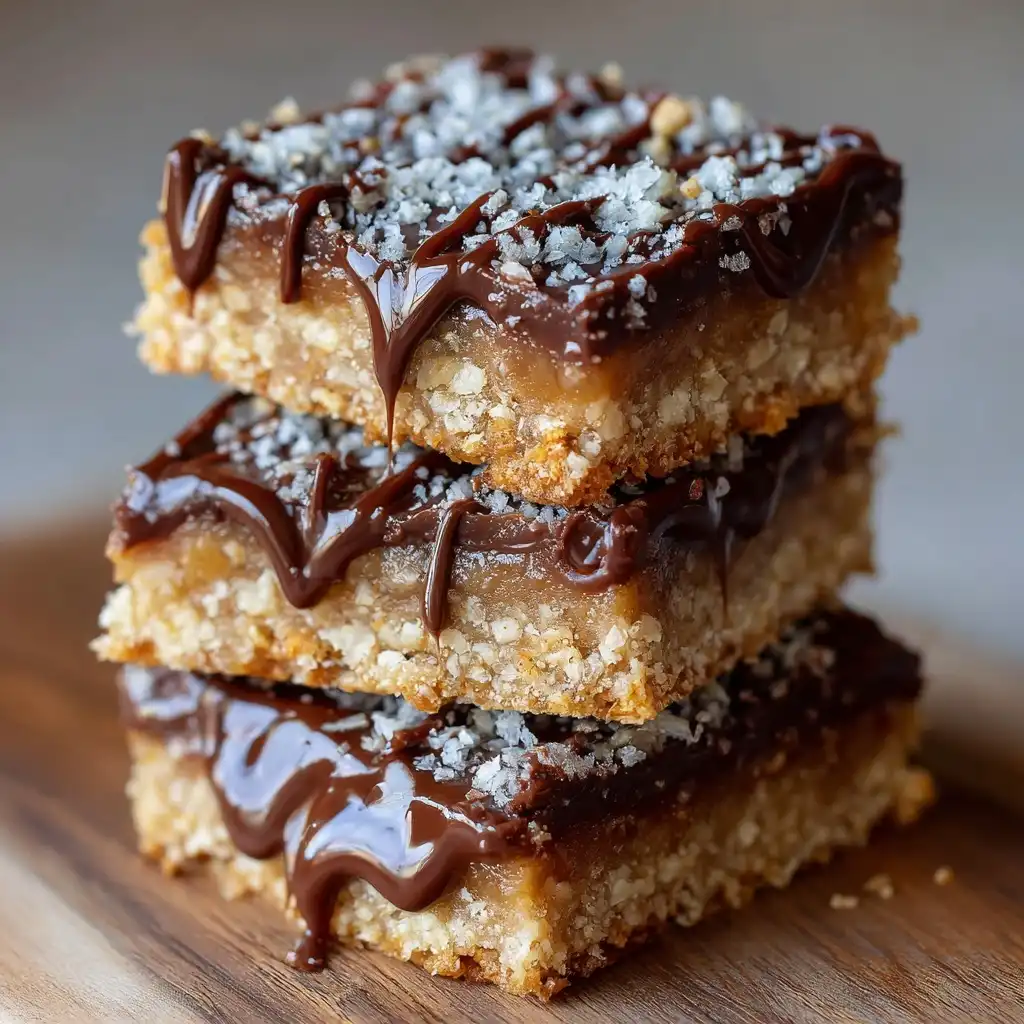
- Portion & Finish: Using a sharp chef’s knife wiped clean between cuts, slice into 16 even 3×2-inch bars. Sprinkle tops generously with flaky sea salt just before serving.
Tips
- Toast oats in advance: Do this up to 3 days ahead and store in an airtight container at room temperature—saves time and guarantees consistent results.
- Measure cocoa by weight when possible: ¾ cup cocoa = ~65g. Volume measurements vary wildly by brand and sifting—weight ensures accuracy for proper fudginess.
- Use a metal pan, not glass or ceramic: Metal conducts heat rapidly and evenly, essential for crisp edges and uniform doneness. Glass retains heat too long and risks overbaked corners.
- Chill before slicing—even if you’re impatient: Warm bars crumble; cold bars hold shape, slice cleanly, and develop deeper chocolate flavor as fats fully solidify.
- Room-temperature egg matters: A cold egg can cause the warm chocolate-butter mixture to seize or become grainy. To warm quickly: place egg in warm (not hot) water for 5 minutes.
- Don’t substitute quick oats: They absorb liquid too fast and turn gummy. If only instant oats are available, use 2¼ cups and reduce bake time by 3–4 minutes—but rolled oats are strongly recommended.
- For ultra-glossy top: After spreading batter, gently press remaining 2 tbsp mini chips onto surface before baking—they’ll melt into a beautiful, shimmering chocolate layer.
- Store smart: Keep bars airtight at room temperature up to 3 days, refrigerated up to 10 days, or frozen (wrapped individually in parchment + placed in freezer bag) up to 3 months. Thaw at room temperature 20 minutes before serving.
Variations and Customizations
This recipe is gloriously adaptable—whether accommodating allergies, celebrating seasons, or elevating presentation:
- Gluten-Free Version: Substitute certified GF old-fashioned oats and ensure all other ingredients (cocoa, chips, vanilla) are GF-certified. Add 1 tbsp ground flaxseed + 2 tbsp water (let sit 5 min) to replace egg if needed for binding.
- Vegan Adaptation: Use vegan butter (e.g., Miyoko’s or Earth Balance), flax “egg” (1 tbsp ground flax + 2.5 tbsp water), dairy-free chocolate chips, and maple syrup (reduce granulated sugar to ¾ cup, increase brown sugar to 1¼ cups for moisture). Bake 2–3 minutes longer.
- Protein-Packed: Stir in ¼ cup unflavored whey or plant-based protein powder with dry ingredients. Add 2 tbsp chia seeds for fiber and omega-3s.
- Decadent Swirls: Before baking, dollop ⅓ cup salted caramel sauce or warmed almond butter over batter, then drag a knife through in figure-eights for marbling.
- Seasonal Twists: In fall—add 1 tsp pumpkin pie spice + ¼ cup chopped crystallized ginger. In winter—fold in ½ cup crushed peppermint candies + extra 1 tsp peppermint extract. In spring—swap ¼ cup cocoa for matcha powder and add white chocolate chips.
- Bar-Inspired Mini Treats: Press batter into lined mini muffin tin cups. Bake 14–16 minutes. Pop out chilled for portable, portion-controlled bites.
- Gourmet Finishes: Drizzle with tempered dark chocolate, sprinkle with edible gold dust, garnish with candied orange peel or rose petals for special occasions.
Health Considerations and Nutritional Value
While undeniably indulgent, these bars offer meaningful nutritional benefits when enjoyed mindfully—and can be adjusted for specific wellness goals. Per standard 3×2-inch bar (recipe yields 16):
- Calories: ~245 kcal — moderate for a dessert bar, especially given satiating fat and fiber.
- Fiber: ~2.3g (from oats and cocoa) — supports digestive health and promotes fullness; equivalent to 9% DV.
- Iron & Magnesium: Cocoa provides non-heme iron (1.4mg, ~8% DV) and magnesium (42mg, ~10% DV), crucial for energy metabolism and muscle function.
- Antioxidants: Raw cocoa contains >300 compounds, including epicatechin and procyanidins—linked to improved vascular function and reduced oxidative stress.
- Healthy Fats: Butter contributes butyric acid (supports gut lining integrity); optional walnuts add alpha-linolenic acid (ALA), a plant-based omega-3.
- Lower-Sugar Options: Reduce total sugar by ¼ cup (replace with 2 tbsp coconut flour + 2 tbsp unsweetened applesauce) — lowers calories by ~45 and net carbs by 11g per bar.
- Dietary Notes: Naturally cholesterol-free if vegan version used; low-FODMAP if made with lactose-free chocolate and maple syrup instead of brown sugar (consult Monash app for serving sizes).
- Important Considerations: Contains gluten (oats may be cross-contaminated unless certified GF); high in saturated fat (11g/bar) — best enjoyed as part of a balanced diet, not daily. Those with diabetes should monitor portions and pair with protein (e.g., Greek yogurt dip) to slow glucose response.
Ingredients
- 3 cups old-fashioned rolled oats (not quick or instant)
- 1 cup unsalted butter, cubed
- ¾ cup unsweetened natural or Dutch-processed cocoa powder
- 1 cup granulated sugar
- 1 cup packed light or dark brown sugar
- 1 large egg, room temperature
- 2 teaspoons pure vanilla extract
- 1½ teaspoons instant espresso powder (unsweetened)
- 1 teaspoon fine sea salt or kosher salt
- 1½ cups mini semi-sweet chocolate chips (plus 2 tablespoons for topping, optional)
- Flaky sea salt, for finishing (e.g., Maldon)
Optional Add-Ins: 1 cup toasted chopped walnuts or pecans; ½ cup dried tart cherries or cranberries; ¼ cup natural peanut butter for swirling.
Directions
- Preheat oven to 350°F (175°C). Grease a 9×13-inch metal baking pan, then line with parchment paper, leaving overhang on two opposite sides. Grease parchment lightly.
- Spread oats evenly on a rimmed baking sheet. Bake 8–10 minutes, stirring once, until golden and fragrant. Cool completely (≈15 minutes).
- In a medium heatproof bowl over barely simmering water (double boiler), combine butter, cocoa, granulated sugar, and brown sugar. Stir constantly until fully melted, smooth, and glossy (5–6 minutes). Remove from heat; cool 5 minutes.
- Whisk in egg, vanilla, espresso powder, and salt until uniform and no streaks remain.
- Fold in cooled oats until fully incorporated. Gently fold in mini chocolate chips (and optional add-ins) until just combined.
- Pour into prepared pan. Use a warm, damp offset spatula to spread evenly. Tap pan firmly on counter 3 times.
- Bake 28–32 minutes—until edges are set and pulling away, top is matte, and toothpick near edge has moist crumbs (not wet batter).
- Cool in pan on wire rack 1 hour. Lift out using parchment. Chill uncovered 2+ hours (or overnight).
- Using a sharp knife wiped between cuts, slice into 16 bars. Sprinkle tops with flaky sea salt. Serve at cool room temperature.
FAQ
- Can I use honey or maple syrup instead of sugar?
- Not directly—the recipe relies on granulated and brown sugar for proper structure and caramelization. Liquid sweeteners add excess moisture and prevent fudgy set. For a natural alternative, try coconut sugar (1:1 swap for brown sugar) + reduce granulated to ¾ cup.
- Why did my bars turn out dry/crumbly?
- Most common causes: overbaking (even 2 extra minutes dries them out), skipping oat toasting (raw oats absorb too much moisture), using quick oats (they break down and release starch), or cutting while warm. Always chill fully and use a timer!
- Can I make these ahead for a party?
- Absolutely—and they improve! Bake up to 3 days ahead, store airtight at room temperature, or freeze up to 3 months. Thaw wrapped at room temp 30 minutes before serving. Flavor deepens over 24–48 hours.
- What if I don’t have espresso powder?
- You can omit it—but you’ll miss significant chocolate depth. As a substitute: ½ tsp very finely ground dark roast coffee (not instant coffee crystals, which are too acidic) OR ¼ tsp instant chicory root powder.
- Can I double the recipe?
- Yes—but bake in two separate 9×13 pans. Doubling in one pan causes uneven baking and undercooked centers. Never stack pans in the oven.
- Are these bars safe for kids with nut allergies?
- Yes—as written, they’re nut-free. Just verify all labels (chocolate chips, vanilla) for potential cross-contamination warnings if severe allergy exists. Avoid optional nut add-ins.
- My batter seems thick/grainy—is that normal?
- It should be thick but smooth and glossy after whisking in the egg. Graininess usually means cocoa wasn’t fully melted or egg was too cold. If grainy, gently re-warm mixture over double boiler 1–2 minutes while whisking—don’t boil.
- Can I use Dutch-process cocoa AND natural cocoa together?
- Yes—but adjust leavening if using baking soda/powder (this recipe has none, so it’s safe). Dutch-process is recommended for superior flavor and consistency.
Summary
Oatmeal Chocolate Fudge Bars are a masterclass in simple luxury—melding toasted oats, premium cocoa, and slow-melted chocolate into dense, chewy, deeply flavorful squares that satisfy cravings without fuss.
With customizable add-ins, flexible dietary adaptations, make-ahead ease, and surprising nutritional perks, they’re not just a dessert—they’re a dependable, joyful ritual in edible form.