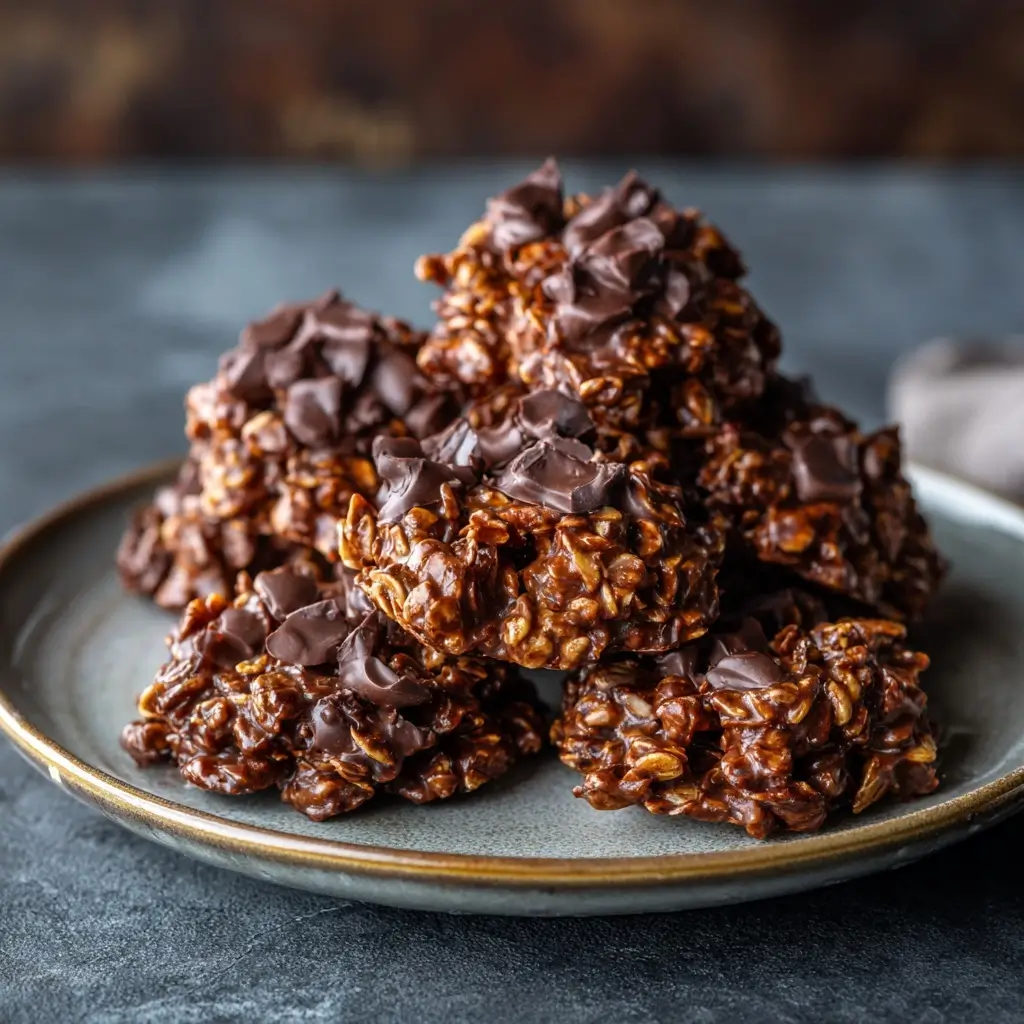
No Bake Chocolate Oat Clusters: A Decadent, Easy-to-Make Treat
If you’re craving a delicious, no-fuss dessert that combines the richness of chocolate with the wholesome goodness of oats, then No Bake Chocolate Oat Clusters are your go-to treat. These clusters are not only incredibly simple to make but also require no baking—perfect for busy days, last-minute cravings, or when you want something sweet without turning on the oven. Whether you’re looking for a quick snack, an energy-boosting bite, or a kid-friendly dessert, these clusters deliver big flavor in every bite.
The History of No Bake Chocolate Oat Clusters
The concept of no bake treats has deep roots in American and British home cooking, dating back to the early 20th century. As refrigeration became more common in households, cooks began experimenting with chilled desserts that didn’t require ovens. Traditional recipes like “oatmeal balls,” “refrigerator cookies,” and “haystacks” emerged as popular options, often made with pantry staples such as oats, peanut butter, sugar, and melted chocolate.
One of the earliest known versions of this type of recipe is the “Haystack Cookie,” which gained popularity in the 1950s and 1960s. Made with chow mein noodles, chocolate, and peanut butter, haystacks evolved over time to include rolled oats, especially as people sought healthier, more accessible alternatives. The oat-based version quickly became a favorite due to its chewy texture, nutty flavor, and nutritional benefits.
By the 1980s and 1990s, no bake chocolate oat clusters appeared in community cookbooks, school lunch menus, and diet-conscious recipe collections. Their versatility allowed for endless variations—adding coconut, dried fruit, seeds, or different types of chocolate—which contributed to their lasting appeal. Today, they remain a beloved staple in homes around the world, embraced by families, health enthusiasts, and dessert lovers alike.
Ingredients Breakdown: What Makes These Clusters So Irresistible?
The magic of No Bake Chocolate Oat Clusters lies in the balance between indulgence and nutrition. Each ingredient plays a key role in creating the perfect texture, flavor, and binding structure—all without requiring flour, eggs, or baking. Let’s dive into each component:
- Old-Fashioned Rolled Oats: These form the base of the clusters. Unlike instant oats, rolled oats have a heartier texture and hold up well after chilling. They provide fiber, complex carbohydrates, and a satisfying chewiness.
- Peanut Butter (or Nut/Seed Butter): Acts as the glue that binds everything together while adding creaminess and protein. Natural peanut butter enhances the healthy profile, while processed versions offer extra sweetness and smoothness.
- Unsweetened Cocoa Powder or Melted Chocolate: Delivers rich chocolate flavor. Using cocoa powder mixed with a fat source creates a fudgy coating, while melting dark, milk, or semi-sweet chocolate gives a glossy finish.
- Honey or Maple Syrup: Natural sweeteners that also help bind the mixture. They add moisture and prevent the clusters from becoming too dry or crumbly.
- Coconut Oil or Butter: Helps achieve a smooth, spreadable consistency when mixing and contributes to a firm set once chilled. Coconut oil adds a subtle tropical note and supports clean melting and re-hardening.
- Vanilla Extract: Enhances overall flavor depth and rounds out the sweetness.
- Salt: A pinch elevates all other flavors, balancing sweetness and enhancing savoriness.
- Optional Add-ins: Chia seeds, flaxseed meal, shredded coconut, chopped nuts, raisins, dried cranberries, cacao nibs, or even mini marshmallows can be folded in for extra texture and nutrition.
Step-by-Step Recipe: How to Make Perfect No Bake Chocolate Oat Clusters
Making these clusters is so easy it feels like cheating—yet the results are restaurant-quality delicious. Follow these detailed steps for foolproof success every time.
- Gather Your Tools and Ingredients: You’ll need a medium saucepan or microwave-safe bowl, a spatula, measuring cups/spoons, and a lined baking sheet or tray (use parchment paper or a silicone mat).
- Combine Wet Ingredients: In a saucepan over low heat, add ½ cup creamy peanut butter, ¼ cup honey (or maple syrup), 2 tablespoons coconut oil, and ¼ cup unsweetened cocoa powder. Stir continuously until fully melted and smooth. Alternatively, microwave in 30-second bursts, stirring between each, until blended.
- Add Flavor Enhancers: Remove from heat and stir in 1 teaspoon vanilla extract and a pinch of sea salt. Taste and adjust sweetness if needed.
- Incorporate Oats: Pour the warm mixture into a large mixing bowl containing 2 cups of old-fashioned rolled oats. Use a wooden spoon or spatula to mix thoroughly until every oat is evenly coated.
- Fold in Extras (Optional): Now’s the time to add ⅓ cup shredded coconut, ¼ cup chopped almonds, or ½ cup dried fruit. Mix gently to distribute.
- Form Clusters: Scoop tablespoon-sized portions onto the prepared tray. For defined clusters, press down slightly to flatten; for looser bites, leave them mounded. Use a second spoon or your fingers (lightly greased) to shape.
- Chill Until Set: Place the tray in the refrigerator for at least 30–45 minutes, or until firm. For faster setting, use the freezer for 15–20 minutes.
- Store or Serve: Once hardened, transfer clusters to an airtight container. Enjoy chilled or at room temperature.
Tips for Success: Get the Best Results Every Time
- Use Rolled Oats, Not Instant: Quick oats may become mushy and lack structure. Steel-cut oats are too tough unless pre-soaked.
- Don’t Overheat the Mixture: High heat can separate peanut butter or burn cocoa. Low and slow ensures a silky blend.
- Grease Hands or Spoon: If the mixture sticks while shaping, lightly coat your tools with non-stick spray or coconut oil.
- Uniform Sizing: Keep clusters consistent so they chill evenly and look professional.
- Double-Dip for Extra Chocolate: After initial chilling, drizzle melted chocolate on top for a bakery-style finish.
- Freeze for Longevity: These freeze beautifully for up to 3 months. Thaw briefly before eating.
- Prevent Sticking: Store layers with parchment paper between them to avoid fusion in storage.
Variations and Customizations: Make It Your Own
One of the greatest strengths of this recipe is its adaptability. Here are some creative twists to suit dietary needs, flavor preferences, or seasonal themes:
- Vegan Version: Use maple syrup instead of honey and ensure chocolate and peanut butter are plant-based.
- Nut-Free Option: Substitute sunflower seed butter or soy nut butter for peanut butter. Check labels for allergens.
- Protein-Packed: Add one scoop of unflavored or chocolate protein powder to the wet mix. You may need a splash of almond milk to maintain consistency.
- Gluten-Free: Ensure oats are certified gluten-free to avoid cross-contamination.
- Tropical Twist: Mix in toasted coconut flakes, dried mango, and macadamia nuts. Use coconut butter for a stronger island flavor.
- Chocolate Lover’s Dream: Use dark chocolate chips in the mix or roll clusters in crushed cacao nibs.
- Breakfast Clusters: Reduce cocoa powder, increase oats, and add chia seeds and cinnamon for a morning superfood bite.
- Holiday Edition: Add red and green sprinkles, peppermint extract, or crushed candy canes during festive seasons.
- Trail Mix Style: Fold in pumpkin seeds, raisins, banana chips, and almonds for a portable hiking snack.
- Salted Caramel Swirl: Drizzle caramel sauce into the mixture before chilling—or sprinkle flaky sea salt on top after shaping.
Health Considerations and Nutritional Value
No Bake Chocolate Oat Clusters aren’t just tasty—they can be part of a balanced diet when made thoughtfully. While traditionally seen as a treat, small changes can boost their nutritional profile significantly.
Macronutrient Overview (Per Cluster, Approximate – based on standard recipe, yields ~24 clusters):
- Calories: 90–110
- Fat: 5–7g (mostly healthy fats from nut butter and coconut oil)
- Carbohydrates: 10–12g (with 2–3g fiber from oats)
- Protein: 2–3g
- Sugars: 5–7g (varies by sweetener choice)
Health Benefits:
- Oats: Rich in beta-glucan, a soluble fiber that supports heart health and helps regulate blood sugar.
- Nut Butter: Provides monounsaturated fats, vitamin E, magnesium, and sustained energy.
- Dark Chocolate/Cocoa: Contains antioxidants like flavonoids, linked to improved circulation and reduced inflammation.
- Minimal Processing: No refined flour or artificial additives when made at home with whole ingredients.
Dietary Notes:
- Can be adapted for vegan, gluten-free, refined sugar-free, and plant-based diets.
- Not suitable for those with peanut/tree nut allergies unless substitutions are carefully made.
- Portion control is advised due to calorie density—these are nutrient-rich but energy-dense.
- Avoid giving to young children under 1 year due to honey content (risk of botulism).
Full Ingredient List (Standard Recipe)
- 2 cups old-fashioned rolled oats (certified gluten-free if needed)
- ½ cup creamy peanut butter (natural or regular)
- ¼ cup honey or pure maple syrup
- 2 tablespoons coconut oil (or unsalted butter)
- ¼ cup unsweetened cocoa powder (Dutch-process or natural)
- 1 teaspoon pure vanilla extract
- Pinch of sea salt (about ⅛ tsp)
- Optional: ⅓ cup add-ins (shredded coconut, chopped nuts, dried fruit, etc.)
Detailed Directions
- Line a large baking sheet or tray with parchment paper or a silicone baking mat. Set aside.
- In a medium saucepan over low heat, combine the peanut butter, honey, coconut oil, and cocoa powder.
- Stir constantly with a silicone spatula or wooden spoon until the mixture is completely melted, smooth, and glossy—about 3–5 minutes. Be careful not to let it bubble or scorch.
- Remove from heat and stir in the vanilla extract and sea salt. The mixture should smell rich and chocolatey.
- In a large mixing bowl, pour the hot chocolate mixture over the rolled oats.
- Using a sturdy spoon or spatula, mix thoroughly until all the oats are evenly coated. The mixture will thicken quickly as it cools.
- If using any optional add-ins (like coconut, nuts, or dried fruit), fold them in now and stir gently to combine.
- Allow the mixture to cool slightly for 2–3 minutes to make scooping easier (but don’t let it harden).
- Using a tablespoon or small cookie scoop, portion the mixture onto the prepared tray. Aim for about 1-tablespoon portions.
- Gently press each cluster down with the back of the spoon to create a rustic, rounded shape. Alternatively, roll into balls for a smoother look.
- Place the tray in the refrigerator and chill for at least 30 minutes, or until firm and set.
- Once chilled, transfer clusters to an airtight container. Store in the fridge for up to 2 weeks or freeze for longer storage.
- For a decorative touch, melt additional chocolate and drizzle over the tops before storing.
Frequently Asked Questions (FAQ)
Q: Can I make these without peanut butter?
A: Absolutely! Try almond butter, cashew butter, sunflower seed butter (great for schools with nut bans), or even tahini for a unique twist.
Q: Why are my clusters too soft or falling apart?
A: This usually happens if there’s too much liquid or not enough oats. Try increasing oats by ¼ cup next time or chilling longer. Also, ensure you’re using old-fashioned oats—not instant.
Q: Can I use cocoa powder and melted chocolate together?
A: Yes! For deeper flavor, replace half the cocoa powder with ¼ cup melted dark chocolate. Adjust coconut oil accordingly for fluidity.
Q: Are these safe for kids?
A: Yes, except for infants under 1 year due to honey. Always supervise young children to prevent choking on larger clusters.
Q: Can I bake these to make them crunchy?
A: Technically yes, but they’re designed to be no-bake. Baking may dry them out. If you prefer crispy bars, consider making baked granola bars instead.
Q: How long do they last?
A: Up to 2 weeks in the refrigerator or 3 months in the freezer. They stay fresher when stored in an airtight container with parchment between layers.
Q: Can I make them oil-free?
A: Yes—omit coconut oil and use only nut butter and syrup. You might need to warm the mixture slightly longer to achieve a pourable consistency.
Q: Can I use powdered sugar instead of honey?
A: Not recommended. Powdered sugar won’t dissolve properly and lacks the binding properties of liquid sweeteners.
Q: Are these considered healthy?
A: They contain nutritious ingredients like fiber-rich oats and healthy fats, but are still a treat due to natural sugars and calories. Best enjoyed in moderation as part of a balanced diet.
Q: Can I make them ahead of time?
A: Definitely! These are ideal for meal prep. Make a batch on Sunday and enjoy all week long as snacks or dessert.
Summary
No Bake Chocolate Oat Clusters are the ultimate easy, customizable treat that combines wholesome oats with rich chocolate and creamy nut butter—no oven required. Ready in under 15 minutes and packed with flavor, fiber, and energy, they’re perfect for snacking, gifting, or satisfying sweet cravings the healthy way.