Introduction
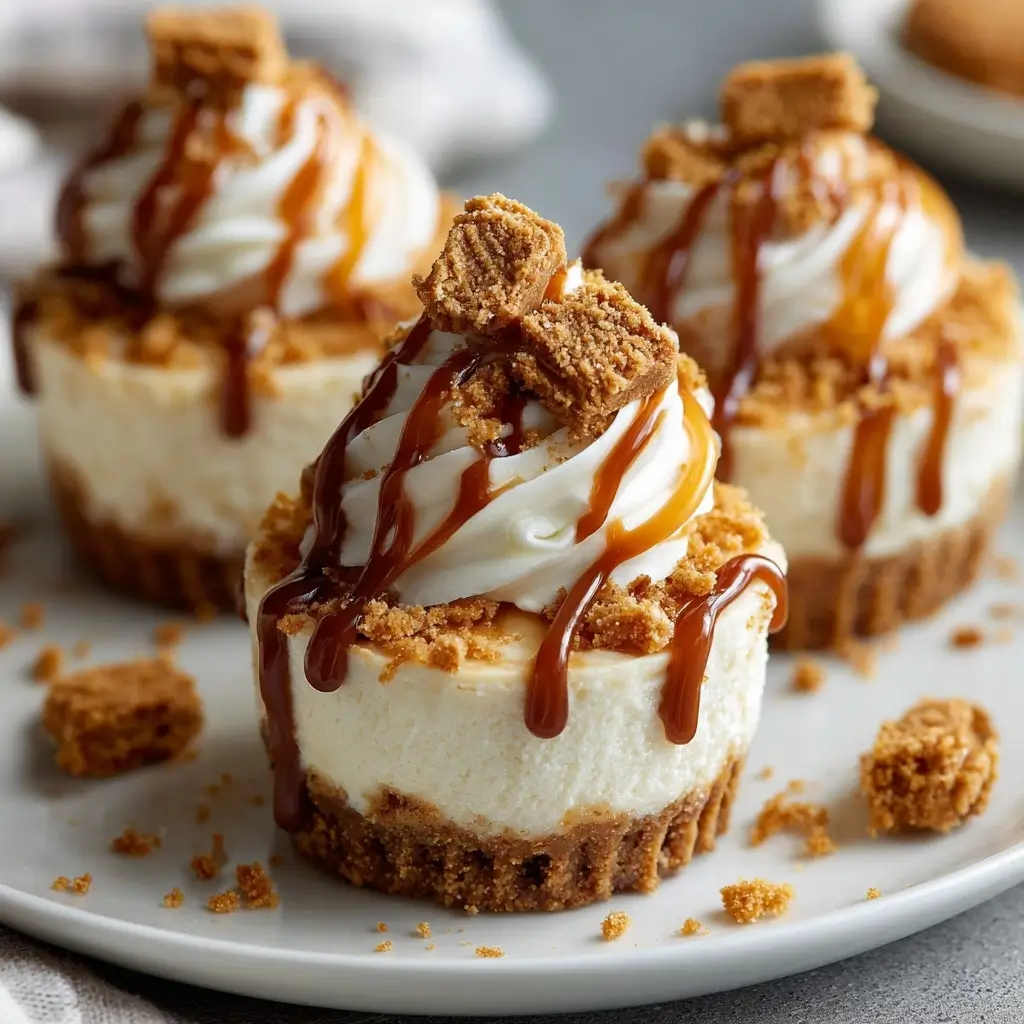
Indulge in the creamy, rich, and utterly irresistible No Bake Biscoff Cheesecake Cups — a modern dessert sensation that combines the nostalgic warmth of spiced Biscoff cookies with the luxurious texture of silky cheesecake. These individual treats are perfect for parties, potlucks, or simply satisfying your sweet tooth without turning on the oven. With their elegant presentation in clear cups or jars, they’re as photogenic as they are delicious. Whether you’re a seasoned baker or a complete beginner, this no-bake recipe is foolproof, quick to assemble, and guaranteed to impress. The blend of caramelized biscuit flavor, smooth cream cheese filling, and optional garnishes makes each bite a harmonious balance of sweetness, spice, and crunch.
What sets these cheesecake cups apart is their convenience and versatility. No baking means no stress over cracked tops or water baths. Instead, you get a perfectly set, chilled dessert that chills in the fridge while you relax. Plus, they’re customizable to suit dietary preferences — make them gluten-free, vegan, or lower in sugar with simple swaps. Ideal for summer gatherings, holiday desserts, or anytime you want something special with minimal effort, these No Bake Biscoff Cheesecake Cups are destined to become a staple in your recipe collection.
The History
The origins of Biscoff trace back to Belgium in the early 20th century, where Lotus Bakeries began producing their signature spiced biscuits — known as speculoos — traditionally enjoyed alongside coffee. The unique blend of cinnamon, nutmeg, ginger, and cloves gives Biscoff its distinctive warm, caramel-like flavor. Over time, these biscuits gained international fame, especially when served on airplanes, earning them the nickname “those airplane cookies.” But it was the invention of Biscoff cookie butter (or speculoos spread) in the 2000s that truly revolutionized how people used the beloved biscuit flavor.
Biscoff spread quickly became a pantry staple, inspiring countless dessert creations — from pancakes and waffles to frostings and milkshakes. Enter the cheesecake: a classic dessert with roots in ancient Greece, perfected over centuries and popularized globally for its creamy richness. Combining Biscoff with cheesecake was a natural evolution. The no-bake version emerged as a convenient, accessible twist, especially appealing to home cooks looking for quick yet impressive desserts. No Bake Biscoff Cheesecake Cups represent the fusion of European tradition and modern American dessert culture — portable, personal-sized delights that celebrate flavor, texture, and ease. Today, they’re a viral favorite across food blogs, Pinterest boards, and Instagram feeds, adored for their eye-catching layers and bold taste profile.
Ingredients Breakdown
Creating the perfect No Bake Biscoff Cheesecake Cups starts with understanding each ingredient’s role in building flavor, texture, and structure. Here’s a detailed breakdown:
- Cream Cheese (Full-Fat): The foundation of any great cheesecake, full-fat cream cheese ensures a rich, velvety texture. It provides body and tanginess that balances the sweetness of other ingredients. Always use room-temperature cream cheese to avoid lumps and ensure smooth blending.
- Biscoff Cookie Butter (Smooth): This is the star ingredient, delivering the iconic spiced, caramelized flavor. Smooth Biscoff spread integrates seamlessly into the filling, while crunchy versions can add texture if desired. It also acts as a natural sweetener and fat source, enhancing creaminess.
- Heavy Whipping Cream: When whipped to stiff peaks, this adds lightness and fluffiness to the filling, transforming dense cream cheese into an airy mousse-like consistency. Its high fat content helps the mixture hold shape when chilled.
- Powdered Sugar: Adds sweetness and helps stabilize the whipped mixture. Sifting prevents clumps and ensures even distribution. You can reduce or substitute with powdered erythritol for a lower-sugar option.
- Vanilla Extract: Enhances overall flavor complexity with a warm, aromatic note that complements the spices in Biscoff.
- Biscoff Cookies (Crushed): Used for the crust layer, crushed Biscoff biscuits form a flavorful base that mirrors the filling. They’re often combined with melted butter to help them bind and create a firm, crumbly bottom layer.
- Melted Butter (Unsalted): Binds the crushed cookies together to form a cohesive crust. Unsalted butter allows better control over sodium levels.
- Salt (Optional Pinch): A tiny amount enhances all the flavors, balancing sweetness and bringing out the depth of the spices.
- Garnishes (Optional): Include extra dollops of Biscoff spread, whipped cream, crushed Biscoff cookies, chocolate shavings, caramel drizzle, or fresh berries for visual appeal and added taste.
Each ingredient plays a crucial role — from structural integrity (butter and cookies) to mouthfeel (cream cheese and whipping cream) and flavor dominance (Biscoff spread). Quality matters: using real, full-fat dairy and authentic Biscoff products will yield the best results.
Step-by-Step Recipe
Follow these detailed steps to create flawless No Bake Biscoff Cheesecake Cups every time:
- Prepare the Crust: Crush about 8–10 Biscoff cookies into fine crumbs using a food processor or sealed plastic bag and rolling pin. In a small bowl, mix the crumbs with 2 tablespoons of melted unsalted butter until evenly moistened. Divide the mixture among 4–6 clear dessert cups or mason jars (depending on size), pressing firmly with the back of a spoon or small glass to form a compact, even layer at the bottom. Place in the refrigerator to chill while preparing the filling.
- Beat the Cream Cheese: In a large mixing bowl, beat 8 oz (one block) of softened cream cheese with an electric hand mixer on medium speed until smooth and creamy (about 1–2 minutes). Scrape down the sides as needed to ensure uniform consistency.
- Add Biscoff Spread and Sweetener: Add ½ cup of smooth Biscoff cookie butter and ¼ cup of sifted powdered sugar to the cream cheese. Mix on low until combined, then increase speed to medium and beat until fully incorporated and fluffy. Add 1 teaspoon of vanilla extract and a pinch of salt, mixing briefly to blend.
- Whip the Cream: In a separate clean bowl, pour 1 cup of cold heavy whipping cream. Using a whisk attachment or hand mixer, whip on high speed until soft peaks form. Gradually increase to stiff peaks — be careful not to over-whip into butter.
- Fold Together: Gently fold the whipped cream into the cream cheese-Biscoff mixture in two additions using a silicone spatula. Use a gentle folding motion (cut through the center, scrape along the bottom, and fold over the top) to maintain airiness and prevent deflating the mixture. Continue until no white streaks remain and the filling is uniformly smooth and cloud-like.
- Assemble the Cups: Remove the cups from the fridge. Spoon or pipe the cheesecake filling over the chilled crust layer, filling each cup almost to the top. Smooth the surface with the back of a spoon or offset spatula for a polished look.
- Chill Thoroughly: Cover the cups loosely with plastic wrap or place in a container with a lid. Refrigerate for at least 4 hours, preferably overnight, to allow the filling to set completely.
- Garnish and Serve: Before serving, top each cup with a small swirl of additional Biscoff spread, a sprinkle of crushed Biscoff cookies, a dollop of whipped cream, or a drizzle of caramel. For elegance, serve in clear glassware to showcase the beautiful layers.
Tips
- Use Room-Temperature Cream Cheese: Cold cream cheese leads to lumps. Let it sit out for 30–60 minutes before starting.
- Don’t Overmix After Adding Cream: Once you begin folding in the whipped cream, stop as soon as the mixture is blended. Overmixing can deflate the air and result in a denser texture.
- Chill Bowls and Beat Attachments: For best whipping results, chill your mixing bowl and beaters in the freezer for 10–15 minutes before whipping cream.
- Press Crust Firmly: A well-compacted crust prevents crumbling when eating. Use steady pressure and consider chilling it longer for extra stability.
- Prevent Weeping: Avoid over-chilling beyond 24 hours; prolonged refrigeration may cause moisture droplets (weeping) on the surface. Serve within 3 days for optimal texture.
- Make Ahead Friendly: Assemble up to 2 days in advance and store covered in the fridge. Add garnishes just before serving to maintain freshness and crunch.
- Use Piping Bags for Elegance: Transfer the filling to a piping bag fitted with a wide round tip for neat, professional-looking layers.
- Keep Ingredients Cold: Ensure heavy cream is very cold before whipping — warmth inhibits proper aeration.
Variations and Customizations
These cheesecake cups are incredibly adaptable. Try these creative twists to match your taste or dietary needs:
- Vegan Version: Substitute cream cheese with dairy-free alternative (e.g., Kite Hill or Miyoko’s), use coconut cream instead of heavy cream (chill overnight and whip the solid part), and ensure Biscoff-style spread is plant-based (some brands offer vegan options).
- Gluten-Free: Use gluten-free speculoos-style cookies (available from certain specialty brands) to make the crust. Verify that all packaged ingredients are certified GF.
- Lower-Sugar/Keto-Friendly: Replace powdered sugar with powdered erythritol or monk fruit blend. Use a low-carb Biscoff-style spread or make your own keto version with almond flour, butter, and spices.
- Protein Boost: Fold in 1–2 scoops of unflavored or vanilla whey or collagen protein powder into the cream cheese mixture (adjust liquid if too thick).
- Chocolate Swirl: Melt ¼ cup dark chocolate and drizzle into the filling before chilling, then use a toothpick to create marbled effects.
- Fruity Twist: Layer in raspberry compote, sliced strawberries, or banana slices between crust and filling for a fruity contrast.
- Coffee-Infused: Add 1 teaspoon instant espresso powder to the cream cheese mixture for a mocha-Biscoff fusion.
- Spice It Up: Enhance warmth by adding a dash of ground cinnamon, nutmeg, or ginger to the filling.
- Mini Jars vs. Dessert Shooters: Use mini mason jars, parfait glasses, or plastic shot cups for different occasions — ideal for weddings, baby showers, or school events.
- Seasonal Themes: Top with peppermint candy in winter, pastel sprinkles for Easter, or edible flowers for spring brunches.
Health Considerations and Nutritional Value
While undeniably decadent, understanding the nutritional profile of No Bake Biscoff Cheesecake Cups helps in enjoying them mindfully. On average, one serving (1/4 of recipe in a 6-oz cup) contains approximately:
- Calories: ~380–420 kcal
- Total Fat: ~30–35g (mostly from cream cheese, butter, and heavy cream)
- Saturated Fat: ~18–20g
- Carbohydrates: ~25–30g (primarily from cookies, sugar, and Biscoff spread)
- Sugars: ~18–22g (naturally occurring and added)
- Protein: ~5–7g
- Calcium: Moderate source due to dairy content
- Sodium: ~200–250mg
Health Notes:
- High in saturated fats; enjoy in moderation, especially for those monitoring heart health.
- Lactose-sensitive individuals may experience discomfort; consider lactose-free substitutes.
- Rich in energy-dense ingredients — suitable as an occasional treat rather than a daily snack.
- Can be adapted for various diets (vegan, gluten-free, low-sugar) with appropriate ingredient swaps.
- Portion control is key — using smaller cups naturally limits intake.
- Contains no artificial preservatives when made with whole ingredients.
Ingredients
- 8–10 Biscoff cookies (plus extra for garnish)
- 2 tablespoons unsalted butter, melted
- 8 oz (1 package) full-fat cream cheese, softened
- ½ cup smooth Biscoff cookie butter
- ¼ cup powdered sugar, sifted
- 1 teaspoon pure vanilla extract
- Pinch of salt (optional)
- 1 cup cold heavy whipping cream
- Optional garnishes: whipped cream, extra Biscoff spread, caramel sauce, chocolate curls, fresh berries
Directions
- In a food processor or sealed bag, crush Biscoff cookies into fine crumbs. Transfer to a bowl and stir in melted butter until the mixture resembles wet sand.
- Divide the crust mixture evenly among 4–6 serving cups (6–8 oz size). Press down firmly with the back of a spoon to create a flat, compact base. Chill in the refrigerator for at least 20 minutes.
- In a large bowl, beat softened cream cheese with an electric mixer on medium speed until smooth and creamy (about 1–2 minutes).
- Add Biscoff spread, powdered sugar, vanilla extract, and salt. Beat on low until combined, then increase to medium and mix for another 1–2 minutes until fluffy. Scrape down the sides as needed.
- In a separate bowl, whip cold heavy cream until stiff peaks form. Do not over-whip.
- Gently fold half of the whipped cream into the cream cheese mixture to lighten it, then add the remaining cream and continue folding until smooth and fully incorporated.
- Remove cups from fridge. Spoon or pipe the filling over the chilled crust, smoothing the tops neatly.
- Cover and refrigerate for at least 4 hours, or ideally overnight, to set completely.
- Before serving, decorate with a swirl of Biscoff spread, whipped cream, crushed cookies, or other toppings of choice.
- Serve chilled. Store leftovers covered in the refrigerator for up to 3 days.
FAQ
Q: Can I use Philadelphia whipped cream cheese?
A: It’s not recommended. Whipped cream cheese contains air and stabilizers that can alter texture and prevent proper setting. Stick to regular brick-style full-fat cream cheese.
Q: My filling is too soft. What went wrong?
A: Possible causes include under-whipped cream, warm ingredients, skipping the chill time, or overmixing. Ensure cream is whipped to stiff peaks and refrigerate for at least 4 hours.
Q: Can I freeze No Bake Biscoff Cheesecake Cups?
A: Yes, but texture may change slightly. Freeze uncovered for 1 hour, then wrap tightly in plastic. Thaw in the fridge for 3–4 hours before serving. Garnish after thawing.
Q: Can I make these without Biscoff spread?
A: You’ll lose the signature flavor, but you can try substituting with peanut butter, almond butter, or homemade speculoos paste (grind Biscoff cookies into a paste). Results will vary.
Q: How long do they last in the fridge?
A: Up to 3–4 days when stored covered. The crust may soften over time, so best enjoyed within 2 days.
Q: Can I use Cool Whip instead of whipping cream?
A: Yes, for convenience. Replace the whipped cream with 1 cup of thawed Cool Whip. Fold in gently after mixing the cream cheese and Biscoff. Texture will be lighter and less rich.
Q: Why did liquid pool at the bottom?
A: This could be weeping from over-chilling or using cold cream cheese. Always bring cream cheese to room temperature and don’t exceed 24 hours in the fridge.
Summary (in two lines)
No Bake Biscoff Cheesecake Cups are creamy, spiced, and effortlessly delicious individual desserts that combine a buttery Biscoff crust with a luxuriously smooth cheesecake filling. Perfect for any occasion, they require no oven, set in the fridge, and deliver maximum flavor with minimal effort.