Gingerbread Whoopie Pies with Cream Cheese Filling
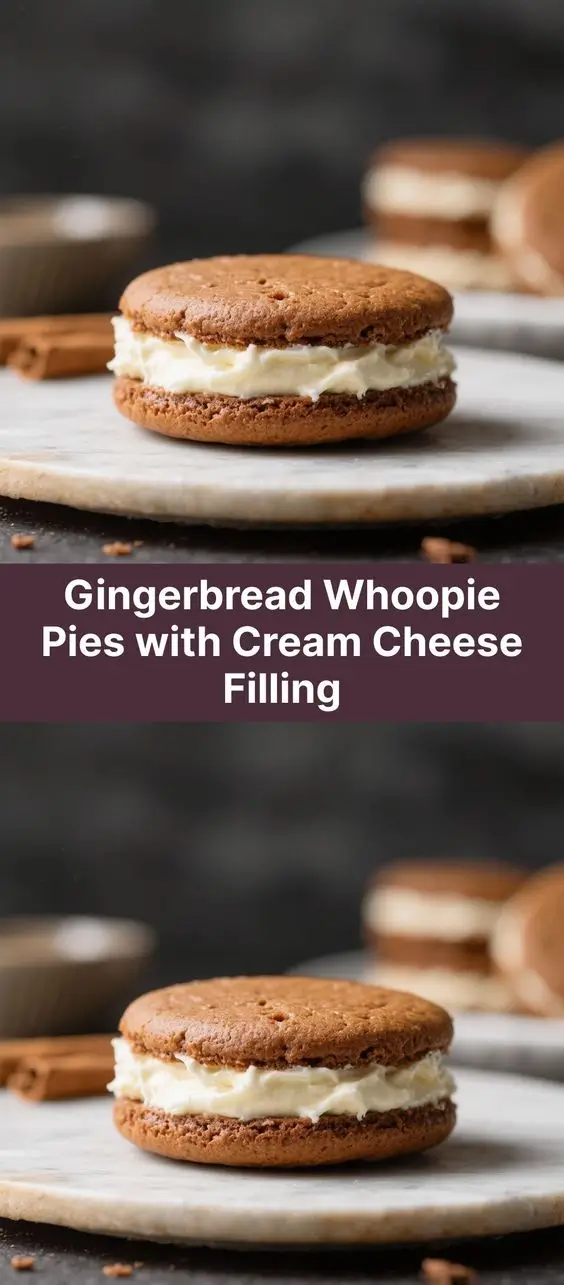
Gingerbread Whoopie Pies with Cream Cheese Filling are a delightful holiday treat that combines the warm, spiced flavors of gingerbread with the rich, tangy sweetness of cream cheese. These soft, cake-like cookies sandwich a luscious filling, creating a handheld dessert that’s both nostalgic and indulgent. Whether you’re making them for a festive gathering, a school bake sale, or simply to enjoy with a cup of tea by the fire, these whoopie pies are sure to impress.
The History of Whoopie Pies
Whoopie Pies have a charming and somewhat mysterious history, believed to have originated in either Pennsylvania Dutch country or Maine—both regions fiercely claim the treat as their own. In Pennsylvania, they were traditionally made by Amish bakers and packed into lunchboxes as a surprise dessert, often prompting children to shout “Whoopie!” upon discovery. The Maine version gained fame when it was declared the official state treat in 2011. Originally known as “gobs” or “black-and-whites,” whoopie pies consist of two soft, round cake layers filled with a creamy frosting.
While traditional whoopie pies were made with chocolate cakes and marshmallow or vanilla filling, modern variations like Gingerbread Whoopie Pies showcase seasonal creativity. The addition of gingerbread spices transforms the classic dessert into a winter favorite, blending cultural heritage with contemporary flavor profiles. Over time, whoopie pies have evolved from simple homemade treats to gourmet bakery items, featured in food magazines, holiday markets, and even competitive baking shows.
Ingredients Breakdown
Understanding each ingredient’s role ensures your Gingerbread Whoopie Pies turn out perfectly every time. Here’s a detailed look at what goes into this delicious dessert:
- All-Purpose Flour: Provides the structural base for the cookies. It gives the right balance of tenderness and stability.
- Baking Soda: Acts as a leavening agent, helping the cookies rise slightly and become soft and cake-like.
- Spices (Ground Ginger, Cinnamon, Cloves, Nutmeg): These are the heart of the gingerbread flavor. Freshly ground spices offer the most vibrant taste.
- Salt: Enhances all the other flavors and balances the sweetness.
- Butter (Unsalted): Adds richness and moisture. Room-temperature butter creams well with sugar for a smooth batter.
- Brown Sugar: Contributes deep molasses notes and helps keep the cookies moist. Its hygroscopic nature retains moisture over time.
- Egg: Binds the ingredients together and adds structure while contributing to the tender crumb.
- Vanilla Extract: Complements the spices and rounds out the flavor profile.
- Unsulphured Molasses: A key ingredient in authentic gingerbread, it provides chewiness, color, and that signature bittersweet depth.
- Heavy Cream or Milk: Adds moisture and helps achieve the ideal dough consistency—not too stiff, not too runny.
- Cream Cheese (for filling): Should be full-fat and softened for a smooth, spreadable texture. It offers a tangy contrast to the sweet cookies.
- Butter (for filling): Combines with cream cheese to create a stable, fluffy filling that holds its shape.
- Powdered Sugar: Sweetens the filling and gives it body without adding moisture.
- Vanilla Extract (for filling): Enhances the overall flavor of the frosting.
- Salt (for filling): A pinch brings balance and prevents the filling from tasting flat.
Step-by-Step Recipe
Ingredients
Makes approximately 14–16 whoopie pies
For the Gingerbread Cookies:
- 2 cups (250g) all-purpose flour
- 1 tsp baking soda
- 1/2 tsp salt
- 1 tbsp ground ginger
- 1 tsp ground cinnamon
- 1/4 tsp ground cloves
- 1/4 tsp freshly grated nutmeg
- 1/2 cup (1 stick / 113g) unsalted butter, at room temperature
- 3/4 cup (150g) packed dark brown sugar
- 1 large egg, at room temperature
- 1 tsp vanilla extract
- 1/3 cup (80ml) unsulphured molasses
- 1/4 cup (60ml) heavy cream or whole milk
For the Cream Cheese Filling:
- 8 oz (226g) full-fat cream cheese, softened
- 1/4 cup (1/2 stick / 57g) unsalted butter, softened
- 1 1/2 cups (180g) powdered sugar, sifted
- 1 tsp vanilla extract
- Pinch of salt
Directions
- Preheat Oven & Prepare Baking Sheets: Preheat your oven to 350°F (175°C). Line two large baking sheets with parchment paper or silicone baking mats.
- Mix Dry Ingredients: In a medium bowl, whisk together the flour, baking soda, salt, ginger, cinnamon, cloves, and nutmeg. Set aside.
- Cream Butter and Sugar: In a large mixing bowl, using a hand mixer or stand mixer fitted with the paddle attachment, beat the butter and brown sugar together on medium speed until light and fluffy (about 2–3 minutes).
- Add Wet Ingredients: Add the egg and vanilla extract, beating until fully incorporated. Scrape down the sides of the bowl as needed.
- Incorporate Molasses: Mix in the molasses until evenly distributed. The batter will darken significantly.
- Alternate Dry and Wet Additions: Gradually add the dry ingredients in three parts, alternating with the heavy cream in two parts, beginning and ending with the dry mix. Mix just until combined after each addition. Do not overmix.
- Portion the Dough: Using a cookie scoop or two spoons, drop rounded tablespoons of dough onto the prepared baking sheets, spacing them about 2 inches apart. Gently flatten the tops slightly with damp fingers or the back of a spoon.
- Bake: Bake for 9–11 minutes, or until the edges are set and the centers spring back lightly when touched. Avoid overbaking to keep them soft.
- Cool Completely: Let the cookies cool on the baking sheet for 5 minutes before transferring them to a wire rack to cool completely. Repeat with remaining dough if necessary.
- Make the Filling: While the cookies cool, prepare the filling. Beat the softened cream cheese and butter together until smooth and creamy. Gradually add the powdered sugar, then mix in the vanilla and salt. Beat on medium-high speed for 2–3 minutes until light and fluffy.
- Assemble the Whoopie Pies: Once all cookies are cooled, pair them up by size. Turn half of them upside down. Spread or pipe a generous amount of filling onto the flat side of one cookie, then gently press the matching cookie on top to form a sandwich. Do not twist, as this can squeeze the filling out.
- Chill (Optional but Recommended): Place assembled whoopie pies in the refrigerator for at least 30 minutes to set the filling and enhance flavor melding.
Tips for Perfect Gingerbread Whoopie Pies
- Use a Cookie Scoop: For uniform size and appearance, use a #40 or tablespoon-sized cookie scoop to portion the dough.
- Don’t Overbake: These are meant to be soft and cake-like, not crisp. Remove them from the oven when the edges are just set.
- Room Temperature Ingredients: Ensure butter, cream cheese, egg, and dairy are at room temperature to prevent curdling and ensure smooth batter and filling.
- Sift Powdered Sugar: Sifting eliminates lumps in the filling for a silky-smooth texture.
- Chill the Filling First: If your kitchen is warm, chill the filling for 15–20 minutes before piping to make it easier to handle.
- Store Properly: Keep assembled whoopie pies in an airtight container in the refrigerator for up to 5 days. They also freeze beautifully for up to 3 months.
- Double the Batch: These are popular and disappear quickly! Consider doubling the recipe for holiday gifting or parties.
Variations and Customizations
One of the joys of making whoopie pies is how easily they can be customized. Try these fun twists:
- Gluten-Free Version: Substitute the all-purpose flour with a high-quality gluten-free flour blend. Add 1/2 tsp xanthan gum if your blend doesn’t include it.
- Spice Level Adjustment: Reduce cloves and nutmeg for a milder flavor, or add a pinch of black pepper or cardamom for complexity.
- Maple Cream Cheese Filling: Replace 1–2 tbsp of powdered sugar with pure maple syrup for a rustic, autumnal twist.
- Lemon Zest Addition: Add 1 tsp lemon zest to the filling to brighten the rich, spicy cookies.
- Dipped Edges: Melt dark chocolate and dip the outer edges of the assembled whoopie pies for an elegant presentation.
- Mini Whoopie Pies: Use a smaller scoop to make bite-sized versions—perfect for dessert tables or kids’ parties.
- Vegan Option: Use plant-based butter, flax egg (1 tbsp ground flaxseed + 3 tbsp water), and vegan cream cheese. Choose a non-dairy milk instead of cream.
- Boozy Filling: Add 1/2 tsp bourbon or rum extract to the cream cheese filling for an adult-friendly upgrade.
Health Considerations and Nutritional Value
While Gingerbread Whoopie Pies are undeniably a treat, understanding their nutritional content helps with mindful enjoyment. On average, one whoopie pie (with filling) contains approximately:
- Calories: 280–320
- Total Fat: 13–16g (including 7–8g saturated fat)
- Carbohydrates: 42–46g
- Sugars: 28–32g (mostly from brown and powdered sugars)
- Protein: 3–4g
- Sodium: 180–220mg
Considerations:
- High in added sugars and fats—best enjoyed in moderation.
- Contains dairy and eggs; not suitable for those with allergies unless modified.
- Can be adapted for special diets (gluten-free, vegan) with careful substitutions.
- Rich in spices like ginger and cinnamon, which have anti-inflammatory properties and aid digestion.
- Pair with a cup of herbal tea or a glass of cold milk to balance sweetness.
Frequently Asked Questions (FAQ)
Can I make the dough ahead of time?
Yes! You can refrigerate the dough for up to 2 days. Scoop it first, then cover and chill. Let sit at room temperature for 10–15 minutes before baking.
Can I freeze whoopie pies?
Absolutely. Freeze un-frosted cookies on a tray, then transfer to a freezer bag. Thaw before filling. Assembled whoopie pies can also be frozen—wrap individually and thaw in the fridge overnight.
Why did my whoopie pies crack on top?
This could be due to overmixing the batter, using cold ingredients, or an oven that runs too hot. Ensure ingredients are at room temperature and avoid overworking the dough.
Can I use regular molasses instead of unsulphured?
Yes, but unsulphured molasses has a cleaner, sweeter flavor. Blackstrap molasses is too bitter and strong for this recipe.
How do I store leftover whoopie pies?
Keep them in an airtight container in the refrigerator for up to 5 days. Bring to room temperature before serving for best texture.
Can I pipe the filling instead of spreading?
Definitely! Fit a piping bag with a large round tip and swirl the filling for a professional look.
Are whoopie pies the same as cookies or cupcakes?
They’re somewhere in between—softer than cookies, denser than cupcakes. Their unique texture is part of their charm!
Can I make them without cream cheese?
You can substitute with marshmallow fluff, whipped cream, or a vegan alternative, but cream cheese offers the ideal balance of tang and structure.
Summary
Gingerbread Whoopie Pies with Cream Cheese Filling combine warmly spiced, soft cake-like cookies with a rich, tangy filling for a festive and irresistible treat. Easy to customize and perfect for holidays, gifts, or cozy nights, they bring joy in every bite.