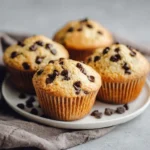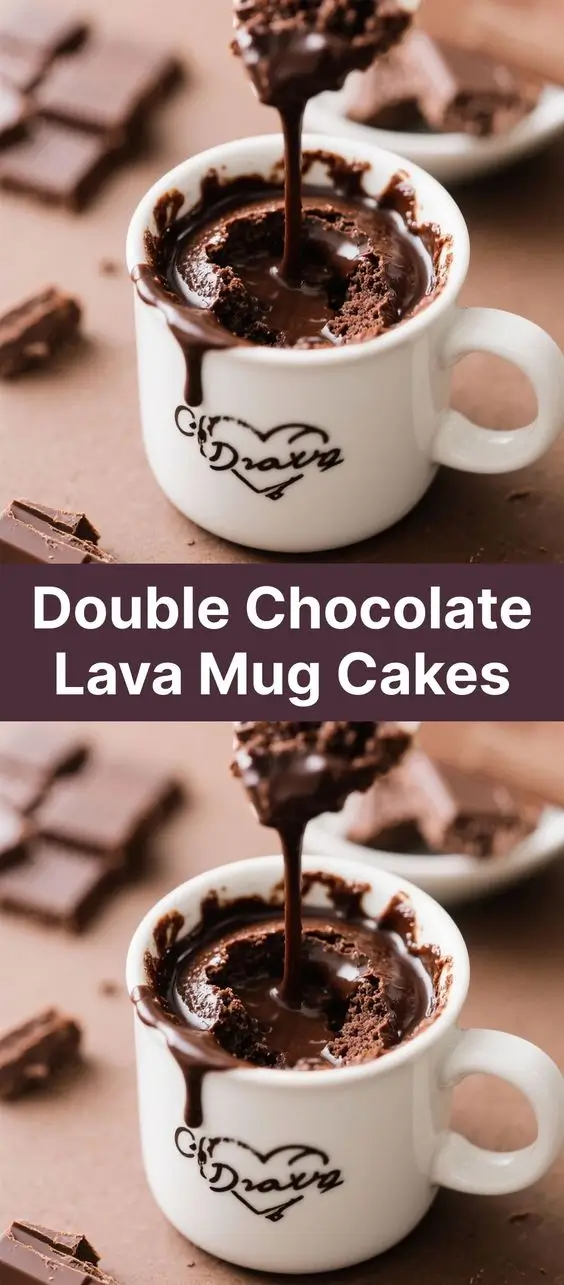
Double Chocolate Lava Mug Cake: A Decadent Single-Serving Delight
The History of the Mug Cake
The concept of the mug cake is a modern culinary innovation born out of convenience, minimalism, and the desire for instant gratification. While cakes have been enjoyed for centuries—dating back to ancient civilizations like the Egyptians and Romans—the mug cake didn’t emerge until the late 20th century with the widespread adoption of microwave ovens. The first known reference to a microwave mug cake appeared in the 1980s and early 1990s, when manufacturers began including quick dessert recipes in microwave cookbooks to showcase the appliance’s speed and versatility.
Mug cakes gained mainstream popularity in the 2000s, particularly through food blogs and social media platforms like YouTube, Pinterest, and Instagram. Home bakers loved the idea of whipping up a warm, gooey dessert in under five minutes using just one mug and common pantry staples. The double chocolate lava mug cake, in particular, became an internet sensation due to its rich flavor, molten center, and indulgent texture—offering all the satisfaction of a restaurant-style chocolate fondant without the time or effort.
Today, the double chocolate lava mug cake stands as a symbol of modern comfort food: fast, delicious, customizable, and perfect for satisfying sudden sweet cravings. Whether you’re a busy professional, college student, or someone who simply loves chocolate, this single-serving treat has earned its place in kitchens around the world.
Ingredients Breakdown: What Makes This Mug Cake So Irresistible?
The magic of the double chocolate lava mug cake lies in its simplicity and balance of ingredients. Each component plays a crucial role in creating a moist cake with a warm, flowing chocolate center. Here’s a detailed breakdown:
- Flour (All-Purpose): Provides structure to the cake. Too much can make it dense; too little and it won’t hold together. A scant ¼ cup is ideal for one serving.
- Granulated Sugar: Adds sweetness and helps with browning and texture. It also contributes to the slight crispness on the outer edges when microwaved.
- Cocoa Powder (Unsweetened): The backbone of chocolate flavor. Use high-quality Dutch-processed or natural cocoa for a deep, rich taste.
- Baking Powder: A leavening agent that gives the cake a light rise without over-expanding. Just ⅛ teaspoon ensures a tender crumb.
- Salt: Enhances all the flavors and balances the sweetness. Even a pinch makes a noticeable difference.
- Milk: Adds moisture and helps bind the ingredients. Whole milk yields creamier results, but any dairy or non-dairy alternative (like almond, oat, or soy milk) works well.
- Vegetable Oil (or Melted Butter): Keeps the cake moist and tender. Oil integrates more smoothly than butter, but butter adds richness and flavor.
- Vanilla Extract: Deepens the overall flavor profile and rounds out the chocolate notes.
- Dark Chocolate Chips (or Chopped Chocolate Bar): This is the secret to the “lava” center. When melted during cooking, these create a molten pool in the middle. Using high-cacao chocolate (60–70%) intensifies the decadence.
- Mini Semi-Sweet Chocolate Chips (optional additional layer): For true double chocolate depth, adding another handful boosts both texture and flavor complexity.
Optional enhancements include a splash of espresso powder (to amplify chocolate), a dusting of cinnamon, or even a small amount of instant coffee granules dissolved in the milk. These subtle additions elevate the flavor without overpowering it.
Step-by-Step Recipe: How to Make the Perfect Double Chocolate Lava Mug Cake
Follow this foolproof guide to achieve a bakery-quality chocolate lava mug cake every time. Total prep and cook time: less than 10 minutes.
- Gather Your Equipment: You’ll need a large microwave-safe mug (at least 12 oz capacity), a small mixing bowl, a whisk or fork, measuring spoons and cups, and a napkin or towel to handle the hot mug.
- Preheat (in a way): While there’s no oven preheating, ensure your microwave is clean and functioning properly. Set it to high power (usually 100% power level).
- Mix Dry Ingredients: In the mug, combine ¼ cup all-purpose flour, 3 tablespoons granulated sugar, 2 tablespoons unsweetened cocoa powder, ⅛ teaspoon baking powder, and a pinch of salt. Whisk thoroughly until no lumps remain and the mixture is evenly combined.
- Add Wet Ingredients: Pour in 3 tablespoons of milk, 1½ tablespoons of vegetable oil (or melted butter), and ¼ teaspoon of vanilla extract. Stir vigorously with a fork or small whisk until smooth and glossy, about 20–30 seconds. Scrape the sides to ensure everything is incorporated.
- Incorporate the Chocolate: Fold in 2 tablespoons of dark chocolate chips and 1 tablespoon of mini semi-sweet chocolate chips. Push some down into the center of the batter—this will form the molten core.
- Microwave Carefully: Place the mug in the center of the microwave. Cook on high for 75 to 90 seconds. The exact time depends on your microwave’s wattage (most are between 700–1200 watts). Start with 75 seconds and check. The cake should be risen, slightly cracked on top, and still soft in the center. If it looks wet, add 5–10 second increments—but do not overcook, or the lava center will solidify.
- Rest Before Serving: Let the mug cake sit for 1–2 minutes after microwaving. This allows the internal temperature to stabilize and the molten center to become safely spoonable without burning your mouth.
- Serve Immediately: Enjoy straight from the mug! Top with powdered sugar, whipped cream, vanilla ice cream, chocolate shavings, or fresh berries for extra indulgence.
Tips for Success: Achieving the Ideal Texture and Flavor
- Use the Right Mug: Choose a ceramic or stoneware mug labeled microwave-safe. Avoid thin glass or metal-rimmed mugs. The size matters—a 12 oz minimum prevents overflow.
- Don’t Overmix: Once you add the wet ingredients, stir only until blended. Overmixing develops gluten, leading to a rubbery texture.
- Watch Cooking Time Closely: Microwaves vary significantly. A lower-wattage microwave may need up to 2 minutes, while high-powered ones might require only 60 seconds. Always start low and adjust.
- Look for Visual Cues: The cake is done when the edges pull slightly away from the mug, the surface has small cracks, and the center still jiggles faintly when nudged.
- Keep the Center Molten: The key to the “lava” effect is underbaking slightly. The residual heat continues to cook the cake after removal, so pulling it out just before it’s fully set ensures a gooey middle.
- Chop Your Own Chocolate: Pre-chopped chocolate or high-quality bars melted into chunks provide better melt consistency than mass-produced chips, which often contain stabilizers.
- Grease Lightly (Optional): For easier cleanup, lightly coat the inside of the mug with non-stick spray or butter—but this isn’t necessary if using a smooth ceramic mug.
Variations and Customizations: Make It Your Own
One of the greatest advantages of the double chocolate lava mug cake is its adaptability. Try these creative twists to suit dietary needs, flavor preferences, or seasonal moods:
- Peanut Butter Swirl: Add 1 tablespoon of creamy peanut butter to the batter or drop a spoonful in the center before microwaving for a Reese’s-inspired treat.
- Peppermint Chocolate: Mix in ⅛ teaspoon peppermint extract and top with crushed candy canes for a holiday version.
- Spicy Mexican Chocolate: Add a pinch of cayenne pepper, cinnamon, and nutmeg for a bold, warming kick.
- Gluten-Free Version: Substitute all-purpose flour with a 1:1 gluten-free baking blend (ensure it contains xanthan gum for binding).
- Dairy-Free/Vegan Option: Use almond milk or oat milk, replace oil with coconut oil, and use dairy-free chocolate chips. For egg-free, no additional egg is needed in this recipe—it’s naturally eggless!
- White Chocolate & Raspberry: Swap half the dark chocolate for white chocolate chips and add a few fresh raspberries before cooking.
- Cookie Dough Center: Bury a small ball of edible cookie dough in the middle before microwaving for a surprise filling.
- Alcohol Infusion: Replace 1 tablespoon of milk with Baileys, Kahlúa, or Grand Marnier for an adult-only dessert.
- Nutty Crunch: Fold in chopped walnuts, pecans, or hazelnuts for added texture.
- Protein Boost: Add 1 scoop of chocolate protein powder and increase liquid by 1 tablespoon to maintain moisture.
Health Considerations and Nutritional Value
While undeniably indulgent, understanding the nutritional content helps you enjoy this treat mindfully. A standard double chocolate lava mug cake (as described above) contains approximately:
| Nutrient | Amount (Approximate) |
|---|---|
| Calories | 320–360 kcal |
| Total Fat | 14–18g |
| Saturated Fat | 6–8g |
| Cholesterol | 0mg (if using plant-based milk and no butter) |
| Sodium | 100–150mg |
| Total Carbohydrates | 48–54g |
| Dietary Fiber | 3–4g |
| Sugars | 30–35g |
| Protein | 4–5g |
Health Notes:
- This dessert is high in sugar and fat, primarily from chocolate and oil. Enjoy occasionally as part of a balanced diet.
- Cocoa powder contains antioxidants like flavonoids, which may support heart health in moderation.
- Using dark chocolate with higher cocoa content increases antioxidant intake and reduces added sugar.
- To reduce calories, consider using sugar substitutes like erythritol or monk fruit, applesauce instead of oil (though texture changes), and low-fat milk.
- For those managing blood sugar, pair with a source of protein or fiber (e.g., Greek yogurt on the side) to slow glucose absorption.
Ingredients
- ¼ cup (30g) all-purpose flour (or gluten-free 1:1 blend)
- 3 tablespoons (36g) granulated sugar
- 2 tablespoons (10g) unsweetened cocoa powder
- ⅛ teaspoon baking powder
- A pinch of salt
- 3 tablespoons (45ml) milk (dairy or non-dairy)
- 1½ tablespoons (22ml) vegetable oil (or melted butter)
- ¼ teaspoon vanilla extract
- 2 tablespoons (28g) dark chocolate chips
- 1 tablespoon (15g) mini semi-sweet chocolate chips
Directions
- In a large microwave-safe mug, mix together flour, sugar, cocoa powder, baking powder, and salt until well combined.
- Add milk, oil, and vanilla extract. Stir with a fork or small whisk until smooth and no dry streaks remain.
- Fold in both types of chocolate chips, pressing a few into the center of the batter to create the molten core.
- Microwave on high for 75 to 90 seconds, depending on your microwave’s power. The cake should be puffed and set around the edges but still soft in the center.
- Let rest for 1–2 minutes before eating to allow the lava center to settle slightly.
- Serve warm, ideally with a scoop of ice cream or a dusting of powdered sugar.
FAQ
Q: Can I make this mug cake without a microwave?
A: Yes! Bake it in a preheated oven at 350°F (175°C) in a ramekin for 12–15 minutes. Use a similar-sized container and monitor closely for doneness.
Q: Why did my mug cake turn out dry?
A: Overcooking is the most common cause. Reduce the time by 10–15 seconds next time. Also, ensure you’re using accurate measurements—too much flour or cocoa can dry it out.
Q: Can I prepare the dry ingredients ahead of time?
A: Absolutely! Mix the dry ingredients in a small jar or bag and store for up to 3 months. When ready, just add wet ingredients and chocolate.
Q: Is it safe to eat a raw-like center?
A: Yes. This recipe contains no eggs, so the soft center is simply melted chocolate and underbaked batter—not raw dough in the traditional sense.
Q: Can I double the recipe for two servings?
A: It’s best to make two separate mug cakes. Doubling in one mug leads to uneven cooking and collapse in the center.
Q: How do I clean the mug afterward?
A: Let it cool slightly, then fill with warm water and let soak for 10 minutes. Most residue will wipe away easily. Avoid abrasive scrubbers on glazed ceramics.
Q: Can I freeze leftover mug cake?
A: Mug cakes are best eaten fresh. Reheating or freezing compromises the texture, especially the molten center. Make only what you plan to eat immediately.
Summary
The double chocolate lava mug cake is a rich, quick, and deeply satisfying dessert that brings restaurant-style indulgence to your kitchen in under 10 minutes. With simple ingredients and endless customization options, it’s the ultimate single-serving chocolate fix.