Chocolate Peanut Butter Oat Bars: A Decadent, No-Bake Delight
Introduction
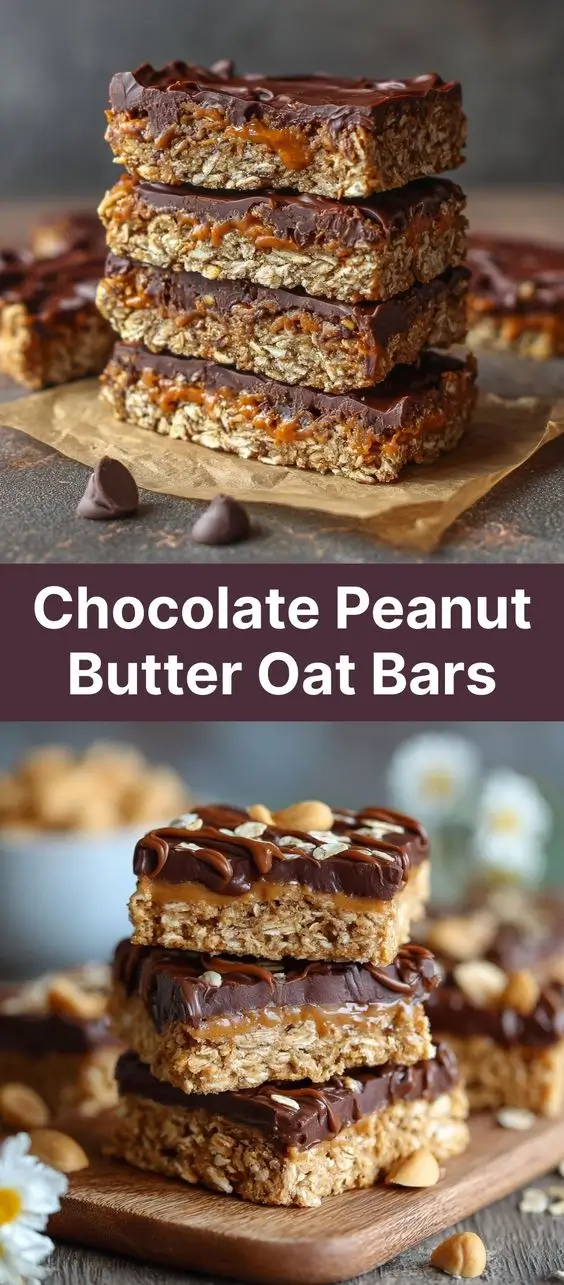
Imagine a rich, chewy, and satisfying treat that combines the deep, velvety flavor of chocolate with the creamy, nutty essence of peanut butter—all held together by hearty oats. Enter the Chocolate Peanut Butter Oat Bars: the ultimate no-bake dessert that’s as easy to make as it is delicious. These bars are perfect for anyone looking for a quick snack, a post-workout energy boost, or a crowd-pleasing dessert for parties and potlucks. Whether you’re a busy parent, a college student in need of a study snack, or someone who simply loves indulging in sweet treats without spending hours in the kitchen, these bars are your go-to solution.
What makes these bars so special isn’t just their taste—it’s their versatility. They can be customized with different mix-ins, adjusted for dietary needs, and stored easily for up to two weeks. Plus, they require no baking, which means you can enjoy them year-round without heating up your kitchen. From the first bite, you’ll experience a harmonious blend of textures—crisp edges, a soft, chewy center, and a melt-in-your-mouth richness that lingers long after you’re done. In this comprehensive guide, we’ll walk you through every aspect of making the perfect Chocolate Peanut Butter Oat Bars, from the history behind such treats to detailed instructions, variations, nutritional insights, and frequently asked questions.
The History
While the exact origin of Chocolate Peanut Butter Oat Bars is difficult to pinpoint, their roots lie in the broader tradition of no-bake confections that gained popularity in mid-20th century America. The rise of processed sugars, evaporated milk, and shelf-stable ingredients like oats and peanut butter created the perfect environment for simple, homemade treats that required minimal equipment and effort.
No-bake desserts like Rice Krispies Treats (introduced in the 1930s) paved the way for similar creations, including oat-based bars. The combination of oats, peanut butter, and chocolate became especially popular due to its balance of nutrition and indulgence. Oats were already known for their health benefits, being high in fiber and complex carbohydrates, while peanut butter offered protein and healthy fats. Chocolate, of course, added the irresistible sweetness and comfort factor.
In the 1960s and 70s, cookbooks and home economics classes began featuring recipes for “oat squares,” “peanut butter balls,” and “refrigerator bars” made with corn syrup, honey, or melted chocolate as binders. These evolved over time with the introduction of healthier sweeteners and alternative ingredients. Today’s version of Chocolate Peanut Butter Oat Bars reflects modern preferences—using natural sweeteners like maple syrup or agave, dark chocolate for antioxidants, and organic or gluten-free oats for dietary inclusivity.
The bar has also found a place in fitness culture, often adapted into “protein oat bars” with added whey or plant-based protein powders. Its enduring popularity speaks to its timeless appeal: a simple recipe that delivers maximum satisfaction with minimal effort.
Ingredients Breakdown
The magic of Chocolate Peanut Butter Oat Bars lies in the synergy of a few humble ingredients coming together to create something extraordinary. Let’s take a closer look at each component and why it plays a crucial role in the final product:
- Old-Fashioned Rolled Oats: These are the backbone of the bars, providing structure, chewiness, and fiber. Unlike instant oats, rolled oats hold their shape better and give the bars a heartier texture. They also contribute complex carbohydrates that release energy slowly, making these bars a more balanced snack option.
- Peanut Butter: Opt for natural, unsweetened peanut butter with just peanuts (and maybe salt) listed in the ingredients. It acts as both a binder and a flavor enhancer, adding creaminess and protein. The oils in peanut butter help create a smooth, cohesive mixture that sets firmly when chilled.
- Dark Chocolate: Used for both mixing into the base and drizzling on top, dark chocolate adds depth and a slight bitterness that balances the sweetness. Choose a high-quality chocolate with at least 60% cocoa content for the best flavor and antioxidant benefits.
- Honey or Maple Syrup: These natural sweeteners not only add sweetness but also help bind the ingredients together. They contribute to the chewy texture and prevent the bars from becoming too dry. Maple syrup offers a subtle earthy note, while honey adds floral undertones.
- Coconut Oil: This ingredient helps the mixture set firmly in the refrigerator and gives the bars a smooth mouthfeel. It also aids in melting the chocolate evenly and contributes healthy medium-chain triglycerides (MCTs).
- Vanilla Extract: A small amount goes a long way in enhancing the overall flavor profile, rounding out the sweetness and bringing warmth to the bars.
- Pinch of Salt: Essential for balancing flavors, salt enhances the sweetness and brings out the richness of the peanut butter and chocolate.
- Optional Add-Ins: Chia seeds, flaxseeds, chopped nuts, dried fruit, mini chocolate chips, or protein powder can be incorporated for extra nutrition, texture, or flavor.
Step-by-Step Recipe
Follow these detailed instructions to create perfectly textured, deeply flavorful Chocolate Peanut Butter Oat Bars every time.
- Prepare Your Pan: Line an 8×8-inch square baking dish with parchment paper, leaving overhang on two opposite sides. This will make it easy to lift the bars out once set. Lightly grease the paper with coconut oil or non-stick spray.
- Melt the Base: In a medium saucepan over low heat, combine ½ cup of natural peanut butter, ⅓ cup of honey or maple syrup, ¼ cup of coconut oil, and ¼ cup of dark chocolate chips. Stir continuously until fully melted and smooth. Be careful not to burn—this should take about 5–7 minutes.
- Add Flavor Enhancers: Remove the saucepan from heat. Stir in 1 teaspoon of vanilla extract and a pinch of sea salt. Taste and adjust if needed—add more salt for depth or a bit more honey for sweetness.
- Combine with Oats: In a large mixing bowl, add 2 cups of old-fashioned rolled oats. Pour the warm peanut butter-chocolate mixture over the oats. Use a spatula or wooden spoon to stir until every oat is evenly coated. If using optional add-ins (e.g., 2 tablespoons chia seeds, ¼ cup chopped peanuts, or ⅓ cup mini chocolate chips), fold them in now.
- Press into Pan: Transfer the mixture to the prepared pan. Use the spatula or the back of a spoon to press it down firmly and evenly. Take your time to ensure there are no air pockets and the surface is completely flat—this prevents crumbling when cutting.
- Chill to Set: Place the pan in the refrigerator for at least 2 hours, or until completely firm. For faster setting, you can chill for 30–45 minutes in the freezer, but don’t exceed an hour or the bars may become too hard.
- Make the Chocolate Drizzle: While the bars are chilling, melt ¼ cup of dark chocolate chips with 1 teaspoon of coconut oil in a microwave-safe bowl. Heat in 20-second intervals, stirring between each, until smooth.
- Drizzle and Decorate: Once the bars are set, lift them out using the parchment overhang. Spread or drizzle the melted chocolate over the top using a spoon or piping bag. For a decorative touch, sprinkle with flaky sea salt, crushed peanuts, or shredded coconut.
- Final Chill: Return the pan (or the slab of bars) to the refrigerator for another 15–20 minutes to allow the chocolate topping to harden.
- Cut into Bars: Using a sharp knife, cut into 12 equal bars or 16 smaller squares. Wipe the knife between cuts for clean edges.
- Store Properly: Keep the bars in an airtight container in the refrigerator for up to 2 weeks, or freeze for up to 3 months.
Tips
- Use Room-Temperature Ingredients: Ensure your peanut butter isn’t cold from the fridge, as this can cause clumping when mixed with warm liquids.
- Press Firmly: The key to bars that hold together is pressing the mixture very tightly into the pan. Use the bottom of a measuring cup to compact it evenly.
- Don’t Skip the Chill Time: Rushing this step leads to crumbly bars. Patience ensures clean cuts and proper texture.
- Customize the Sweetness: If you prefer less sweet bars, reduce the honey/maple syrup by 1–2 tablespoons or use a sugar-free alternative like monk fruit syrup (though binding properties may vary).
- Double the Batch: These bars keep well and are great for meal prep. Make two pans at once and freeze one for later.
- Use High-Quality Chocolate: Since chocolate is a dominant flavor, investing in good chocolate significantly improves the final taste.
- For Clean Cuts: Dip your knife in hot water and wipe it dry before slicing—this helps glide through the chocolate topping smoothly.
- Prevent Sticking: If the mixture sticks to your hands while pressing, lightly oil your spatula or wear food-safe gloves.
Variations and Customizations
One of the greatest strengths of this recipe is its adaptability. Here are some creative ways to switch things up:
- Almond Butter Version: Swap peanut butter for almond butter for a slightly milder, nuttier flavor. Works especially well with white chocolate drizzle.
- Gluten-Free: Use certified gluten-free oats to make this recipe safe for those with celiac disease or gluten sensitivity.
- Vegan: Ensure your chocolate chips are dairy-free and use maple syrup instead of honey to keep it plant-based.
- Protein-Packed: Add 2–3 scoops of vanilla or chocolate protein powder. You may need to increase the wet ingredients slightly (extra 1–2 tbsp peanut butter or syrup) to maintain consistency.
- Chocolate Lover’s Dream: Mix in cocoa powder (2–3 tablespoons) into the base for a richer chocolate flavor throughout.
- Fruity Twist: Fold in dried cranberries, raisins, or chopped dates for a chewy, tart contrast.
- Savory-Sweet: Sprinkle the top with flaky sea salt or smoked sea salt for a gourmet touch.
- Nut & Seed Crunch: Add sunflower seeds, pumpkin seeds, chopped walnuts, or pecans for extra crunch and nutrition.
- Keto-Friendly: Replace oats with crushed pork rinds or low-carb granola, use sugar-free syrup, and a keto-approved chocolate.
- Mini Bites: Instead of pressing into a pan, roll the mixture into small balls for no-bake energy bites.
- Seasonal Themes: Add peppermint extract and red sprinkles for holidays, or orange zest and white chocolate for a citrus twist.
Health Considerations and Nutritional Value
While Chocolate Peanut Butter Oat Bars are undeniably indulgent, they can be part of a balanced diet when enjoyed in moderation. Here’s a breakdown of the nutritional profile per bar (based on 12 servings):
| Nutrient | Amount (Approximate) |
|---|---|
| Calories | 220–250 |
| Total Fat | 14–16g |
| Saturated Fat | 5–6g |
| Carbohydrates | 22–25g |
| Dietary Fiber | 3–4g |
| Sugars | 10–12g (naturally occurring) |
| Protein | 5–7g |
| Sodium | 80–100mg |
Benefits:
- Oats: Rich in beta-glucan, a soluble fiber that supports heart health and helps regulate blood sugar.
- Peanut Butter: Provides plant-based protein, monounsaturated fats, and essential vitamins like niacin and vitamin E.
- Dark Chocolate: Contains flavonoids, which have antioxidant properties and may improve mood and circulation.
- Healthy Fats: From coconut oil and nut butter, supporting satiety and brain function.
Considerations:
- High in calories and fat—best consumed in moderation, especially if weight management is a goal.
- May contain allergens: peanuts, tree nuts (if using nut butter), and dairy (if using regular chocolate).
- Natural sugars from honey/maple syrup still count toward daily added sugar intake; consider alternatives for diabetics.
- Not suitable for infants under one year due to raw honey risk.
Ingredients
- 2 cups old-fashioned rolled oats (certified gluten-free if needed)
- ½ cup natural creamy peanut butter (no added sugar or hydrogenated oils)
- ⅓ cup honey or pure maple syrup
- ¼ cup coconut oil (solid state)
- ¼ cup dark chocolate chips (plus more for topping)
- 1 teaspoon pure vanilla extract
- Pinch of sea salt
- Optional: 2 tbsp chia seeds, ¼ cup chopped nuts, ⅓ cup mini chocolate chips
- Additional ¼ cup dark chocolate chips + 1 tsp coconut oil (for drizzle)
- Flaky sea salt or crushed peanuts (for garnish)
Directions
- Line an 8×8-inch baking pan with parchment paper and lightly grease.
- In a saucepan over low heat, melt peanut butter, honey, coconut oil, and ¼ cup chocolate chips, stirring until smooth (5–7 minutes).
- Remove from heat. Stir in vanilla and salt.
- In a large bowl, combine oats and any optional mix-ins.
- Pour warm mixture over oats and stir until fully coated.
- Transfer to prepared pan and press down firmly with a spatula or cup.
- Refrigerate for 2 hours or until completely firm.
- Melt additional chocolate with 1 tsp coconut oil for drizzle.
- Lift bars out using parchment. Drizzle with chocolate and sprinkle with toppings.
- Chill 15–20 minutes more to set the topping.
- Cut into 12 bars with a sharp knife. Store in the fridge.
FAQ
Can I make these bars without peanut butter?
Yes! Substitute with almond butter, sunflower seed butter (great for schools with nut bans), or tahini for a unique twist.
Why are my bars too crumbly?
This usually happens if there’s not enough binder. Next time, increase peanut butter or syrup by 1–2 tablespoons. Also, ensure you press the mixture very firmly into the pan.
Can I freeze these bars?
Absolutely. Wrap individually in parchment and store in a freezer-safe container for up to 3 months. Thaw in the fridge or at room temperature for 15 minutes.
Are these bars healthy?
They contain wholesome ingredients and offer fiber, protein, and healthy fats, but are still a treat due to sugar and fat content. Best enjoyed in moderation as part of a balanced diet.
Can I use quick oats?
Yes, but the texture will be softer and less chewy. Rolled oats are recommended for the best structure.
How long do they last?
Up to 2 weeks in the refrigerator, 3 months in the freezer. Keep covered to prevent drying out.
Can I bake these instead?
These are designed as no-bake bars. Baking may dry them out. However, baked versions exist—try pressing into a pan and baking at 325°F for 15–18 minutes for a firmer, cookie-like bar.
Can kids help make these?
Yes! This is a kid-friendly recipe with minimal steps. Supervise melting and cutting, but children can stir, press, and decorate.
Summary
Chocolate Peanut Butter Oat Bars are a no-bake, nutrient-rich treat that blends the richness of dark chocolate with the creaminess of peanut butter and the heartiness of oats. Easy to customize, store, and share, they’re perfect for snacks, desserts, or on-the-go energy.