Chocolate Peanut Butter Cookie Bars: A Decadent Delight for Every Occasion
The History of Chocolate Peanut Butter Cookie Bars
The origin of chocolate peanut butter cookie bars can be traced back to the early 20th century when both chocolate and peanut butter emerged as beloved American staples. Peanut butter, invented in the late 1800s by physicians seeking a protein-rich food for dental patients, quickly gained popularity due to its affordability and rich flavor. Around the same time, milk chocolate was being perfected by chocolatiers like Milton S. Hershey, making it more accessible to the general public.
The fusion of these two ingredients into baked treats began gaining momentum during the Great Depression, when home bakers looked for inexpensive yet satisfying recipes. Cookies and bars using peanut butter and cocoa were ideal—simple, filling, and delicious. By the 1950s and 60s, with the rise of suburban baking culture and the proliferation of recipe books, chocolate peanut butter bars became a staple in school bake sales, potlucks, and holiday platters.
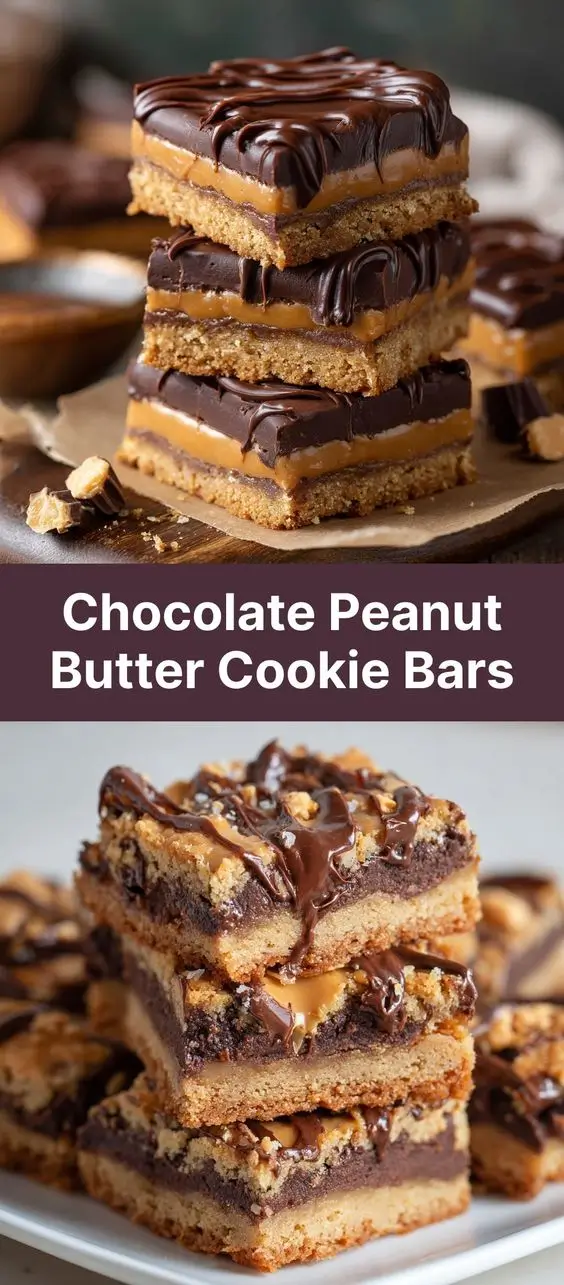
These bars evolved from simple drop cookies into layered confections, often featuring a peanut butter base topped with a rich chocolate layer or swirled together in marbled perfection. Today, they are celebrated not only for their nostalgic charm but also for their versatility—easily adapted to dietary preferences such as gluten-free, vegan, or low-sugar versions—while still delivering that iconic sweet-and-salty, creamy-and-chewy experience loved by generations.
Ingredients Breakdown: What Makes These Bars Irresistible?
The magic of chocolate peanut butter cookie bars lies in the harmony of a few key ingredients, each playing a crucial role in texture, flavor, and structure:
- Peanut Butter: The star of the show. Use creamy, unsweetened natural peanut butter for a rich, authentic taste, or opt for conventional brands like Jif or Skippy for added sweetness and smoother blending. Avoid oily or freshly ground varieties unless you adjust other liquids in the recipe.
- Granulated Sugar and Brown Sugar: Granulated sugar provides sweetness and helps create a crisp edge, while brown sugar adds moisture, chewiness, and a hint of molasses depth.
- Eggs: Bind the ingredients together and contribute to the cake-like yet fudgy texture. Room temperature eggs integrate more smoothly into the batter.
- Vanilla Extract: Enhances overall flavor, rounding out the sweetness and adding aromatic complexity.
- All-Purpose Flour: Gives structure to the bars. For gluten-free versions, a 1:1 substitute works well.
- Baking Soda: A leavening agent that helps the bars rise slightly and become tender without turning cakey.
- Salt: Balances sweetness and intensifies the flavors—especially important when using unsalted peanut butter.
- Cocoa Powder: Unsweetened Dutch-process or natural cocoa powder lends deep chocolate flavor. Dutch-process is less acidic and gives a smoother, richer taste.
- Chocolate Chips (Optional): Semi-sweet, dark, or milk chocolate chips can be folded in or used as a topping for extra indulgence.
- Butter (or Oil): Adds richness and moisture. Unsalted butter is preferred so you can control the salt level.
Some variations may include oats for texture, espresso powder to amplify chocolate notes, or a swirl of melted chocolate on top for visual appeal and decadence.
Step-by-Step Recipe: How to Make Perfect Chocolate Peanut Butter Cookie Bars
Ingredients
- 1 cup (250g) creamy peanut butter (no-stir recommended)
- 1 cup (225g) unsalted butter, softened
- 1 cup (200g) granulated sugar
- 1 cup (220g) packed light brown sugar
- 2 large eggs, room temperature
- 2 teaspoons pure vanilla extract
- 3 cups (375g) all-purpose flour
- ½ cup (50g) unsweetened cocoa powder (Dutch-process preferred)
- 1 teaspoon baking soda
- 1 teaspoon salt
- 1 cup (175g) semi-sweet chocolate chips (optional)
- ½ cup chopped peanuts (optional, for crunch)
Directions
- Preheat Oven & Prepare Pan: Preheat your oven to 350°F (175°C). Line a 9×13-inch baking pan with parchment paper, leaving overhang on two sides for easy removal. Lightly grease any exposed areas.
- Cream Butter and Sugars: In a large mixing bowl, beat the softened butter, peanut butter, granulated sugar, and brown sugar together until light, fluffy, and fully combined—about 3–4 minutes using a hand mixer or stand mixer.
- Add Wet Ingredients: Beat in the eggs one at a time, ensuring each is fully incorporated before adding the next. Stir in the vanilla extract.
- Combine Dry Ingredients: In a separate bowl, whisk together the flour, cocoa powder, baking soda, and salt until uniform and no streaks remain.
- Mix Dry into Wet: Gradually add the dry ingredients to the wet mixture, mixing on low speed until just combined. Do not overmix. The batter will be thick and fudgy.
- Fold in Extras: Gently fold in chocolate chips and chopped peanuts, if using.
- Press Into Pan: Transfer the dough to the prepared pan. Use a spatula or lightly greased hands to press the dough into an even layer. Smooth the top as much as possible.
- Bake: Place in the center of the preheated oven and bake for 25–30 minutes, or until a toothpick inserted into the center comes out with moist crumbs (not wet batter). The edges should be set and slightly cracked.
- Cool Completely: Allow the bars to cool in the pan on a wire rack for at least 1 hour. For clean cuts, refrigerate for 30 minutes before slicing.
- Cut and Serve: Lift the bars out using the parchment overhang. Cut into 12–16 rectangular pieces using a sharp knife wiped clean between cuts.
Expert Tips for the Best Chocolate Peanut Butter Cookie Bars
- Don’t Overbake: These bars continue to set as they cool. Remove them from the oven when the center still looks slightly underdone to ensure a soft, chewy texture.
- Use Room Temperature Ingredients: Cold eggs or butter can lead to uneven mixing and a denser final product.
- Chill the Dough (Optional): If the dough feels too soft to spread, chill it for 15–20 minutes before pressing into the pan.
- Line the Pan Properly: Parchment paper makes removal effortless and prevents sticking better than nonstick spray alone.
- Sharp Knife is Key: Warm your knife under hot water and dry it before cutting for smooth, clean slices through sticky bars.
- Let Them Rest: Allowing the bars to cool completely enhances flavor and improves texture. They firm up significantly after cooling.
- Double the Recipe: These disappear fast! Consider making a double batch and freezing half unbaked (wrap tightly and freeze for up to 3 months).
Variations and Customizations: Make It Your Own
One of the greatest strengths of this recipe is its adaptability. Whether you’re catering to dietary needs, seasonal moods, or just want to experiment, here are some delicious twists:
- Gluten-Free: Substitute all-purpose flour with a high-quality 1:1 gluten-free flour blend. Ensure your cocoa powder and other ingredients are certified gluten-free.
- Vegan Version: Replace butter with vegan margarine or coconut oil, use flax eggs (1 tbsp ground flax + 3 tbsp water per egg), and choose dairy-free chocolate chips.
- Protein-Packed: Add a scoop of vanilla or chocolate peanut butter protein powder and reduce flour by ¼ cup to balance texture.
- Reduced Sugar: Use monk fruit sweetener or erythritol in place of granulated and brown sugars. Opt for sugar-free chocolate chips.
- Marbled Effect: Swirl melted chocolate or extra peanut butter on top before baking for a stunning visual effect and intensified flavor.
- Layered Bars: Create a peanut butter base, then pour a thin chocolate ganache (½ cup cream + 1 cup chocolate chips) on top after baking and cooling.
- Crunchy Toppings: Sprinkle crushed pretzels, sea salt flakes, or chopped roasted peanuts on top before baking for a sweet-and-salty crunch.
- Seasonal Flavors: Add ½ tsp cinnamon and a pinch of nutmeg for fall, or mix in peppermint extract and crushed candy canes in winter.
- Cookie Sandwich Style: Make smaller bars and sandwich them with a layer of peanut butter frosting or chocolate buttercream.
- No-Bake Option: Combine melted peanut butter, butter, powdered sugar, cocoa powder, and oats; press into pan and chill for a no-bake treat.
Health Considerations and Nutritional Value
While chocolate peanut butter cookie bars are undeniably indulgent, understanding their nutritional profile helps you enjoy them mindfully.
Nutritional Breakdown (per bar, based on 16 servings):
- Calories: ~320–360 kcal
- Total Fat: 18–22g (mostly from peanut butter and butter; includes healthy monounsaturated fats)
- Saturated Fat: 8–10g
- Cholesterol: ~40mg
- Sodium: ~200–250mg
- Total Carbohydrates: 38–42g
- Dietary Fiber: 2–3g
- Sugars: 22–26g (naturally occurring and added)
- Protein: 6–8g (thanks to peanut butter and eggs)
Health Notes:
- Peanut butter contributes heart-healthy fats, protein, vitamin E, magnesium, and niacin. However, store-bought versions may contain added oils and sugars.
- Cocoa powder contains antioxidants like flavonoids, which may support cardiovascular health in moderation.
- These bars are energy-dense and best enjoyed as an occasional treat, especially for those managing blood sugar, weight, or heart conditions.
- To make them healthier, consider reducing sugar, using whole wheat pastry flour, or incorporating oats and seeds for fiber.
- Portion control is essential—savor one square slowly rather than consuming multiple in one sitting.
Frequently Asked Questions (FAQ)
Can I use crunchy peanut butter instead of creamy?
Yes! Crunchy peanut butter adds a pleasant texture and nutty bite. Just be aware it may make the bars slightly denser.
Why did my bars turn out dry or crumbly?
Overbaking, too much flour, or using a dry peanut butter brand can cause dryness. Always spoon flour into the measuring cup (don’t scoop), and check for doneness a few minutes early.
Can I freeze these bars?
Absolutely! Store cooled bars in an airtight container with parchment between layers. Freeze for up to 3 months. Thaw at room temperature for 30 minutes before serving.
Can I make this recipe without eggs?
Yes. Try flax eggs (1 tbsp ground flaxseed + 2.5 tbsp water per egg) or commercial egg replacers. Texture may be slightly denser.
Why do my bars sink in the middle?
This can happen due to underbaking, opening the oven door too early, or incorrect leavening. Ensure your baking soda is fresh and avoid jostling the pan during baking.
Can I add oats to this recipe?
Yes. Replace up to 1 cup of flour with old-fashioned rolled oats for a chewier, heartier bar. No other changes needed.
How long do these bars stay fresh?
Stored in an airtight container at room temperature, they last 4–5 days. In the fridge, up to 1 week. For longer storage, freeze.
Can I use almond butter or other nut butters?
Yes, though flavor and texture will vary. Almond butter is less sweet and oilier, so you may need to reduce added fat slightly.
Summary
Chocolate peanut butter cookie bars combine the rich, creamy essence of peanut butter with deep, velvety chocolate in a chewy, fudgy bar perfect for sharing—or keeping all to yourself. Easy to make, endlessly customizable, and always a crowd-pleaser, they’re a timeless treat that bridges comfort and indulgence.
From their humble American roots to modern-day kitchen creativity, these bars prove that sometimes, the simplest ingredients make the most unforgettable desserts.