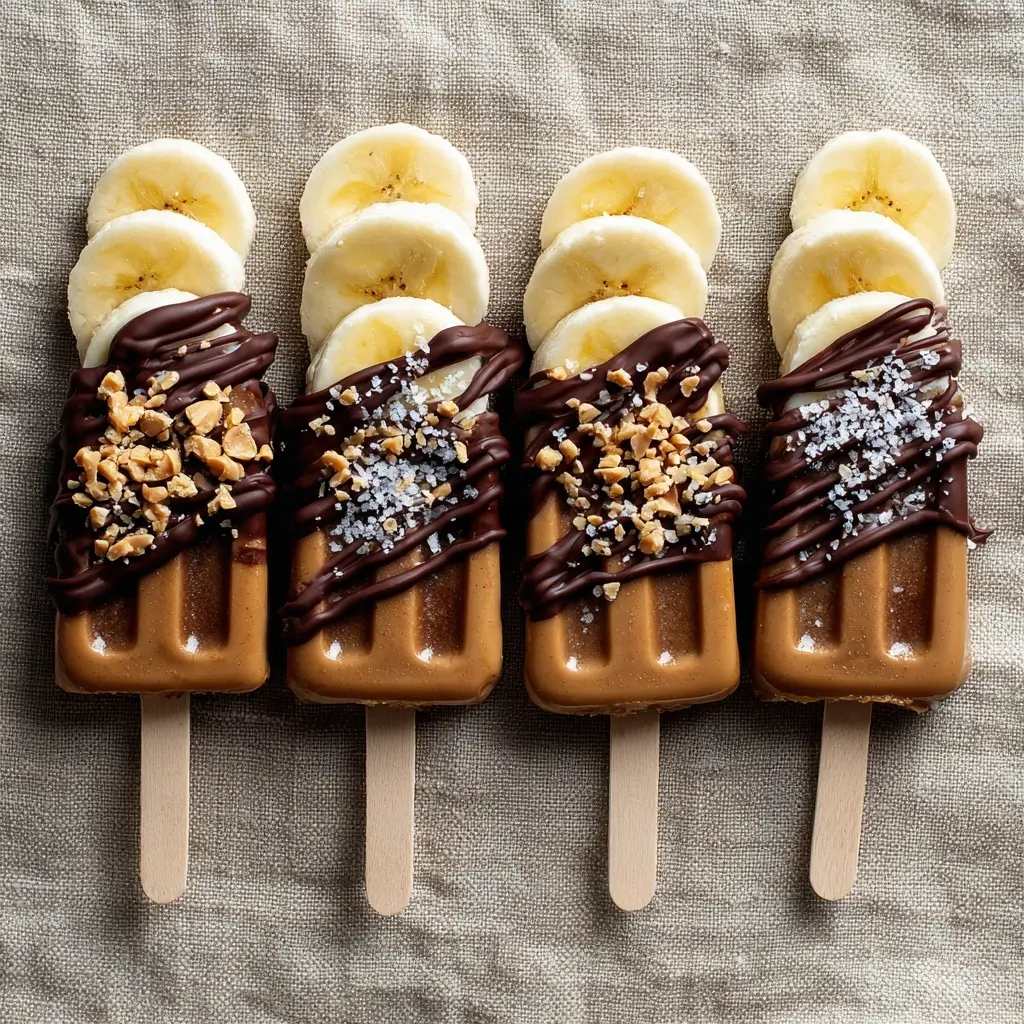
Chocolate Peanut Butter Banana Pops: A Decadent, Healthy, and Irresistible Treat
The History
The story of the Chocolate Peanut Butter Banana Pops is one that begins not in ancient cookbooks or royal kitchens, but in modern-day homes, gyms, and health-conscious cafés. While bananas, peanut butter, and chocolate have each enjoyed centuries of culinary fame, their union into a frozen pop form is a relatively recent innovation—born from the rise of clean eating, fitness culture, and the desire for desserts that don’t compromise on nutrition.
Bananas have long been a staple in tropical regions and were introduced to the Western world in the 19th century as an exotic fruit. Peanut butter, patented in the late 1800s by Dr. John Harvey Kellogg (yes, that Kellogg), gained popularity as a protein-rich alternative to meat. Meanwhile, chocolate—originally consumed as a bitter beverage by the Aztecs—evolved into sweetened confections during European colonial expansion. It wasn’t until the late 20th and early 21st centuries, however, that these three ingredients began appearing together in no-bake, freezer-friendly treats.
The “pop” format—essentially a frozen fruit bar on a stick—gained momentum with the popularity of smoothie bowls, energy bites, and healthy dessert trends championed by food bloggers, Instagram influencers, and plant-based chefs. The Chocolate Peanut Butter Banana Pops emerged as a go-to recipe for parents seeking kid-friendly snacks, fitness enthusiasts needing pre- or post-workout fuel, and anyone craving something indulgent without guilt. Today, this treat symbolizes the perfect balance between decadence and nourishment—a modern classic with global appeal.
Ingredients Breakdown
To create the ultimate Chocolate Peanut Butter Banana Pops, every ingredient plays a vital role—not just in flavor, but in texture, nutritional value, and overall satisfaction. Here’s a detailed look at what goes into each bite:
- Ripe Bananas (3 medium): The foundation of the pops. Ripe bananas are naturally sweet, creamy when frozen, and rich in potassium, vitamin B6, and fiber. Their soft texture allows for easy blending and a smooth interior once frozen. Overripe bananas (with brown speckles) are ideal—they’re sweeter and mash more easily.
- Natural Creamy Peanut Butter (1/2 cup): Choose a peanut butter with no added sugar or hydrogenated oils. It provides healthy monounsaturated fats, protein, and that signature nutty richness. It also acts as a binder, helping the banana mixture hold its shape on the stick.
- Pure Maple Syrup or Honey (2–3 tbsp): Adds extra sweetness and gloss. Maple syrup is vegan and contains antioxidants; honey offers antimicrobial properties. Adjust based on the ripeness of your bananas and personal taste.
- Vanilla Extract (1 tsp): Enhances flavor depth and brings warmth to the blend. Use real vanilla extract for best results, not imitation.
- Pinch of Sea Salt (1/8 tsp): Balances sweetness and amplifies the other flavors—especially the peanut butter and chocolate.
- Dark Chocolate (1 cup, chopped or chips): Preferably 70% cacao or higher for a bittersweet contrast and antioxidant benefits. Melted, it creates a crisp shell that cracks delightfully when bitten.
- Coconut Oil (1 tbsp): Mixed with the melted chocolate, it gives the coating a glossy finish and helps it harden faster in the freezer. It also promotes a clean snap when you break through the shell.
- Optional Toppings: Crushed peanuts, shredded coconut, chia seeds, cacao nibs, crushed pretzels, or a drizzle of white chocolate. These add crunch, visual appeal, and extra nutrients.
Step-by-Step Recipe
- Prepare the Bananas: Peel 3 ripe bananas and slice them in half crosswise. Insert a popsicle stick into the cut end of each banana half, pushing it about halfway through. Place them on a parchment-lined baking sheet and freeze for at least 1 hour. This prevents them from falling apart when dipped later.
- Make the Peanut Butter Coating: In a medium bowl, combine the peanut butter, maple syrup (or honey), vanilla extract, and sea salt. Mix until completely smooth and well blended. You can use a spatula or hand mixer for a creamier consistency.
- Coat the Bananas: Remove the banana halves from the freezer. Using a spoon or offset spatula, generously spread or pipe the peanut butter mixture over each banana, completely covering it. For a thicker layer, chill the coated bananas for 15 minutes before proceeding—this helps the chocolate adhere better.
- Melt the Chocolate: In a heat-safe bowl, combine the dark chocolate and coconut oil. Melt using a double boiler (a bowl over simmering water) or in 20-second bursts in the microwave, stirring frequently until smooth. Avoid overheating, which can cause the chocolate to seize.
- Dip in Chocolate: Take each peanut butter-coated banana and carefully dip it into the melted chocolate, rotating to cover all sides. Lift it out slowly, letting excess chocolate drip off.
- Add Toppings (Optional): Immediately after dipping, sprinkle your choice of toppings while the chocolate is still wet. Work quickly—chocolate sets fast!
- Freeze Until Firm: Place the finished pops back on the parchment paper and return to the freezer for at least 2–3 hours, or until completely solid. For longer storage, wrap individually in parchment and place in an airtight container.
- Serve & Enjoy: Let sit at room temperature for 2–3 minutes before eating for the best texture. The outside should be crisp, the middle creamy and cold—like a gourmet ice cream bar.
Tips
- Use firm sticks: Wooden popsicle sticks work best. Avoid flimsy paper ones—they can break under the weight.
- Don’t skip the pre-freeze: Freezing the bananas before coating prevents them from becoming too soft and falling off the stick.
- Chill the peanut butter layer: If your kitchen is warm, chill the PB-coated bananas for 15–20 minutes before dipping. This reduces smudging and ensures a neater chocolate coat.
- Maintain chocolate temperature: Keep the melted chocolate warm but not hot. Reheat in 10-second intervals if needed.
- Work in batches: Only take out a few bananas at a time to prevent melting during assembly.
- Line everything: Use parchment paper on trays, plates, and even your countertop to avoid sticky messes.
- Label and date: If storing long-term, label your container with the date. These pops keep well for up to 3 months.
- Let them temper slightly: Straight from the deep freeze, they can be too hard. Letting them sit for a few minutes enhances flavor and mouthfeel.
Variations and Customizations
One of the greatest strengths of Chocolate Peanut Butter Banana Pops is their versatility. Whether you’re catering to dietary restrictions, seasonal moods, or adventurous palates, here are some creative twists:
- Vegan Version: Use maple syrup instead of honey and ensure your chocolate is dairy-free. Opt for certified vegan dark chocolate.
- Nut-Free Option: Substitute peanut butter with sunflower seed butter or soy nut butter. These offer similar creaminess and protein content.
- Protein Boost: Add 1–2 scoops of unflavored or vanilla plant-based protein powder to the peanut butter mixture. You may need to add a splash of almond milk to maintain spreadable consistency.
- Antioxidant-Rich Upgrade: Mix in 1 tbsp of raw cacao powder into the peanut butter blend for a deeper chocolate-nut flavor and added polyphenols.
- Crunchy Center: Before freezing, insert a whole peanut, almond, or mini pretzel rod into the center of the banana for a surprise texture.
- Flavor Infusions: Add a pinch of cinnamon, nutmeg, or espresso powder to the peanut butter mix for a gourmet twist.
- White or Milk Chocolate Dip: Swap dark chocolate for white or milk chocolate for a sweeter, creamier shell. Combine with sprinkles for a funfetti effect.
- Frozen Fruit Swirl: Blend frozen berries into the peanut butter mixture for a marbled effect and added vitamins.
- Mini Pop Bites: Roll mashed banana and peanut butter into small balls, freeze, then dip in chocolate for bite-sized versions—perfect for parties.
- Layered Look: After the first chocolate dip sets, drizzle with contrasting melted chocolate (e.g., white chocolate over dark) using a piping bag or fork.
Health Considerations and Nutritional Value
Despite their dessert-like indulgence, Chocolate Peanut Butter Banana Pops can be a surprisingly nutritious treat when made with wholesome ingredients. Here’s a breakdown of the health benefits and considerations per serving (assuming 6 pops):
Nutritional Highlights (Per Pop)
- Calories: ~180–220 kcal
- Healthy Fats: 10–12g (mostly monounsaturated and polyunsaturated from peanut butter and coconut oil)
- Protein: 4–5g (supports muscle repair and satiety)
- Carbohydrates: 20–25g (naturally occurring sugars from banana and maple syrup)
- Dietary Fiber: 3–4g (promotes digestive health)
- Potassium: ~250mg (supports heart and nerve function)
- Vitamin B6: ~0.4mg (20% of daily value—important for metabolism)
- Magnesium & Iron: Small amounts from banana and dark chocolate
- Antioxidants: Flavonoids in dark chocolate help reduce inflammation and support cardiovascular health.
Health Benefits
- Natural Energy Boost: The combo of complex carbs, healthy fats, and protein makes these pops ideal for pre-workout fuel or afternoon slumps.
- No Refined Sugar (if made right): When using natural sweeteners and unsweetened peanut butter, these avoid blood sugar spikes common in processed desserts.
- Gut-Friendly: Bananas contain prebiotic fibers that feed beneficial gut bacteria.
- Heart-Healthy Fats: Peanut butter and dark chocolate are linked to improved cholesterol levels when consumed in moderation.
Cautions
- Allergies: Contains peanuts and possibly tree nuts (depending on chocolate). Not suitable for those with nut allergies unless substitutions are made.
- Calorie Density: While nutritious, these are calorie-dense due to fats. Stick to one pop as a snack rather than multiple servings.
- Sugar Content: Even natural sugars add up. Diabetics should monitor portion size and consider low-glycemic alternatives like monk fruit-sweetened chocolate.
- Portion Control: They’re delicious—so much so that it’s easy to eat more than intended. Store in individual wraps to avoid overindulging.
Full Ingredients List
- 3 medium ripe bananas, peeled
- 6 popsicle sticks
- 1/2 cup natural creamy peanut butter (no added sugar or oil)
- 2–3 tablespoons pure maple syrup or raw honey
- 1 teaspoon pure vanilla extract
- 1/8 teaspoon sea salt
- 1 cup dark chocolate (70% cacao or higher), chopped
- 1 tablespoon refined coconut oil
- Optional toppings: crushed peanuts, shredded coconut, chia seeds, cacao nibs, crushed pretzels, white chocolate drizzle
Directions
- Line a baking sheet with parchment paper and set aside.
- Cut each banana in half crosswise. Insert a popsicle stick into the cut end of each half and place on the prepared tray.
- Freeze for 1 hour to firm up.
- In a bowl, mix peanut butter, maple syrup (or honey), vanilla, and sea salt until smooth.
- Remove bananas from freezer. Spread or pipe the peanut butter mixture evenly over each banana, fully covering it.
- Return to freezer for 15–20 minutes to set the peanut butter layer.
- In a heat-safe bowl, combine chopped dark chocolate and coconut oil.
- Melt using a double boiler or microwave (20-second intervals, stirring between), until silky smooth.
- Take one banana at a time, dip into melted chocolate, and roll to coat completely.
- Immediately sprinkle with desired toppings.
- Place back on parchment and freeze for 2–3 hours, or until solid.
- Store in an airtight container with parchment layers, for up to 3 months.
- Allow to temper for 2–3 minutes before serving.
FAQ
Can I make these without peanut butter?
Yes! Try sunflower seed butter, almond butter, cashew butter, or even Greek yogurt for a tangy twist.
Why did my chocolate not harden?
Coconut oil is key—it helps the chocolate set firmly in the freezer. Also, ensure your bananas are very cold before dipping.
Can I use regular chocolate bars?
Absolutely, but avoid candy bars with fillings. Stick to solid dark, milk, or white chocolate. Adding coconut oil improves texture.
Are these safe for kids?
Yes, but supervise young children due to choking hazards from sticks and hard chocolate. Consider mini bite sizes for toddlers.
Can I prep these ahead of time?
Yes! They’re perfect for meal prep. Make a batch on Sunday and enjoy all week.
What if my banana leaks or breaks?
Use firmer, less mushy bananas and freeze thoroughly before coating. Very ripe bananas should still hold if handled gently.
Can I use frozen bananas?
You can, but thaw slightly first—otherwise, they’ll be too hard to insert sticks or coat evenly.
How do I prevent ice crystals?
Wrap tightly in plastic or store in a vacuum-sealed container to minimize freezer burn.
Can I bake these instead?
Not recommended—the concept relies on freezing. Baking would turn the banana to mush and melt the chocolate.
Are these gluten-free?
Yes, as long as all ingredients (especially chocolate and peanut butter) are certified gluten-free.
Summary
Chocolate Peanut Butter Banana Pops are the ultimate fusion of flavor, convenience, and nutrition—a frozen dessert that feels indulgent but fuels your body with potassium, healthy fats, and natural energy. Perfect for kids, fitness lovers, and anyone craving a quick, no-guilt treat straight from the freezer.