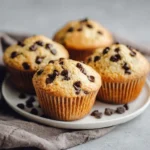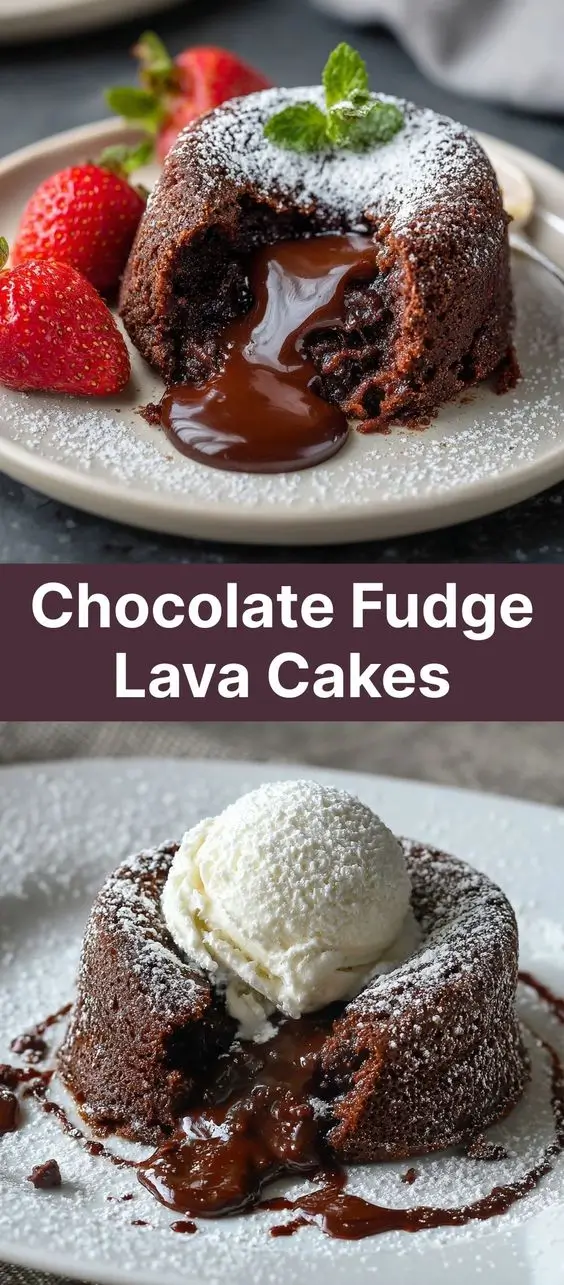
Chocolate Fudge Lava Cakes: A Decadent Delight for Chocolate Lovers
Indulge in the ultimate chocolate fantasy with these rich, velvety Chocolate Fudge Lava Cakes. With their crisp outer shell giving way to a molten center of warm, flowing chocolate, each bite is pure bliss. These individual desserts are surprisingly simple to make yet impressive enough to serve at dinner parties, romantic evenings, or as a luxurious treat for one. Whether you’re a seasoned baker or a novice in the kitchen, this recipe will guide you step-by-step to create restaurant-quality desserts that ooze elegance and flavor.
The History of Chocolate Fudge Lava Cakes
The origin of the Chocolate Fudge Lava Cake—also known as Chocolate Lava Cake, Molten Chocolate Cake, or Fondant au Chocolat—is often credited to French chef Jean-Georges Vongerichten. The popular story dates back to the late 1980s in New York City when Chef Vongerichten accidentally underbaked a chocolate sponge cake. Upon tasting it, he discovered that the gooey, molten center created an entirely new sensory experience. Instead of discarding the “mistake,” he refined the technique and introduced it on his menu at his eponymous restaurant, Jean Georges.
From there, the dessert quickly gained fame across fine dining establishments in America and Europe. Its rise coincided with the growing popularity of minimalist, intensely flavored desserts in the 1990s. Unlike traditional dense chocolate cakes, the lava cake offered drama and surprise—cutting into it revealed a river of liquid chocolate that cascaded over the plate. Over time, home bakers began replicating the recipe, adapting it for everyday ovens and simpler ingredients, making it a beloved classic in both professional kitchens and family homes.
Ingredients Breakdown: What Makes This Cake So Special?
The magic of a perfect Chocolate Fudge Lava Cake lies not just in technique, but in the quality and balance of its core ingredients. Each component plays a crucial role in achieving that signature contrast between the firm exterior and the molten heart.
- Dark Chocolate (70% cocoa): High-quality dark chocolate is essential. It provides deep, complex chocolate flavor and contributes to the fudgy texture. Avoid milk chocolate, which melts too quickly and lacks intensity.
- Unsalted Butter: Adds richness and helps create a smooth, glossy batter. Using unsalted butter allows you to control the salt content precisely.
- Granulated Sugar: Sweetens the cake without overpowering the chocolate. It also aids in creating a slightly crisp crust during baking.
- Large Eggs: Provide structure and help emulsify the fat and chocolate. The yolks add creaminess while the whites contribute to lightness.
- Egg Yolks (extra): Additional yolks enhance richness and promote a silkier texture, helping to create that signature lava flow.
- All-Purpose Flour: Used sparingly to provide minimal structure—just enough to hold the cake together without turning it into a regular baked cake.
- Salt: A pinch enhances all the flavors and balances the sweetness.
- Vanilla Extract: Adds aromatic complexity and rounds out the chocolate flavor.
- Optional Add-ins: Espresso powder (enhances chocolate notes), liqueurs like Grand Marnier or Baileys, or a dash of cayenne for heat.
Step-by-Step Recipe: How to Make Perfect Chocolate Fudge Lava Cakes
Follow this detailed process to achieve flawlessly baked lava cakes with a consistent molten center every time.
Ingredients
- 8 oz (225g) high-quality dark chocolate (70% cocoa), finely chopped
- ½ cup (115g / 1 stick) unsalted butter
- ⅔ cup (130g) granulated sugar
- 2 large eggs
- 2 large egg yolks
- ¼ teaspoon salt
- 1 teaspoon vanilla extract
- 3 tablespoons (25g) all-purpose flour
- Butter and cocoa powder (for greasing ramekins)
- Powdered sugar, fresh berries, whipped cream, or vanilla ice cream (for serving)
Directions
- Preheat Oven & Prepare Ramekins: Preheat your oven to 425°F (220°C). Generously butter four 6-ounce ramekins, then dust the insides with cocoa powder, tapping out excess. This ensures easy release after baking.
- Melt Chocolate and Butter: In a heatproof bowl set over a pot of simmering water (double boiler method), melt the chopped chocolate and butter together, stirring frequently until smooth. Remove from heat and let cool slightly.
- Whisk Eggs and Sugar: In a separate bowl, whisk together the eggs, egg yolks, sugar, salt, and vanilla extract until pale, thickened, and well combined—about 2–3 minutes with a hand mixer or vigorous whisking by hand.
- Combine Mixtures: Slowly pour the warm chocolate mixture into the egg mixture, whisking constantly to temper the eggs and prevent scrambling. Once fully incorporated, gently fold in the flour until no streaks remain. Do not overmix.
- Fill Ramekins: Divide the batter evenly among the prepared ramekins, filling each about ¾ full. Place them on a baking sheet for easy handling.
- Bake: Bake for 12 to 14 minutes. The edges should be set and slightly puffed, but the center should still jiggle faintly when gently shaken. This timing is crucial—overbaking will eliminate the lava center.
- Serve Immediately: Remove from oven and let rest for 1 minute. Run a knife around the edge of each ramekin, place a dessert plate upside-down over the top, and invert carefully. Tap lightly and lift the ramekin to reveal the cake.
- Garnish and Enjoy: Dust with powdered sugar, add a scoop of vanilla ice cream, and serve immediately while hot and molten.
Tips for Success: Mastering the Perfect Lava Flow
- Use Quality Chocolate: Since chocolate is the star, choose a premium bar with at least 70% cocoa solids. Brands like Valrhona, Ghirardelli, Callebaut, or Lindt work beautifully.
- Don’t Skip the Double Boiler: Melting chocolate directly over heat can cause scorching. Always use indirect heat and stir frequently.
- Room Temperature Eggs: They incorporate more smoothly into the batter, reducing the risk of curdling when mixed with warm chocolate.
- Avoid Overbaking: Set a timer! Even 60 seconds too long can turn your molten center into a fully baked cake. The ideal bake shows firm edges with a soft, jiggling center.
- Uniform Ramekins: Use identical ramekins to ensure even baking. Ceramic or porcelain works best for consistent heat distribution.
- Prepare Ahead: You can prepare the batter up to 24 hours in advance, pour into greased ramekins, cover, and refrigerate. Bring to room temperature for 20 minutes before baking, adding 1–2 extra minutes if needed.
- Serve Immediately: The molten effect disappears quickly as the cake continues to cook from residual heat. Serve within 1–2 minutes of baking.
Variations and Customizations: Elevate Your Lava Cake Game
While the classic version is divine on its own, feel free to experiment with exciting twists to suit different tastes and occasions.
- White Chocolate Raspberry: Replace half the dark chocolate with white chocolate and add a fresh raspberry in the center of each ramekin before baking for a tart-sweet burst.
- Peppermint Chocolate: Add ¼ teaspoon peppermint extract to the batter and top with crushed candy canes for a festive holiday dessert.
- Spicy Mexican-Inspired: Stir in ¼ teaspoon ground cinnamon and a pinch of cayenne pepper for warmth and depth.
- Alcohol-Infused: Add 1–2 tablespoons of Grand Marnier, Kahlúa, Amaretto, or bourbon to the chocolate mixture for a sophisticated twist.
- Gluten-Free Option: Substitute the all-purpose flour with almond flour or a gluten-free 1:1 baking blend. Almond flour adds nuttiness and pairs well with chocolate.
- Vegan Version: Use dairy-free chocolate and vegan butter. Replace eggs with flax eggs (2 tbsp ground flaxseed + 5 tbsp water) though texture may vary slightly—best tested in small batches.
- Stuffed Centers: Hide a piece of chocolate truffle, caramel square, or peanut butter cup in the middle of the batter for an extra surprise.
- Mini Lava Cakes: Use smaller ramekins or muffin tins to make bite-sized versions for parties—reduce baking time to 8–10 minutes.
Health Considerations and Nutritional Value
While undeniably decadent, Chocolate Fudge Lava Cakes do offer some redeeming qualities when enjoyed in moderation.
Nutritional Breakdown (Per Serving – 1 Cake)
| Nutrient | Amount |
|---|---|
| Calories | ~420 kcal |
| Total Fat | 30g |
| Saturated Fat | 18g |
| Cholesterol | 180mg |
| Carbohydrates | 35g |
| Sugars | 28g |
| Protein | 6g |
| Fiber | 2g |
| Sodium | 180mg |
Health Notes:
- Dark chocolate contains antioxidants like flavonoids, which may support heart health and reduce inflammation when consumed in moderation.
- High in saturated fat and sugar, so individuals managing cholesterol, diabetes, or weight should enjoy occasionally and in controlled portions.
- Rich in calories, so pair with fresh fruit or a light salad instead of additional sweets.
- Consider using coconut sugar or monk fruit sweetener for reduced glycemic impact (though texture may change).
- Contains eggs and dairy—avoid if allergic or intolerant unless using suitable substitutes.
Frequently Asked Questions (FAQ)
Q: Can I make lava cakes ahead of time?
A: Yes! Prepare the batter and fill the ramekins up to 24 hours in advance. Cover and refrigerate. Let sit at room temperature for 20 minutes before baking, and add 1–2 minutes to the bake time.
Q: Why didn’t my center melt?
A: Likely causes include overbaking, using too much flour, or under-whisking the eggs and sugar (which affects aeration and texture). Ensure precise timing and ingredient measurements.
Q: Can I freeze lava cakes?
A: While not ideal, you can freeze unbaked filled ramekins for up to 1 month. Bake from frozen, adding 3–5 extra minutes, but results may vary in consistency.
Q: Can I double the recipe?
A: Absolutely. Just multiply ingredients accordingly and use matching ramekins for even cooking. Monitor closely, especially in larger ovens with uneven heat.
Q: What if I don’t have ramekins?
A: Use oven-safe coffee mugs, teacups, or silicone molds. Avoid glass unless labeled oven-safe. Adjust size and baking time as needed.
Q: Is it safe to eat undercooked cake?
A: Yes—the eggs are heated sufficiently during baking (typically reaching 160°F internally), making them safe to consume. The center is soft, not raw.
Q: Can I make vegan lava cakes?
A: Yes, though results vary. Use plant-based butter, dairy-free chocolate, and flax or chia eggs. Some bakers report success with aquafaba for lightness. Expect a denser texture.
Summary
Chocolate Fudge Lava Cakes are elegant, rich desserts with a molten chocolate center encased in a tender cake exterior—perfect for special occasions or satisfying intense chocolate cravings.
Easy to prepare with high-quality ingredients and precise timing, they deliver gourmet results in under 30 minutes, making them a show-stopping favorite for home bakers and food lovers alike.