Introduction
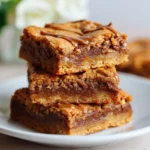
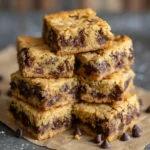
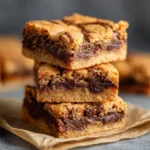
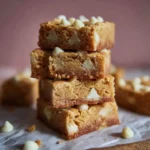
Butterscotch Blondie Bars are the rich, caramel-kissed, chewy-crisp cousins of brownies—without the chocolate. Luxuriously dense yet tender, deeply buttery with molasses-tinged warmth, and studded with golden butterscotch morsels that melt into ribbons of toffee-like silk, these bars deliver pure nostalgic comfort in every bite. Unlike their fudgy or cakey counterparts, blondies occupy a perfect middle ground: substantial enough for dessert, soft enough for an afternoon treat, and endlessly adaptable for holidays, potlucks, bake sales, or quiet moments with a cold glass of milk. Whether you’re a seasoned baker or a curious beginner, mastering the art of the butterscotch blondie is both rewarding and deceptively simple—yet achieving that ideal balance of golden crust, gooey center, and nuanced depth of flavor requires attention to technique, ingredient quality, and timing. This comprehensive guide dives deep into every dimension of this beloved classic—its origins, science-backed methods, nutritional insights, creative riffs, troubleshooting wisdom, and more—so you can bake not just *a batch*, but *the best batch* you’ve ever made.
The History
The story of the blondie begins not in a Scottish bakery—but in late 19th-century America, as a direct evolution of the brownie’s own origin tale. While the exact birthplace remains debated (with strong claims from Chicago’s Palmer House Hotel in 1893 and Boston’s Ward’s Cook Book in 1896), early “brownies” were actually *blond*—made with molasses, sugar, and butter, but no cocoa. The term “blondie” didn’t appear in print until the 1907 edition of Fannie Farmer’s Boston Cooking-School Cook Book, where it described a “brownie without chocolate”—a dense, square-cut bar leavened lightly with baking powder and enriched with nuts. Butterscotch’s rise paralleled this development: though traditional Scottish butterscotch (a hard, boiled confection of butter, brown sugar, and cream) dates to the early 1800s, its American adaptation—softer, more pliable, and eventually formulated into shelf-stable morsels by brands like Hershey’s (introduced in 1960) and Nestlé (1961)—catapulted the butterscotch blondie into mainstream popularity by the mid-20th century. By the 1950s and ’60s, it had become a staple in church cookbooks, Junior League collections, and Betty Crocker pamphlets—often baked in vintage aluminum loaf pans and served at PTA meetings and holiday open houses. Its enduring appeal lies in its unpretentious elegance: a humble canvas that celebrates the profound complexity of brown sugar, butter, and heat-transformed sucrose—a true testament to the alchemy of American home baking.
Ingredients Breakdown
Every exceptional butterscotch blondie starts with intentionality—not just measuring, but *understanding* how each component functions:
- Unsalted Butter (1 cup / 2 sticks / 227g): Provides richness, moisture, and structure. Unsalted allows precise sodium control. Clarified butter or browned butter (cooled) can add nutty depth—though standard melted butter yields the most reliable texture.
- Packed Light Brown Sugar (1 ½ cups / 300g): The soul of the bar. Molasses content (about 3.5%) delivers acidity, moisture retention, and signature caramel notes. Dark brown sugar intensifies flavor and chewiness but may darken the bars excessively; light brown offers ideal balance. *Crucially*, “packed” means pressing firmly into the measuring cup—under-packing leads to dry, crumbly bars.
- Granulated Sugar (½ cup / 100g): Adds sweetness, aids in crust formation, and contributes to spread and crispness. Reducing it significantly compromises texture and browning.
- Large Eggs (2, room temperature): Bind the batter, add moisture, and provide lift. Room temperature ensures even emulsification. Cold eggs can cause the melted butter to seize or create lumps.
- Pure Vanilla Extract (2 tsp): Not optional. Real vanilla enhances butterscotch’s complexity and rounds out sharp sugar notes. Imitation extract lacks depth and can taste artificial when baked.
- All-Purpose Flour (1 ¼ cups / 156g, spooned & leveled): The structural backbone. Too much = tough, cakey bars; too little = greasy, overspread slabs. Spooning (not scooping) prevents compaction. For gluten-free versions, a 1:1 certified GF blend (like King Arthur or Bob’s Red Mill) works well—add ¼ tsp xanthan gum if not included.
- Baking Powder (½ tsp): A subtle leavener—just enough to lift without making bars cakey. Omitting it yields denser, fudgier results; doubling causes doming and tunneling.
- Sea Salt or Kosher Salt (1 tsp + pinch for topping): Essential for balancing sweetness and amplifying all other flavors. Fine sea salt dissolves evenly; flaky Maldon adds textural contrast when sprinkled pre-bake.
- Butterscotch Morsels or Chips (1 ½ cups / 255g): Use high-quality, real-dairy chips (e.g., Ghirardelli, Guittard, or Hershey’s Special Dark Butterscotch). Avoid “baking chips” with palm oil—they don’t melt smoothly. Chopping a butterscotch candy bar (like Kerr’s or old-school O’Henry) adds irregular, artisanal pockets of intense toffee.
- Optional Add-Ins: Toasted walnuts or pecans (¾ cup), semisweet chocolate chunks (½ cup), flaky sea salt flakes (for finishing), or a swirl of salted caramel sauce (2–3 tbsp, swirled in before baking).
Step-by-Step Recipe
- Preheat & Prep: Position oven rack in the center. Preheat to 350°F (177°C). Grease a 9×13-inch metal baking pan *thoroughly* with butter or non-stick spray, then line with parchment paper, leaving 2-inch overhangs on two opposite sides for easy lifting. This step is non-negotiable for clean removal and clean slicing.
- Melt Butter: In a medium saucepan over low heat—or in a microwave-safe bowl in 20-second bursts—melt butter completely. Let cool slightly (1–2 minutes) until warm but not hot to the touch (~110°F/43°C). Overheating will cook the eggs later.
- Cream Sugars & Butter: In a large heatproof bowl, whisk the warm melted butter, brown sugar, and granulated sugar vigorously for 1 full minute until glossy, thickened, and slightly lighter in color. This incorporates air and begins dissolving sugar crystals—critical for texture and crust formation.
- Add Eggs & Flavor: Whisk in eggs one at a time, fully incorporating each before adding the next. Whisk in vanilla until smooth and homogenous. Batter should be thick, shiny, and cohesive—not broken or curdled.
- Dry Ingredients: In a separate bowl, whisk together flour, baking powder, and salt until fully combined and aerated. Sift if lumpy.
- Combine Gently: Using a flexible silicone spatula, fold the dry ingredients into the wet mixture in 3 additions. Fold *just until no streaks remain*. Overmixing develops gluten → tough, rubbery bars. It’s okay to see tiny flour specks—they’ll vanish during baking.
- Fold in Butterscotch: Add butterscotch morsels (and nuts, if using) and gently fold until evenly distributed. Do not overfold—preserve chip integrity.
- Spread & Smooth: Pour batter into prepared pan. Use an offset spatula or the back of a spoon to spread evenly into corners. Tap pan sharply 3–4 times on the counter to release air bubbles and settle batter.
- Optional Finishing Touch: Sprinkle top with a generous pinch of flaky sea salt for contrast and sophistication.
- Bake with Precision: Bake for 30–38 minutes. Begin checking at 30 minutes: edges should be deeply golden and pulling slightly from the pan; center should look set but still have a *slight* jiggle (like firm Jell-O) when gently shaken. A toothpick inserted 1 inch from the edge should come out with moist crumbs; the center toothpick should have a few *wet*, glossy crumbs—not wet batter, not dry crumbs. Underbaked = soupy center; overbaked = dry, crumbly bars.
- Cool Completely (The Hardest Step): Place pan on a wire rack. Cool for *at least 2 hours* at room temperature—do not rush this. Cutting while warm guarantees mushy, sticky, misshapen bars. For cleanest cuts, refrigerate cooled bars for 1 hour before slicing.
- Cut & Serve: Use a sharp chef’s knife wiped clean between cuts. For perfect squares, cut into 4 rows by 5 columns (20 bars). Wipe knife after every slice for pristine edges.
Tips
- Room Temperature Eggs Are Key: Cold eggs cause melted butter to solidify into tiny beads, leading to uneven texture and poor emulsification. Place eggs in warm water for 5 minutes if forgotten.
- Don’t Skip the Resting Time: Letting the batter sit for 15–20 minutes before baking allows flour to fully hydrate and sugar to dissolve further—yielding smoother, more uniform bars.
- Rotate Your Pan: If your oven has hot spots (most do), rotate the pan 180° halfway through baking for even browning.
- Use Metal, Not Glass: Glass pans retain heat longer and bake slower, often causing overdone edges before the center sets. Aluminum conducts heat evenly and predictably.
- Measure Flour Correctly: Too much flour is the #1 cause of dry blondies. Use the “spoon-and-level” method: fluff flour in bag, spoon into measuring cup, level with straight edge. Never scoop directly from the bag.
- Know Your Oven: Use an oven thermometer! Many ovens run 25–50°F off. An inaccurate temp ruins timing and texture.
- Chill Before Cutting—Seriously: Refrigeration firms up the butter and sugar matrix, allowing razor-sharp cuts. Warm bars squish and smear.
- Store Smart: Keep in an airtight container at room temperature for up to 4 days, or freeze (unfrosted) for up to 3 months. Thaw at room temperature for 30 minutes.
- Revive Stale Bars: Wrap individually in foil and warm in a 300°F oven for 5–7 minutes—they’ll taste freshly baked.
- Scale with Confidence: This recipe scales beautifully. For a 9×9 pan, halve all ingredients and bake 25–32 minutes. For mini muffin tins, fill ¾ full and bake 12–15 minutes.
Variations and Customizations
The butterscotch blondie is a masterclass in versatility—here are inspired, tested variations that elevate tradition without compromising integrity:
- Maple-Butterscotch Swirl: Replace ¼ cup brown sugar with pure maple syrup. After spreading batter, drizzle 3 tbsp warm maple syrup over top and swirl gently with a knife.
- Espresso-Scotch Blondies: Dissolve 1 tbsp instant espresso powder in 1 tsp hot water; stir into batter with vanilla. Enhances butterscotch’s bitterness and adds sophistication.
- Oatmeal-Butterscotch Chewies: Fold in 1 cup old-fashioned rolled oats (not quick oats) for hearty, chewy texture and subtle nuttiness.
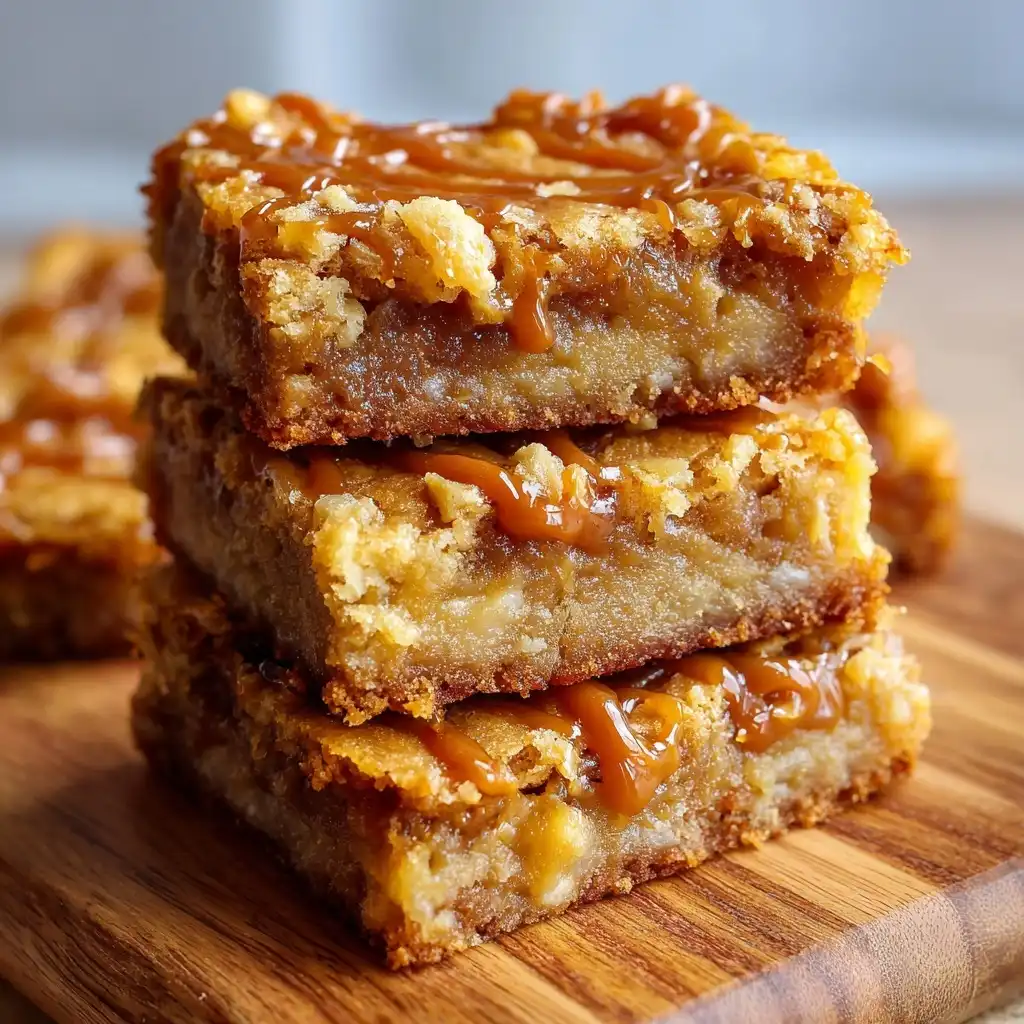
- Salted Caramel Butterscotch: Layer ½ cup thick, homemade salted caramel sauce (cooled) over half the batter, top with remaining batter, then swirl. Garnish with extra caramel and sea salt.
- Spiced Holiday Blondies: Add 1 tsp ground cinnamon, ¼ tsp ground ginger, and a pinch of cloves to dry ingredients. Top with crystallized ginger pieces.
- Double-Scotch (Whiskey-Infused): Stir 1 tbsp high-quality bourbon or Scotch into the batter with the vanilla. Alcohol bakes off, leaving only aromatic warmth.
- White Chocolate & Butterscotch: Swap ½ cup butterscotch chips for high-quality white chocolate chips. The vanilla-bean notes complement butterscotch beautifully.
- Gluten-Free & Vegan Adaptation: Use GF 1:1 flour blend + ¼ tsp xanthan gum. Replace eggs with 2 flax eggs (2 tbsp ground flax + 6 tbsp water, rested 5 min) and butter with refined coconut oil (same amount, melted). Use vegan butterscotch chips (e.g., Enjoy Life).
- Streusel-Topped Blondies: Mix ⅓ cup flour, ⅓ cup brown sugar, 3 tbsp cold butter, and ¼ tsp cinnamon; crumble over batter before baking for a crunchy, spiced crown.
- Blondie “S’mores”: Press 1 cup crushed graham crackers into bottom of pan before adding batter. Top with mini marshmallows during last 3 minutes of baking—broil 30 seconds to toast.
Health Considerations and Nutritional Value
While butterscotch blondies are undeniably indulgent, understanding their nutritional profile empowers mindful enjoyment—and thoughtful adaptations:
- Caloric Density: A standard 2×2-inch bar contains ~280–320 calories, primarily from carbohydrates (35–42g) and fat (14–18g). The majority of fat is saturated (from butter and butterscotch), with minimal protein (~2–3g).
- Sugar Content: Each bar contains ~24–28g of total sugar (naturally occurring + added). Brown sugar contributes beneficial minerals (calcium, potassium, iron) in trace amounts, but not enough to impact daily needs.
- Minimal Micronutrients: Contains small amounts of B vitamins (from flour and eggs), selenium (eggs), and choline (eggs), but is not a significant source of vitamins/minerals. Fortified flour adds iron and some B vitamins.
- Gluten & Allergens: Naturally contains gluten (wheat), dairy (butter, butterscotch), and eggs. Tree nuts are common add-ins. Always label clearly for guests with allergies.
- Health-Conscious Tweaks (Without Sacrificing Soul):
- Reduce sugar by ¼ cup total (replace with 2 tbsp unsweetened applesauce + 1 extra tbsp brown sugar for moisture balance).
- Substitute ¼ cup butter with unsweetened applesauce or mashed banana for slight moisture and fiber.
- Boost fiber with 2 tbsp ground flaxseed or oat bran added to dry ingredients.
- Use dark brown sugar exclusively for higher molasses content (more antioxidants like polyphenols).
- Opt for organic, grass-fed butter for higher CLA (conjugated linoleic acid) and omega-3s.
- Mindful Serving: Portion control is key. Serve smaller bars (1.5×1.5 inches) or pair with fresh fruit (sliced pears or tart apples) to balance sweetness and add fiber/vitamin C.
- Not “Health Food”—But Not “Junk” Either: Made with whole-food ingredients and no artificial preservatives, these bars fit comfortably within a balanced, joyful eating pattern—especially when enjoyed occasionally and intentionally, not mindlessly.
Ingredients
- 1 cup (2 sticks / 227g) unsalted butter, melted and slightly cooled
- 1 ½ cups (300g) packed light brown sugar
- ½ cup (100g) granulated sugar
- 2 large eggs, room temperature
- 2 teaspoons pure vanilla extract
- 1 ¼ cups (156g) all-purpose flour, spooned and leveled
- ½ teaspoon baking powder
- 1 teaspoon fine sea salt (plus extra for topping)
- 1 ½ cups (255g) high-quality butterscotch morsels or chips
- (Optional) ¾ cup toasted walnuts or pecans
- (Optional) Flaky sea salt for finishing
Directions
- Preheat oven to 350°F (177°C). Grease a 9×13-inch metal baking pan and line with parchment paper, leaving overhangs on two sides.
- In a medium saucepan or microwave-safe bowl, melt butter. Let cool 1–2 minutes until warm (not hot).
- In a large bowl, whisk warm butter, brown sugar, and granulated sugar for 60 seconds until thick, glossy, and smooth.
- Whisk in eggs one at a time, then vanilla, until fully combined.
- Fold dry ingredients into wet mixture in 3 parts, mixing *just until no dry streaks remain*. Do not overmix.
- Gently fold in butterscotch chips (and nuts, if using).
- Spread batter evenly into prepared pan. Tap pan firmly on counter 3–4 times. Sprinkle top with flaky sea salt.
- Bake 30–38 minutes, until edges are deeply golden and center is set with only a slight jiggle. A toothpick near the edge should show moist crumbs; center toothpick should show *a few wet, glossy crumbs*.
- Cool completely in pan on a wire rack—minimum 2 hours. For cleanest cuts, refrigerate 1 hour before slicing.
- Use a sharp knife to cut into 20 bars (4×5), wiping blade clean between cuts.
- Store in an airtight container at room temperature up to 4 days, or freeze up to 3 months.
FAQ
- Why did my blondies turn out cakey?
- Likely causes: too much flour (scooped, not spooned), too much baking powder, overmixing the batter, or using cold eggs that caused butter to seize. Also check oven temp—too low causes excessive rise and air pockets.
- Can I use dark brown sugar instead of light?
- Yes—but expect darker color, stronger molasses flavor, and slightly chewier, denser texture. Reduce baking time by 2–3 minutes and watch closely.
- My blondies sank in the center. What happened?
- Sinking usually indicates underbaking (removed too soon) or excessive leavening (double-checked baking powder freshness?). Also, opening the oven door before 25 minutes can cause collapse.
- How do I prevent greasy bars?
- Greasiness stems from insufficient sugar dissolution or under-creaming. Ensure you whisk sugars and warm butter for a full minute until thick and glossy. Also, avoid substituting oil—it lacks emulsifying proteins found in butter.
- Can I make these ahead for a party?
- Absolutely. Bake 1–2 days ahead and store airtight at room temperature. They taste even better on Day 2 as flavors meld. For freshness, freeze unbaked batter (pressed into pan, covered tightly) for up to 1 month—bake frozen, adding 5–7 minutes.
- Why do my bars stick to the pan?
- Inadequate greasing or skipping parchment. Even “non-stick” pans need parchment for foolproof release. Also, cutting before complete cooling guarantees sticking.
- Can I add baking soda instead of baking powder?
- No—baking soda requires acid to activate (we have none here besides trace molasses). It would leave a bitter, soapy taste and cause uneven rise. Stick to baking powder.
- Are there lower-sugar options that still taste great?
- Yes—try reducing total sugar by ¼ cup and adding 2 tbsp unsweetened applesauce + 1 extra tbsp brown sugar. Or use a monkfruit-erythritol blend (1:1 ratio) — texture stays close, but note aftertaste varies by brand.
- Can I bake these in a different size pan?
- Yes—with adjustments: 8×8 pan = halve recipe, bake 28–35 min; 9×9 pan = ¾ recipe, bake 32–38 min; jelly roll pan (10×15) = 1.5x recipe, bake 22–28 min. Always rely on visual cues over time.
- What’s the best way to transport blondies?
- Stack layers separated by parchment in a rigid container. For long trips, chill first, then pack in insulated cooler with ice packs. Avoid stacking warm bars—they’ll steam and soften.
Summary
Butterscotch Blondie Bars are a timeless American classic—rich, chewy, and deeply caramelized—born from simple pantry staples and elevated by precise technique, quality ingredients, and patient cooling. With this definitive guide, you’re equipped to bake perfectly textured, restaurant-worthy bars every time—whether staying true to tradition or exploring inventive, health-conscious, or seasonal variations.
They’re more than dessert: they’re comfort, nostalgia, generosity, and the quiet joy of butter, brown sugar, and heat transformed into something extraordinary—one golden, crinkly-edged, melt-in-your-mouth square at a time.