Oreo Dirt Dessert Cups
Introduction
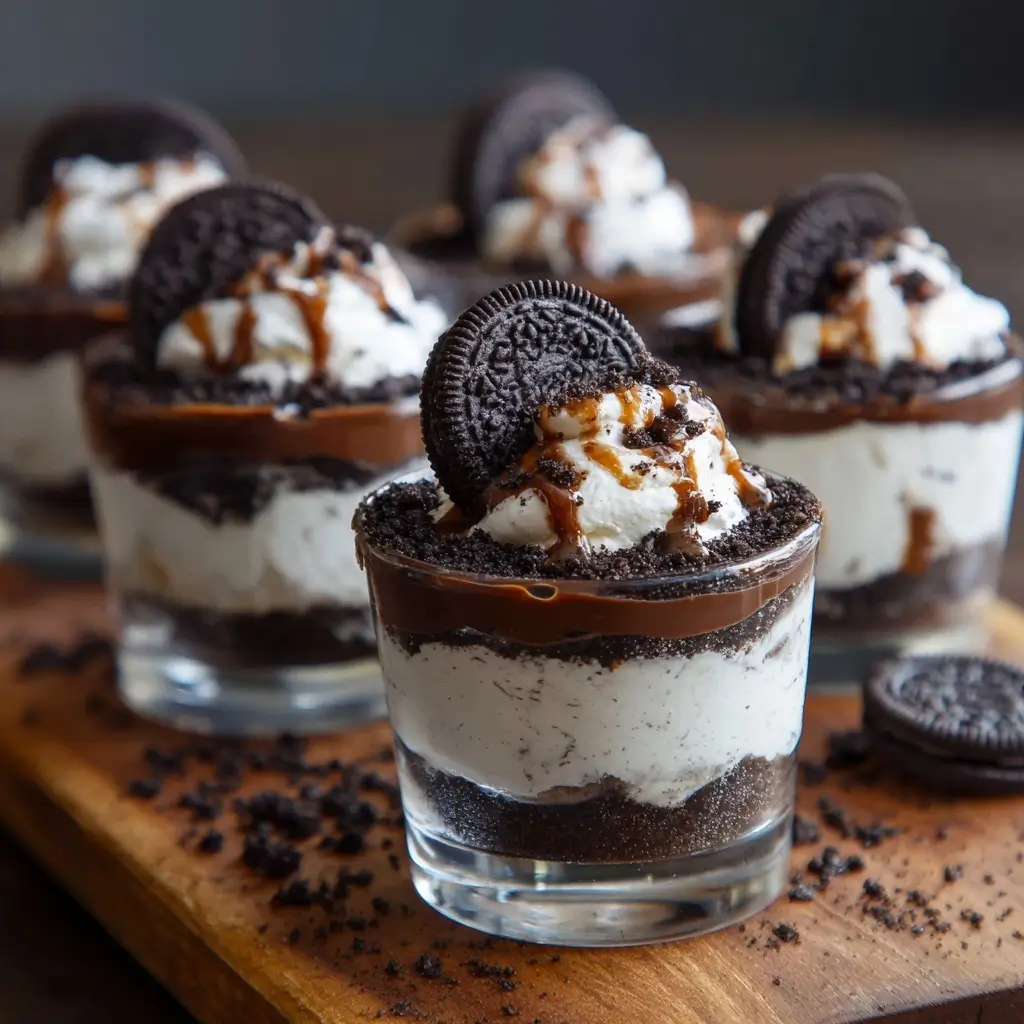
The Oreo Dirt Dessert Cup is a whimsical, no-bake treat that has captured the hearts (and taste buds) of dessert lovers across generations. With its playful appearance resembling actual dirt and worms, this dessert is especially popular at children’s parties, springtime gatherings, Easter celebrations, and summer picnics. Despite its simple ingredients and quick preparation, it delivers a rich, creamy, chocolatey experience that satisfies even the most discerning sweet tooth. Whether you’re a seasoned baker or a beginner in the kitchen, these adorable little cups are incredibly easy to assemble and can be customized in countless ways to suit different dietary needs and flavor preferences.
The History
The origins of the Oreo Dirt Dessert Cup trace back to American home cooking traditions in the late 20th century. While there’s no definitive record of who first created this dessert, it emerged during a time when no-bake, refrigerator-based desserts gained popularity for their convenience and family-friendly appeal. The concept likely evolved from classic “dirt pudding” recipes that used crushed cookies—often chocolate wafers or digestive biscuits—to mimic garden soil, combined with vanilla or chocolate pudding to create a rich base. When Nabisco introduced Oreo cookies in 1912, their intense chocolate flavor and crumbly texture made them an ideal substitute for traditional cookie crumbs.
By the 1980s and 1990s, Oreo-based dirt desserts began appearing in cookbooks, school fundraisers, and community events. The addition of gummy worms elevated the fun factor, turning the dish into a novelty favorite among kids. Over time, the dessert transitioned from a backyard party staple to a viral sensation on social media platforms like Pinterest, Instagram, and TikTok, where users share creative variations featuring colorful layers, themed decorations, and gourmet upgrades. Today, the Oreo Dirt Dessert Cup stands as a beloved icon of American comfort food—a perfect blend of nostalgia, simplicity, and indulgence.
Ingredients Breakdown
The magic of the Oreo Dirt Dessert Cup lies in its minimal yet impactful ingredients. Each component plays a crucial role in creating the final texture, flavor, and visual appeal:
- Oreo Cookies: The star of the show. These sandwich cookies provide both the “dirt” layer and structural integrity. Their chocolate wafer exterior and sweet cream filling contribute richness and depth to the dessert.
- Cream Cheese: Adds tanginess and body to the filling, helping it set firmly while contributing a velvety smoothness.
- Heavy Whipping Cream: When whipped, it introduces air and lightness, transforming the mixture into a fluffy, cloud-like consistency.
- Powdered Sugar: Sweetens the cream cheese mixture without adding moisture, ensuring the texture remains stable.
- Vanilla Extract: Enhances the overall flavor profile with warm, aromatic notes that complement the chocolate.
- Pudding Mix (Optional): Some versions include instant chocolate or vanilla pudding for added creaminess and structure.
- Gummy Worms: The playful garnish that brings the “dirt and worms” theme to life. Available in various colors and sizes, they add a chewy contrast.
- Milk (if using pudding mix): Used to prepare the pudding before folding into the cream mixture.
- Additional Toppings (Optional): Sprinkles, edible flowers, green-tinted coconut flakes (to resemble grass), or fresh berries can enhance presentation.
For those with dietary restrictions, substitutions such as gluten-free Oreos, vegan cream cheese, dairy-free whipping cream alternatives, and sugar-free sweeteners make this dessert accessible to a wider audience.
Step-by-Step Recipe
- Prepare the Oreo Crumbs: Begin by removing the cream filling from 36 Oreo cookies (optional, for less sweetness). Place the chocolate wafers in a food processor and pulse until fine crumbs form. Alternatively, place them in a sealed plastic bag and crush with a rolling pin. Set aside 18 whole cookies for garnish if desired.
- Make the Cream Filling: In a large mixing bowl, beat 8 ounces of softened cream cheese with 1 cup of powdered sugar until smooth and lump-free. Add 1 teaspoon of pure vanilla extract and mix well.
- Whip the Cream: In a separate chilled bowl, use a hand mixer or stand mixer to whip 1 ½ cups of cold heavy whipping cream until stiff peaks form. This ensures maximum volume and stability.
- Combine Mixtures: Gently fold the whipped cream into the cream cheese mixture in three additions, using a spatula to maintain airiness. Be careful not to deflate the mixture. For extra richness, some recipes also incorporate a prepared chocolate pudding layer at the bottom.
- Layer the Cups: Using clear plastic or glass dessert cups (perfect for showcasing the layers), spoon a thin layer of Oreo crumbs into the bottom of each cup. Follow with a generous scoop of the cream mixture. Repeat the layers—crumbs, cream, crumbs—ending with a final dollop of cream on top.
- Add the Final Touches: Sprinkle additional Oreo crumbs over the top to simulate fresh soil. Insert one or two gummy worms so they peek out realistically. For festive occasions, add sprinkles, mini chocolate shavings, or even tiny fondant bugs.
- Chill Before Serving: Cover the assembled cups with plastic wrap and refrigerate for at least 2 hours—or preferably overnight—to allow flavors to meld and textures to firm up.
- Serve and Enjoy: Serve chilled straight from the fridge. These cups can be stored in the refrigerator for up to 3 days, though best consumed within 48 hours for optimal freshness.
Tips
- Use Cold Ingredients: Ensure your cream cheese is softened but not warm, and your heavy cream is ice-cold for the best whipping results.
- Avoid Overmixing: When folding whipped cream into cream cheese, use gentle strokes to preserve the airy texture.
- Uniform Crumbs: Crush Oreos to a consistent, sand-like texture for a more authentic “dirt” appearance.
- Chill Bowls and Utensils: Refrigerating your mixing bowl and beaters before whipping cream improves volume and stability.
- Customize Portion Sizes: Use small shot glasses for mini versions or mason jars for larger servings.
- Prevent Sogginess: Assemble no more than a day ahead; prolonged storage may cause the crumbs to absorb moisture and become soggy.
- Kid-Friendly Fun: Let children help layer the cups or decorate with gummy worms—it’s a great way to involve them in cooking.
- Transporting Tips: If bringing to a party, place cups in a container with a lid to prevent shifting and topping damage.
Variations and Customizations
The versatility of the Oreo Dirt Dessert Cup makes it an ideal canvas for culinary creativity. Here are some popular twists:
- Flavor Swaps: Replace vanilla with chocolate, strawberry, or peanut butter cream cheese. Try mint Oreos for a refreshing twist.
- Different Cookies: Use chocolate chip cookies, Milano, or Nutter Butters for unique flavor profiles.
- Fruit-Infused Layers: Add a layer of raspberry jam, sliced strawberries, or banana slices between the cream and crumbs.
- Alcohol-Infused Version: Add a splash of Baileys Irish Cream, Kahlua, or Godiva liqueur to the cream mixture for an adult-only treat.
- Themed Desserts: Create Halloween versions with orange-tinted cream and plastic spiders, or Easter editions with pastel sprinkles and jelly beans.
- Protein Boost: Fold in unflavored collagen peptides or protein powder (adjust liquid accordingly) for a more nutritious option.
- Gluten-Free & Vegan: Use gluten-free chocolate sandwich cookies and plant-based cream cheese and whipped topping.
- Mini Pies: Serve in tartlet shells instead of cups for a more elegant presentation.
- Ice Cream Base: Layer softened chocolate ice cream with Oreo crumbs for a frozen version.
- Candy Additions: Mix in M&M’s, chopped Reese’s pieces, or crushed candy canes for extra crunch and color.
Health Considerations and Nutritional Value
While undeniably delicious, the Oreo Dirt Dessert Cup is high in sugar, saturated fat, and calories due to ingredients like cream cheese, heavy cream, and cookies. A typical serving (one cup) contains approximately:
- Calories: 350–450
- Total Fat: 20–28g (with 10–14g saturated fat)
- Carbohydrates: 35–45g (including 25–35g sugars)
- Protein: 3–5g
- Sodium: 200–300mg
To make a healthier version:
- Use reduced-fat cream cheese and whipped topping.
- Opt for low-sugar or sugar-free Oreos and powdered erythritol instead of sugar.
- Reduce portion size by using smaller cups.
- Incorporate Greek yogurt for added protein and probiotics.
- Limits gummy worms or choose fruit-based chewy candies.
This dessert should be enjoyed in moderation, particularly by individuals managing diabetes, heart conditions, or weight concerns. However, when balanced within a healthy diet, it can be a joyful indulgence suitable for special occasions.
Ingredients
- 36 Oreo cookies, separated (wafers crushed, fillings reserved or discarded)
- 8 oz (1 package) cream cheese, softened
- 1 cup powdered sugar
- 1 ½ cups heavy whipping cream, cold
- 1 tsp pure vanilla extract
- 18 gummy worms (or more, depending on preference)
- Optional: 1 package (3.4 oz) instant chocolate or vanilla pudding mix + 1 ¾ cups cold milk (if including pudding layer)
- Optional toppings: sprinkles, green coconut flakes, chocolate shavings
Directions
- In a food processor or sealed bag, crush Oreo wafers into fine crumbs. Set aside ¼ cup for topping.
- In a large bowl, beat cream cheese and powdered sugar until smooth. Mix in vanilla extract.
- In a separate bowl, whip cold heavy cream until stiff peaks form.
- Fold whipped cream into cream cheese mixture in three parts until fully incorporated and fluffy.
- If using pudding: prepare according to box instructions with milk, chill for 5 minutes, then gently fold half into cream mixture.
- Begin layering in 12 clear dessert cups: start with 1 tablespoon Oreo crumbs, followed by 2 tablespoons cream mixture, another tablespoon crumbs, then more cream. Top with remaining cream.
- Sprinkle reserved crumbs over the top of each cup. Insert gummy worms so they curl naturally.
- Cover and refrigerate for at least 2 hours before serving.
- Garnish with optional toppings just before serving.
- Enjoy chilled!
FAQ
Can I make Oreo Dirt Dessert Cups ahead of time?
Yes! You can prepare them up to 24 hours in advance. Keep refrigerated and add gummy worms shortly before serving to prevent them from dissolving.
Can I freeze these cups?
Freezing is not recommended, as the texture of the cream filling may become grainy or watery upon thawing.
What can I use instead of Oreos?
You can substitute with any chocolate sandwich cookie, gluten-free cookies, or even chocolate graham crackers for a different flavor profile.
Are there nut allergens in this recipe?
Standard Oreos do not contain nuts, but always check packaging for potential cross-contamination warnings if allergies are a concern.
Can I use Cool Whip instead of whipping cream?
Absolutely. Substitute 2 cups of thawed whipped topping (like Cool Whip) for the homemade whipped cream to save time.
Why is my filling runny?
This usually happens if the cream wasn’t whipped to stiff peaks or the cream cheese was too soft. Always ensure proper chilling and whipping techniques.
How many servings does this recipe make?
This recipe yields approximately 12 standard-sized dessert cups.
Can I make this without sugar?
Yes—use sugar-free Oreos and replace powdered sugar with a powdered sugar substitute like monk fruit or erythritol blend.
Summary
The Oreo Dirt Dessert Cup is a fun, no-bake treat that combines creamy, dreamy filling with crunchy chocolate cookie crumbs for an unforgettable sensory experience. Perfect for parties, holidays, or a sweet family night in, this easy-to-make dessert brings joy with every bite.