Mini Chocolate Cheesecake Cups: A Decadent Delight in Every Bite
Introduction
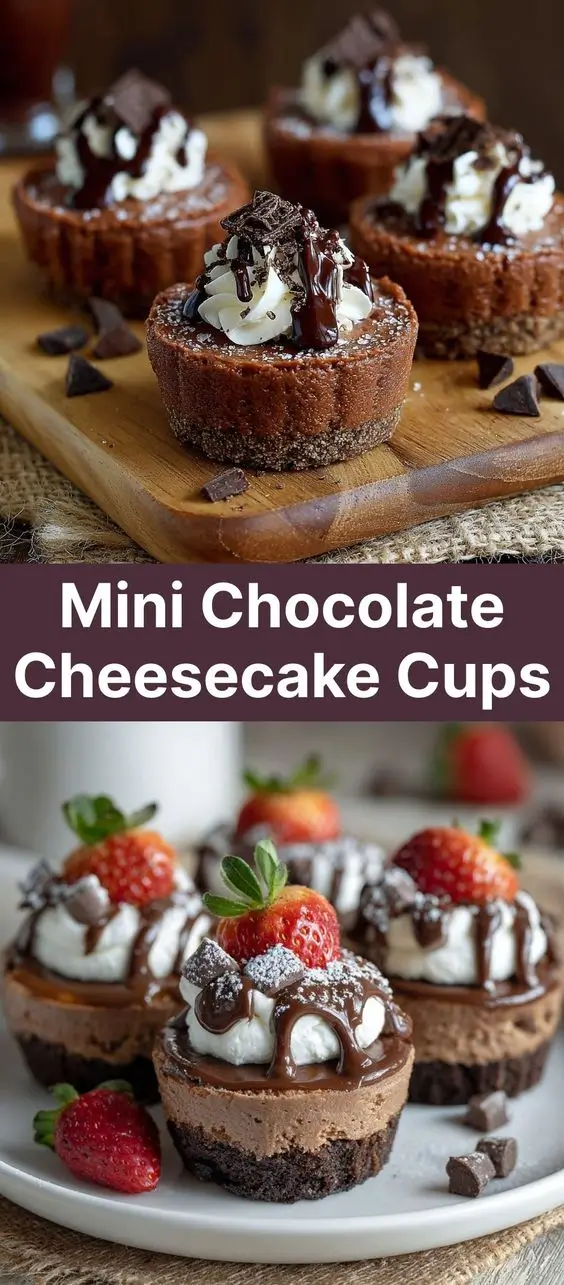
Indulge in the rich, creamy world of Mini Chocolate Cheesecake Cups—a perfect fusion of silky smooth cheesecake and deep chocolate flavor, all nestled into individual servings. These bite-sized desserts are not only a feast for the taste buds but also a visual treat, making them ideal for parties, romantic dinners, holiday gatherings, or simply as a sweet reward after a long day. With their elegant presentation and melt-in-your-mouth texture, mini chocolate cheesecake cups strike the perfect balance between luxurious dessert and effortless preparation.
Whether you’re a seasoned baker or just beginning your culinary journey, these little gems are surprisingly simple to make and can be customized in countless ways. From swirls of ganache to crushed cookie toppings, each cup becomes a canvas for creativity. Plus, their portable size makes them great for meal prep, dessert boxes, or even as edible gifts wrapped in cellophane with a festive ribbon.
The History
The origins of cheesecake trace back thousands of years to ancient Greece, where it was served to athletes during the first Olympic games as a high-energy food. The Romans later adopted the recipe, spreading it across Europe. However, the modern version of cheesecake—especially the American-style baked variety—emerged in the 19th century with the invention of cream cheese by William Lawrence in New York in 1872.
Chocolate, on the other hand, has an equally rich history, originating in Mesoamerica with the Mayans and Aztecs who consumed it as a bitter beverage. When chocolate met cheesecake in the 20th century, a decadent union was born. The combination gained popularity in the mid-1900s, especially with the rise of cocoa powder and accessible baking ingredients.
Miniature desserts became trendy in the 1990s and 2000s, influenced by fine dining presentations and the growing interest in portion control and gourmet aesthetics. Mini chocolate cheesecake cups evolved from this trend, offering all the richness of a full-sized dessert without the heaviness. Today, they’re a staple in dessert buffets, wedding favors, and social media-worthy treats due to their photogenic appeal and crowd-pleasing flavor.
Ingredients Breakdown
To create perfect mini chocolate cheesecake cups, every ingredient plays a crucial role in achieving the right texture, flavor, and structure. Let’s take a detailed look at what goes into these luscious treats:
- Cream Cheese: Full-fat block cream cheese is essential. It provides the creamy base and tangy contrast to the sweetness. Avoid using spreadable tub cream cheese, as it contains more liquid and can result in a runny filling.
- Granulated Sugar: Adds sweetness and helps aerate the mixture when beaten. You can adjust the amount depending on your preference or substitute with coconut sugar for a caramel-like depth.
- Large Eggs: Act as a binder and give the cheesecakes their slight jiggle and custard-like consistency. Room temperature eggs blend more smoothly and reduce the risk of curdling.
- Sour Cream or Greek Yogurt: Enhances creaminess and adds a subtle tang. Sour cream gives a richer mouthfeel, while Greek yogurt offers a lighter alternative with added protein.
- Vanilla Extract: Deepens the overall flavor profile and complements both the chocolate and cheese elements. Pure extract is preferred over imitation for its complex aroma.
- Cocoa Powder: Use high-quality unsweetened Dutch-process or natural cocoa powder. Dutch-process is less acidic and produces a smoother, deeper chocolate flavor, while natural cocoa gives a brighter, more assertive taste.
- Dark Chocolate (optional): Melted dark chocolate (60–70% cacao) can be folded into the batter for an even richer experience. This addition intensifies the chocolate presence and improves texture.
- Chocolate Cookie Crumbs: Typically made from Oreo cookies (with filling removed) or chocolate graham crackers. These form the base layer, adding crunch and a chocolatey foundation.
- Butter: Melted unsalted butter binds the crust crumbs together and helps them crisp up during baking.
- Salt: A pinch enhances all the flavors and balances sweetness, making the dessert more complex and satisfying.
Step-by-Step Recipe
Ingredients
- 1 ½ cups chocolate cookie crumbs (about 15 Oreo cookies, filling scraped out)
- 5 tablespoons unsalted butter, melted
- 16 oz (2 packages) full-fat cream cheese, softened to room temperature
- ⅔ cup granulated sugar
- 2 large eggs, room temperature
- ⅓ cup sour cream (or plain Greek yogurt)
- 1 teaspoon pure vanilla extract
- ¼ cup unsweetened cocoa powder (Dutch-process recommended)
- 2 oz (¼ cup) semi-sweet or dark chocolate, melted and cooled slightly
- Pinch of salt
Directions
- Preheat Oven & Prepare Pan: Preheat your oven to 325°F (165°C). Line a standard 12-cup muffin tin with parchment paper liners or silicone baking cups. Parchment liners are best for easy removal.
- Make the Crust: In a medium bowl, combine the chocolate cookie crumbs and melted butter until the mixture resembles wet sand. Press about 1–2 tablespoons of the mixture firmly into the bottom of each liner using the back of a spoon or a small measuring cup. Chill in the freezer for 10 minutes while you prepare the filling.
- Prepare Filling: In a large mixing bowl, beat the softened cream cheese with an electric mixer on medium speed until smooth and creamy (about 1–2 minutes). Scrape down the sides as needed.
- Add Sweeteners & Flavor: Gradually add the sugar and beat until fully incorporated and fluffy. Add the sour cream and vanilla extract, mixing until smooth.
- Incorporate Eggs: Add the eggs one at a time, beating gently after each addition just until blended. Overmixing at this stage can introduce too much air and cause cracking.
- Add Chocolate Elements: Sift in the cocoa powder to avoid lumps, then mix on low until combined. Fold in the slightly cooled melted chocolate using a spatula to preserve texture.
- Assemble: Remove the crusts from the freezer. Divide the chocolate cheesecake batter evenly among the 12 cups, filling each liner about ¾ full. Tap the pan gently on the counter to release air bubbles.
- Bake: Place the muffin tin in the preheated oven and bake for 20–24 minutes. The centers should still have a slight jiggle, like Jell-O, but the edges should be set.
- Cool Gradually: Turn off the oven, crack the door open slightly, and let the cheesecakes cool inside for 30 minutes. This prevents sudden temperature changes that lead to cracks.
- Chill: Remove from the oven and let cool completely at room temperature. Then refrigerate for at least 4 hours, preferably overnight, to allow the texture to firm up.
- Serve: Carefully peel away the parchment liners. Garnish as desired and serve chilled.
Tips
- Room Temperature Ingredients: Always bring cream cheese, eggs, and sour cream to room temperature before mixing. Cold ingredients lead to lumpy batter and uneven texture.
- Avoid Overmixing: Once you add the eggs, mix only until just combined. Overbeating incorporates excess air, which expands during baking and causes cracks.
- Use a Water Bath (Optional): For ultra-smooth, crack-free cheesecakes, place the muffin tin inside a larger roasting pan and pour hot water halfway up the sides. This gentle steam ensures even cooking. Wrap the bottom of the muffin tin in aluminum foil if concerned about leaks.
- Check Doneness Properly: The jiggly center is key. If the entire surface is firm, they’re likely overbaked and may become dry or crumbly when chilled.
- Chill Thoroughly: Do not skip the chilling step! Cheesecakes need time to set. Rushing this process results in soft, messy bites.
- Peel Liners Gently: Run a thin knife around the edge if stuck, or briefly warm the bottom of the liner with your hands to loosen.
- Wipe Spills Immediately: If any batter spills over, wipe the pan right after baking to prevent hardened residue.
Variations and Customizations
One of the greatest joys of mini chocolate cheesecake cups is their versatility. Here are some delicious twists to inspire your next batch:
- White Chocolate Swirl: Melt white chocolate and drizzle it into the filled cups before baking. Use a toothpick to create marbled patterns.
- Peanut Butter Lover’s: Swirl in a spoonful of creamy peanut butter before baking or top with chopped Reese’s cups.
- Mint Chocolate: Add ¼ teaspoon peppermint extract to the batter and garnish with crushed candy canes or Andes mints.
- Orange Zest Infusion: Add 1 teaspoon of orange zest to brighten the chocolate flavor—pairs beautifully with dark chocolate.
- Gluten-Free Option: Use gluten-free chocolate cookies (like Schär or homemade) for the crust and ensure all other ingredients are certified GF.
- Dairy-Free/Vegan Version: Substitute cream cheese with cashew-based vegan cream cheese, use dairy-free chocolate, and replace eggs with flax eggs (1 tbsp ground flax + 3 tbsp water per egg). Use coconut oil instead of butter in the crust.
- Fruity Toppings: Top with fresh raspberries, strawberries, or a glossy cherry compote for a classic Black Forest twist.
- Espresso Kick: Add 1–2 teaspoons of instant espresso powder to the batter for a mocha variation.
- Nutty Crunch: Sprinkle chopped toasted hazelnuts, almonds, or pecans on top before serving.
- Salted Caramel Drizzle: Warm store-bought or homemade salted caramel sauce and drizzle over the finished cups for a sweet-salty finish.
- Boozy Twist: Add 1 tablespoon of Baileys, Kahlúa, or Grand Marnier to the batter for an adult-only indulgence.
- Holiday Themes: Decorate with red and green sprinkles for Christmas, pastel meringues for Easter, or edible gold dust for New Year’s.
Health Considerations and Nutritional Value
While mini chocolate cheesecake cups are undeniably rich and meant to be enjoyed in moderation, understanding their nutritional profile can help you make mindful choices.
Nutrition Facts (Per Serving – Approximate):
- Calories: ~220–260 kcal
- Total Fat: 16–20g (Saturated Fat: 9–12g)
- Cholesterol: 60–80mg
- Sodium: 150–200mg
- Total Carbohydrates: 18–22g (Dietary Fiber: 1g, Sugars: 14–16g)
- Protein: 4–5g
Health Notes:
- High in Saturated Fat: Due to cream cheese, butter, and chocolate. Enjoy occasionally, especially if managing heart health or cholesterol.
- Sugar Content: Can be reduced by using less sugar or sugar substitutes like erythritol or monk fruit. Note: Sugar replacements may alter texture.
- Lactose Sensitivity: Traditional recipe contains lactose. Lactose-free cream cheese and butter are available for substitution.
- Protein Boost: Using Greek yogurt increases protein content slightly and reduces fat.
- Portion Control: Being mini-sized helps with portion management compared to a full cheesecake slice.
- Energy Dense: High in calories per bite—ideal as an occasional treat rather than a daily snack.
FAQ
Can I make mini chocolate cheesecake cups ahead of time?
Yes! They can be made up to 3 days in advance and stored covered in the refrigerator. You can also freeze them (without toppings) for up to 2 months. Thaw in the fridge before serving.
Why did my cheesecakes crack?
Cracking is usually due to overbaking, overmixing, or sudden temperature changes. Cooling them slowly in the oven helps prevent this.
Can I use a different crust?
Absolutely. Try crushed chocolate graham crackers, brownie pieces, or even pretzels for a salty-sweet twist.
Can I bake them in a toaster oven?
Yes, but monitor closely. Smaller ovens heat unevenly, so rotate the pan halfway through.
How do I prevent sticking?
Always use parchment liners or silicone molds. Avoid greasing metal cups unless specified.
Can I make them without eggs?
You can experiment with chia or flax eggs, but the texture will be softer and less custardy. Results may vary.
Are they safe to eat raw?
No. The eggs must be baked to a safe internal temperature. Never consume unbaked batter.
Can I double the recipe?
Yes, but use two muffin tins and rotate them halfway through for even baking.
Summary
Mini chocolate cheesecake cups are the ultimate indulgent treat—creamy, rich, and irresistibly chocolatey, all in a convenient single-serving size.
Easy to customize, perfect for any occasion, and guaranteed to impress, these little delights bring gourmet dessert magic straight to your kitchen.