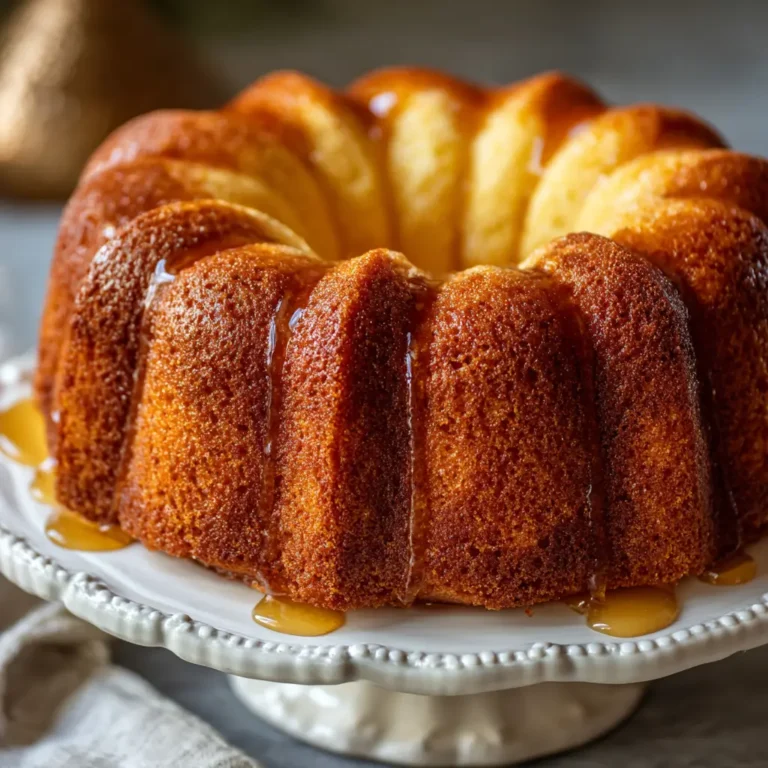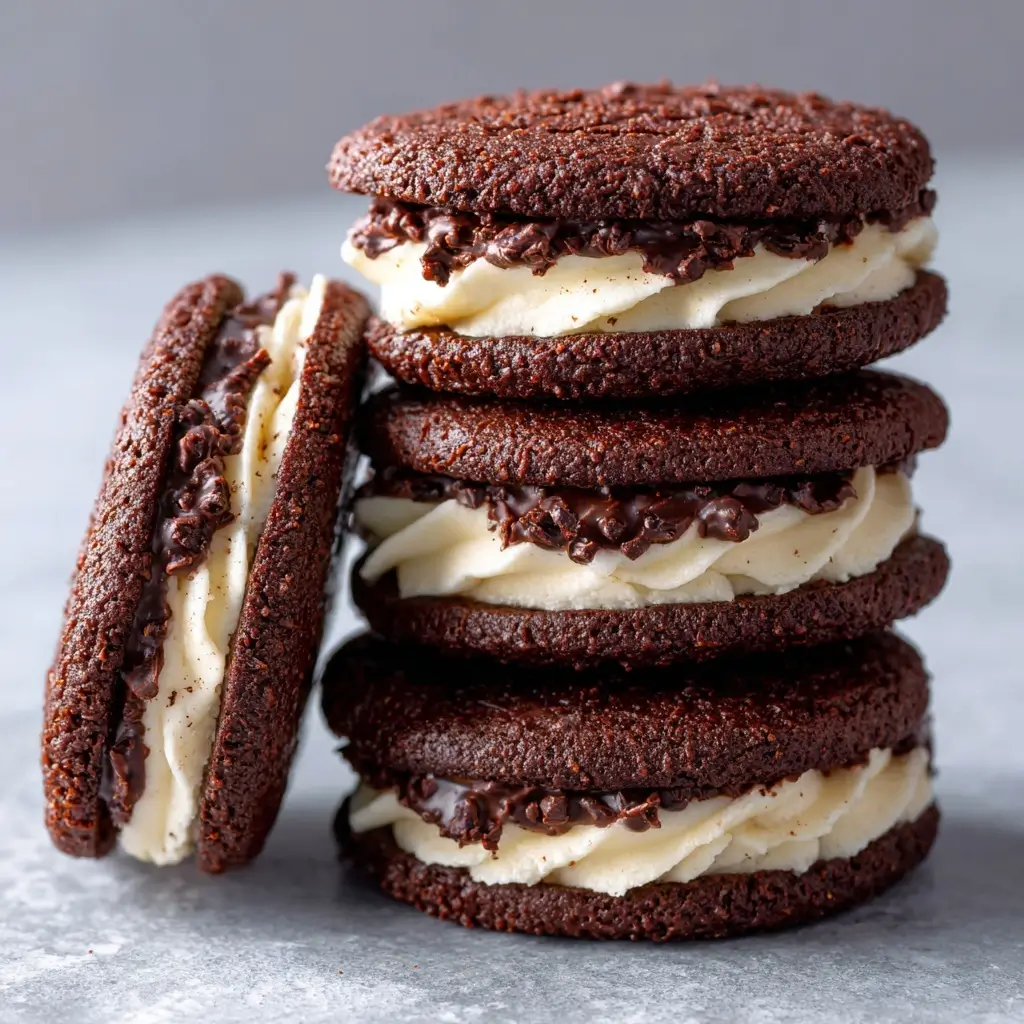
Chocolate Sandwich Cookies with Cream Filling
Chocolate Sandwich Cookies with Cream Filling
Indulge in the timeless delight of chocolate sandwich cookies with cream filling—a classic treat that brings together rich, tender chocolate cookies and a luscious, velvety cream center. Whether enjoyed with a glass of cold milk, shared at a family gathering, or packed into lunchboxes, these cookies offer comfort in every bite. From their humble beginnings to modern-day variations, this beloved dessert has evolved while maintaining its core charm. In this comprehensive guide, we’ll explore everything you need to know about making perfect chocolate sandwich cookies—from ingredient insights and step-by-step instructions to creative variations, health considerations, and expert tips.
The History
The origin of sandwich cookies can be traced back to the 19th century, when bakers began experimenting with combining two sweet biscuits with a creamy layer in between. One of the most iconic versions, the Oreo, was first introduced by the National Biscuit Company (Nabisco) in 1912. Though the exact recipe has changed over time, the concept of pairing chocolate-flavored wafers with a sweet vanilla cream filling quickly captured the hearts of consumers across America and eventually worldwide.
While mass-produced versions dominate supermarket shelves today, the homemade version allows for greater control over ingredients, flavor intensity, and texture. Artisanal bakers and home cooks alike have embraced the idea of crafting their own chocolate sandwich cookies, using premium cocoa, natural sweeteners, and custom fillings to elevate the experience. Over the decades, this treat has become symbolic of nostalgia, childhood memories, and simple pleasures—making it a staple in cookie jars around the globe.
Ingredients Breakdown
Creating the perfect chocolate sandwich cookie begins with understanding each component and how it contributes to the final product. Below is a detailed breakdown of both the cookie and cream filling ingredients:
For the Chocolate Cookies:
- All-Purpose Flour: Provides structure and stability. Sifted to ensure a light, even texture.
- Cocoa Powder (Unsweetened, Natural or Dutch-Process): The heart of the chocolate flavor. Dutch-process cocoa offers a deeper, smoother taste, while natural cocoa gives a slightly tangier profile.
- Baking Soda & Baking Powder: Leavening agents that help the cookies rise slightly and maintain a soft crumb.
- Salt: Enhances overall flavor and balances sweetness.
- Unsalted Butter (Room Temperature): Adds richness and tenderness. Creaming it properly with sugar creates air pockets for a delicate texture.
- Granulated Sugar & Brown Sugar: Granulated sugar aids in spreading and crispness; brown sugar adds moisture and a hint of caramel flavor.
- Egg (Large): Binds ingredients and adds structure while contributing to chewiness.
- Vanilla Extract: Complements the chocolate and rounds out the flavor profile.
- Heavy Cream or Milk: Adjusts dough consistency for optimal rolling and baking.
For the Cream Filling:
- Unsalted Butter (Softened): Forms the base of the frosting, providing smoothness and body.
- Powdered Sugar (Sifted): Sweetens and thickens the filling without graininess.
- Vanilla Extract: Enhances the creamy flavor.
- Milk or Heavy Cream: Adjusts consistency for easy spreading.
- Salt (Pinch): Balances sweetness and deepens flavor complexity.
- Optional Add-ins: Melted chocolate, espresso powder, almond extract, or food coloring for customization.
Step-by-Step Recipe
Follow this detailed process to create bakery-quality chocolate sandwich cookies from scratch.
Step 1: Prepare the Dough
- In a medium bowl, whisk together 1 ¾ cups all-purpose flour, ¾ cup unsweetened cocoa powder, ½ teaspoon baking soda, ¼ teaspoon baking powder, and ½ teaspoon salt. Set aside.
- In a large mixing bowl, beat ¾ cup (1.5 sticks) softened unsalted butter with ¾ cup granulated sugar and ½ cup packed brown sugar on medium speed until light and fluffy (about 3–4 minutes).
- Add 1 large egg and 1 teaspoon vanilla extract. Beat until fully incorporated, scraping down the sides as needed.
- Gradually add the dry ingredients to the wet mixture on low speed, mixing just until combined.
- If the dough feels too dry, add 1–2 tablespoons of heavy cream or milk until a soft, pliable dough forms.
- Divide the dough in half, shape into discs, wrap in plastic, and refrigerate for at least 1 hour (or up to 48 hours). Chilling prevents spreading during baking and enhances flavor development.
Step 2: Roll and Cut the Cookies
- Preheat oven to 350°F (175°C). Line baking sheets with parchment paper.
- On a lightly floured surface, roll one disc of dough to ⅛-inch thickness using a rolling pin. Use a round cookie cutter (approximately 1.5 to 2 inches in diameter) to cut shapes.
- Transfer cookies to prepared baking sheets, spacing them about 1 inch apart.
- Gather scraps, re-roll, and continue cutting until all dough is used. Repeat with the second disc.
Step 3: Bake the Cookies
- Bake for 7–9 minutes, or until the edges are set and the centers no longer look wet. Do not overbake—they will firm up as they cool.
- Allow cookies to cool on the baking sheet for 3 minutes, then transfer to a wire rack to cool completely before filling.
Step 4: Make the Cream Filling
- In a large bowl, beat ½ cup softened unsalted butter on medium speed until creamy (about 2 minutes).
- Add 2 cups sifted powdered sugar, 1 teaspoon vanilla extract, a pinch of salt, and 1–2 tablespoons of milk or cream.
- Beat on low initially, then increase to high speed for 2–3 minutes until light, fluffy, and spreadable. If desired, fold in 2 tablespoons melted and cooled chocolate for a chocolate cream variation.
Step 5: Assemble the Sandwich Cookies
- Once all cookies are completely cooled, flip half of them upside down (flat side up).
- Using a piping bag, small spoon, or offset spatula, apply a generous dollop of cream filling (about 1 tablespoon) onto the flat side of each cookie.
- Top with another cookie (flat side down) and gently press until the filling reaches the edges but doesn’t squeeze out.
- Repeat with remaining cookies and filling.
Step 6: Chill and Serve
- Place assembled cookies on a tray and refrigerate for 15–20 minutes to set the filling.
- Serve chilled or at room temperature. Store in an airtight container for best results.
Tips
- Chill the Dough Thoroughly: This prevents spreading and ensures clean cuts. Cold dough holds its shape better during baking.
- Use Parchment Paper or Silicone Mats: Prevents sticking and promotes even browning.
- Roll Evenly: Uneven thickness leads to inconsistent baking. Use rolling pin guides or dowels for uniformity.
- Don’t Overbake: Remove cookies when they appear set but still soft in the center—they continue cooking on the pan.
- Sift Ingredients: Especially cocoa and powdered sugar, to avoid lumps in both dough and filling.
- Match Cookie Sizes: Pair similarly sized cookies for a professional look. Save mismatched ones for snacking!
- Flavor Variations: Add a splash of peppermint extract, orange zest, or cinnamon to either component for a twist.
- Smooth Filling Application: Use a small icing spatula or the back of a spoon to swirl the filling neatly.
- Freeze for Longevity: Unfilled cookies freeze well for up to 3 months. Thaw before assembling.
Variations and Customizations
One of the greatest joys of homemade chocolate sandwich cookies is the ability to personalize them. Here are some popular and creative variations:
- Double Chocolate: Add ½ cup mini chocolate chips to the cookie dough for extra richness.
- Gluten-Free: Substitute all-purpose flour with a quality gluten-free flour blend. Ensure cocoa powder and other ingredients are certified GF.
- Vegan Version: Replace butter with vegan margarine, egg with flax egg (1 tbsp ground flax + 3 tbsp water), and use plant-based milk. For filling, use vegan butter and check powdered sugar sources.
- Peppermint Cream: Add ¼ teaspoon peppermint extract to the filling and garnish with crushed candy canes during holidays.
- Coffee-Infused: Mix 1 teaspoon instant espresso powder into the cookie dough or filling for a mocha twist.
- Colored Fillings: Use gel food coloring to create fun hues—perfect for birthdays or themed events.
- Stuffed Center: Place a small piece of caramel, peanut butter cup, or marshmallow in the center before sandwiching.
- Larger “Whoopie Pie” Style: Bake bigger cookies (3-inch rounds) and fill with more cream for a decadent dessert.
- Crunchy Edge Variation: Roll cookie dough balls in granulated sugar before flattening for a slightly crisp exterior.
- Dipped in Chocolate: After assembly, dip half of each cookie in melted dark, milk, or white chocolate and let harden on parchment.
Health Considerations and Nutritional Value
While chocolate sandwich cookies are undeniably delicious, it’s important to enjoy them mindfully, especially for those monitoring sugar intake, calories, or dietary restrictions.
- Calories: A typical homemade sandwich cookie contains approximately 120–160 calories, depending on size and filling amount.
- Sugar Content: High due to both cookie and frosting components. One serving may contain 10–15 grams of sugar.
- Fat: Primarily from butter. Using reduced-fat alternatives may compromise texture and flavor.
- Gluten and Allergens: Contains wheat, dairy, eggs, and soy (in most chocolates). Always label accordingly for guests.
- Dietary Modifications: Can be adapted for gluten-free, vegan, or lower-sugar diets with careful substitutions.
- Portion Control: These treats are rich and satisfying—a few go a long way.
- Nutrient Density: Low in essential nutrients. Best enjoyed occasionally as part of a balanced diet.
- Kid-Friendly: Popular with children, but consider reducing added sugars in homemade versions compared to store-bought.
Ingredients
Chocolate Cookies:
- 1 ¾ cups (220g) all-purpose flour
- ¾ cup (65g) unsweetened cocoa powder (natural or Dutch-process)
- ½ tsp baking soda
- ¼ tsp baking powder
- ½ tsp salt
- ¾ cup (1.5 sticks / 170g) unsalted butter, softened
- ¾ cup (150g) granulated sugar
- ½ cup (100g) packed light brown sugar
- 1 large egg, room temperature
- 1 tsp vanilla extract
- 1–2 tbsp heavy cream or whole milk
Cream Filling:
- ½ cup (1 stick / 113g) unsalted butter, softened
- 2 cups (240g) powdered sugar, sifted
- 1 tsp vanilla extract
- Pinch of salt
- 1–2 tbsp milk or heavy cream
- (Optional) 2 tbsp melted and cooled dark chocolate
Directions
- Whisk dry ingredients (flour, cocoa, baking soda, baking powder, salt) in a bowl. Set aside.
- Cream butter and sugars until light and fluffy (3–4 mins).
- Beat in egg and vanilla until smooth.
- Gradually mix in dry ingredients until combined.
- Add cream/milk as needed to form a soft dough.
- Divide into two discs, wrap, and chill for 1+ hours.
- Preheat oven to 350°F (175°C). Line baking sheets.
- Roll dough ⅛-inch thick and cut into rounds.
- Bake 7–9 minutes; cool completely.
- Beat filling ingredients until fluffy.
- Spread filling on flat side of half the cookies; top with remaining cookies.
- Chill 15–20 minutes before serving.
FAQ
Q: Can I make these cookies ahead of time?
A: Yes! Bake and cool cookies up to 3 days in advance. Store unfilled in an airtight container. Fill within 24 hours of serving for best texture.
Q: Why did my cookies spread too much?
A: Likely causes include warm dough, overcreaming butter, or insufficient flour. Always chill dough and measure ingredients accurately.
Q: Can I freeze the assembled cookies?
A: Yes. Freeze in a single layer on a tray, then transfer to a sealed container. Thaw in fridge before serving.
Q: How do I make the filling less sweet?
A: Reduce powdered sugar slightly and add more butter or a touch of cream cheese. You can also use monk fruit-sweetened powdered sugar.
Q: Can I use oil instead of butter?
A: Not recommended. Butter provides structure and flavor. Oil may result in greasy, flat cookies.
Q: What’s the best way to store these cookies?
A: In an airtight container at room temperature for up to 5 days, or refrigerated for up to 1 week. Layer with parchment to prevent sticking.
Q: Can I pipe the filling?
A: Absolutely! Use a star or round tip for decorative swirls. It also helps control portion size.
Q: Are these cookies kid-friendly to make?
A: Yes! Children can help with rolling, cutting, and decorating. Supervise near the oven and with electric mixers.
Summary
Homemade chocolate sandwich cookies with cream filling combine rich cocoa-infused biscuits and silky sweet frosting for a nostalgic treat that surpasses store-bought versions in flavor and freshness.
Customizable, make-ahead friendly, and endlessly adaptable, these cookies are perfect for gifting, parties, or enjoying with a warm beverage on a cozy day.