Molten Lava Mug Cake
Introduction
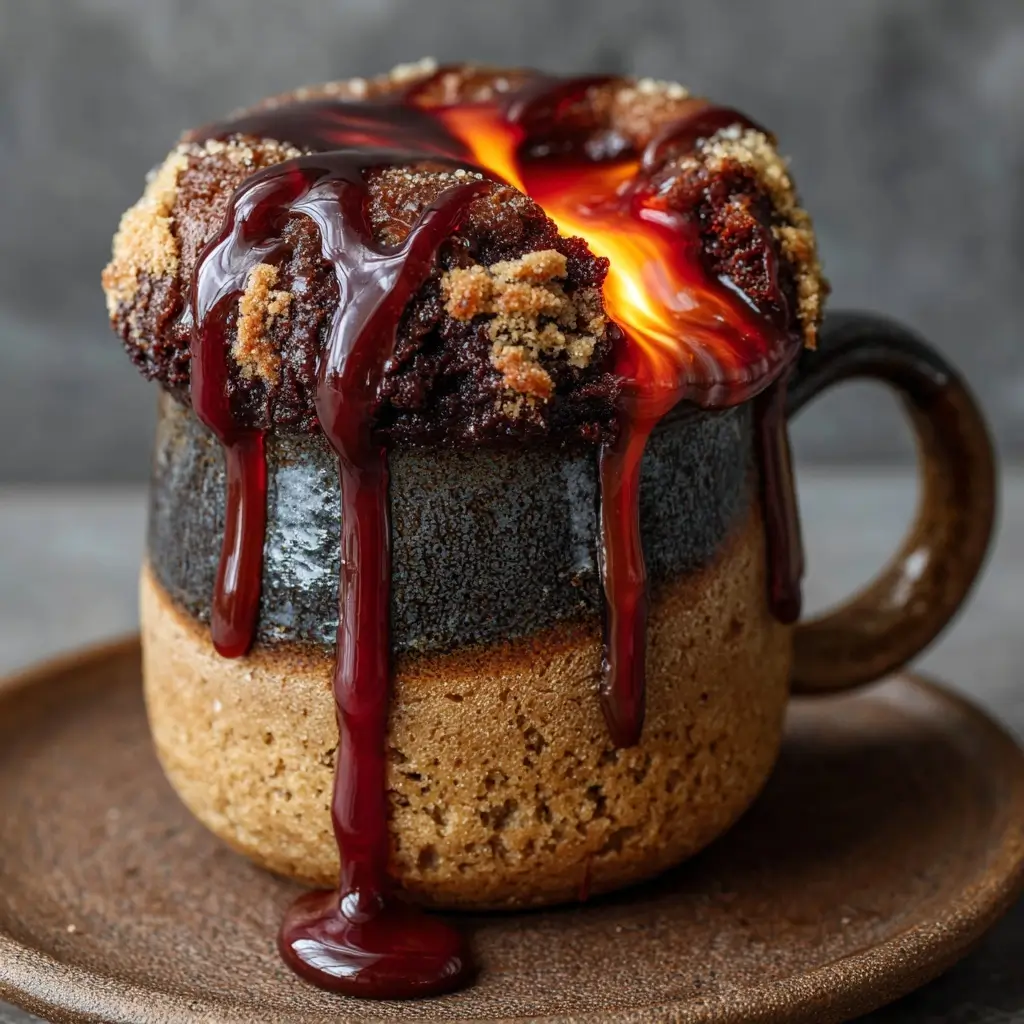
The Molten Lava Mug Cake is the ultimate indulgence for chocolate lovers who crave a rich, decadent dessert in minutes. Perfectly suited for spontaneous sweet cravings, this single-serving cake combines the elegance of a fine-dining dessert with the convenience of a microwave and a coffee mug. Imagine cracking open a warm, moist chocolate cake to reveal a luscious, flowing center of molten chocolate—smooth, velvety, and intensely satisfying. This dessert isn’t just quick and easy; it’s an experience. Whether you’re treating yourself after a long day, impressing a date with minimal effort, or simply craving something sinfully delicious, the Molten Lava Mug Cake delivers on every level. In this comprehensive guide, we’ll dive deep into its history, explore each ingredient, provide detailed instructions, offer expert tips, and uncover countless ways to customize your creation—all while keeping nutritional insights and dietary considerations in mind.
The History
The Molten Lava Cake, also known as Chocolate Lava Cake or Fondant au Chocolat, has a legendary origin story that traces back to the 1980s in France. It is widely credited to French chef Michel Bras, who reportedly created the dessert in 1981 at his restaurant in Laguiole. However, American chef Jean-Georges Vongerichten popularized the dish in the United States during the late 1980s after accidentally underbaked a chocolate sponge cake. Upon slicing into it, he discovered the gooey, liquid chocolate center and recognized its potential. He refined the recipe and introduced it at his New York City restaurant, JoJo, where it quickly became a sensation. The dessert soon graced menus across the country, symbolizing modern gastronomy’s embrace of controlled imperfection—where the magic lies not in perfection, but in the contrast between crisp outer layers and a molten heart.
The transition from haute cuisine to home kitchens began with the rise of microwave cooking and the desire for instant gratification. By the early 2000s, food bloggers and culinary websites started sharing “mug cake” versions of classic desserts. The Molten Lava Mug Cake emerged as a clever adaptation—offering the same dramatic effect in under five minutes using common kitchenware. Its popularity soared during the 2010s, especially with millennials and college students looking for fast, low-effort treats. Today, the Molten Lava Mug Cake stands as a cultural icon of comfort food innovation—a testament to how gourmet experiences can be democratized through simplicity and accessibility.
Ingredients Breakdown
Creating the perfect Molten Lava Mug Cake starts with understanding the role each ingredient plays in achieving the ideal texture, flavor, and flow. Below is a detailed breakdown of every component:
- All-Purpose Flour: Provides structure to the cake. Too much will make it dense; too little may cause it to collapse. Sifted flour ensures no lumps and a light crumb.
- Granulated Sugar: Adds sweetness and helps create a tender texture. It also contributes to browning during microwaving.
- Cocoa Powder (Unsweetened): The backbone of chocolate flavor. Opt for high-quality Dutch-process cocoa for a richer, smoother taste, though natural cocoa works well too.
- Baking Powder: A leavening agent that helps the cake rise slightly, creating a soft yet firm exterior that encases the molten center.
- Salt: Enhances all flavors, particularly chocolate, by balancing sweetness and bringing depth.
- Butter (Unsalted): Adds richness, moisture, and flavor. Melted butter integrates smoothly into the batter and promotes a fudgy consistency.
- Milk: Moistens the batter and activates gluten formation without making it tough. Whole milk yields creamier results, but any milk substitute can work.
- Vanilla Extract: Elevates the overall aroma and complexity of the dessert, adding a subtle warmth that complements chocolate.
- Chocolate (Dark or Semi-Sweet): The star of the show. A small chunk placed in the center melts during cooking to create the signature lava flow. High cocoa content (60–70%) ensures a deep, luxurious melt.
- Egg: Binds ingredients together, adds structure, and contributes to a custard-like texture. For vegan versions, substitutes like flax eggs or applesauce can be used with slight texture adjustments.
Optional enhancements include espresso powder (to intensify chocolate flavor), a pinch of cinnamon, or liqueurs such as Baileys, Kahlua, or Grand Marnier for adult twists.
Step-by-Step Recipe
- Gather Your Tools: Choose a microwave-safe mug or ramekin (10–12 oz capacity). Have all ingredients measured and ready. Use a small whisk or fork for mixing.
- Preheat (Indirectly): While mugs don’t require preheating, ensure your microwave is clean and functioning properly for even heating.
- Dry Ingredients: In the mug, combine 4 tablespoons all-purpose flour, 3 tablespoons granulated sugar, 2 tablespoons unsweetened cocoa powder, 1/4 teaspoon baking powder, and a pinch of salt. Whisk thoroughly until no clumps remain.
- Wet Ingredients: Add 3 tablespoons melted unsalted butter, 3 tablespoons milk, 1 large egg, and 1/2 teaspoon vanilla extract. Mix gently but completely until smooth and glossy. Scrape sides if needed.
- Add the Lava Core: Push a 1-inch cube of dark or semi-sweet chocolate into the center of the batter. Do not stir—it should remain submerged and centered.
- Optional Flavor Boost: Sprinkle a few drops of espresso powder or a splash of liqueur over the top for enhanced depth.
- Microwave: Place the mug in the center of the microwave. Cook on high for 75 to 90 seconds. Start checking at 75 seconds—look for set edges and a slightly soft center. Overcooking will solidify the lava core.
- Rest Briefly: Let the cake sit for 45–60 seconds after microwaving. This allows internal heat to continue cooking the edges while preserving the molten center.
- Serve Immediately: Carefully remove the mug (it will be hot!) and add desired toppings. Use a spoon to crack open the top and reveal the flowing chocolate inside.
Ingredients
- 4 tablespoons all-purpose flour (sifted)
- 3 tablespoons granulated sugar
- 2 tablespoons unsweetened cocoa powder (preferably Dutch-process)
- 1/4 teaspoon baking powder
- A pinch of fine sea salt
- 3 tablespoons unsalted butter, melted
- 3 tablespoons whole milk (or dairy-free alternative)
- 1 large egg
- 1/2 teaspoon pure vanilla extract
- 1 ounce (about 1-inch cube) high-quality dark chocolate (60–70% cacao)
- Optional: 1/8 teaspoon instant espresso powder, 1 tablespoon chocolate chips, or 1 teaspoon liqueur
Directions
- In a microwave-safe mug, combine the flour, sugar, cocoa powder, baking powder, and salt. Stir with a fork or small whisk until evenly blended and no dry pockets remain.
- Add the melted butter, milk, egg, and vanilla extract. Mix vigorously for about 20–30 seconds until the batter is smooth, shiny, and free of streaks.
- Press the chocolate cube gently into the center of the batter, ensuring it’s fully covered. Avoid stirring it in.
- If desired, sprinkle espresso powder or drizzle liqueur over the top for added flavor complexity.
- Place the mug in the microwave and cook on high power for 75 to 90 seconds. Watch carefully—the cake should rise and appear set around the edges, but the center should still look slightly soft and moist.
- Remove the mug carefully using oven mitts or a towel (the handle and sides will be hot).
- Allow the cake to rest undisturbed for 1 minute. This step is crucial for allowing residual heat to finish cooking the outer layer while maintaining the liquid core.
- Optionally dust with powdered sugar, add a scoop of vanilla ice cream, or drizzle with chocolate sauce.
- Serve immediately with a spoon, cracking open the top to release the molten chocolate center. Enjoy warm and fresh!
Tips
- Use the Right Mug: Choose a ceramic or stoneware mug labeled microwave-safe. Avoid metal-trimmed mugs or overly large containers, which can lead to uneven cooking.
- Don’t Overmix: Once wet and dry ingredients are combined, mix only until incorporated. Overmixing develops gluten, leading to a rubbery texture.
- Monitor Cooking Time: Microwaves vary greatly in wattage. Begin checking at 75 seconds. If the center is still very wet, add 5-second increments until just set at the edges.
- Center the Chocolate: Ensure the chocolate piece is centered and fully submerged. Off-center placement can cause leakage or uneven melting.
- Let It Rest: Skipping the resting period can result in a messy spill or undercooked edges. Patience enhances both safety and texture.
- Enhance Flavor: A tiny bit of espresso powder doesn’t make it taste like coffee—it deepens the chocolate notes dramatically.
- Double Batch? You can make two mug cakes at once, but place them symmetrically in the microwave for even exposure. Never stack mugs.
- Prevent Overflow: Fill the mug no more than 3/4 full. The cake will rise during cooking.
- Greasing the Mug: Not necessary due to butter content, but a light spray can aid cleanup if desired.
- Serving Warmth: Pre-warm your serving plate or saucer slightly to keep the cake warm longer.
Variations and Customizations
The beauty of the Molten Lava Mug Cake lies in its versatility. Here are dozens of creative variations to suit every palate and occasion:
- Vegan Version: Replace butter with coconut oil, milk with almond or oat milk, and egg with a flax egg (1 tbsp ground flaxseed + 3 tbsp water, let sit 5 mins). Use dairy-free chocolate.
- Gluten-Free: Substitute all-purpose flour with a 1:1 gluten-free baking blend containing xanthan gum.
- Protein-Packed: Add 1 tablespoon unflavored or chocolate protein powder and increase milk slightly for balance.
- White Chocolate Raspberry: Replace dark chocolate with white chocolate and fold a few fresh raspberries into the batter.
- Peanut Butter Swirl: Drop 1 teaspoon peanut butter onto the chocolate center before microwaving for a gooey PB-chocolate combo.
- Salted Caramel Core: Swap the chocolate cube for a caramel-filled chocolate truffle or a dollop of thick salted caramel sauce.
- Mint Chocolate: Add 1/4 teaspoon peppermint extract to the batter and use a mint chocolate square in the center.
- Spiced Mexican Chocolate: Add a pinch of cinnamon, chili powder, and nutmeg to evoke traditional mole flavors.
- Orange Zest Delight: Grate orange zest into the batter and pair with a dark chocolate-orange bar in the center.
- S’mores Style: Top with mini marshmallows and crushed graham crackers after cooking, then broil briefly (if using oven-safe mug).
- Almond Joy Inspired: Use coconut-flavored chocolate or add shredded coconut and a toasted almond sliver.
- Dulce de Leche Surprise: Fill the center with a spoonful of dulce de leche for a Latin-inspired twist.
- Boozy Edition: Add 1 teaspoon of bourbon, rum, or amaretto to the batter for adults-only indulgence.
- Double Chocolate Chunk: Fold 1 tablespoon mini chocolate chips into the batter for extra melty pockets.
- Strawberry Shortcake Twist: Replace cocoa with 1 tbsp less flour and add diced strawberries. Skip chocolate center; add after cooking.
- Holiday Special: Add red velvet flavor with food coloring and buttermilk, or pumpkin spice mix for autumn.
- Keto-Friendly: Use almond flour, erythritol, cocoa, butter, almond milk, egg, and keto chocolate. Adjust ratios carefully.
You can even experiment with different mugs—silicone molds for easy removal, heart-shaped dishes for romance, or layered mug cakes with multiple lava centers!
Health Considerations and Nutritional Value
While undeniably delicious, the traditional Molten Lava Mug Cake is a treat best enjoyed in moderation. Here’s a general nutritional estimate per serving (based on standard recipe):
- Calories: ~380–420 kcal
- Total Fat: ~22–25g (mostly from butter and chocolate)
- Saturated Fat: ~14g
- Cholesterol: ~85mg (from egg and butter)
- Carbohydrates: ~45g
- Sugars: ~30g
- Protein: ~6g
- Fiber: ~2g
- Sodium: ~150–200mg
Health Notes:
- High in Saturated Fat and Sugar: Regular consumption may contribute to increased risk of heart disease and blood sugar fluctuations. Diabetics should monitor intake or opt for sugar-free alternatives.
- Portion Control: Being a single-serving dessert, it naturally limits overeating—unlike larger cakes.
- Nutrient Density: Low in vitamins and minerals unless modified. Adding nuts, seeds, or fruit can boost fiber and micronutrients.
- Dietary Modifications: Easily adaptable for vegan, gluten-free, or lower-sugar diets with ingredient swaps. Stevia or monk fruit can replace sugar, though texture may change.
- Balanced Pairing: Serve with Greek yogurt instead of ice cream for added protein, or fresh berries to increase antioxidant content.
- Caffeine Content: Cocoa contains theobromine and trace caffeine—usually not significant, but sensitive individuals should note.
For those managing weight, diabetes, or cholesterol, consider lighter versions using applesauce instead of butter, egg whites, skim milk, and reduced sugar. Remember: occasional indulgence is part of a balanced lifestyle.
FAQ
Q: Can I make this without a microwave?
A: Yes! Use an oven-safe ramekin and bake at 375°F (190°C) for 12–15 minutes. The result will be similar, though slightly less gooey.
Q: Why did my cake overflow?
A: Likely overfilled or cooked too long. Stick to 3/4 mug capacity and monitor time closely.
Q: My lava center didn’t melt—what went wrong?
A: Possible causes: overcooking, using too little chocolate, or a chocolate type with high melting point. Try reducing time by 5–10 seconds or using a softer chocolate bar.
Q: Can I prepare the batter ahead of time?
A: Yes, mix dry and wet ingredients separately and store. Combine and cook when ready. However, best results come from immediate cooking after mixing.
Q: Is it safe to eat with a runny center?
A: Yes, because the egg cooks partially during microwaving. For extra caution, use pasteurized eggs, especially for pregnant individuals or immunocompromised people.
Q: Can I freeze leftover mug cake?
A: Not recommended. Mug cakes are meant to be eaten fresh. Freezing ruins the texture and molten effect.
Q: Can I double the recipe in one mug?
A: No—doubling alters cooking dynamics. Always make one serving per mug for optimal results.
Q: What kind of mug should I use?
A: A standard 10–12 oz ceramic coffee mug labeled microwave-safe. Avoid plastic or metallic finishes.
Q: Can I use cocoa mix instead of cocoa powder?
A: Not recommended—cocoa mixes contain sugar and additives that will throw off proportions and sweetness.
Q: How do I clean the mug easily?
A: Soak in warm, soapy water immediately after eating. Dried chocolate is harder to remove.
Summary
The Molten Lava Mug Cake is a heavenly fusion of gourmet dessert and instant gratification—rich chocolate cake with a flowing center, made in under five minutes. Effortless, customizable, and endlessly delightful, it proves that luxury can be both quick and personal.