Introduction
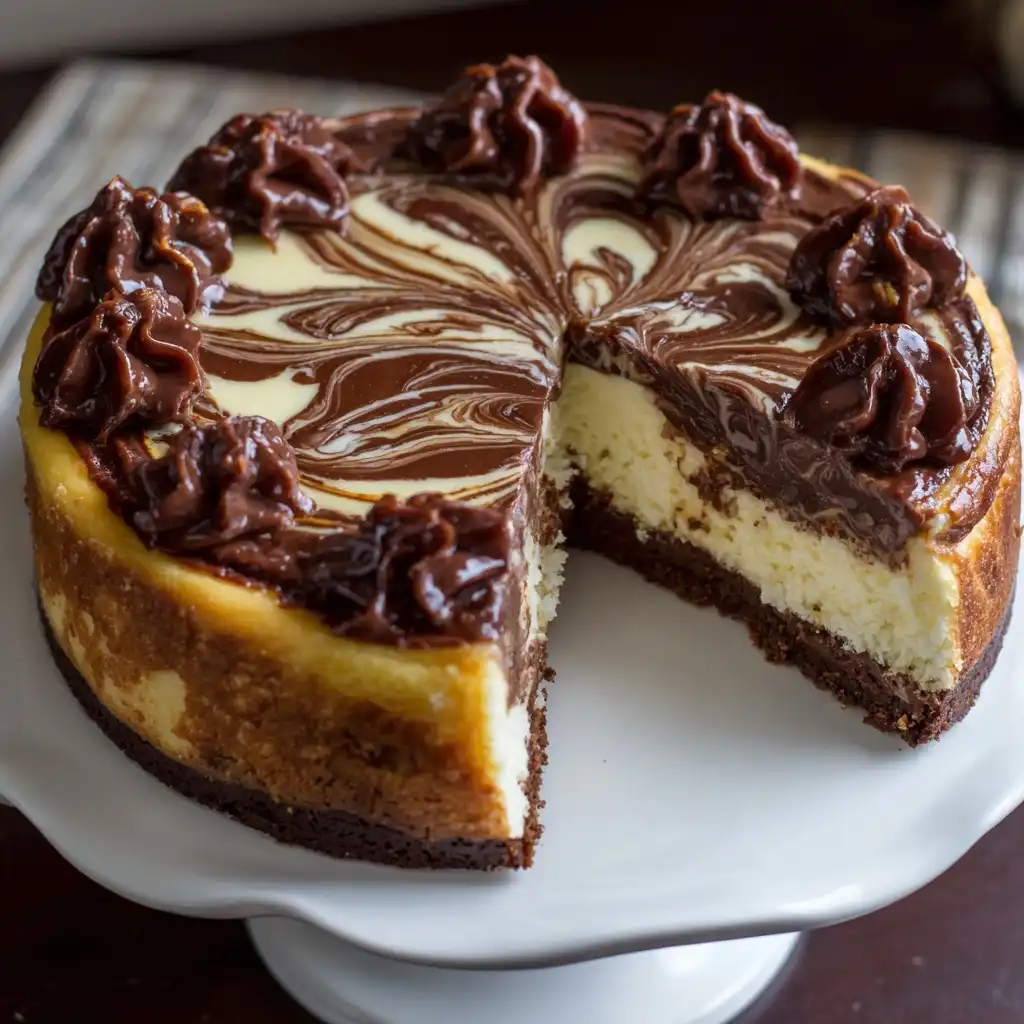
Indulge in the luxurious, velvety elegance of Chocolate Marble Cheesecake — a showstopping dessert that marries the rich, dense creaminess of classic New York-style cheesecake with the deep, bittersweet allure of premium chocolate. This isn’t just a cheesecake; it’s a symphony of textures and flavors — smooth yet substantial, decadent yet balanced, swirled with artistic precision to create mesmerizing ribbons of dark chocolate dancing through ivory-hued vanilla batter. Whether served at an intimate dinner party, a holiday gathering, or simply as a well-deserved reward after a long week, Chocolate Marble Cheesecake delivers sophistication in every forkful. Its visual drama — glossy surface, delicate marbling, clean slice — makes it as photogenic as it is delicious, transforming any occasion into something truly special.
The History
The origins of Chocolate Marble Cheesecake are rooted in the broader evolution of both cheesecake and marble cake traditions. Cheesecake itself traces back over 2,000 years to ancient Greece, where simple versions made with fresh cheese, honey, and wheat were served to athletes during the first Olympic Games in 776 BCE. The Romans later adopted and refined it, spreading variations across their empire. In America, cheesecake evolved dramatically in the late 19th and early 20th centuries — especially with the invention of cream cheese by William Lawrence in 1872 in Chester, New York, and the subsequent rise of the Philadelphia Cream Cheese brand — paving the way for the dense, tangy, oven-baked New York style we cherish today.
Meanwhile, the “marble” technique emerged from Victorian-era American baking, inspired by European swirl cakes and the desire to create visually striking, economical desserts using minimal ingredients (often repurposing leftover cocoa or chocolate syrup). By the mid-20th century, marble cakes — particularly marble pound cake — had become staples in community cookbooks and women’s magazines. The fusion of these two iconic traditions — the structural integrity and luxurious mouthfeel of baked cheesecake with the aesthetic charm and flavor contrast of marbling — gained momentum in the 1970s and 1980s, buoyed by food television pioneers like Julia Child and later, Martha Stewart. Today, Chocolate Marble Cheesecake stands as a beloved modern classic — a testament to culinary ingenuity, patience, and the timeless appeal of contrasting yet complementary flavors.
Ingredients Breakdown
Every exceptional Chocolate Marble Cheesecake begins with thoughtfully selected, high-quality components — each playing a precise role in texture, structure, flavor balance, and visual artistry:
- Graham Cracker Crust Base: Whole graham crackers provide the ideal blend of sweetness, subtle cinnamon warmth, and structural integrity when combined with melted unsalted butter and a touch of granulated sugar. The crumbs must be finely ground (not coarse) to ensure even compaction and prevent crumbling upon slicing.
- Cream Cheese: Full-fat, brick-style cream cheese — softened to true room temperature (65–70°F / 18–21°C) — is non-negotiable. Cold cream cheese leads to lumps; low-fat versions compromise richness and cause curdling. Philadelphia, Kraft, or store-brand full-fat bricks work best — never spreadable or whipped varieties.
- Sour Cream & Heavy Cream: Sour cream adds tang, moisture, and tenderness without thinning the batter excessively. Heavy cream (36–40% fat) contributes lushness, improves sliceability, and enhances the creamy sheen of the finished surface.
- Full-Fat Dairy: Large eggs — also at room temperature — act as emulsifiers and leaveners. Their gradual incorporation ensures stability and prevents air pockets. Real vanilla extract (not imitation) provides aromatic depth, while pure almond extract (optional but recommended) adds a nuanced complexity that elevates the chocolate notes.
- Sugar: Granulated sugar dissolves cleanly and provides necessary structure and sweetness. A small portion of brown sugar (light or dark) can be added to the crust or even the filling for molasses-tinged warmth and improved moisture retention.
- Chocolate Component: High-cocoa-content (60–72%) semi-sweet or bittersweet chocolate — finely chopped and gently melted with a touch of neutral oil (like grapeseed or avocado) or warm heavy cream — ensures fluidity for marbling without seizing. Dutch-processed cocoa powder (unsweetened, alkalized) may be used in some variations for deeper color and milder acidity, but real chocolate delivers superior mouthfeel and gloss.
- Acid & Stabilizers: Freshly squeezed lemon juice and zest brighten the richness and cut through fat, while a pinch of fine sea salt intensifies all other flavors. Cornstarch or tapioca starch (1–2 tsp) is often included to reinforce structure, minimize cracking, and improve freeze-thaw stability — especially important for make-ahead and catering applications.
Step-by-Step Recipe
- Prepare the Crust: Preheat oven to 350°F (175°C). Pulse 1 ½ cups (150g) finely crushed graham crackers, ¼ cup (50g) granulated sugar, and 6 tbsp (85g) unsalted butter (melted and slightly cooled) in a food processor until moist clumps form. Press firmly and evenly into the bottom and 1 inch up the sides of a 9-inch (23cm) springform pan lined with parchment on the bottom. Bake for 10 minutes. Cool completely on a wire rack — do not skip cooling; a warm crust will melt the filling.
- Softening & Mixing the Base Filling: In a large stand mixer fitted with the paddle attachment, beat 24 oz (680g / four 8-oz bricks) full-fat cream cheese on medium-low for 2–3 minutes until completely smooth and fluffy — scraping down the bowl thoroughly. Add 1 cup (200g) granulated sugar and ¼ tsp fine sea salt; beat 2 more minutes until homogeneous and lightened. One at a time, add 4 large room-temperature eggs, beating on low just until yolk disappears (about 20 seconds per egg), fully scraping bowl between each addition. Mix in 1 tsp pure vanilla extract and ½ tsp pure almond extract (if using).
- Incorporating Dairy: Reduce speed to low. Add 1 cup (240g) full-fat sour cream and ½ cup (120ml) heavy cream in two alternating additions, mixing just until incorporated after each. Overmixing at this stage introduces excess air, increasing crack risk. Gently fold in 1 tbsp (8g) cornstarch and 1 tsp freshly squeezed lemon juice with a silicone spatula until no streaks remain.
- Preparing the Chocolate Swirl: In a heatproof bowl set over barely simmering water (double boiler), melt 6 oz (170g) finely chopped semi-sweet chocolate with 2 tbsp (30ml) heavy cream and 1 tsp neutral oil until smooth and glossy (~3–4 minutes). Remove from heat, stir in 1 tbsp (12g) granulated sugar and a pinch of salt. Let cool to lukewarm (about 90°F / 32°C) — too hot and it will cook the batter; too cold and it won’t swirl smoothly.
- Marbling Technique: Pour three-quarters of the plain batter into the cooled crust. Spoon dollops of the cooled chocolate mixture evenly over the surface. Carefully pour the remaining plain batter on top. Using a butter knife, toothpick, or small offset spatula, begin at the center and drag outward in slow, gentle figure-eight or “S” motions — only 6–8 passes total. Avoid over-swirling: the goal is defined, ribbon-like marbling, not a homogenous gray-brown batter. A few untouched patches are desirable.
- Baking with Precision: Place springform pan on a large aluminum foil-lined baking sheet (for easy cleanup and steam containment). Create a water bath: carefully pour hot (not boiling) water into the larger pan until it reaches halfway up the springform’s exterior. Bake at 325°F (165°C) for 1 hour 15 minutes — the edges should be set, but the center should still have a 2–3 inch (5–7 cm) soft, jiggly “jello-like” wobble. Turn off oven, crack door open 1 inch with a wooden spoon, and let cheesecake cool inside for 1 hour — this gradual temperature drop prevents dramatic contraction and cracking.
- Chilling & Setting: Carefully remove from water bath. Run a thin knife around the inner edge to loosen. Cool completely at room temperature (2–3 hours), then refrigerate uncovered for *at least* 12 hours — preferably 24–48 hours. This extended chill allows proteins to fully relax, fats to re-solidify, and flavors to harmonize. Do not rush this step — it’s essential for clean slices and optimal texture.
- Unmolding & Finishing: Just before serving, dip a thin metal spatula in hot water, dry, and run around the perimeter again. Release the springform clamp, lift off the outer ring, and gently peel away the parchment. For a polished finish, use a hot, dry offset spatula to smooth the top and sides. Optional garnishes: shaved dark chocolate, crème fraîche rosettes, toasted hazelnuts, or a delicate dusting of cocoa or edible gold luster dust.
Tips
- Room Temperature is Non-Negotiable: All dairy and eggs must be at true room temperature (65–70°F). Take cream cheese out 3–4 hours ahead; eggs, 1 hour. Cold ingredients cause lumps, curdling, and uneven baking.
- Scrape Religiously: Scrape the bowl and paddle after every major addition — especially after eggs and dairy. Unmixed pockets lead to dense spots or cracks.
- Low & Slow Mixing: Use low to medium-low speeds throughout. High speed incorporates air, leading to puffing and collapse — the enemy of a flat, elegant surface.
- Water Bath Wisdom: Use hot (not boiling) water to avoid sudden steam surges. Foil the pan thoroughly — double-wrap the bottom and lower sides if needed — to prevent leaks. If water seeps in, the crust becomes soggy and the base may taste faintly mineral.
- Crack Prevention Trio: (1) Don’t overmix, (2) Use cornstarch/tapioca, (3) Cool gradually — oven-off + cracked-door rest is critical. If a small crack appears, embrace it — conceal with ganache, berries, or a glossy mirror glaze.
- Marbling Mastery: Chill the chocolate mixture until *just* lukewarm. Test by touching the bowl — it should feel warm but not hot. Swirl gently and minimally — think “painterly,” not “whisked.” Too much motion creates muddy gray swirls.
- Patience Pays Off: Never cut into the cheesecake before the full 12+ hour chill. Slicing too soon yields smearing, crumbling, and loss of marbled definition. Use a thin, sharp knife dipped in hot water and wiped clean between every slice.
- Freezing Friendly: Fully chilled, uncut cheesecake freezes beautifully for up to 3 months. Wrap tightly in plastic wrap, then foil. Thaw overnight in the refrigerator — never at room temperature — to preserve texture.
Variations and Customizations
While the classic Chocolate Marble Cheesecake is sublime, its foundation invites endless creative interpretation — always respecting the core principles of balance, texture, and structural integrity:
- Flavor Infusions: Steep 1 tsp orange zest or ½ tsp espresso powder into the warm heavy cream before adding to the chocolate swirl. Infuse the base batter with 1 tbsp bourbon, 1 tsp cardamom, or 2 tbsp crumbled candied ginger for unexpected warmth and complexity.
- Crust Innovations: Swap graham crackers for Oreo cookies (fillings removed), Biscoff cookies, digestive biscuits, or even a salted pretzel-chocolate shortbread hybrid. Add 1 tbsp cocoa powder to the crust for intensified chocolate presence.
- Swirl Sophistication: Replace standard chocolate swirl with white chocolate raspberry coulis, salted caramel ribbons, or a vibrant matcha-green tea paste. For dramatic contrast, use black cocoa (like King Arthur’s) for an almost ebony swirl against pale batter.
- Texture Twists: Fold ½ cup toasted walnuts, pecans, or hazelnuts into the base batter before marbling. Or, press a thin layer of crushed amaretti cookies or feuilletine into the top of the warm, just-baked cheesecake for delicate crunch.
- Dietary Adaptations: For gluten-free: use certified GF graham crackers or almond flour crust. For reduced sugar: substitute ½ the granulated sugar with allulose or erythritol blends designed for baking (note: texture may be slightly less dense). Vegan versions exist using soaked cashews, coconut cream, and agar-agar — though marbling behavior differs significantly and requires specialized testing.
- Miniature Marvels: Bake in lined muffin tins for individual portions. Reduce bake time to 20–25 minutes; chill 8+ hours. Perfect for parties and portion control — plus, marbling is even more pronounced in small format.
- Seasonal Embellishments: Top with spiced poached pears (fall), fresh blackberries and mint (summer), candied cranberries and orange zest (winter), or roasted rhubarb compote (spring).
Health Considerations and Nutritional Value
Chocolate Marble Cheesecake is, by nature, a celebratory, energy-dense dessert — rich in saturated fat, added sugars, and calories. However, understanding its nutritional profile empowers mindful enjoyment and informed customization:
Per Standard Slice (1/12 of 9-inch cake, approx. 180g):
- Calories: ~520–580 kcal
- Total Fat: 36–42g (22–26g saturated)
- Carbohydrates: 42–48g (34–38g sugars)
- Protein: 8–10g
- Calcium: ~12% DV (from dairy)
- Vitamin A & D: Moderate amounts (fat-soluble vitamins from dairy and eggs)
Positive Aspects: Contains high-quality protein from eggs and dairy, bone-supportive calcium, and beneficial compounds found in dark chocolate — including flavanols (antioxidants linked to cardiovascular and cognitive support) and magnesium. Using 70%+ dark chocolate maximizes flavanol content while minimizing added sugar.
Considerations: High saturated fat and added sugar intake should be moderated within overall dietary patterns, especially for individuals managing blood lipids, diabetes, or weight. The crust contributes significant refined carbohydrates; reducing sugar in the crust or using nut-based alternatives lowers glycemic impact. Portion control remains key — savoring one generous, mindful slice is nutritionally preferable to multiple smaller, distracted servings.
Mindful Modifications: Opt for organic, grass-fed dairy when possible for a more favorable omega-3:omega-6 ratio. Choose chocolate with minimal added emulsifiers (soy lecithin is acceptable; PGPR is less ideal). Serve with a side of fresh seasonal berries — their fiber and polyphenols help modulate sugar absorption and add vital micronutrients. Remember: health is holistic — enjoying this dessert with joy, connection, and balance is part of well-being.
Ingredients
Makes one 9-inch cheesecake (12–14 servings)
- For the Crust:
– 1 ½ cups (150g) finely crushed graham crackers (about 12 full sheets)
– ¼ cup (50g) granulated sugar
– 6 tablespoons (85g) unsalted butter, melted and slightly cooled - For the Cheesecake Filling:
– 24 ounces (680g) full-fat brick-style cream cheese, at room temperature (65–70°F)
– 1 cup (200g) granulated sugar
– ¼ teaspoon fine sea salt
– 4 large eggs, at room temperature
– 1 teaspoon pure vanilla extract
– ½ teaspoon pure almond extract (optional, but highly recommended)
– 1 cup (240g) full-fat sour cream
– ½ cup (120ml) heavy cream (36–40% fat)
– 1 tablespoon (8g) cornstarch or tapioca starch
– 1 teaspoon freshly squeezed lemon juice
– 1 teaspoon lemon zest (optional, for brightness) - For the Chocolate Swirl:
– 6 ounces (170g) high-quality semi-sweet or bittersweet chocolate (60–72% cocoa), finely chopped
– 2 tablespoons (30ml) heavy cream
– 1 teaspoon neutral oil (grapeseed, avocado, or refined coconut)
– 1 tablespoon (12g) granulated sugar
– Pinch of fine sea salt - For Serving (Optional):
– Fresh raspberries or blackberries
– Whipped cream or crème fraîche
– Shaved dark chocolate or cocoa nibs
– Toasted hazelnuts or pistachios
– Edible gold leaf or luster dust
Directions
- Prep & Crust: Preheat oven to 350°F (175°C). Grease the bottom and sides of a 9-inch springform pan. Line the bottom with a round of parchment paper. In a food processor, pulse graham crackers until fine crumbs form. Add sugar and melted butter; pulse until mixture resembles wet sand. Press firmly and evenly into the bottom and 1 inch up the sides of the pan. Bake 10 minutes. Cool completely on a wire rack (minimum 45 minutes).
- Base Batter: Reduce oven temperature to 325°F (165°C). In the bowl of a stand mixer fitted with the paddle attachment, beat cream cheese on medium-low for 2–3 minutes until perfectly smooth, scraping bowl and paddle thoroughly. Add sugar and salt; beat 2 minutes until lightened. Add eggs one at a time on low speed, beating just until yolk disappears (20 sec each), scraping bowl after each. Beat in vanilla and almond extracts.
- Dairy Integration: With mixer on low, add sour cream in two parts, mixing just until incorporated. Add heavy cream in two parts, same method. Stop mixer. Gently fold in cornstarch and lemon juice with a silicone spatula until no streaks remain — do not overfold.
- Chocolate Swirl Prep: Melt chocolate, heavy cream, and oil in a heatproof bowl over barely simmering water, stirring constantly until smooth and glossy (3–4 min). Remove from heat. Stir in sugar and salt. Let cool to lukewarm (90°F / 32°C) — test by touching bowl; it should feel warm, not hot.
- Marbling: Pour ¾ of the plain batter into the cooled crust. Spoon chocolate mixture in 8–10 even dollops over the surface. Carefully pour remaining plain batter on top. Using a thin knife or toothpick, gently drag from center outward in slow figure-eights — no more than 8 passes. Swirl lightly; preserve contrast.
- Bake: Place springform pan inside a larger roasting pan. Wrap the *outside* of the springform pan tightly with two layers of heavy-duty aluminum foil. Carefully pour hot water into the roasting pan until it reaches halfway up the springform. Bake at 325°F for 1 hour 15 minutes — center should jiggle softly like set Jell-O. Turn off oven, crack door open 1 inch with a wooden spoon, and let sit 1 hour.
- Cool & Chill: Carefully lift springform from water bath. Run a thin knife around the edge. Cool completely on wire rack (2–3 hrs). Refrigerate uncovered for minimum 12 hours, ideally 24–48 hours.
- Unmold & Serve: Run hot knife around perimeter. Release clamp, lift off ring. Peel off parchment. For clean slices, dip a thin, sharp knife in hot water, wipe dry, and cut — rewarming and wiping between each slice. Garnish as desired.
FAQ
- Can I make this without a water bath?
- Technically yes — but strongly discouraged. The water bath provides gentle, even, humid heat critical for preventing cracks, ensuring creamy texture, and achieving the signature dense-yet-tender crumb. Without it, risk of severe cracking, dry edges, and uneven baking increases dramatically. If you absolutely cannot use one, reduce oven temp to 300°F and place a shallow pan of hot water on the lowest rack — but results won’t match the authentic version.
- Why did my cheesecake crack?
- Most common causes: (1) Overmixing the batter (especially eggs), (2) Cooling too quickly (skipping the oven-off rest), (3) Opening the oven door before the 1-hour mark, (4) Not using cornstarch/starch, (5) Overbaking — the center should still jiggle. Small cracks can be disguised; large ones indicate structural failure.
- Can I use low-fat cream cheese or sour cream?
- No. Low-fat or fat-free dairy lacks the necessary fat structure to emulsify properly, leading to a grainy, watery, or rubbery texture and increased risk of cracking. Full-fat is essential for richness, stability, and mouthfeel.
- How do I get perfect marbling every time?
- Three keys: (1) Chocolate mixture must be lukewarm — not hot, not cold, (2) Batter must be thick enough to hold ribbons (don’t thin it), (3) Swirl *once*, gently, with minimal passes. Less is more. Practice on a small batch first.
- Can I freeze Chocolate Marble Cheesecake?
- Absolutely. Fully chilled, uncut cheesecake freezes exceptionally well for up to 3 months. Wrap tightly in plastic wrap, then heavy foil. Thaw overnight in the refrigerator — never at room temperature — to maintain texture and prevent condensation.
- My crust stuck to the pan! What went wrong?
- Ensure the pan is well-greased *before* lining with parchment and pressing the crust. Also, allow the baked crust to cool *completely* before adding filling — residual heat melts the butter and causes sticking. Always line the bottom with parchment.
- Can I make this ahead for an event?
- Yes — in fact, it’s ideal. Bake and chill 2–3 days ahead. Store covered in the refrigerator. Bring to cool room temperature (not warm) for 20–30 minutes before serving for optimal flavor release and sliceability.
- What’s the best way to store leftovers?
- Cover tightly with plastic wrap or place in an airtight container. Refrigerate for up to 5 days. Avoid storing near strong-smelling foods — cheesecake absorbs odors readily.
- Can I use a different pan size?
- You can use a 10-inch pan — reduce bake time by 5–10 minutes and monitor closely. For an 8-inch pan, increase bake time by 10–15 minutes. Always rely on the jiggle test, not just time.
- Is there a way to make it lighter without sacrificing too much?
- Modest adjustments: Use Neufchâtel cheese (⅓ less fat than cream cheese) for part of the cream cheese (up to 50%), reduce sugar by 2 tbsp, and omit the heavy cream in the chocolate swirl (replace with extra sour cream in base). Expect a slightly less rich, more tangy result — but still delicious.
Summary
Chocolate Marble Cheesecake is a masterclass in balance — where the profound depth of premium chocolate meets the cloud-like creaminess of a meticulously crafted New York-style base, all unified by a buttery graham cracker foundation and elevated by artisanal marbling technique.
It demands patience, precision, and respect for ingredient quality — but rewards the baker with a dessert of breathtaking beauty, complex flavor, and unforgettable texture: rich yet refreshing, dense yet airy, indulgent yet harmonious — a true centerpiece worthy of any celebration or quiet moment of self-care.