Introduction
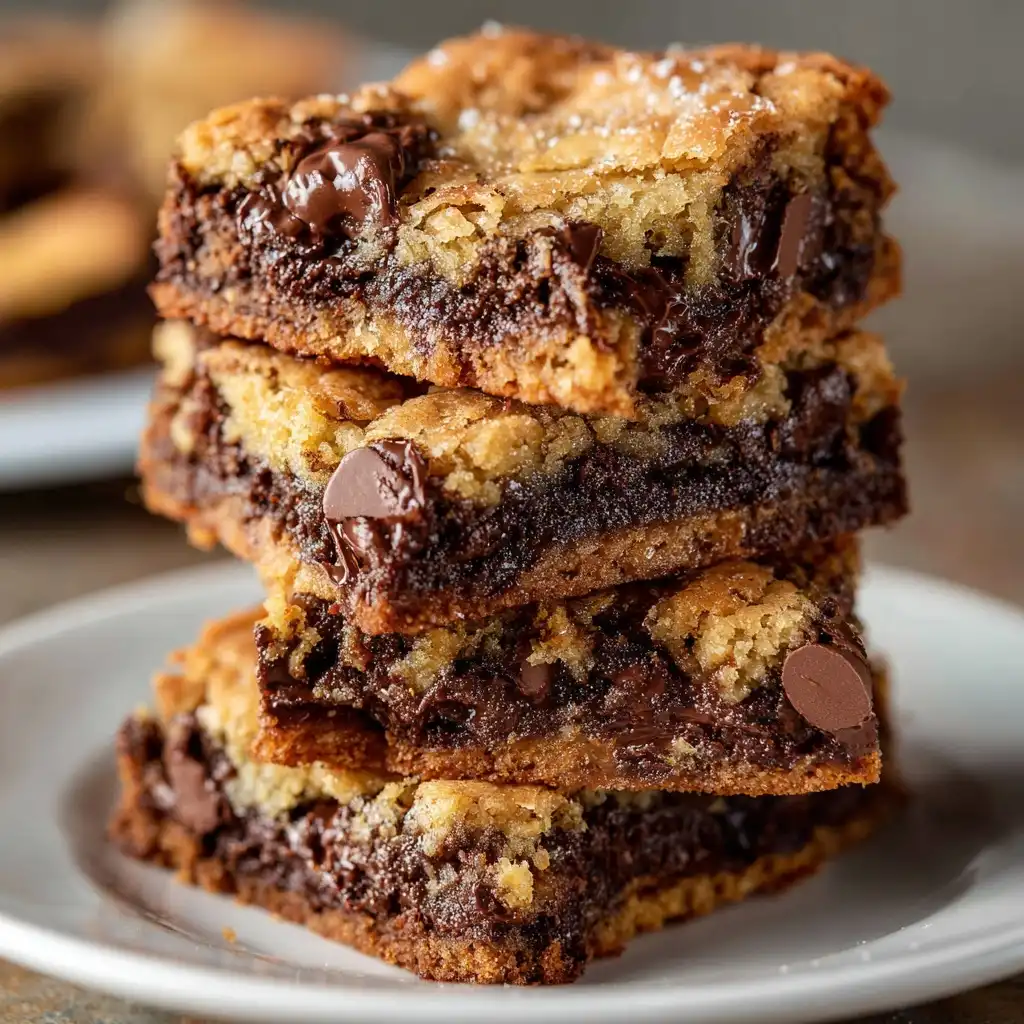
Brookie Bars—where the rich, fudgy soul of a brownie meets the soft, chewy heart of a chocolate chip cookie—are more than just a dessert; they’re a cultural phenomenon wrapped in buttery nostalgia and modern indulgence. Born from the joyful collision of two beloved American classics, Brookie Bars embody the perfect marriage of textures, temperatures, and tastes: crisp-edged yet tender-centered, deeply chocolatey with pockets of melty chips, and layered with intentional contrast that delights with every bite. Whether served at bake sales, holiday gatherings, summer potlucks, or as an after-school treat, these bars have earned their place as a staple in home kitchens across the country—and increasingly, around the world. Their appeal lies not only in their decadent flavor but also in their versatility: endlessly adaptable to dietary preferences, seasonal ingredients, and creative flair—making them as functional for meal prep as they are unforgettable for special occasions.
The History
The origin story of the Brookie—a portmanteau of “brownie” and “cookie”—is delightfully informal and deeply rooted in kitchen experimentation rather than culinary patents or restaurant menus. While exact documentation is elusive, food historians and baking communities widely trace its emergence to the early 2000s, coinciding with the rise of food blogs, viral Pinterest recipes, and the “swirled dessert” trend. Home bakers began layering unbaked brownie batter over chilled cookie dough (or vice versa), then baking them together—discovering that the differing fat contents, sugar ratios, and leavening agents created a magical stratification: a dense, moist base crowned by a golden, slightly puffed top with signature crackled surface. By 2012–2013, “brookie” appeared in major publications like Food & Wine, Real Simple, and Martha Stewart Living, often credited to innovative test kitchens or reader-submitted “genius hacks.” The concept was further popularized through competitive baking shows and social media challenges (#BrookieBarChallenge), where bakers experimented with swirl techniques, marble effects, and even three-layer “brookie-cake” hybrids. Notably, commercial bakeries—including Levain Bakery (New York) and Milk Bar (via Christina Tosi’s “Crack Pie”-adjacent experiments)—helped legitimize the brookie as a premium confection, inspiring gourmet versions with sea salt finishes, bourbon-infused batters, and house-made caramel swirls. Today, the Brookie Bar stands as a testament to grassroots culinary innovation—proof that the most iconic desserts are often born not in Michelin-starred labs, but in home ovens, shared on dog-eared index cards and texted between friends.
Ingredients Breakdown
Understanding the science behind each ingredient unlocks consistency, texture control, and flavor depth in Brookie Bars. Below is a meticulous, function-driven analysis:
- Unsalted Butter (1 cup, softened): Provides richness, tenderness, and steam for lift. Softened—not melted—butter emulsifies properly with sugars to trap air, contributing to the cookie layer’s slight rise and chew. Clarified butter can be used for enhanced browning notes and reduced water content (ideal for crisper edges).
- Granulated Sugar (¾ cup): Adds sweetness, aids in browning (caramelization), and contributes to crispness and spread in the cookie layer. Its finer crystal structure dissolves readily, supporting structure without grittiness.
- Brown Sugar (¾ cup, packed light or dark): Introduces molasses-derived moisture, acidity, and complex caramel/toffee notes. Dark brown sugar yields a deeper, more robust flavor and slightly chewier texture; light brown offers milder sweetness and greater balance with chocolate.
- Large Eggs (2, room temperature): Act as binders, emulsifiers, and leavening agents. Room temperature eggs incorporate more evenly into the batter, preventing curdling and ensuring uniform texture. The yolks add fat and richness; whites contribute structure and subtle lift.
- Pure Vanilla Extract (2 tsp): Enhances all other flavors—especially chocolate and brown sugar—without overpowering. Alcohol-based extract carries volatile aromatic compounds essential for depth; imitation vanilla lacks nuance and can taste flat or chemical under high heat.
- All-Purpose Flour (2¼ cups, spooned & leveled): Provides gluten-forming protein for structure. Over-measuring causes toughness; spooning flour into the cup and leveling with a knife ensures accuracy. For gluten-sensitive needs, a 1:1 certified gluten-free blend (with xanthan gum) works well—just avoid almond or coconut flours alone, which lack binding capacity.
- Natural Unsweetened Cocoa Powder (¾ cup, Dutch-process preferred): Imparts deep, velvety chocolate flavor. Dutch-process cocoa is alkalized, yielding smoother, less acidic notes and richer color—ideal for brownie layers. Natural cocoa works but may require added baking soda (¼ tsp) to neutralize acidity and optimize rise.
- Baking Powder (1 tsp) & Baking Soda (½ tsp): A dual-leavening system: baking powder provides gradual lift during baking, while baking soda reacts immediately with acidic components (brown sugar, cocoa, buttermilk if used) for initial expansion and browning. Omitting either compromises height and crumb openness.
- Salt (1 tsp fine sea salt or kosher): Critical for flavor balancing—suppressing bitterness in cocoa, enhancing sweetness perception, and strengthening gluten networks. Flaky sea salt sprinkled pre-bake adds delightful bursts of salinity.
- Semi-Sweet Chocolate Chips (1½ cups): The workhorse chocolate—60% cacao offers ideal melt-and-set behavior. Mini chips distribute more evenly; jumbo chips create dramatic pockets. For sophistication, substitute with chopped 64% dark chocolate or a mix of milk, dark, and white chocolate.
- Optional Add-Ins: Toasted walnuts or pecans (1 cup, chopped), flaky sea salt (½ tsp, sprinkled post-bake), espresso powder (1 tsp, amplifies chocolate), or a swirl of salted caramel (⅓ cup, drizzled before baking) elevate complexity without compromising integrity.
Step-by-Step Recipe
- Prep & Preheat: Position oven rack to center position. Preheat oven to 350°F (177°C). Line a 9×13-inch metal baking pan with parchment paper, leaving 2-inch overhang on two opposite sides for easy lifting. Lightly grease exposed pan edges and parchment with nonstick spray or softened butter. This double-barrier prevents sticking and ensures clean, professional-looking bars.
- Cream Butter & Sugars: In a large bowl of a stand mixer fitted with paddle attachment (or use hand mixer), beat softened unsalted butter, granulated sugar, and brown sugar on medium speed for 3–4 minutes until pale, fluffy, and noticeably increased in volume. Scrape down bowl and paddle halfway. Proper creaming incorporates micro-air pockets—essential for cookie layer lift and tenderness.
- Incorporate Wet Ingredients: Add eggs one at a time, beating on medium speed for 45 seconds after each addition until fully incorporated and glossy. Add vanilla and mix 15 seconds more. Batter should be smooth, homogenous, and slightly thickened—not broken or curdled.
- Dry Ingredients Assembly: In a separate medium bowl, whisk together flour, cocoa powder, baking powder, baking soda, and salt until no streaks remain. Whisk for full 30 seconds to aerate and evenly distribute leaveners and salt. Sift if cocoa shows lumps (common with natural cocoa).
- Fold Dry into Wet: Reduce mixer speed to low. Gradually add dry ingredients in three additions, mixing just until no dry patches remain after each—about 15–20 seconds per addition. Do NOT overmix; gluten development beyond this point yields dense, tough bars. Use a silicone spatula for final folds to ensure bottom-scraping.
- Add Chocolate Chips: Gently fold in chocolate chips (and nuts, if using) with spatula until evenly distributed. Avoid vigorous stirring—chips should retain shape, not smear.
- Layering Technique (The Brookie Secret): Pour ~⅔ of the batter (about 3 cups) into prepared pan. Using an offset spatula or greased back of spoon, spread evenly to corners and smooth surface. This forms the *brownie base*. Refrigerate uncovered for 15 minutes—this firms the base, preventing excessive mixing when adding cookie layer.
- Prepare Cookie Layer (Optional but Recommended): While base chills, prepare a simplified chocolate chip cookie dough: In small bowl, combine ½ cup softened butter, ¼ cup brown sugar, ¼ cup granulated sugar, 1 egg yolk, ½ tsp vanilla, ¾ cup flour, ¼ tsp salt, and ½ cup chocolate chips. Mix until just combined—do not overwork. Chill 10 minutes. This layer adds authentic cookie texture and visual definition.
- Top & Swirl: Remove pan from fridge. Dollop chilled cookie dough in tablespoon-sized mounds evenly across brownie base. Use a butter knife or skewer to gently swirl dough into base—5–7 figure-eights, stopping before full integration. Goal: visible marbling, not homogeneity. Optional: sprinkle with flaky sea salt now.
- Bake with Precision: Bake 38–45 minutes. Start checking at 38 minutes: edges should be set and lightly pulling away from pan; center should appear *just* set with faint jiggle (like firm Jell-O) when gently nudged—not liquidy, not completely still. A toothpick inserted 1 inch from edge should come out with moist crumbs; center insertion should show damp, fudgy residue—not wet batter. Rotate pan front-to-back at 25 minutes for even baking.
- Cool Completely (Non-Negotiable Step): Transfer pan to wire rack. Cool *undisturbed* for full 2 hours at room temperature. This allows starches to retrograde, fats to re-solidify, and structure to stabilize—critical for clean cuts and optimal chew/fudginess balance. Rushing this step causes crumbling, smearing, or overly soft bars.
- Cut & Serve: Using parchment overhang, lift entire slab onto cutting board. With sharp chef’s knife wiped clean between cuts, slice into 12–16 uniform bars (2×3″ or 2×2″). For ultra-clean edges, chill fully-cut bars in fridge 30 minutes before serving.
Tips
- Room Temperature Is Non-Negotiable: Cold eggs or butter cause separation and uneven emulsification—leading to greasy pools or grainy texture. Plan ahead: pull dairy from fridge 60–90 minutes pre-baking.
- Weigh Your Flour: Volume measurements vary wildly—1 cup AP flour ranges from 120g to 160g depending on scooping method. For reproducible results, use a digital scale: 1 cup = 125g (spooned & leveled standard).
- Chill Before Baking = Cleaner Layers: That 15-minute refrigerator rest for the brownie base isn’t optional—it prevents the cookie layer from sinking and creates distinct strata instead of muddy fusion.
- Oven Thermometer Required: Built-in oven thermostats are notoriously inaccurate (+/- 25°F). An inexpensive oven thermometer ensures precise 350°F baking—critical for proper set and crumb development.
- Underbake Slightly, Then Rest: Pull bars from oven when center is *almost* set—not fully firm. Carryover cooking during cooling completes the process without drying. Overbaking guarantees cakey, crumbly bars.
- Sharp, Clean Knife Cuts: Warm knife under hot water, dry thoroughly, then cut. Wipe blade clean after every 1–2 slices. For presentation-worthy edges, chill bars 30 minutes prior to slicing.
- Storage Strategy: Store cooled bars in airtight container at room temperature up to 4 days, or refrigerate up to 10 days. To freeze: wrap individual bars tightly in plastic + foil, store in freezer bag up to 3 months. Thaw overnight in fridge or 15 minutes at room temp.
- Revive Stale Bars: If bars dry out, microwave single bar at 50% power for 8–10 seconds—moisture redistributes, restoring chew. Or serve warm with a scoop of vanilla bean ice cream and warm salted caramel sauce.
Variations and Customizations
The Brookie Bar is a canvas for boundless creativity—each variation preserving structural integrity while introducing new sensory dimensions. Here’s how to explore thoughtfully:
- Gluten-Free Brookie Bars: Substitute 2¼ cups certified GF 1:1 baking flour (e.g., King Arthur Measure for Measure or Bob’s Red Mill). Add 1 tsp xanthan gum if not included in blend. Replace brown sugar with coconut sugar for lower glycemic impact (note: darker color, molasses notes intensify). Ensure chocolate chips are GF-certified.
- Vegan Brookie Bars: Use vegan butter (Miyoko’s or Earth Balance), flax eggs (2 tbsp ground flax + 6 tbsp water, rested 10 min), coconut sugar (½ cup granulated + ½ cup brown-style), and dairy-free chocolate chips. Add 1 tbsp apple cider vinegar to batter to react with baking soda for lift. Bake 5–7 minutes longer—vegan batters set slower.
- Protein-Packed Brookie Bars: Add 2 scoops (60g) unflavored or chocolate whey/collagen protein powder to dry ingredients. Compensate with 2–3 tbsp extra milk or brewed coffee to prevent dryness. Reduce flour by ¼ cup to maintain ratio. Ideal post-workout treat with ~8g protein/bar.
- Seasonal Fruit Infusions: Fold 1 cup finely diced, well-drained strawberries (tossed in 1 tsp cornstarch) into brownie batter for spring. In fall, add ¾ cup spiced apple compote (simmered apples + cinnamon + maple) swirled in. Winter calls for ½ cup dried tart cherries + orange zest.
- Gourmet Swirls: Before baking, drizzle ⅓ cup of any of the following: salted caramel, raspberry coulis, peanut butter, dulce de leche, or melted white chocolate. Use chopstick to marble minimally—preserves integrity while adding luxury.
- Espresso-Infused: Dissolve 1½ tsp instant espresso powder in 1 tbsp hot water; cool, then add with vanilla. Enhances chocolate depth without coffee flavor. For intensity, add 1 tbsp cold-brew concentrate to wet mix.
- Mini Brookie Bites: Use a lined muffin tin. Fill cups ¾ full. Bake 18–22 minutes. Perfect for portion control, parties, or lunchbox treats. Yield: 24–30 bites.
- Brookie Brownie Sandwiches: Bake full batch as directed. Once cooled, cut into 2″ squares. Sandwich two squares with 1 tsp salted caramel or vanilla buttercream. Roll edges in crushed pretzels or toasted coconut.
Health Considerations and Nutritional Value
While Brookie Bars are inherently indulgent, mindful formulation allows for thoughtful nutritional optimization—without sacrificing joy or authenticity. Per standard 2×2-inch bar (recipe yields 16), baseline values are approximately: Calories: 285 | Fat: 14g (8g saturated) | Carbs: 37g (25g sugars) | Protein: 3g | Fiber: 2g. Key considerations:
- Sugar Reduction Strategies: Swap half the granulated sugar for coconut sugar (lower GI, retains minerals) or erythritol/monk fruit blend (zero-calorie, non-glycemic). Note: bulk sweeteners may reduce spread and crispness—add 1 tbsp extra butter or 1 tsp liquid (milk/coffee) to compensate. Never eliminate *all* sugar—the Maillard reaction and texture depend on it.
- Healthy Fat Integration: Replace ¼ cup butter with cold-pressed avocado oil or walnut oil for monounsaturated fats and subtle nuttiness. Maintain ¾ cup total fat for structure—reducing further yields crumbly, dry bars.
- Fiber & Micronutrient Boost: Add 3 tbsp ground flaxseed or chia seeds to dry ingredients—adds 2g fiber, omega-3s, and binding gel. Incorporate ¼ cup black bean puree (rinsed, blended smooth) for 2g plant protein and moisture—undetectable in flavor.
- Portion Control Psychology: Cutting into 24 smaller bars (1.5×2″) reduces calories/bar to ~190 and encourages mindful eating. Pair with Greek yogurt or berries to balance macros.
- Allergen Awareness: Top allergens include dairy, eggs, wheat, soy (in chocolate), and tree nuts. Always label clearly for gatherings. Sunflower seed butter and oat milk can replace dairy/egg in vegan versions—but cross-contamination risk remains with shared facilities.
- Mindful Indulgence Framework: Nutritionists emphasize *frequency* and *context* over demonizing single foods. Enjoying one Brookie Bar alongside a balanced meal, regular movement, and adequate sleep aligns with sustainable wellness—far more impactful than restrictive labeling.
Ingredients
- 1 cup (227g) unsalted butter, softened to room temperature
- ¾ cup (150g) granulated sugar
- ¾ cup (165g) packed light or dark brown sugar
- 2 large eggs, room temperature
- 2 teaspoons pure vanilla extract
- 2¼ cups (281g) all-purpose flour, spooned & leveled
- ¾ cup (75g) Dutch-process unsweetened cocoa powder
- 1 teaspoon baking powder
- ½ teaspoon baking soda
- 1 teaspoon fine sea salt or kosher salt
- 1½ cups (270g) semi-sweet chocolate chips (or chopped chocolate)
- (Optional) 1 cup (120g) toasted walnuts or pecans, chopped
- (Optional) Flaky sea salt for finishing
Directions
- Preheat oven to 350°F (177°C). Line a 9×13-inch metal baking pan with parchment paper, leaving 2-inch overhang on two opposite sides. Lightly grease exposed pan edges and parchment.
- In a large bowl of a stand mixer fitted with paddle attachment, beat softened butter, granulated sugar, and brown sugar on medium speed for 3–4 minutes until pale, fluffy, and voluminous. Scrape bowl and paddle.
- Add eggs one at a time, beating 45 seconds after each until fully incorporated and glossy. Add vanilla and mix 15 seconds more.
- In a separate bowl, whisk together flour, cocoa powder, baking powder, baking soda, and salt for 30 seconds until fully combined and aerated.
- Reduce mixer speed to low. Gradually add dry ingredients in three additions, mixing just until no dry streaks remain—15–20 seconds per addition. Do not overmix.
- Fold in chocolate chips (and nuts, if using) with silicone spatula until evenly distributed.
- Pour ~⅔ of batter (≈3 cups) into prepared pan. Spread evenly with offset spatula. Refrigerate uncovered for 15 minutes.
- While base chills, prepare optional cookie layer: In small bowl, mix ½ cup softened butter, ¼ cup brown sugar, ¼ cup granulated sugar, 1 egg yolk, ½ tsp vanilla, ¾ cup flour, ¼ tsp salt, and ½ cup chocolate chips until just combined. Chill 10 minutes.
- Remove pan. Dollop chilled cookie dough in mounds over brownie base. Gently swirl with knife or skewer—5–7 passes—to create marbled effect. Sprinkle with flaky sea salt.
- Bake 38–45 minutes, rotating pan at 25 minutes. Bars are done when edges are set and pulling from pan, center jiggles slightly when nudged, and toothpick 1″ from edge shows moist crumbs.
- Cool in pan on wire rack for 2 full hours—undisturbed. Lift out using parchment. Slice into 12–16 bars with clean, sharp knife.
- Store in airtight container at room temperature up to 4 days, refrigerated up to 10 days, or frozen up to 3 months.
FAQ
- Can I make Brookie Bars without a mixer?
- Yes! Use a sturdy wooden spoon or silicone spatula. Cream butter and sugars vigorously for 4–5 minutes by hand until fluffy. It requires effort but yields identical results—just allow extra time.
- Why did my layers merge into one homogenous mass?
- Most commonly due to warm brownie base (skip the 15-min chill) or over-swirling. Also occurs if cookie dough is too soft—chill both layers adequately and swirl minimally with light touch.
- Can I use oil instead of butter?
- Yes—but expect denser, less chewy cookie layer and muted flavor. Use ¾ cup neutral oil (avocado, grapeseed) + ¼ cup melted butter for compromise. Never use olive oil—it overwhelms.
- My bars sank in the center. What went wrong?
- Sinking usually indicates underbaking (structure didn’t set) or excessive leavener (double-check measuring spoons). Opening oven door before 30 minutes also causes collapse—resist peeking!
- How do I prevent chocolate chips from sinking?
- Toss chips in 1 tsp flour before folding in—creates light coating that helps suspend them. Also ensure batter isn’t overly thin; proper creaming prevents runniness.
- Can I add mix-ins like marshmallows or candy bars?
- Absolutely—but add delicate items (mini marshmallows, chopped Reese’s) in last 5 minutes of baking so they don’t melt into oblivion. For crunch, press candies onto surface post-bake while still warm.
- Are Brookie Bars safe for pregnant individuals?
- Yes—they contain no raw eggs or unpasteurized dairy when baked fully. Ensure eggs are USDA Grade A and consumed within shelf life. Consult OB-GYN for personalized guidance.
- What’s the best way to transport Brookie Bars?
- Stack bars in single layer in rigid container with parchment between layers. Place in insulated cooler with ice packs for >2-hour travel. Avoid direct sunlight or warm cars.
Summary
Brookie Bars are the ultimate celebration of chocolate harmony—a meticulously layered, scientifically grounded, and emotionally resonant dessert that balances fudgy brownie density with chewy cookie texture in every golden-brown square. With customizable ingredients, adaptable techniques, and mindful variations, they satisfy cravings while inviting creativity, making them as nourishing for the spirit as they are indulgent for the palate.
Whether you’re a novice baker seeking foolproof joy or a seasoned pro chasing the perfect crumb, the Brookie Bar delivers consistent magic: rich, nostalgic, endlessly expressive—and always worth the wait.