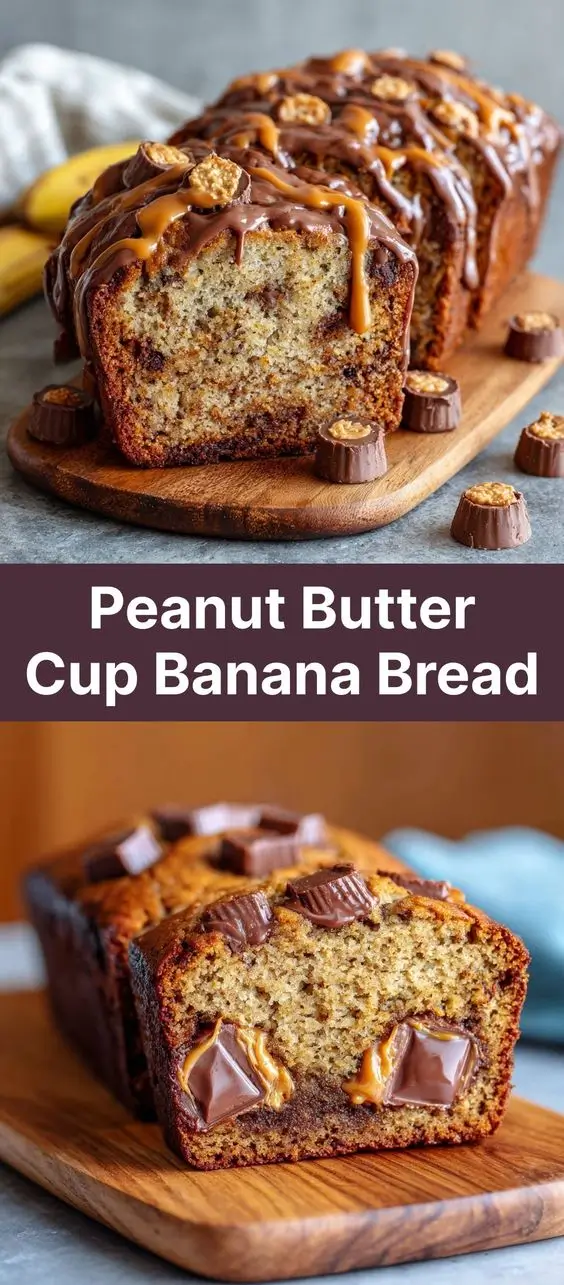
Peanut Butter Cup Banana Bread: A Decadent Twist on a Classic Favorite
There’s something undeniably comforting about the warm aroma of banana bread wafting through your kitchen. Now, imagine that classic treat elevated with rich peanut butter flavor and melty pockets of chocolate from everyone’s favorite candy—peanut butter cups. The result? Peanut Butter Cup Banana Bread—a moist, tender loaf bursting with nostalgia, sweetness, and just the right amount of indulgence. This recipe brings together the wholesome goodness of ripe bananas with the irresistible charm of peanut butter cups, making it perfect for breakfast, brunch, dessert, or an anytime snack. Whether you’re baking for family, friends, or just treating yourself, this over-the-top version of banana bread is guaranteed to become a staple in your recipe collection.
The History: From Humble Beginnings to Gourmet Treats
Banana bread itself traces its roots back to the 1930s during the Great Depression, when home bakers sought creative ways to use overripe bananas and pantry staples like flour, sugar, and butter. As baking soda and baking powder became more widely available, quick bread recipes like banana bread gained popularity for their ease and delicious results. Over time, banana bread evolved from a frugal kitchen solution into a beloved comfort food found in homes, cafes, and bakeries worldwide.
Peanut butter, another American classic, surged in popularity in the early 20th century thanks to companies like Skippy and Jif. When Reese’s Peanut Butter Cups were introduced in the 1920s, they quickly became a cultural phenomenon. It was only a matter of time before these two icons—banana bread and peanut butter cups—would collide in the most delicious way possible. Today’s Peanut Butter Cup Banana Bread is a testament to modern culinary creativity, combining tradition with decadence. It reflects how home bakers continue to reinvent classics by incorporating nostalgic candies and bold flavors, turning simple ingredients into showstopping treats.
Ingredients Breakdown: What Makes This Loaf So Irresistible?
The magic of Peanut Butter Cup Banana Bread lies in its carefully balanced blend of ingredients. Each component plays a vital role in creating a moist crumb, rich flavor, and delightful texture contrast. Let’s dive into what goes into this masterpiece:
- Ripe Bananas: The foundation of any great banana bread. Overripe bananas (with brown speckled peels) are sweeter, softer, and easier to mash, contributing natural moisture and deep banana flavor without needing excess sugar or oil.
- Unsalted Butter: Adds richness and tenderness. Using unsalted butter gives you better control over the salt content in the recipe.
- Granulated Sugar & Brown Sugar: Granulated sugar provides sweetness and structure, while brown sugar adds moisture, chewiness, and a subtle caramel note due to its molasses content.
- Eggs: Act as a binder and add structure and richness. They also help create a fine, soft crumb.
- Peanut Butter: Not just for flavor—creamy peanut butter contributes fat and protein, enhancing both taste and texture. Opt for natural or traditional creamy varieties, but avoid overly oily or separated kinds unless stirred well.
- All-Purpose Flour: Provides the necessary gluten structure for the bread to rise and hold together. For best results, spoon and level the flour to prevent a dense loaf.
- Baking Soda: Reacts with the bananas’ acidity to help the bread rise and become fluffy.
- Salt: Balances sweetness and enhances all other flavors.
- Vanilla Extract: Adds depth and warmth to the overall flavor profile.
- Whole Milk or Buttermilk: Increases moisture and tenderness. Buttermilk adds a slight tang and reacts with baking soda for extra lift.
- Peanut Butter Cups: The star of the show! Use mini peanut butter cups for even distribution or chop regular-sized ones for gooey pockets. Semi-sweet, milk chocolate, or dark chocolate varieties can be used based on preference.
- Optional Add-ins: Chopped peanuts for crunch, chocolate chips for extra chocolatey goodness, or a swirl of melted peanut butter for visual appeal and intensified flavor.
Step-by-Step Recipe: How to Bake the Perfect Peanut Butter Cup Banana Bread
Follow this detailed guide to create a bakery-quality loaf with minimal effort and maximum flavor.
Ingredients
- 3 large ripe bananas (about 1½ cups mashed)
- ½ cup (1 stick / 115g) unsalted butter, softened
- ¾ cup (150g) granulated sugar
- ¼ cup (50g) packed light brown sugar
- 2 large eggs, room temperature
- ⅔ cup (160g) creamy peanut butter (not natural/oily)
- 1 tsp vanilla extract
- 1¾ cups (220g) all-purpose flour
- 1 tsp baking soda
- ½ tsp salt
- ½ cup (120ml) whole milk or buttermilk
- 1½ cups (about 7–8 oz / 200g) peanut butter cups, halved or quartered
- Optional: ¼ cup chopped roasted peanuts
Directions
- Preheat oven to 350°F (175°C). Grease a 9×5-inch loaf pan and line it with parchment paper, leaving overhang on the long sides for easy removal.
- Mash bananas: In a medium bowl, peel and mash the bananas with a fork until smooth. Measure out 1½ cups; set aside.
- Cream butter and sugars: In a large mixing bowl, beat softened butter, granulated sugar, and brown sugar together with an electric mixer on medium speed for 2–3 minutes until light and fluffy.
- Add wet ingredients: Beat in the eggs one at a time, scraping down the bowl after each addition. Mix in the peanut butter and vanilla extract until fully combined.
- Incorporate bananas: Stir in the mashed bananas until evenly distributed.
- Mix dry ingredients: In a separate bowl, whisk together flour, baking soda, and salt.
- Combine wet and dry: Gradually add the dry mixture to the wet ingredients, alternating with the milk. Begin and end with the dry ingredients (dry-wet-dry), mixing on low speed just until combined. Do not overmix.
- Fold in peanut butter cups: Using a spatula, gently fold in the peanut butter cup pieces and optional chopped peanuts until evenly dispersed.
- Pour batter into pan: Transfer the batter to the prepared loaf pan and spread into an even layer. Press a few extra peanut butter cup halves on top for a beautiful finish.
- Bake: Place in the center of the preheated oven and bake for 55 to 65 minutes, or until a wooden skewer inserted into the center comes out clean or with a few moist crumbs (avoid hitting a melted peanut butter cup).
- Cool completely: Let the bread cool in the pan for 15 minutes, then use the parchment overhang to lift it onto a wire rack. Cool for at least 1 hour before slicing to prevent crumbling.
Expert Tips for Baking Success
- Use very ripe bananas: The darker the banana peel, the sweeter and more flavorful your bread will be. If your bananas aren’t ripe enough, place them in a 300°F oven for 15–20 minutes to speed up ripening.
- Don’t overmix the batter: Once you add the flour, stir only until ingredients are incorporated. Overmixing develops gluten, leading to a tough, dense loaf.
- Chop peanut butter cups evenly: Cut them into similar-sized pieces so they distribute uniformly throughout the loaf.
- Prevent sinking: Toss the peanut butter cup pieces in 1 tablespoon of flour before folding them in. This helps suspend them in the batter rather than sinking to the bottom.
- Check doneness properly: Because peanut butter cups contain chocolate and peanut butter, they may appear wet even when the bread is done. Test in multiple spots, avoiding visible candy pieces.
- Boost flavor: Add ½ teaspoon of cinnamon or a pinch of nutmeg for warmth. A tablespoon of espresso powder can deepen chocolate notes.
- Storage tip: Store cooled banana bread wrapped in plastic wrap at room temperature for up to 4 days, or refrigerate for up to 1 week.
Variations and Customizations: Make It Your Own
This recipe is highly adaptable. Here are some fun twists to suit different tastes and dietary needs:
- Gluten-Free: Substitute all-purpose flour with a 1:1 gluten-free baking blend containing xanthan gum.
- Dairy-Free: Replace butter with coconut oil or vegan butter, and use almond, oat, or soy milk instead of dairy milk.
- Vegan: Use flax eggs (2 tbsp ground flaxseed + 5 tbsp water per egg), plant-based butter, non-dairy milk, and vegan-certified peanut butter cups (such as Unreal or Justin’s).
- Lower Sugar: Reduce total sugar to ½ cup and use sugar-free peanut butter cups. Ripe bananas naturally sweeten the loaf.
- Nut-Free: Replace peanut butter with sunflower seed butter and use nut-free chocolate cups to accommodate allergies.
- Double Chocolate: Add ⅓ cup cocoa powder to dry ingredients and use chocolate peanut butter cups for an ultra-rich experience.
- Peanut Butter Swirl: Drop spoonfuls of warmed peanut butter over the batter before baking, then use a knife to swirl it through for marbled effect.
- Muffin Version: Divide batter into a lined muffin tin and bake at 350°F for 20–25 minutes for portable treats.
- Mini Loaves: Pour batter into small loaf pans and adjust baking time to 35–45 minutes—perfect for gifting!
Health Considerations and Nutritional Value
While Peanut Butter Cup Banana Bread is undeniably indulgent, it does offer some nutritional benefits thanks to its core ingredients:
- Bananas: Rich in potassium, vitamin B6, fiber, and antioxidants. They support heart health and digestion.
- Peanut Butter: A good source of healthy fats, protein, and magnesium. However, it’s calorie-dense, so moderation is key.
- Eggs: Provide high-quality protein, choline, and essential amino acids.
- Flour: Offers carbohydrates for energy, though refined flour has less fiber than whole grain options.
A typical slice (1/12th of the loaf) contains approximately:
- Calories: 320–360
- Total Fat: 16–19g (mostly from peanut butter, butter, and chocolate)
- Saturated Fat: 7–9g
- Carbohydrates: 45–50g
- Sugar: 28–32g (natural and added)
- Protein: 6–8g
- Fiber: 2–3g
To make a healthier version:
- Replace half the flour with whole wheat flour for added fiber.
- Reduce sugar by ¼ cup and rely on ripe bananas for sweetness.
- Use dark chocolate peanut butter cups with higher cocoa content and less sugar.
- Substitute applesauce or Greek yogurt for half the butter to reduce fat.
- Limit portion size and enjoy as an occasional treat rather than a daily staple.
Frequently Asked Questions (FAQ)
Can I freeze Peanut Butter Cup Banana Bread?
Yes! Wrap the cooled loaf tightly in plastic wrap and aluminum foil, or slice and store in a freezer-safe bag. Freeze for up to 3 months. Thaw at room temperature or gently warm in the oven.
Why is my banana bread dense?
Overmixing the batter, using unripe bananas, or expired baking soda can cause density. Ensure your leavening agents are fresh and mix just until combined.
Can I use natural peanut butter?
Natural peanut butter tends to be oilier and may alter the texture. If using, stir well, measure accurately, and consider reducing added liquid slightly. Traditional brands like Jif or Skippy work best for consistent results.
How do I keep banana bread moist?
Avoid overbaking, cool completely before slicing, and store in an airtight container. Adding an extra tablespoon of oil or substituting sour cream for milk can boost moisture.
Can I add nuts or chocolate chips too?
Absolutely! Combine peanut butter cups with chopped walnuts, pecans, or extra chocolate chips for a loaded loaf. Just don’t exceed 2 cups total add-ins to maintain structure.
What if I don’t have a 9×5 pan?
You can use an 8×4-inch pan for a taller loaf (extend baking time by 10–15 minutes) or bake as muffins in a standard tin.
Can I make this ahead of time?
Yes—mix the dry and wet ingredients separately the night before, then combine and bake the next day. Alternatively, bake the loaf and reheat slices briefly in the toaster oven.
Summary
Peanut Butter Cup Banana Bread combines the moist, tender crumb of classic banana bread with the rich, creamy indulgence of peanut butter and melty chocolate from peanut butter cups. It’s a crowd-pleasing treat that transforms humble leftovers into a decadent delight.